Limey the Syncro 16 2.5TDi Westy. 330mm Brakes!!
Printed From: The Brick-yard
Category: The Brickyard
Forum Name: The Bus Park
Forum Description: Post pickies of yer wagon here. You can post multiple images (Max size 100K each) in a single post. Requires no outside hosting. Be nice and keep it clean please. PHOTOS ONLY.
URL: http://www.brick-yard.co.uk/forum/forum_posts.asp?TID=8602
Printed Date: 23 Apr 24 at 17:39
Software Version: Web Wiz Forums 12.06 - https://www.webwizforums.com
Topic: Limey the Syncro 16 2.5TDi Westy. 330mm Brakes!!
Posted By: Ghia
Subject: Limey the Syncro 16 2.5TDi Westy. 330mm Brakes!!
Date Posted: 30 Jul 06 at 09:53
|
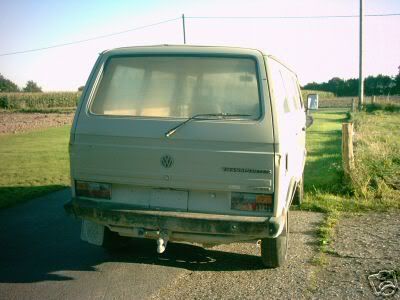
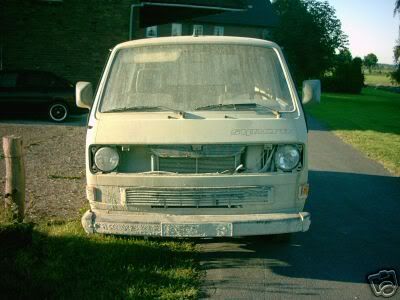
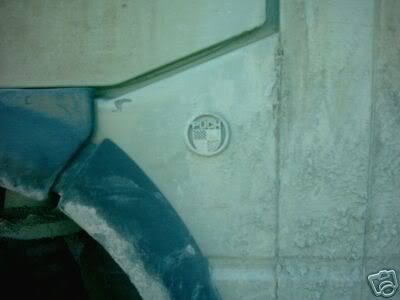
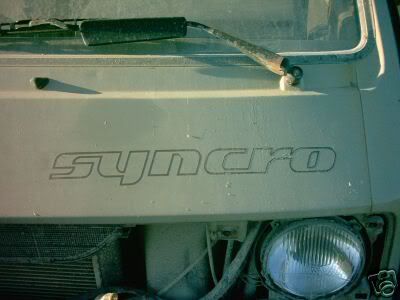
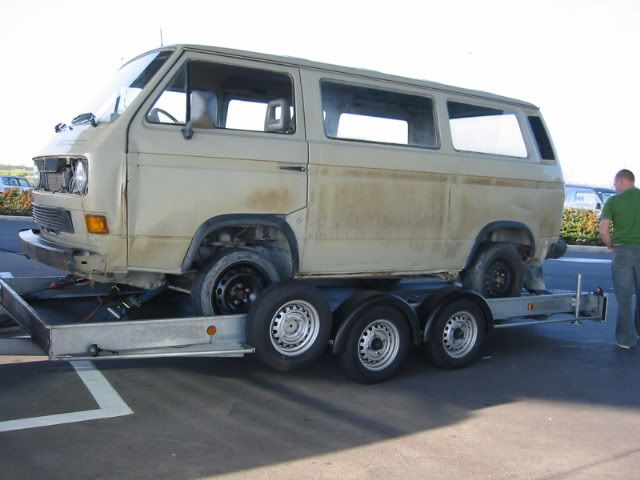
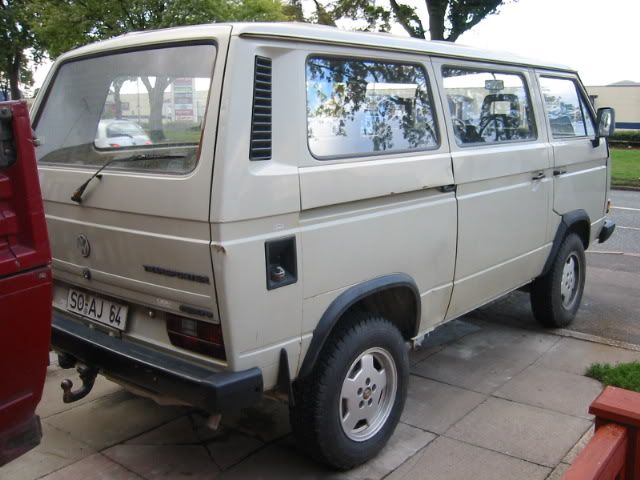
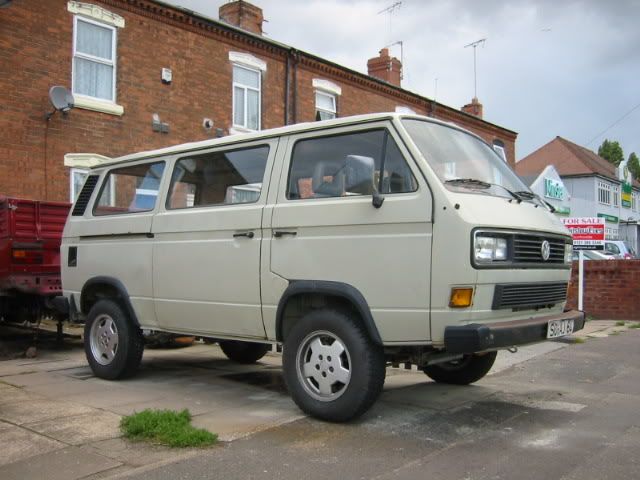
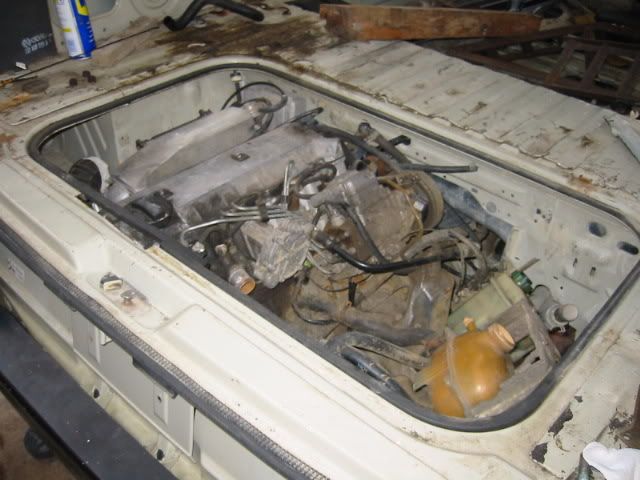
Wel I've had this in the country since November 2005 but not really had much of a chance to get it road worthy as I've been working on the Crewcab (now sold). Fingers crossed I can get somewheer with it now and start driving it around... espeically offroad! When I first saw pictures of it, it didn't look too good. The windscreen was smashed, the 2.1 DJ was long gone, the drivers door has been folded back onto the bodywork
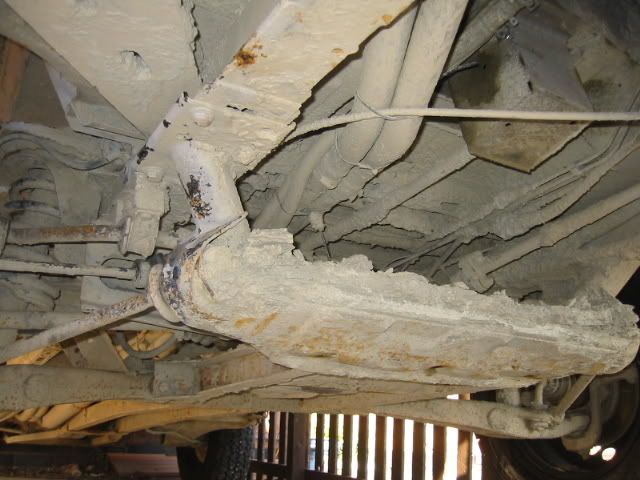
The history on the van is a bit sketchy but it seems to have lived most of its life in a Lime Quarry in Germany. It was ordered from VW with Vinyl undercoating which I had never heard of until I looked at the options list for the van. As a result the underneath is totally solid More details to come as I progress. MG |
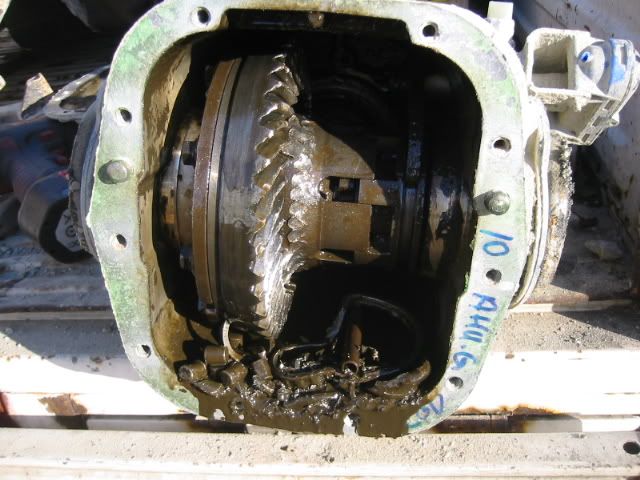
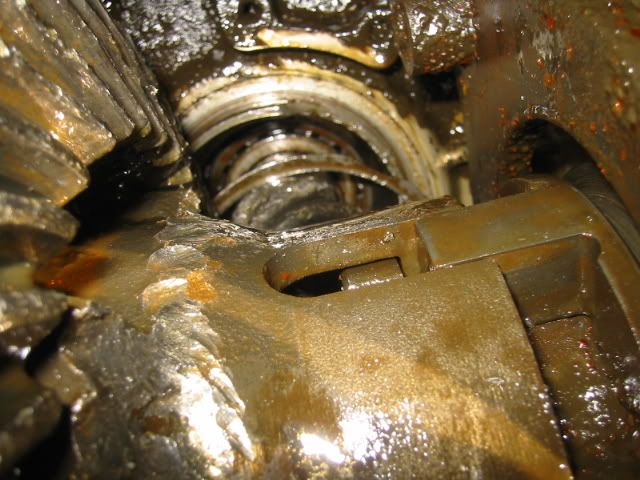
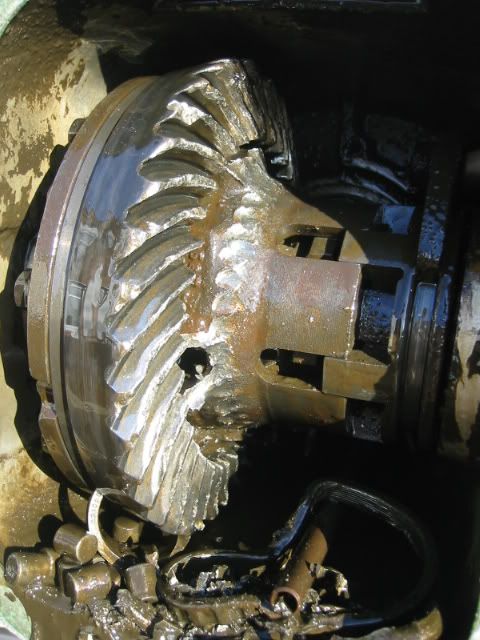
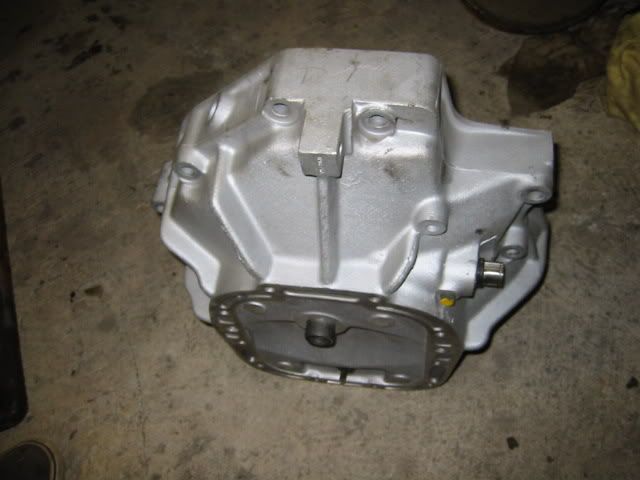
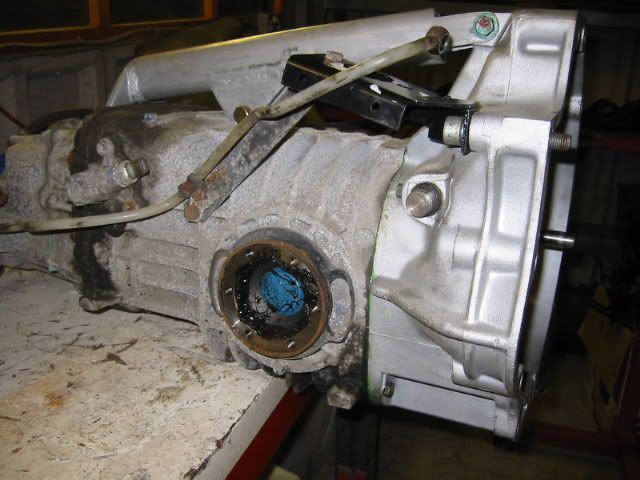
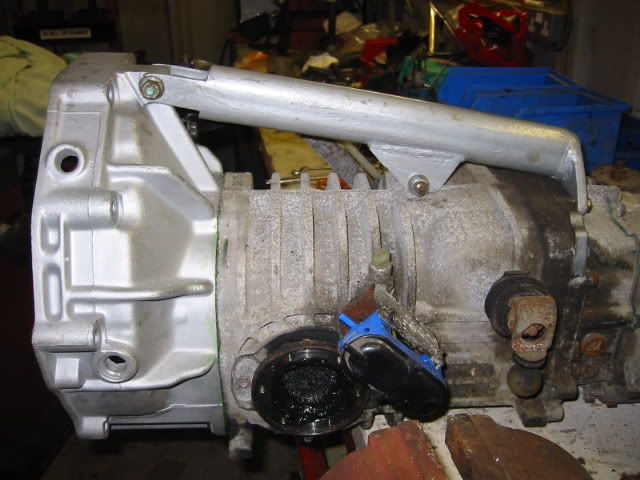
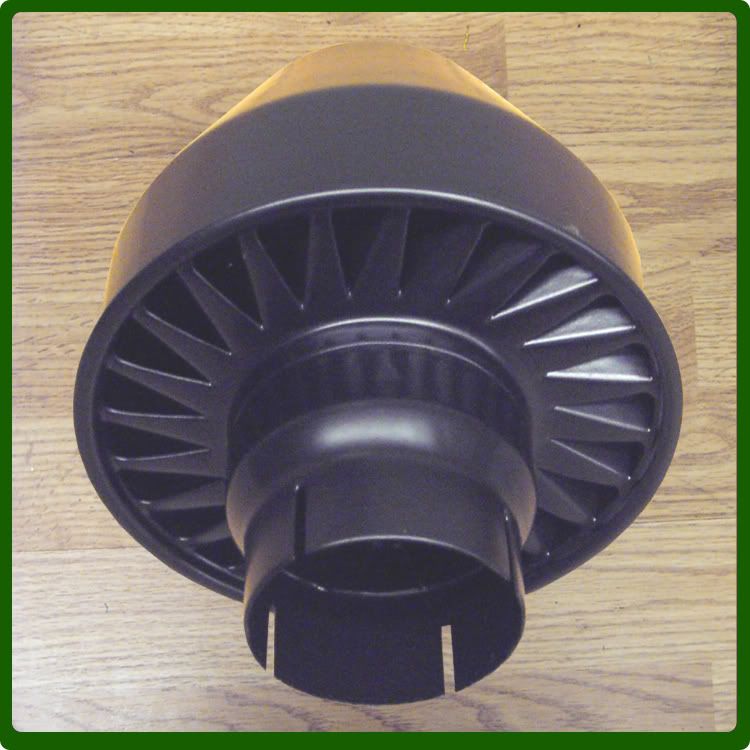
 , the propshaft was dead and the the front diff felt horrible. When I removed the front cover plate, you can see that the main pinion bearing has failed and from there on it's just been a giant mincing machine!
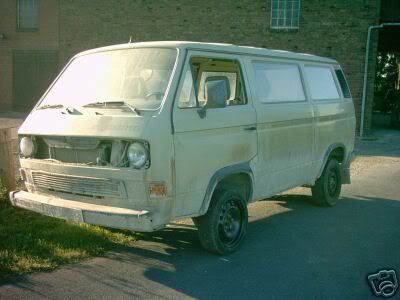
Replies:
Posted By: KevH
Date Posted: 30 Jul 06 at 10:21
You gonna have it ready for CJ's Devon outing then??
|
Posted By: Ghia
Date Posted: 30 Jul 06 at 10:23
|
Hahaha... no
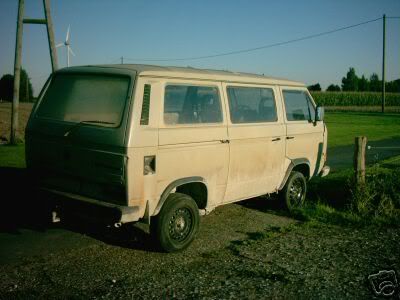
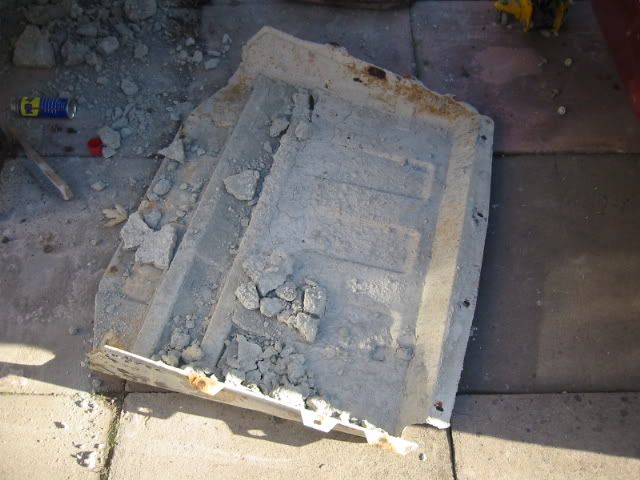
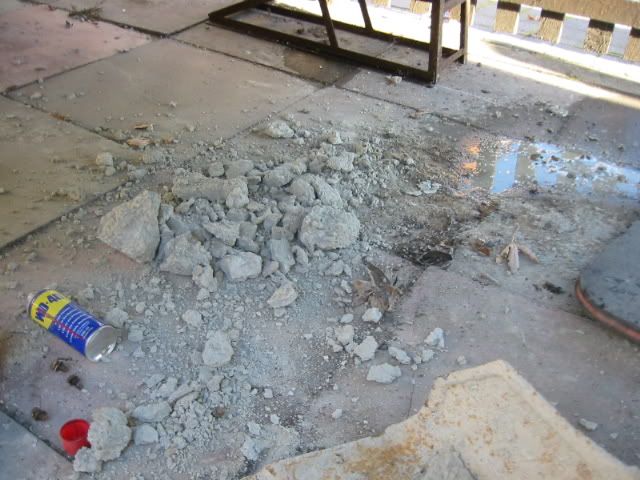
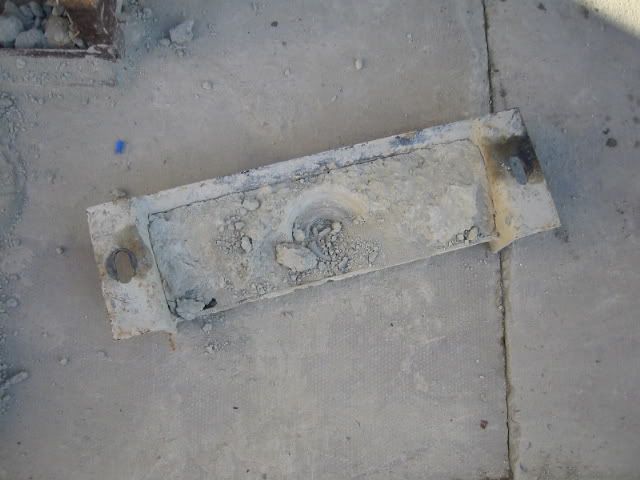
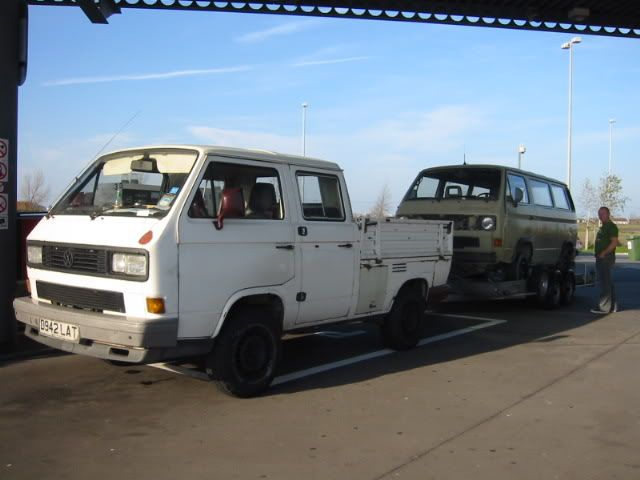
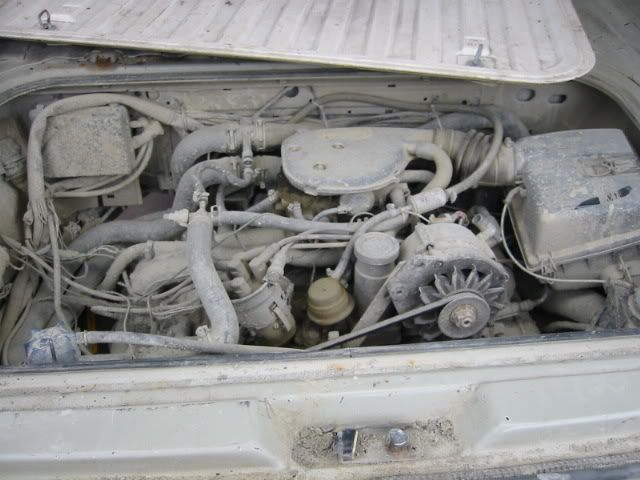
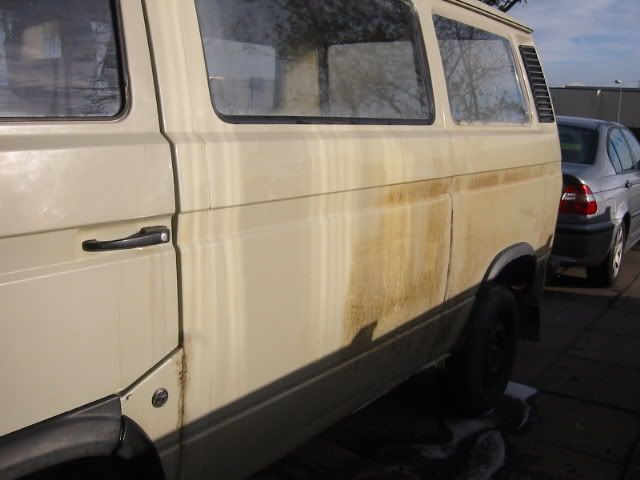
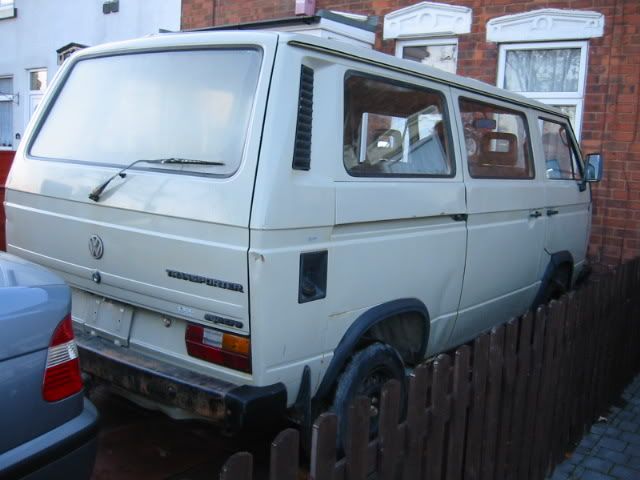
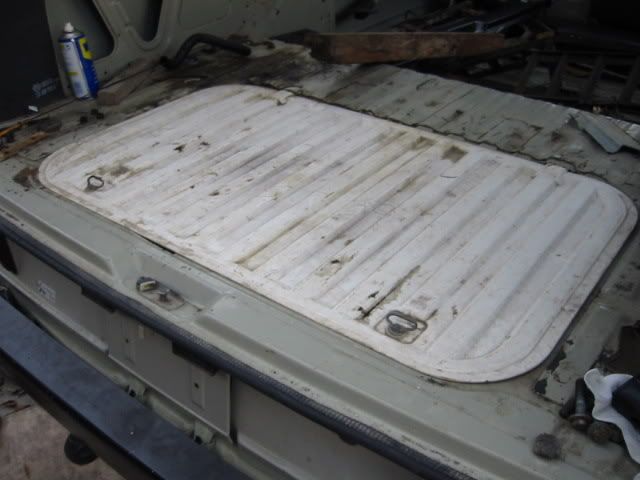
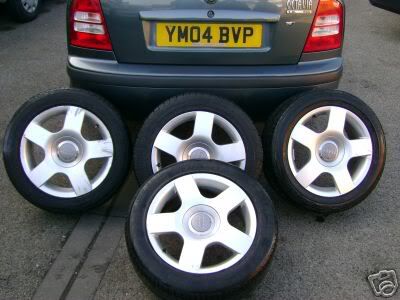
A few more bits of info. The rear window was perspex (!), The engine was/is a DG from a 2WD and had been fitted with the 2WD engine bar putting the rear UJ of the propshaft at a horrible angle... probably why it had failed! The wheels you can see it on are Mercedes 15inch steels at the back and Audi 16 inch steels up front on 185/50/16's!! When I removed the front bash plate, I dropped it on the floor to remove all the lime which was sitting insdie it and then weighed it.. 30KG of Lime! The Lime had embedded itself into the paint and nothing seemed to shift it. We tried washing, scrubbing with brillo pads and scrubbing brushes, even T-cut wouldn't move it. Eventually we grabbed some Mr.Muscle and Cillit Bang All the rear brake lines were history along with the front discs and all 4 flexi's. Thankfully the rear driveshafts and CV joints are ok as are the rear arms. These are very expensive to replace as they're 16 only parts! I phoned up VW UK before heading over to Germany to pick up the van with the Chassis number trying to get confirmation that it was really a 16 and got back some wonderful results. VW sent me a series of emails with the whole options list It comes with heated drivers seat (plastic, not cloth), Electric mirrors, Front and Rear diff locks, Engine access panel lock, Vinyl Undercoating, dip rear view mirror, Rear wiper, Rear heated screen, 16 inch wheels option (basically this is a very small amount of writing to say what differences are made on the van to make it a 16) and lots more... MG |

Posted By: KevH
Date Posted: 30 Jul 06 at 10:27
| If you tried really hard you could , you know? |
Posted By: Ghia
Date Posted: 30 Jul 06 at 10:28
|
Kev... er no. Just too much to do and work takes up my time. Have to get it registered once its MOT'd too and I think I'll have to go down to the DVLA office to do that. I'll have it on the road hopefully in the next month.... MG |

Posted By: syncro4wd
Date Posted: 07 Aug 06 at 17:53
|
Hi Michael, Saw this one ebay last year...have seen a lot of 16inches in bad shape but this one looked horrible on the pics but i have to say you made a fine 16inch of it again. Offcourse lots of work still to be done but its worth it on rare beast like the 16inch.
Cheers, Erwin |
Posted By: Ghia
Date Posted: 09 Aug 06 at 18:41
|
Thanks mate, There's still a way to go as you say but I can't wait to take it off roading and see how it compares with a stock Syncro 14 MG |
Posted By: Ghia
Date Posted: 28 Aug 06 at 18:19
Just needing an MOT now 
MG |
Posted By: Baxter
Date Posted: 28 Aug 06 at 19:13
| Looking good! |
Posted By: Dai01
Date Posted: 29 Aug 06 at 09:59
Nice to hear its up and running Mike,good luck with the MOT -------------   2.1 DJ 2.1 DJ
|
Posted By: Ghia
Date Posted: 12 Sep 06 at 18:44
|
Update: Now MOT'd and had it at Van Fest! Just to register it now and get the TDi in MG |

Posted By: David Pickles
Date Posted: 14 Sep 06 at 09:19
|
I thought you didn't like Diesels any more. I thought you were a petrol man. Whats wrong with Flat 4s, Flat 6s, V8s. ------------- 1990 1.9td SYNCRO DOKA 1988 1.6td SYNCRO AMBULANCE 1989 2.1i LPG Camper |
Posted By: Bloodbath
Date Posted: 14 Sep 06 at 10:13
to be fair, that has scrubbed up a treat. Nice 1 mike.  -------------  |
Posted By: Ghia
Date Posted: 14 Sep 06 at 19:34
|
Dave, I can't get away from the way it drove offroad. Having all that torque from tickover made it feel like you could drive it up walls! I was fairly unimpressed with how much it vibrated through the body (my fault) and the gearing (also my fault) but these will be addressed when it goes into the 16. The V8 is going in the Sika so I'm still a petrol nut Nick, cheers mate. I spent some time cleaning it up and done a small amount of bodywork but I'm not a painter so will have the whole thing re done at some point when it gets the camper conversion. MG |
Posted By: kombi57
Date Posted: 15 Sep 06 at 15:32
|
Mike, it was good to see you and the van at Vanfest. Looking forward to following the vehicle's progress.  ------------- T30 104 Kombi |
Posted By: Ghia
Date Posted: 15 Sep 06 at 17:58
|
Kombi57, it was nice meeting you too mate... always good to put a face to a name MG |
Posted By: Ghia
Date Posted: 05 Nov 06 at 18:44
|
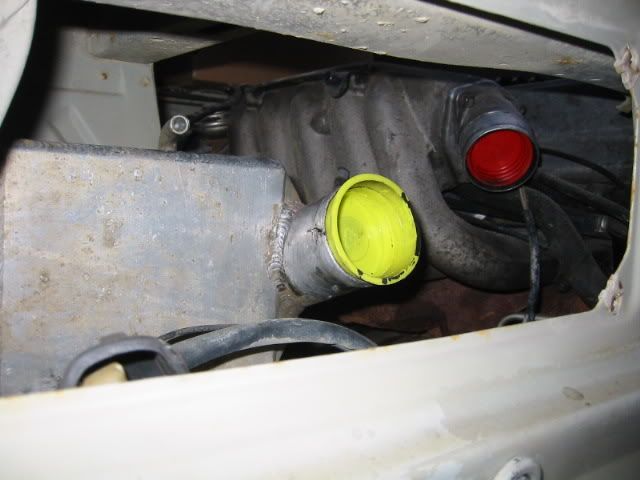
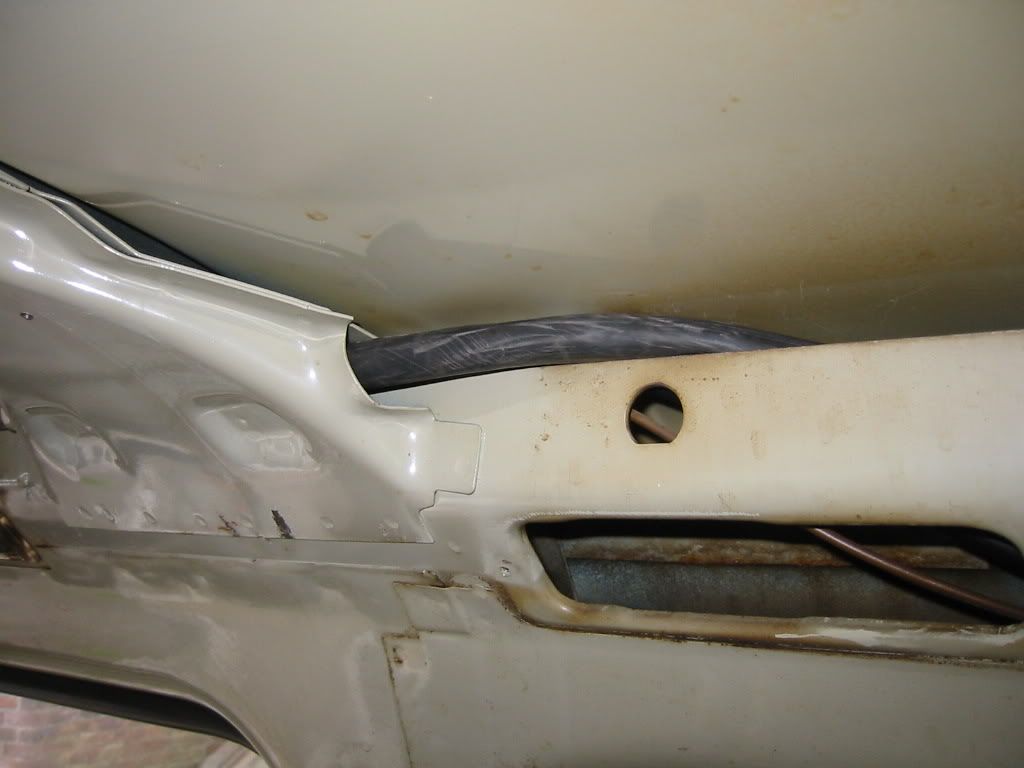
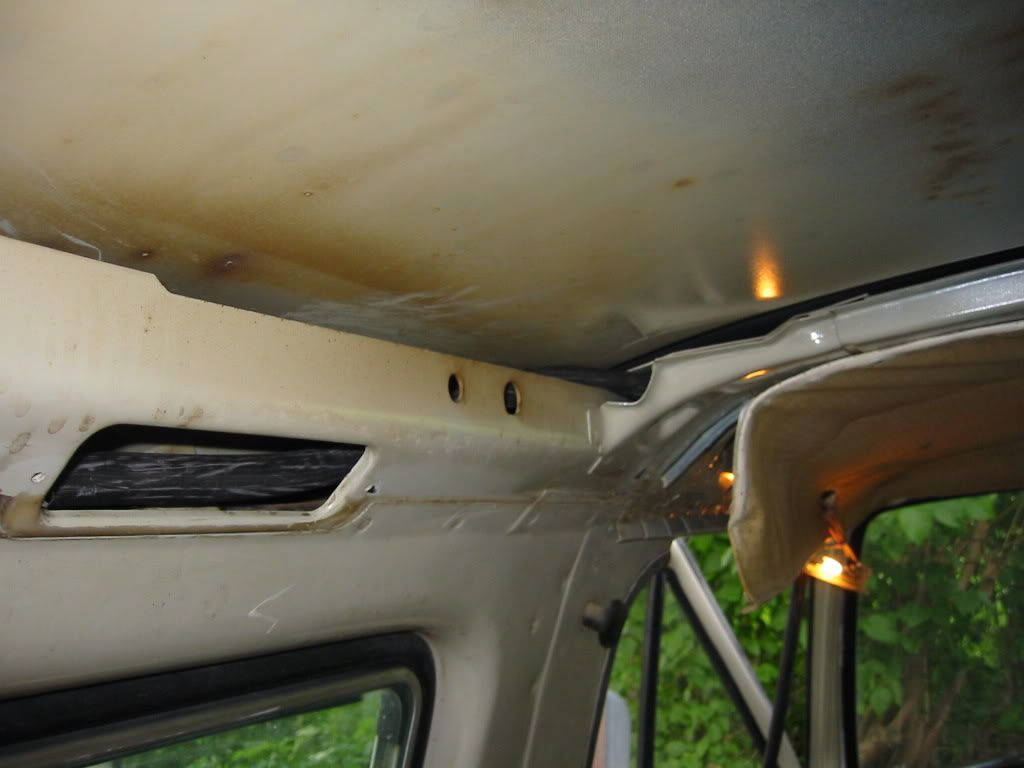
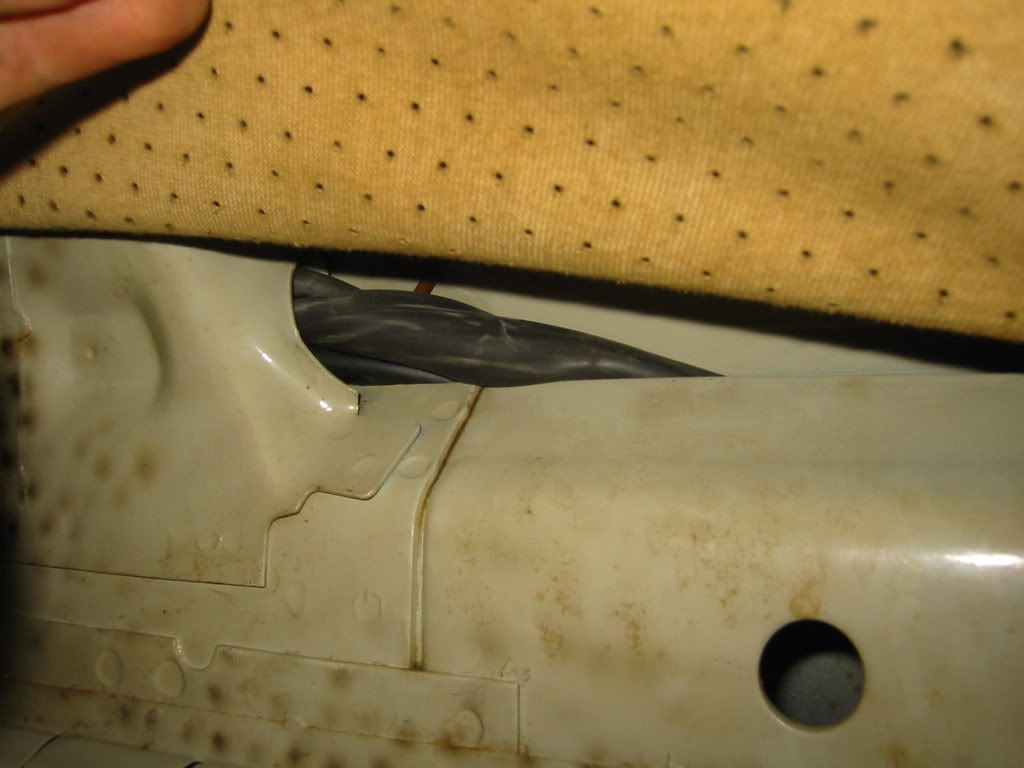
Update: The TDi is bolted up to the gearbox with South African bellhousing etc and in position. Depsite everyone saying you have to lift the lid for this conversion on an Audi 5 cylinder engine, it fits under the stock lid!! This is gonna save me a huge amount of bodywork raising the bed and then trying to seal it properly again. The TDi has a much lower inlet manifold that the petrol engines so I can only presume that that is the main thing which gets in the way of the engine lid on 5 cyl petrol engine conversions. Add to that that the syncro engine and gearbox already sit 20mm lower that the 2WD and the clearance is just enough! I have cut out some of the rear top cross member to clear the timing belt cover but will be able to put back the section at the very top which seals up against the lid. I'll also weld some metal in further into the cross member to put the strenth back in where I've cut metal out. I now have to weld in strengthening plates to the chassis rails and then add captive M12 nuts. Hopefully it'll be nice again next weekend so I can get on with the welding.
Here are some pics of the South African specific parts needed for the 5 cylinder conversion. 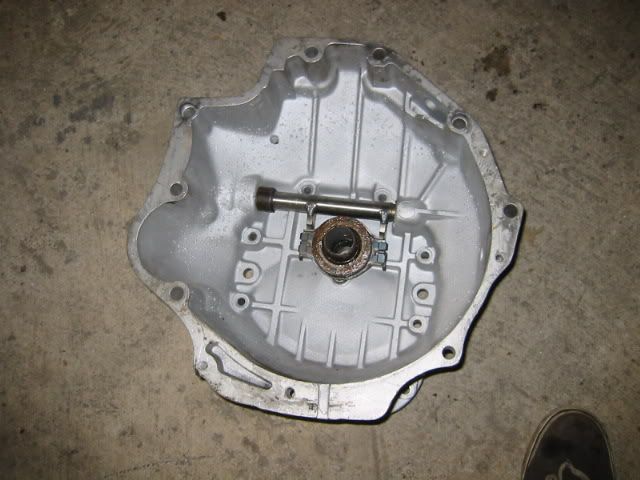
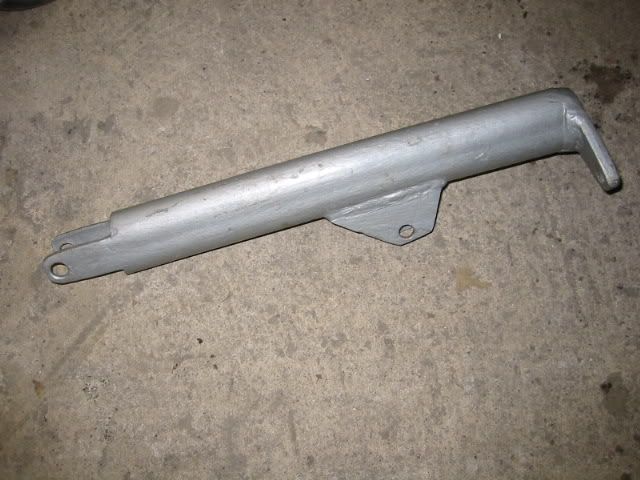
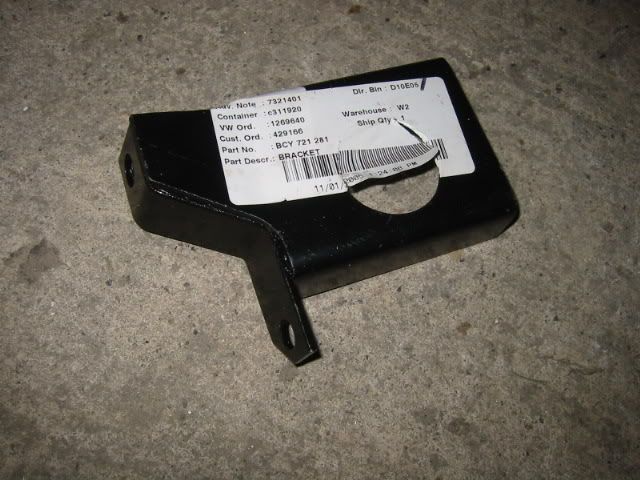
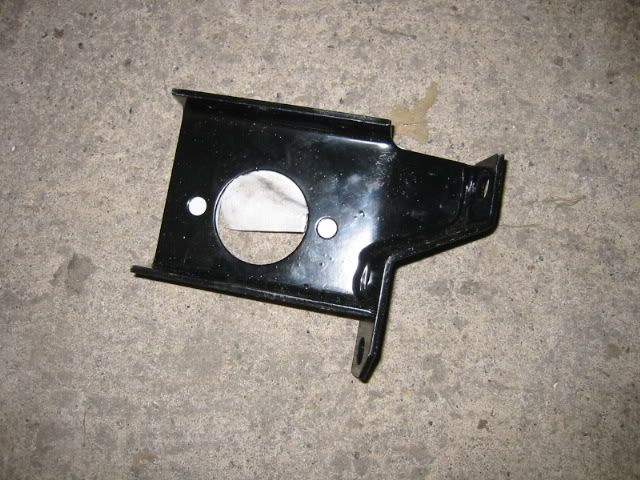
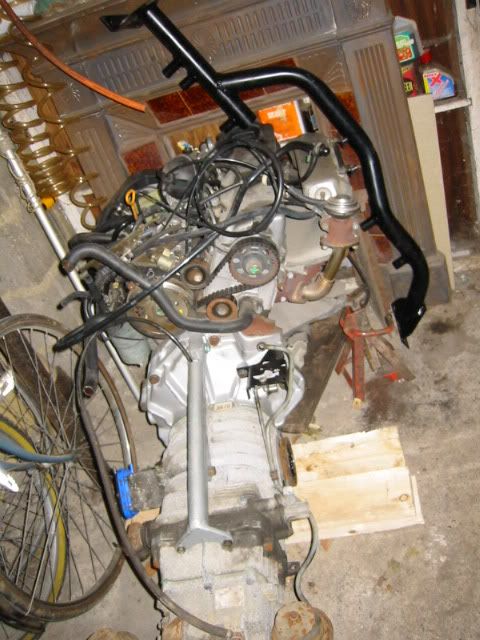
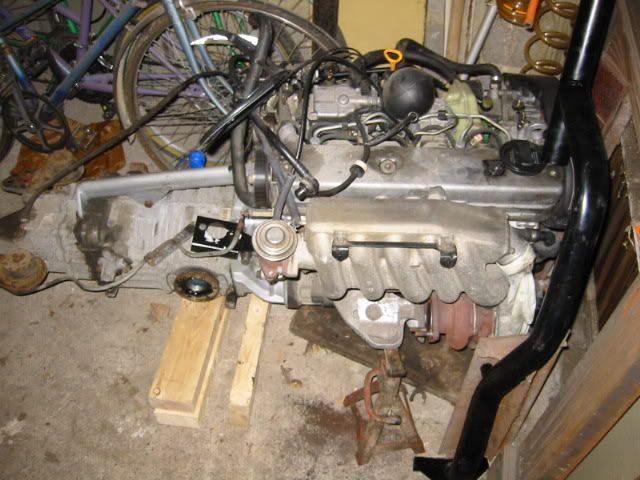
MG |
Posted By: rogerthecat
Date Posted: 05 Nov 06 at 21:27
|
Hi Mike, great to see the van after hearing about it last weekend. All seems to be going nicely, especially like the rubber wheel arch extensions. Cheers, Paul.
------------- T3 Westy, T3 Syncro (the ScoobyVelle), New Beetle Cab, 2 x Polos - I have too many projects |
Posted By: Ghia
Date Posted: 08 Nov 06 at 17:43
|
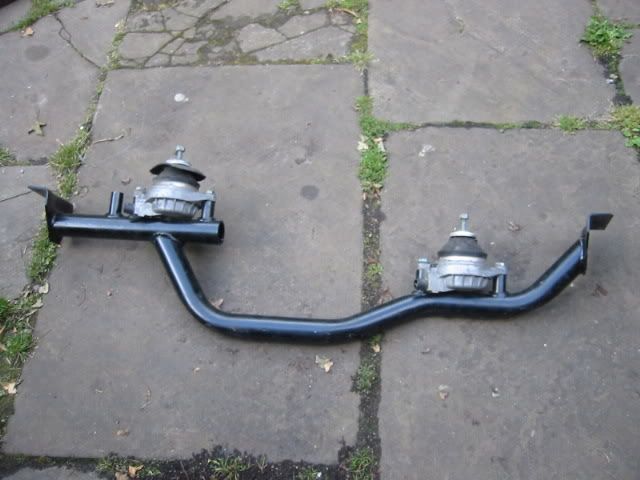
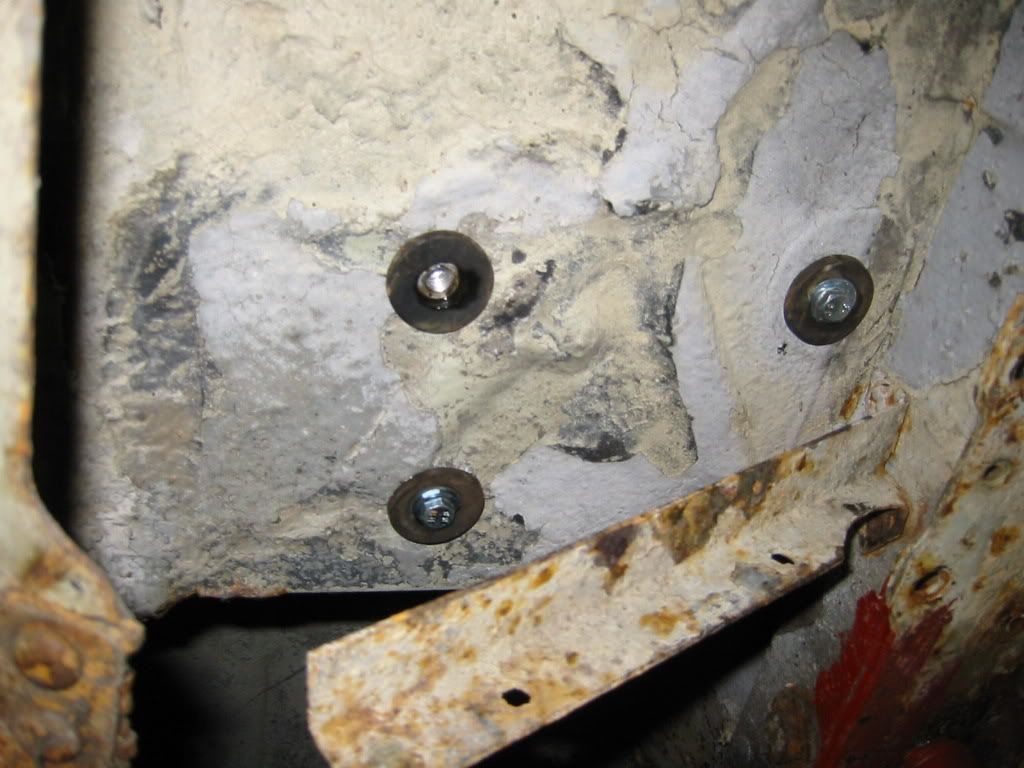
Well the work continues.
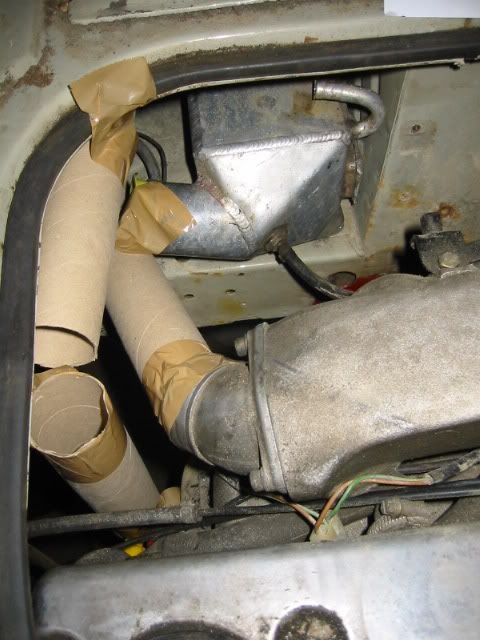
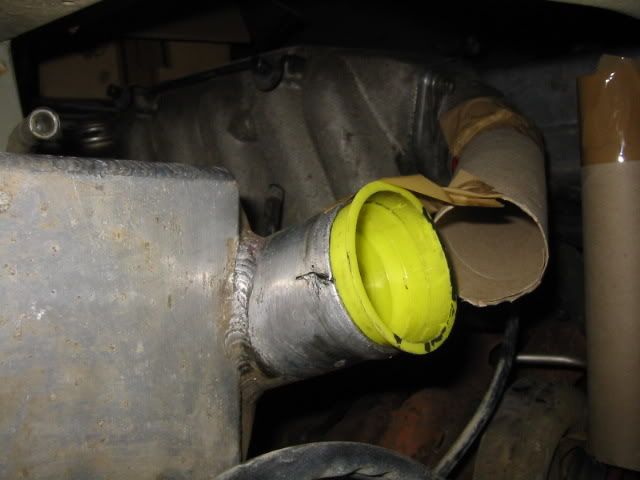
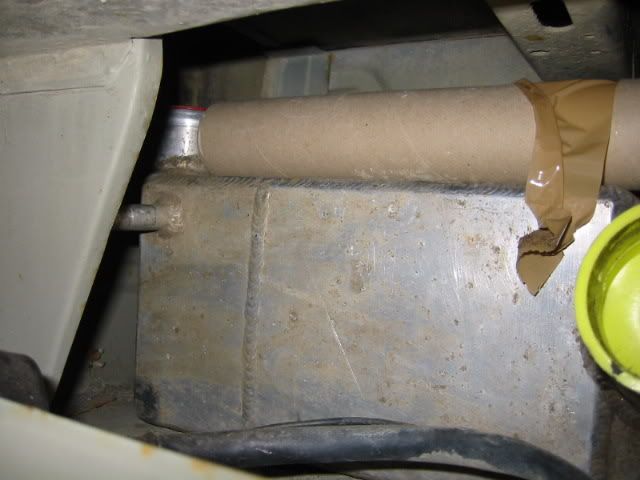
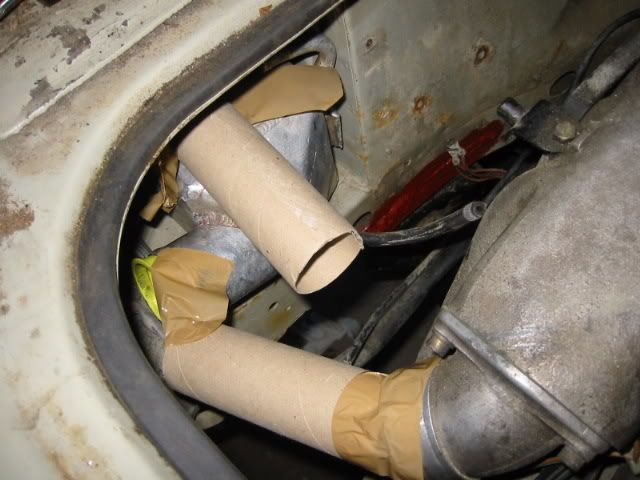
Today I managed to weld in the chassis strengthening plates with captive nuts (M12x1.25) and bolt the whole lot up into position, please excuse the sockets I'm using as spacers until I have some makde up in aluminium! Now I'm looking at the Charge Cooler placement and the main air inlet to the engine. When I had the charge cooler in the Doka, I had it fairly tightly squeezed into the N/S/R corner. The pipes were sent through very tight angles and to be honest it was thrown in in a hurry. This time I'm going to take my time and have everything comfortable! You can see where I plan to sit the charge cooler, it'll eventually be rubber mounted to the body. Mocking up with cardboard tube I have worked out the lengths, angles etc which I need so I can go out and buy everything without guessing. I've decided to mount the air flow meter inside the van rather than in the engine bay and run the main inlet pipe up the inside of the rear wall and then out through to the rear vent. I'll also mount the air filter box inside. This way I know no water is going to get to the airflow meter or air filter without getting to the top of the air vent first! As the van will have a cupboard at the back, all of this will be hidden away. Now to buy lots of ally tubing and rubber/silicone tube angles
MG |
Posted By: poshbuggers
Date Posted: 08 Nov 06 at 18:16
Mmmmm...nice engine cradle. 
Will be good to see it when I come down for the exhaust and mounting kit. Will give me a chance to pick your brains and check out the mountings on the 16". |
Posted By: syncroandy
Date Posted: 08 Nov 06 at 21:01
|
Mike, good to see that work in progress. Will the AFM work OK perpendicular to its normal position ? Andy |
Posted By: rogerthecat
Date Posted: 08 Nov 06 at 21:03
Hey Mike, not sure whether the bog rolls will form a good enough seal, and you want to help me with the wiring loom Looking good though. Van off to Baxters place on Saturday to sort the CV, a good fettle and once over to get the definitive list so the loom shortening party will have to wait a while. Cheers, Paul ------------- T3 Westy, T3 Syncro (the ScoobyVelle), New Beetle Cab, 2 x Polos - I have too many projects |
Posted By: Full Throttle
Date Posted: 08 Nov 06 at 21:04
|
I,I whats gong on here then. Have you cut into the side of the chassis and slotted a plate into there and welded it up. ? Must admit i like the look of the engine cradle as well, should stop a lot of the vibration. The inter cooler looks smart, is it home made ? Nice to see something different, vision my friend. |
Posted By: Ghia
Date Posted: 08 Nov 06 at 23:19
|
Andy, I had a good look at the AFM and the plate has a fairly strong spring unlike the usual petrol engine'd AFMs so I think it'll be ok running vertically. It certainley doesn't open the flap from its stop just by turning it over. If its a prob, I can always change the pipework and run it the other way Nige, yes I've welded in some 8mm thick plate with M12 nuts welded to the top of it. Should be strong enough for the grief I'm going to give it! MG |
Posted By: Ghia
Date Posted: 02 Dec 06 at 18:56
|
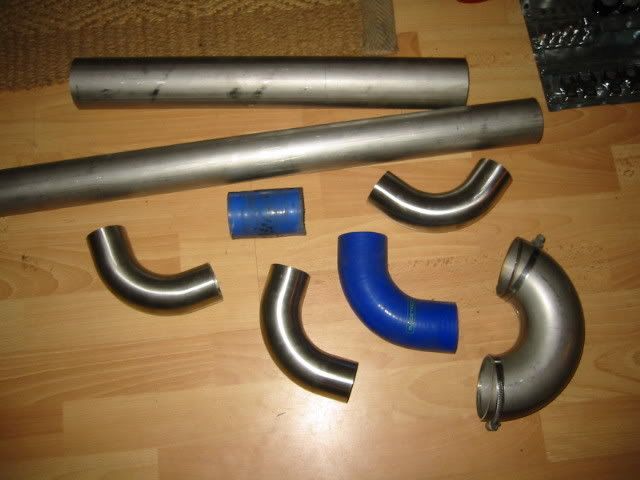
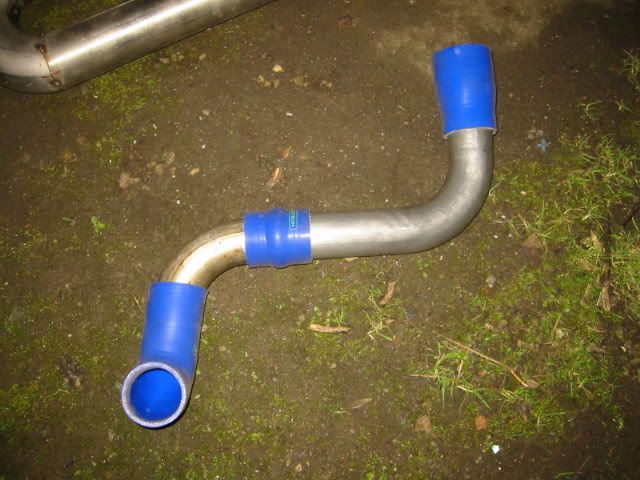
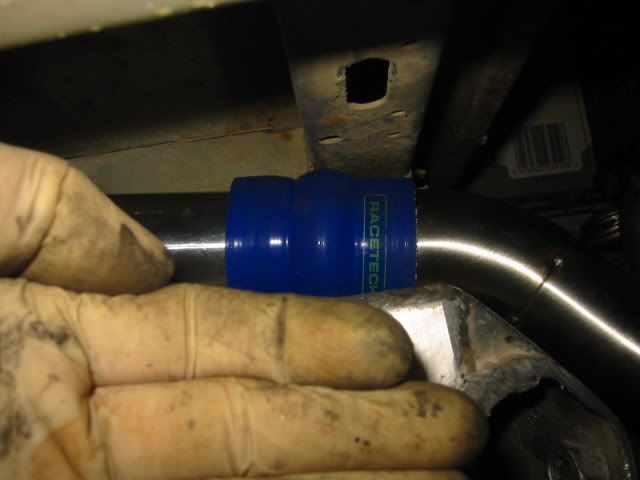
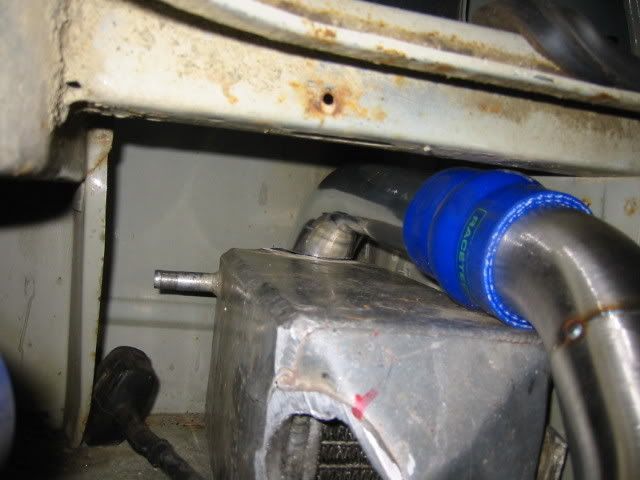
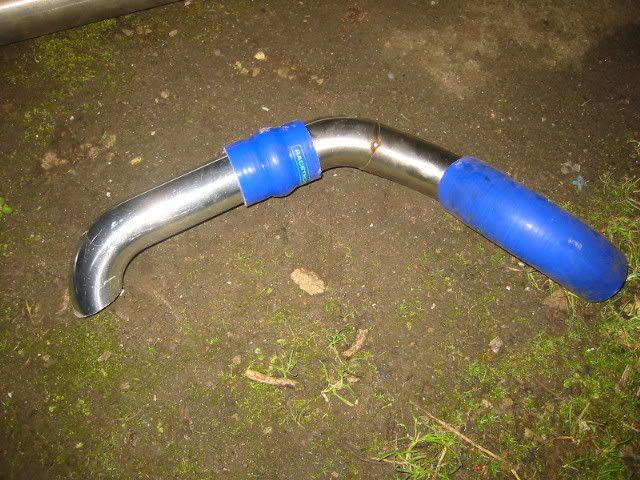
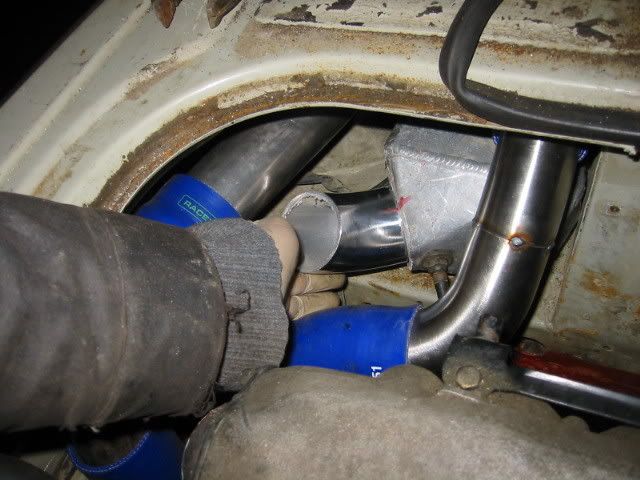
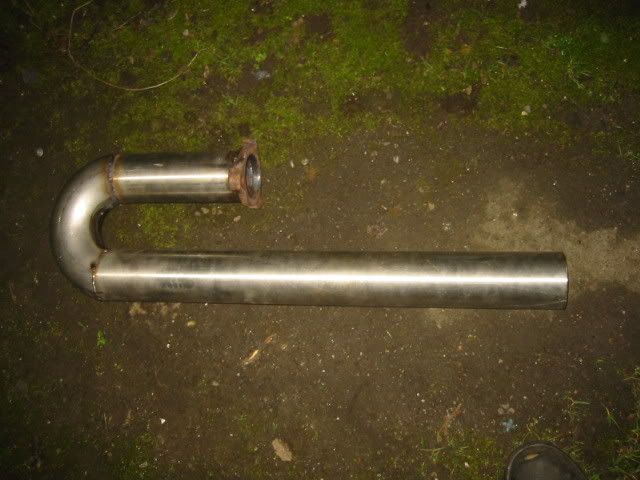
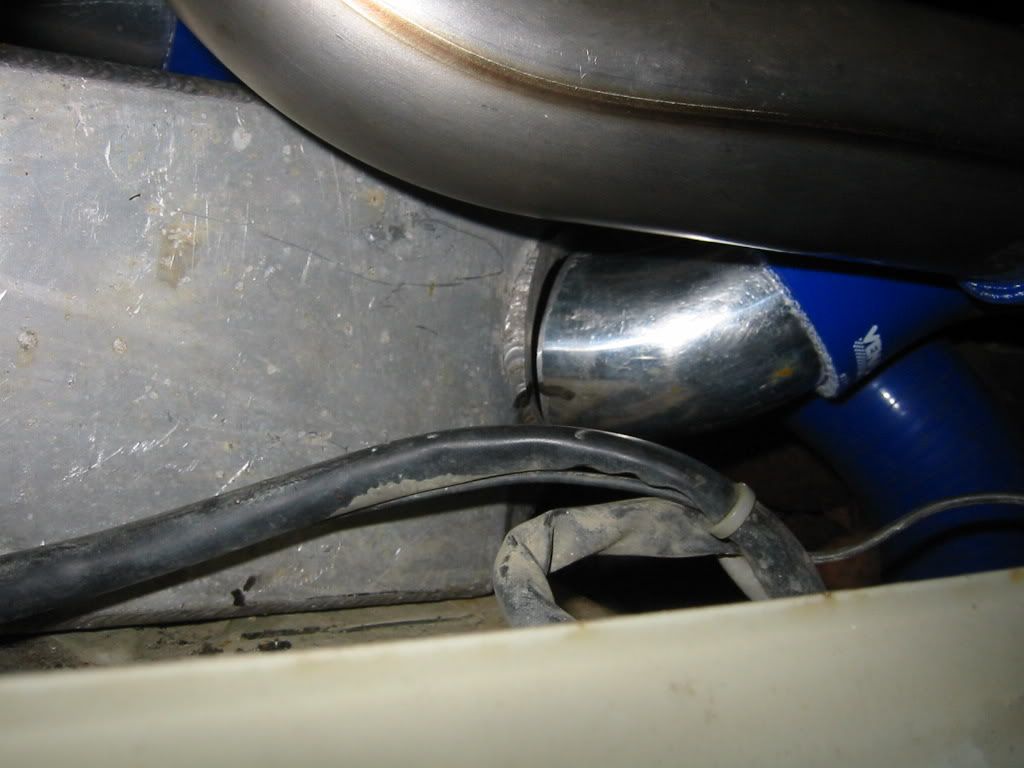
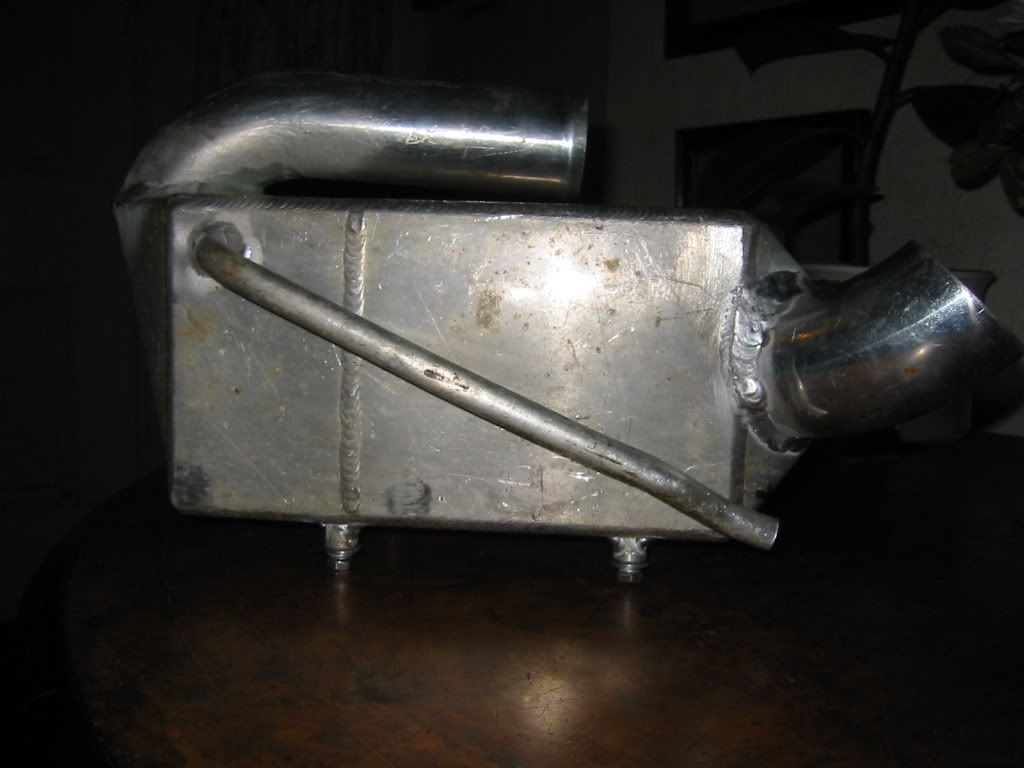
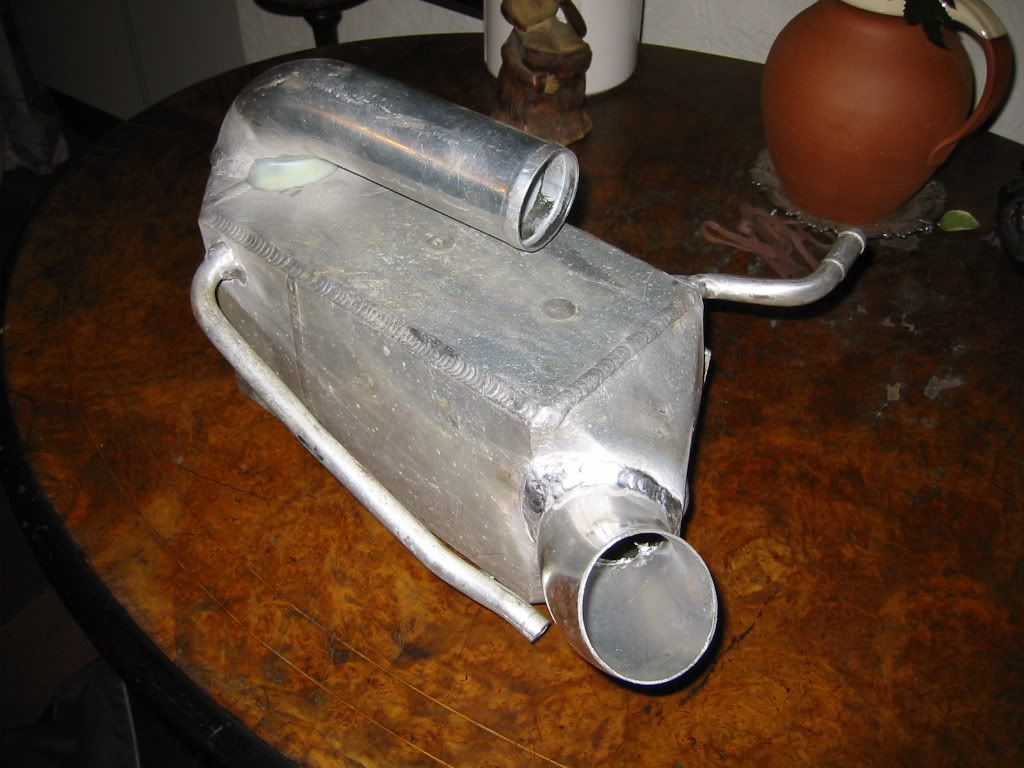
Ok a small update but still thinking of ways to build this thing I've bought a load of stainless pipe for the intake pipes and the exhaust aswell as Racetech sending me a 50mm 90o silicone hose as a sample. I think I'll be buying more from them although probably in 60mm sizes. The exhaust will be 3 inch bore all the way through and I'll be making a silencer out of an old Stainless twin DTM styleeee from my Golf GTi days It's going to be very close on the left hand side of the engine bay as everything (inlet and exhaust) is on that side. Shame really but there isn't enough room to get any of the pipework over to the other side of the engine bay. 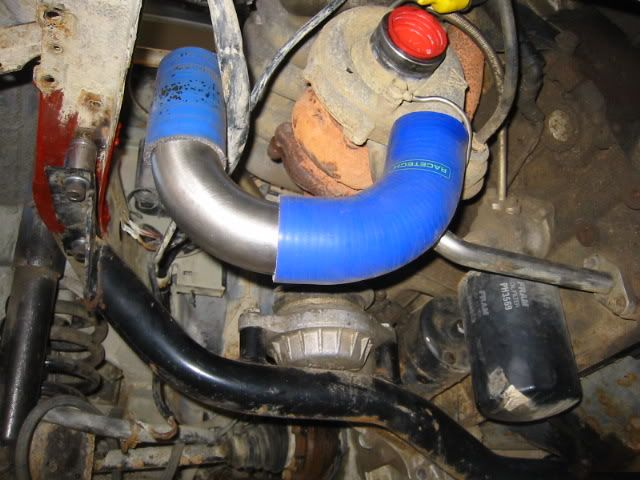
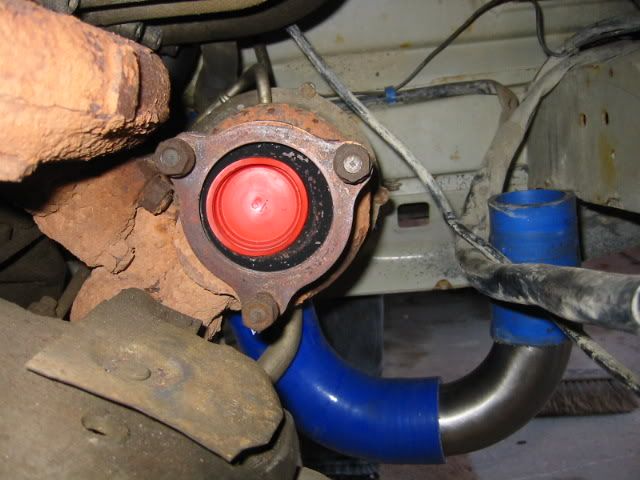
These are hopefully going to give me enough flex in the pipework to allow the engine/gearbox unit to move around when offroading without putting too much stress on the charge cooler or intake pipe. 
Oh and this is my old silencer which will be shortened and opened up to allow a 3 inch bore pipe through the middle 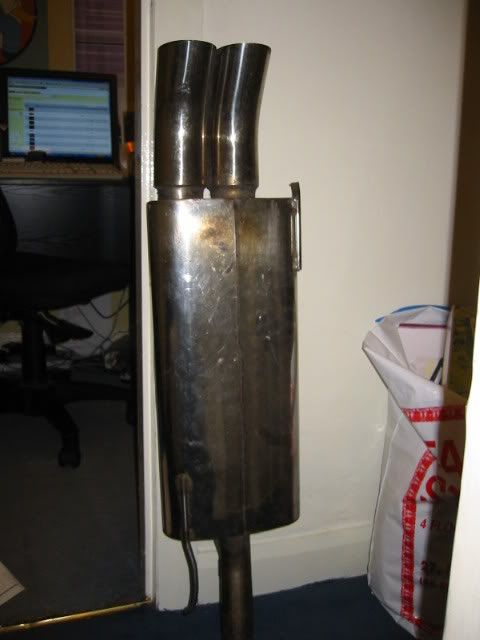
MG |
Posted By: Ghia
Date Posted: 02 Dec 06 at 19:48
Silicone hoses are from http://www.raceparts.co.uk - www.raceparts.co.uk and the stainless pipes are from http://by105fd.bay105.hotmail.msn.com/cgi-bin/compose?curmbox=00000000-0000-0000-0000-000000000001&a=21bc83fb030fc31e5501844bbd6c2672f28f29ccc21238af83a7453b09eb8448&mailto=1&to=stainless_steel_sections@hotmail.com&msg=969F5FCC-91F9-4AAA-AF73-E6702F017206&start=0&len=2683&src=&type=x - <FONT face="Courier New" color=#0000ff>stainless_steel_sections@hotmail.com who operate on ebay. I bought a 2 meter length of 3 inch pipe, a 1 meter length of 50mm, a 750mm length of 60mm and a 500mm length of 70mm, 3 50mm 90o bends and they brought it to my work place at a great price. MG |
Posted By: Ghia
Date Posted: 24 Mar 07 at 21:36
|
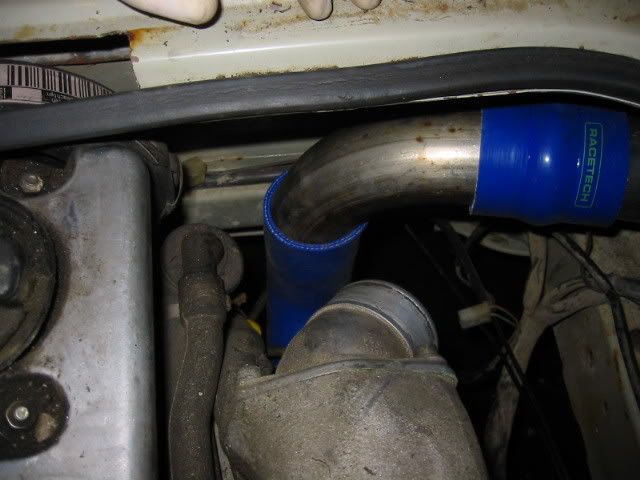
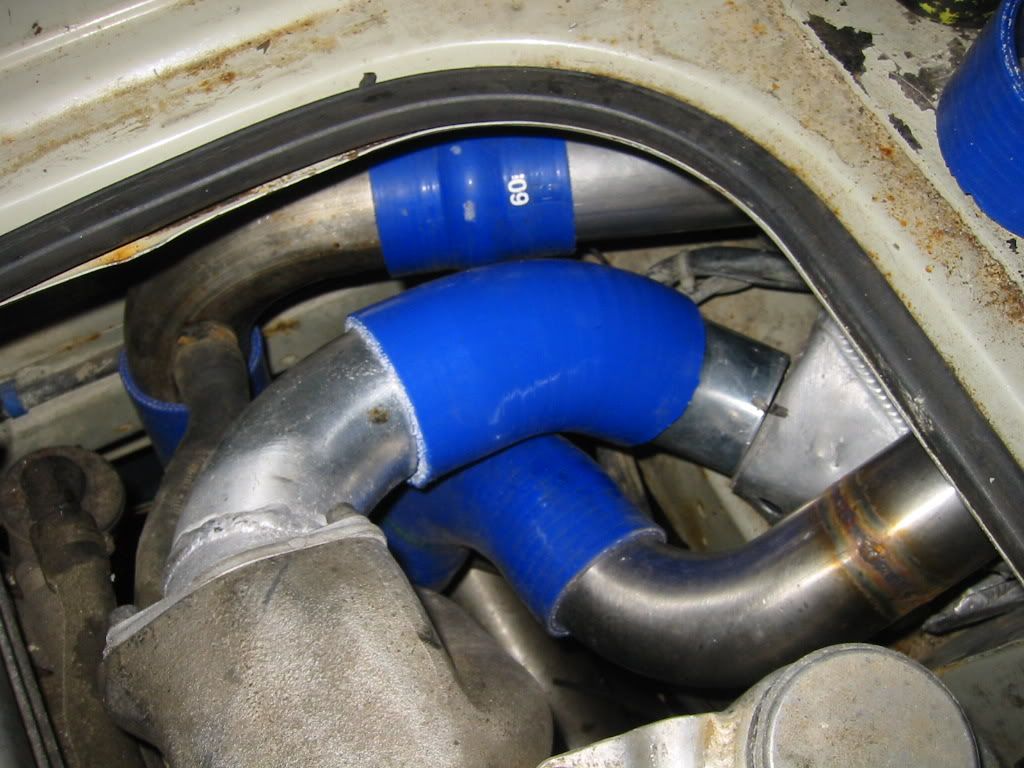
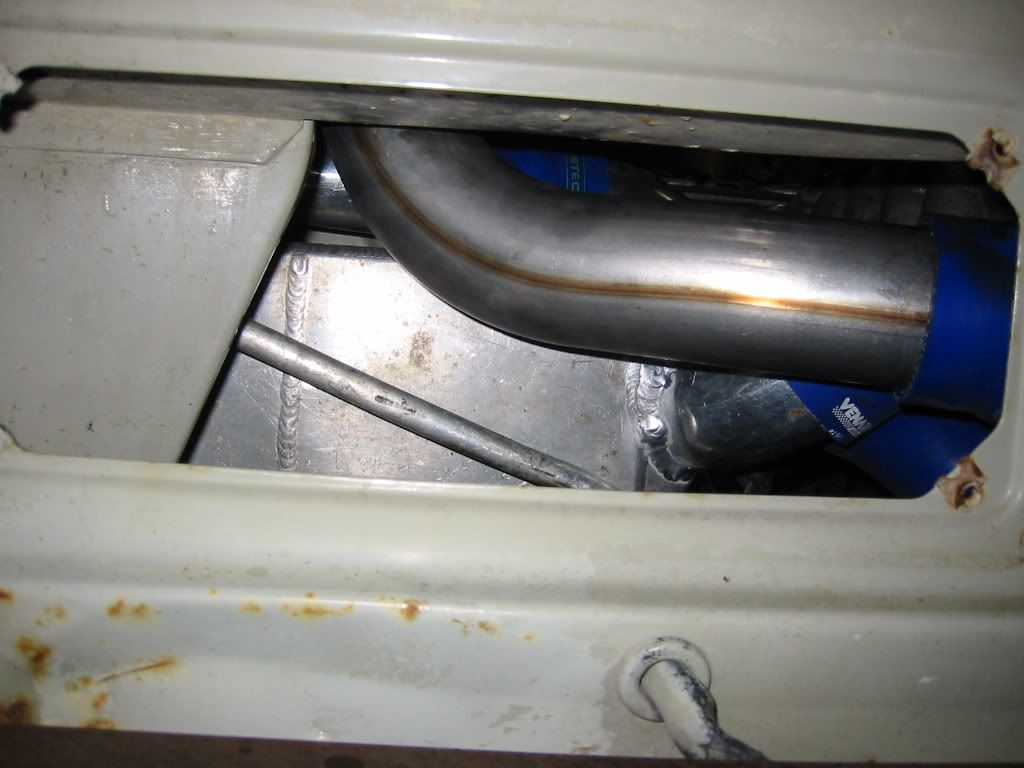
Ok it's been a while since the last update, sorry about that. Now that I have managed to get back to it, here are some pics of the bits I've managed to get sorted over the last couple of days. The left side of the engine bay is getting a little crowded! Fistly there is the main inlet pipe TO the turbo which will eventually run from a snorkle into the van through the left rear vent, then into a K&N Apollo sealed filter, into the air flow meter, through the floor into the area infront of the left rear light unit and across to the Turbo. 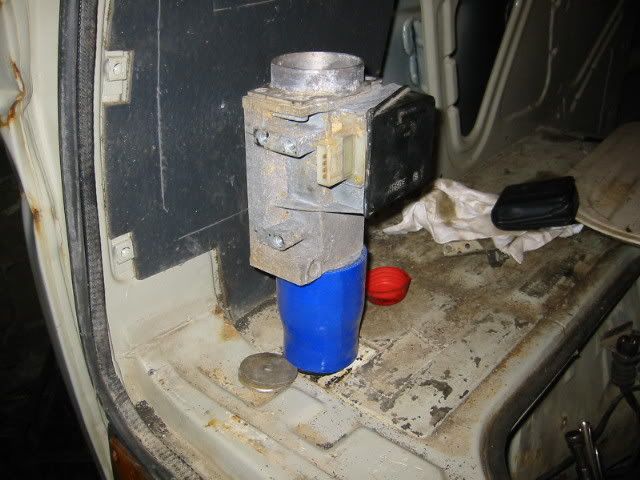
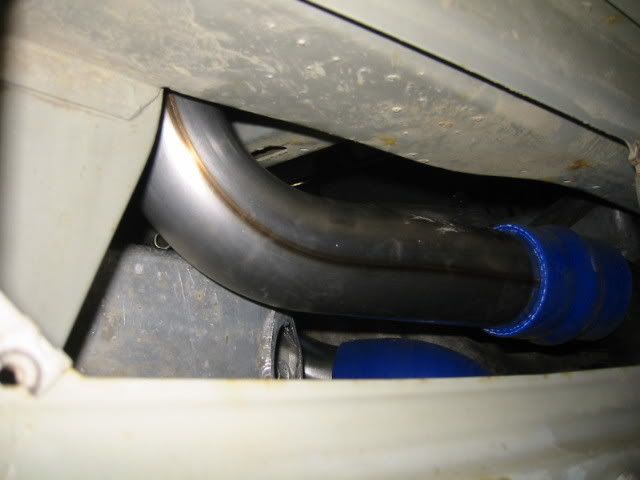
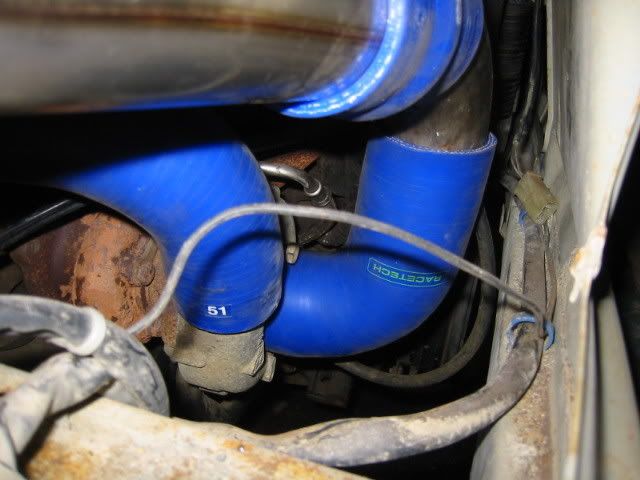
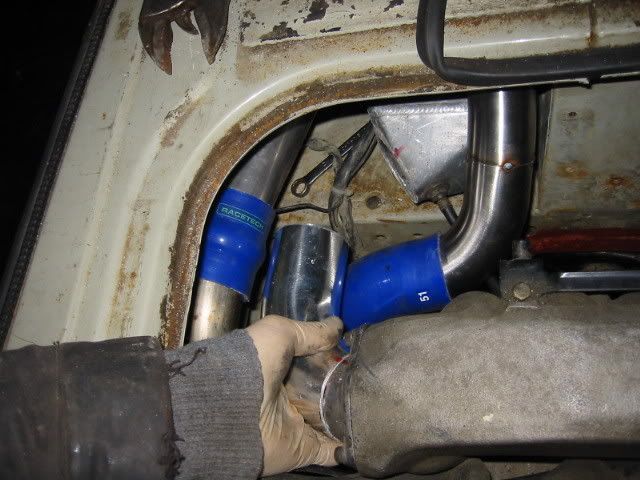
Next is the compressor pipe FROM the turbo to the Chargecooler. I had originally planned on running the pipework down, across and up as pictured above but after looking at how to sort the exhaust, I figured there was nothing stopping me from turning the compressor housing around to make a shorter run helping with throttle response and keeping the heat away from the exhaust. 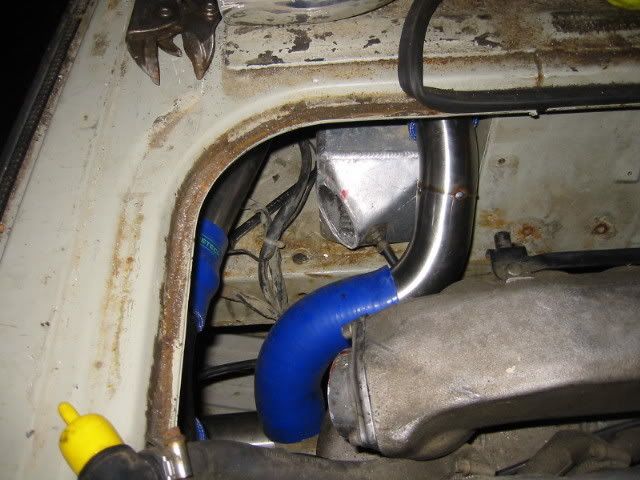
This will mean remaking the waste gate feed pipe from the compressor housing. I had to cut off the original pipe from the chargecooler and use a 90o bend in order to clear the bodywork above it. 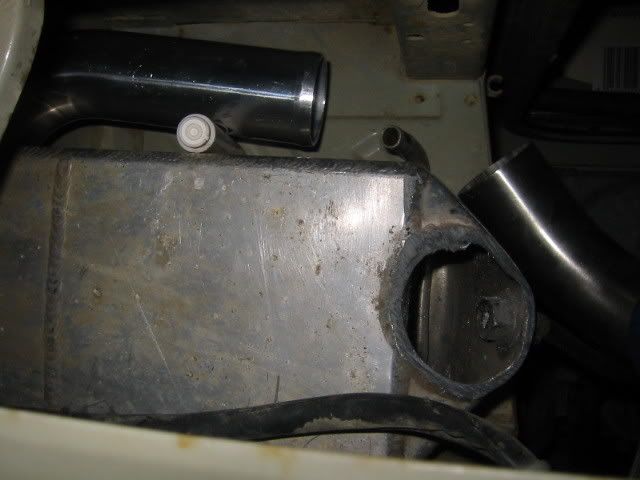
Next was the inlet manifold pipe FROM the chargecooler TO the engine. I have yet to tig these pieces to the chargecooler and inlet manifold. There will be a 60mm 45o bend of silicone pipe inbetween once it's all done. 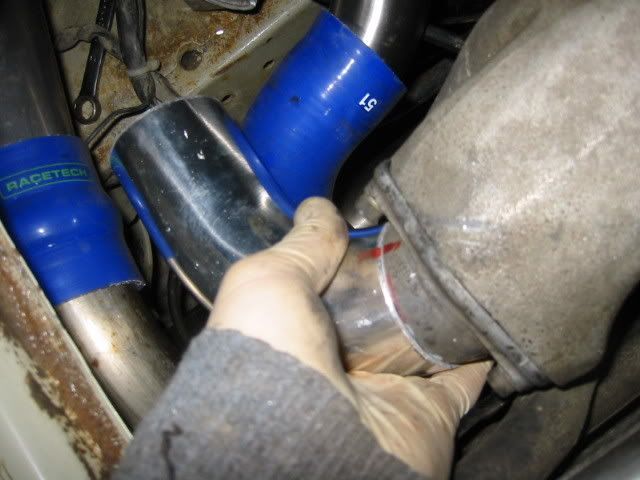
I have now sorted out the run of the exhaust and managed to get the bulk of it Tig'd up today although the flange had to be arc welded due to the differences of mild steel and stainless. I may yet add a silencer to it but I think I'll try running the straight through pipe with a larger cylinder over 12 inches of the main pipe with holes in it and some matting to allow 'some' of the noise to be quietened! 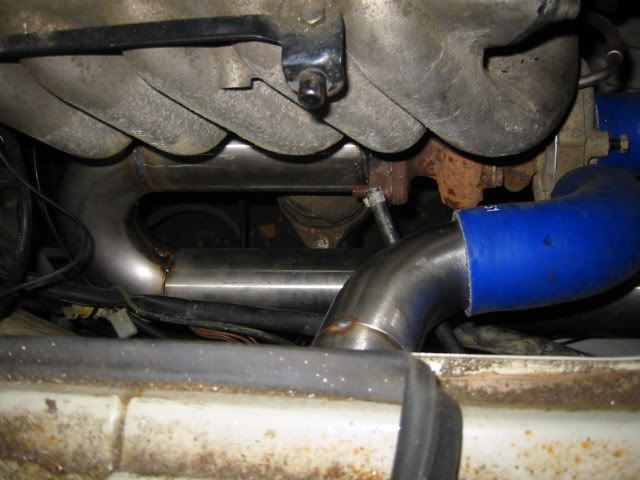
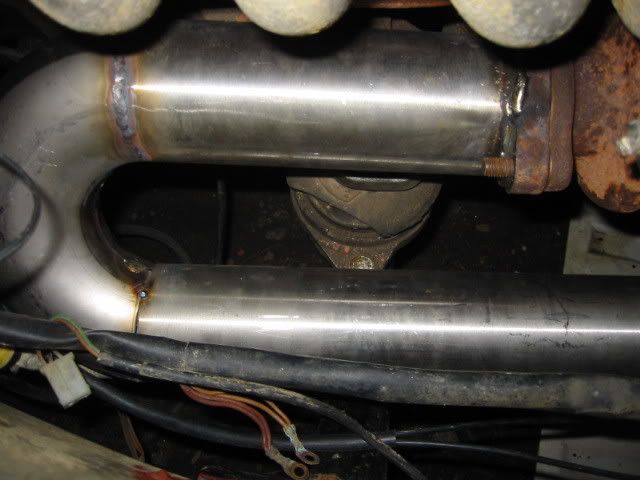
More work to do as soon as I can get back to my mates tig welder! MG |
Posted By: Full Throttle
Date Posted: 24 Mar 07 at 22:32
|
Whos been busy then, best get on with mine. Nice to see it coming together mike. |

Posted By: Ghia
Date Posted: 02 May 07 at 21:42
|
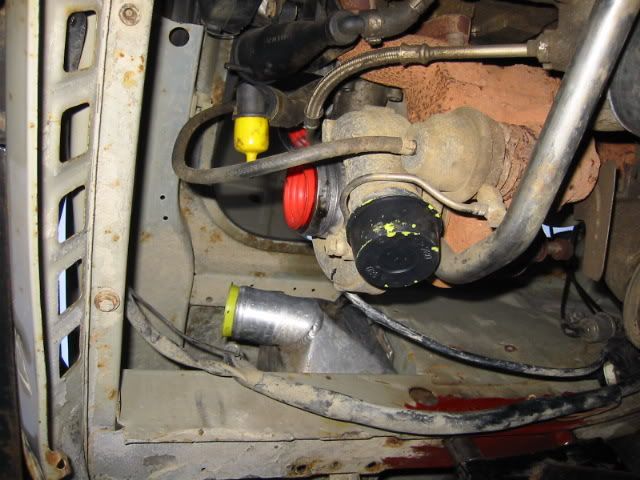
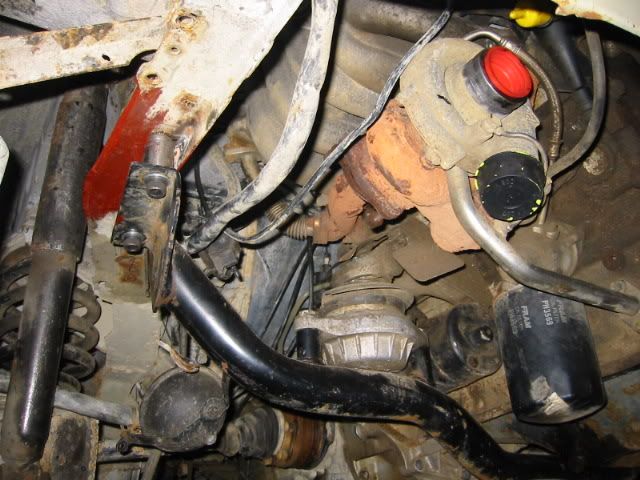
At last I've just had a delivery of the water pipes I've been waiting for from South Africa. These are brand new and fresh from VW. I have bought 3 sets as I plan on 2 5 Cylinder Audi engine conversions in my vans and then I want a set for spares... NO They are not for sale! I will email the part numbers for those interested though. 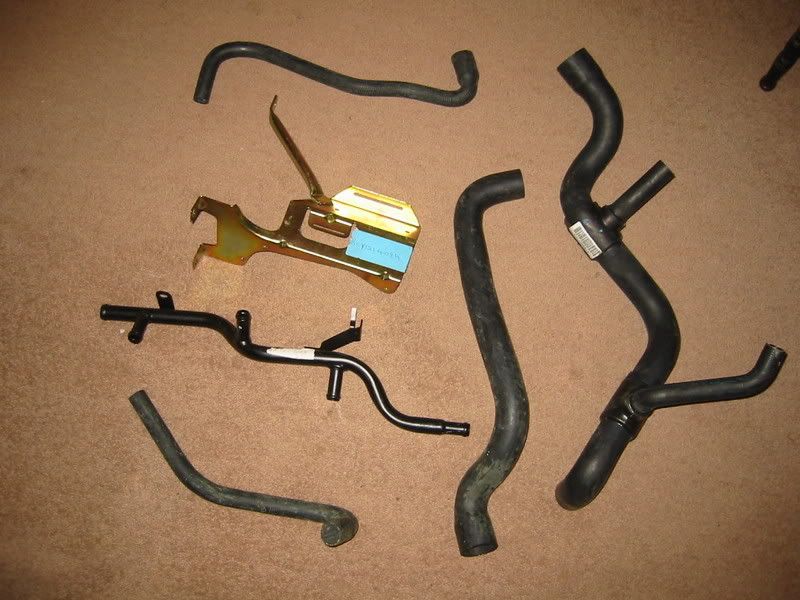
I need to change the thermostat outer housing for one the same as the South African vans so the water pipe will fit. Good time to fit a new VW thermostat. 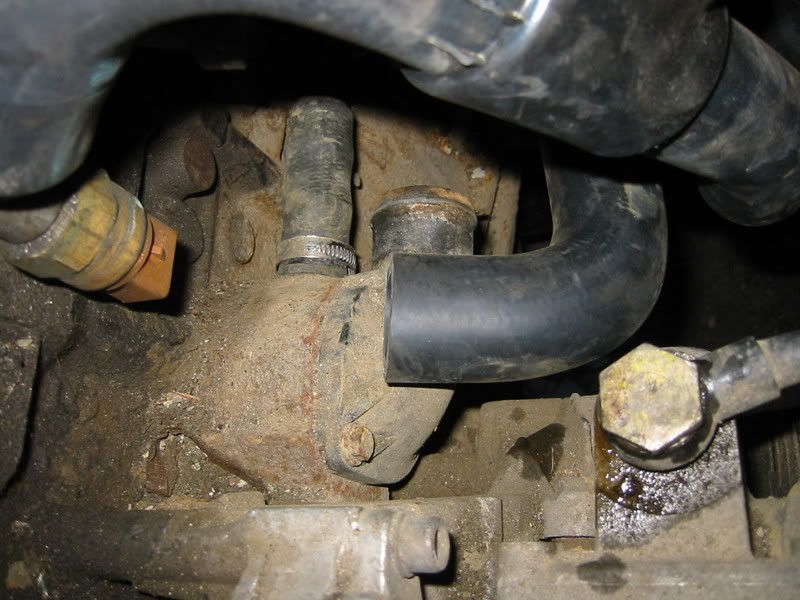
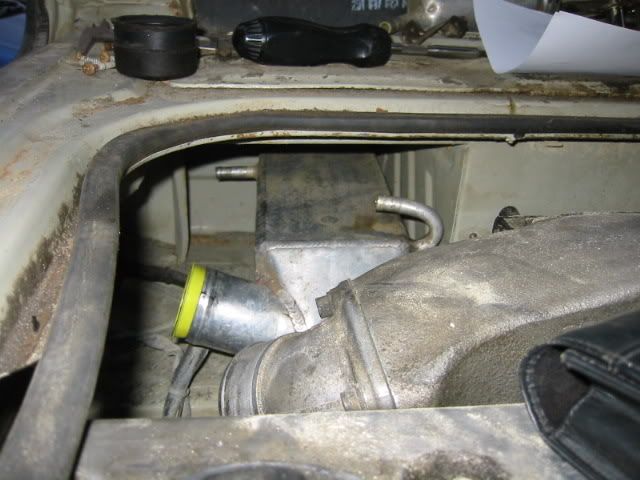
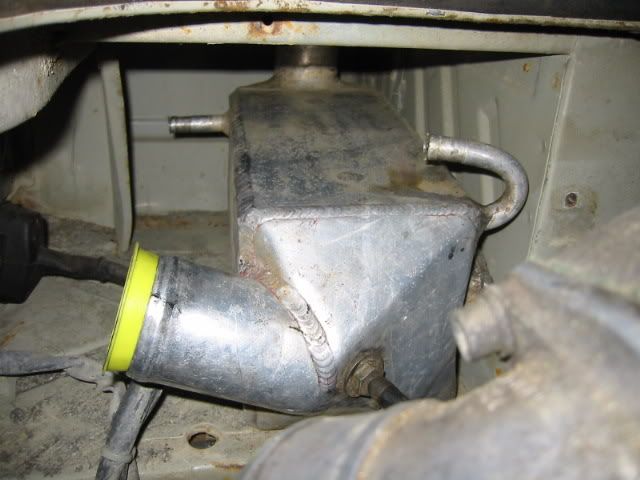
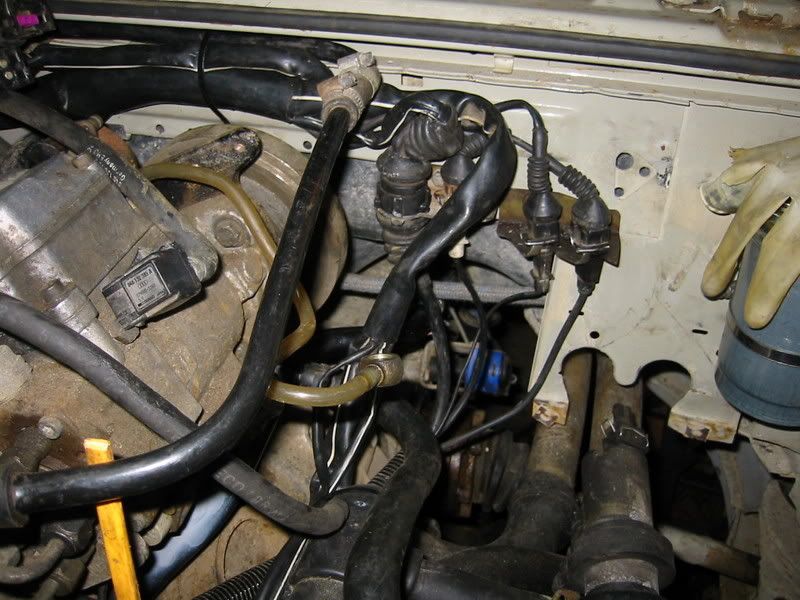
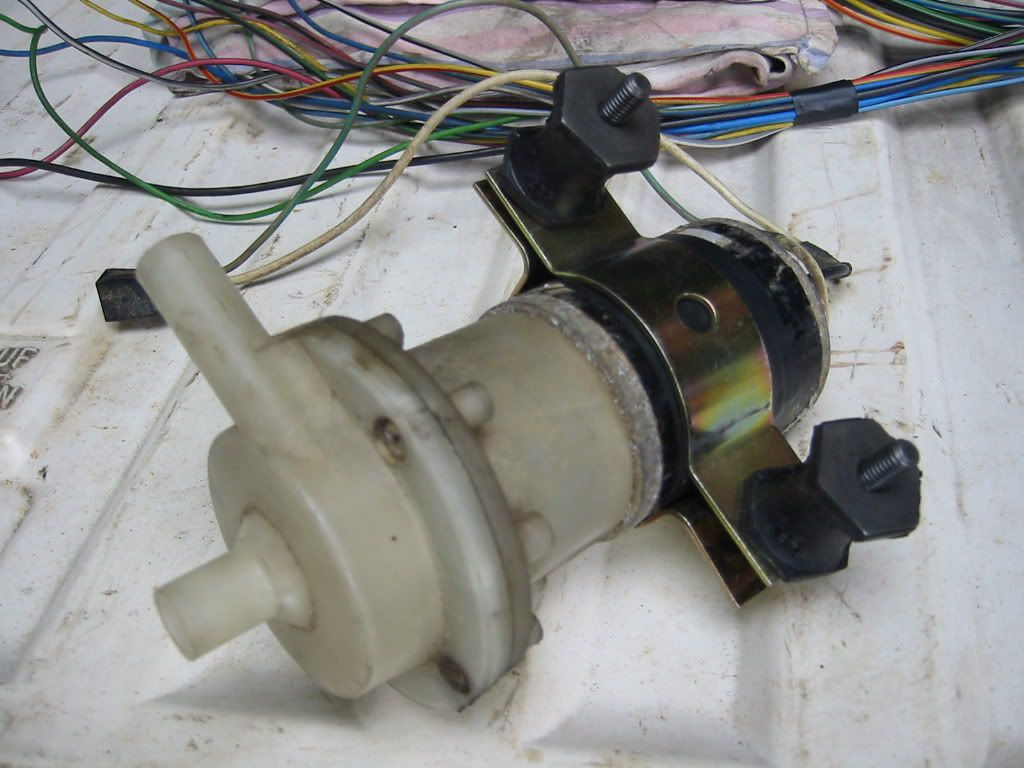
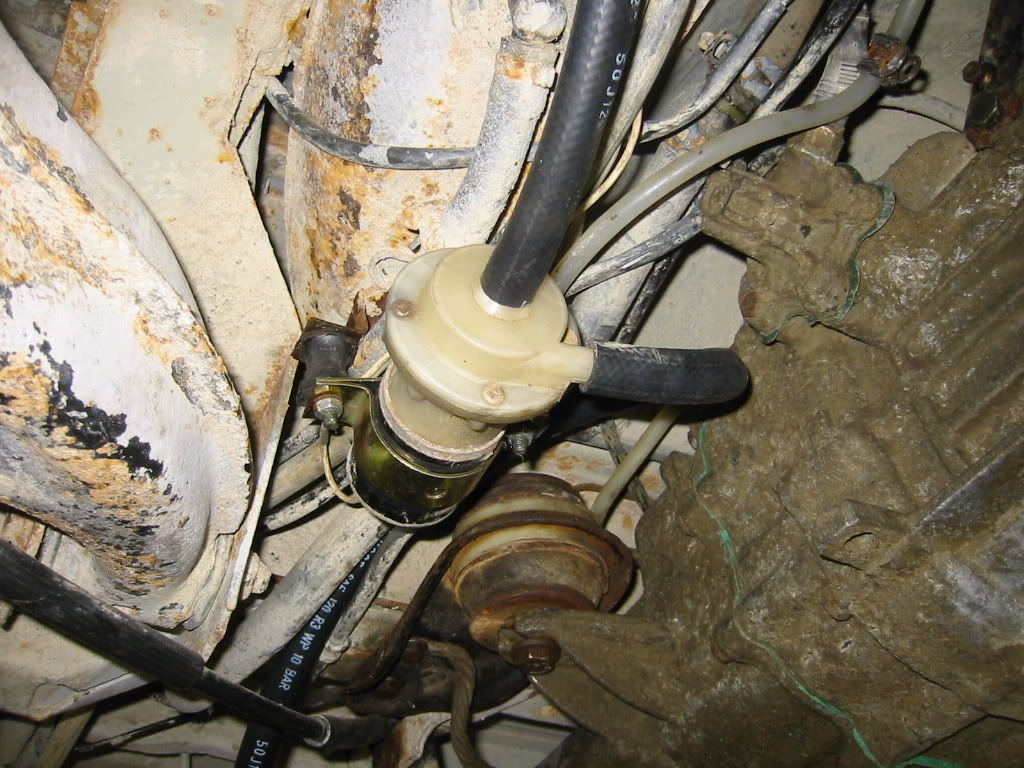
The South African vans came with an electric aux water pump which I'll be fitting. The Syncro TD comes with the same setup and I'll be fitting a turbo temperature sensor to bring it in when things get hot. The water pump fits inbetween to the 2 pipes which are sitting behind the cooland header tank. 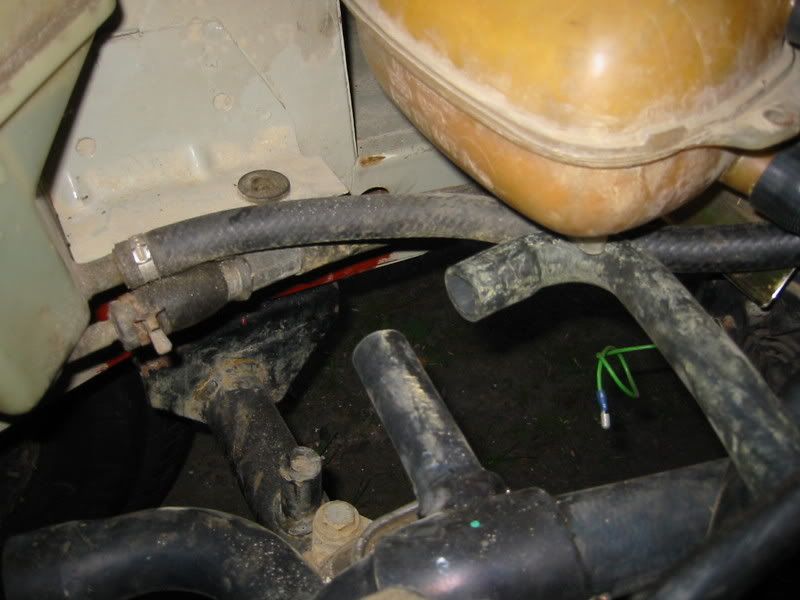
You can just make out the black metal pipe which bolts to the block. This is a fairly important piece as 5 pipes join onto it from the block, cooland header tank, heater matrix and aux water pump. 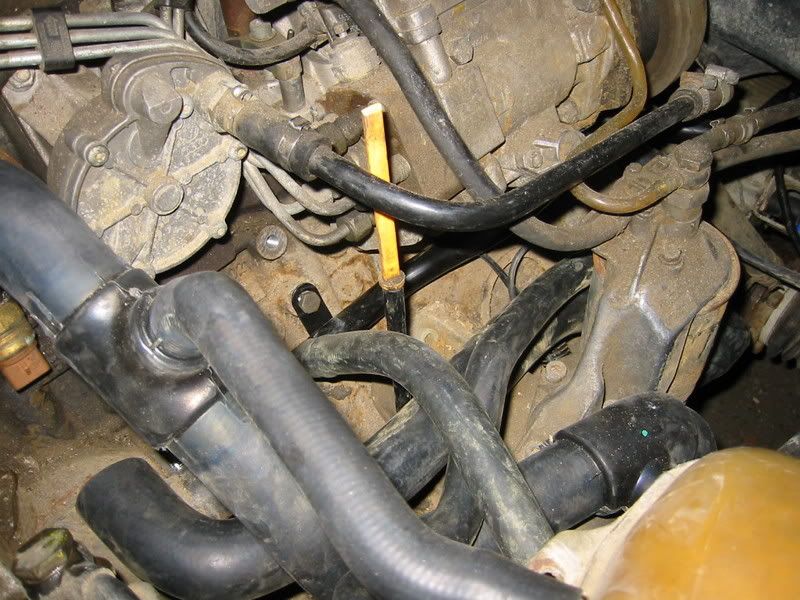
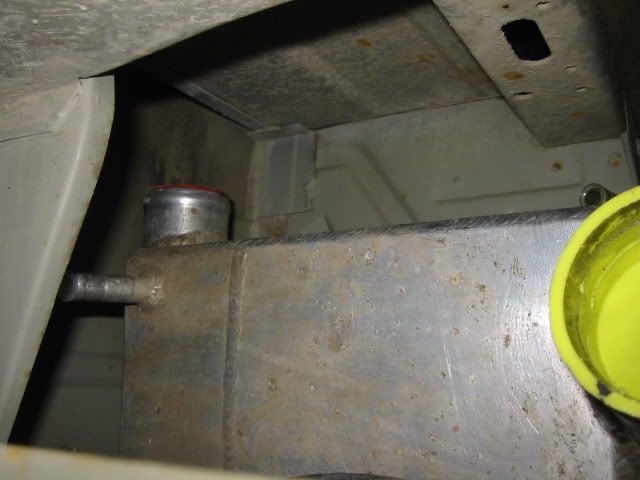
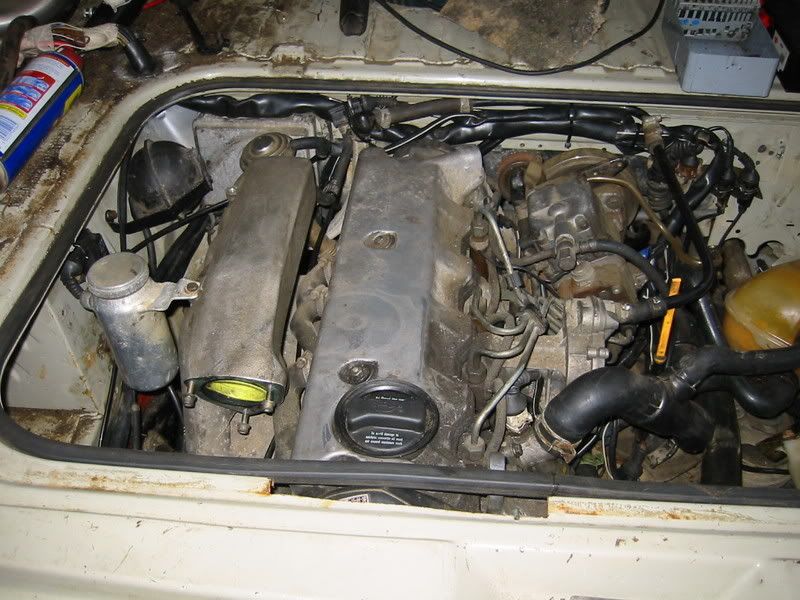
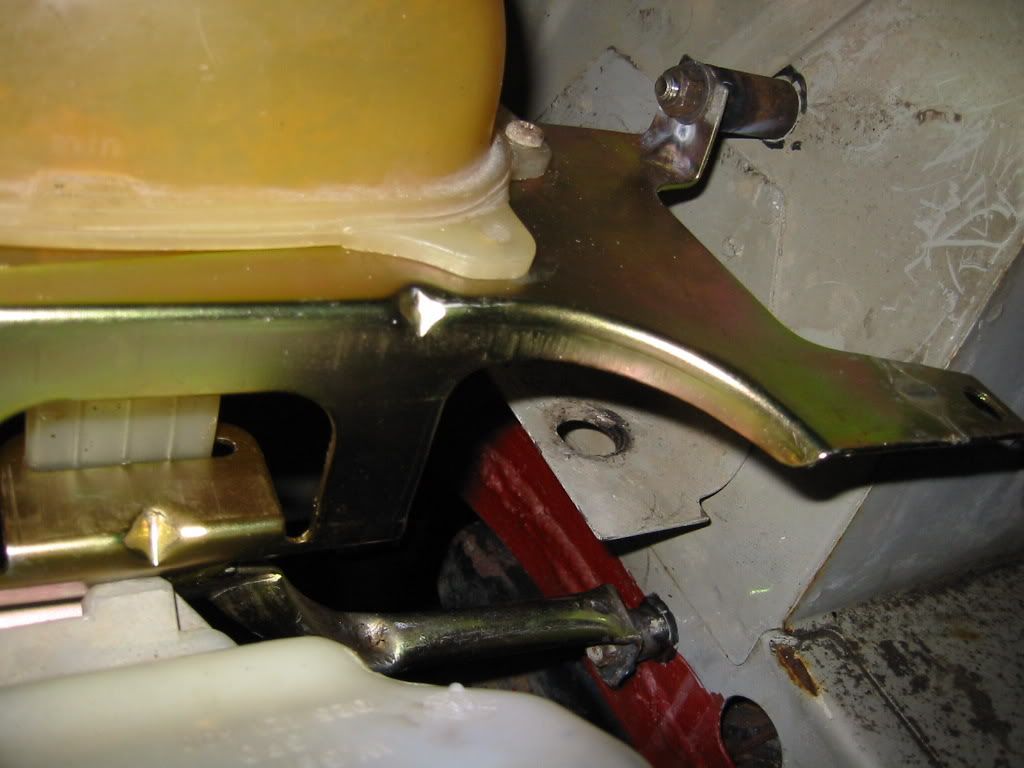
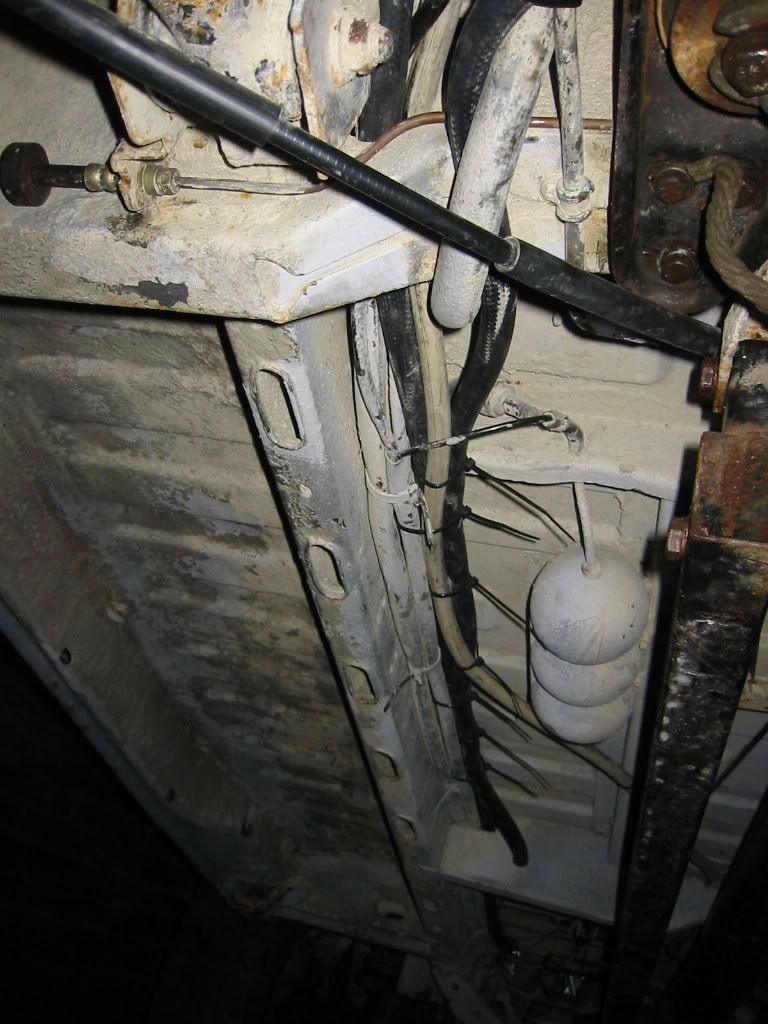
I'll have to heat up and bend the end of the metal pipe to clear the syncro tank. The last bit of this kit is the bracket which both standard coolant bottles bolt to. I've only fitted one bottle for the moment as I'm going to have to re-route the power steering feed pipe to allow it to sit in it's proper place. Here are 2 pics of 2 original South African engines to compare with. 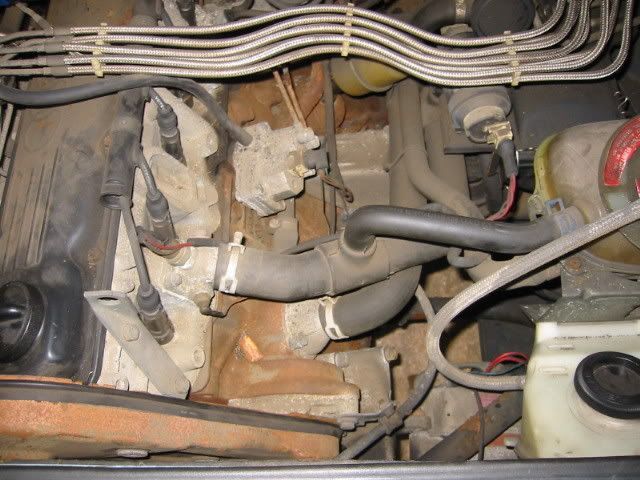
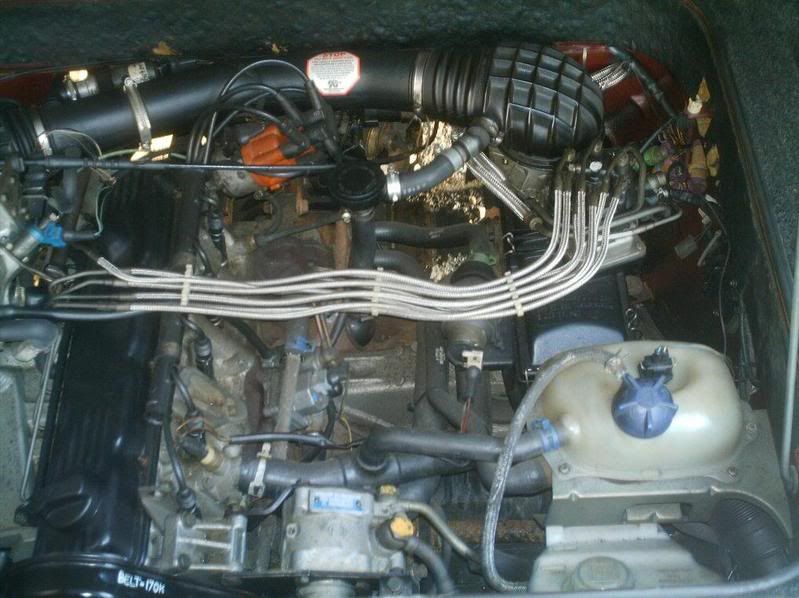
I think I'll remove the original 2.5TDi diesel fuel filter and bracket so that the water pipes can sit comfortably without chaffing against things. I'll prob use a stock T3 Diesel filter and bracket for neatness. MG |
Posted By: Dubkopfeyellow
Date Posted: 03 May 07 at 07:18
|
Good work, it's always impressive to me when someone goes ahead and
does an engine conversion for themselves Should be a beast when it's done
|
Posted By: Full Throttle
Date Posted: 05 May 07 at 07:56

|
Posted By: Ghia
Date Posted: 05 May 07 at 09:05
|
Nigel, are you doing the Coast to Coast? MG |
Posted By: Full Throttle
Date Posted: 06 May 07 at 00:27
|
No i'm affraid not, the van still needs the VC fitting, front diff converting, new outer boot for front prop but the good news is the AKG rear box is in the van now. Down side is i have to fit the tdi to drive it all. Still getting the 2wd ready to sell, then concentrate on the syncro. You best pull your finger out or i will be coming past you with the diffs and gears. |

Posted By: Ghia
Date Posted: 19 May 07 at 22:01
|
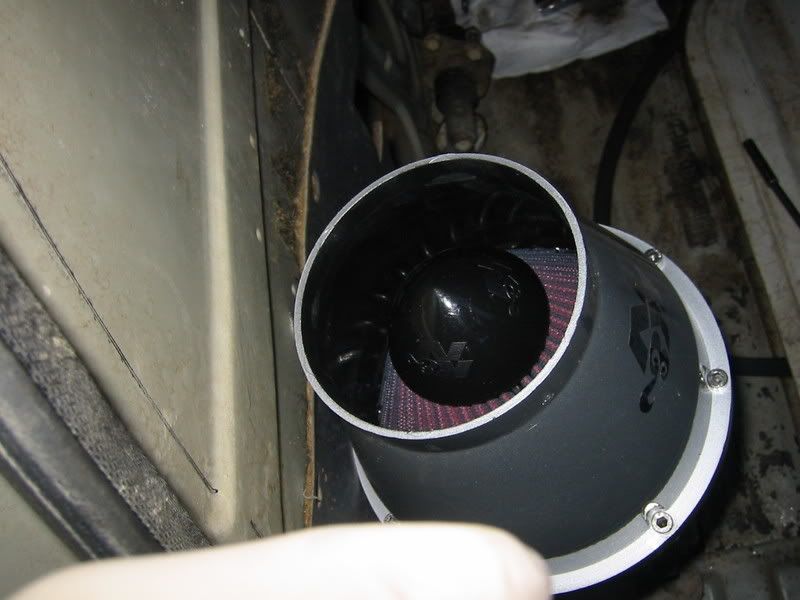
Update on the 16. No it won't be ready for coast to coast, not a chance in hell! Maybe the next event.... I finished tig-welding up the exhaust (what there is of it Then I started on the ally welding... hum this isn't as easy, in fact 3/4 of an hour later and I'd not gotten very far with the first section at all with lots more to do. I could not get my friends tig-welder to work for me welding ally. For whatever reason the arc just wouldn't centralise and was jumping around all over the place. More practice needed! Back inside the van I got the K&N Apollo filter out with all it's associated bits and mounted it in place with riv-nuts. 
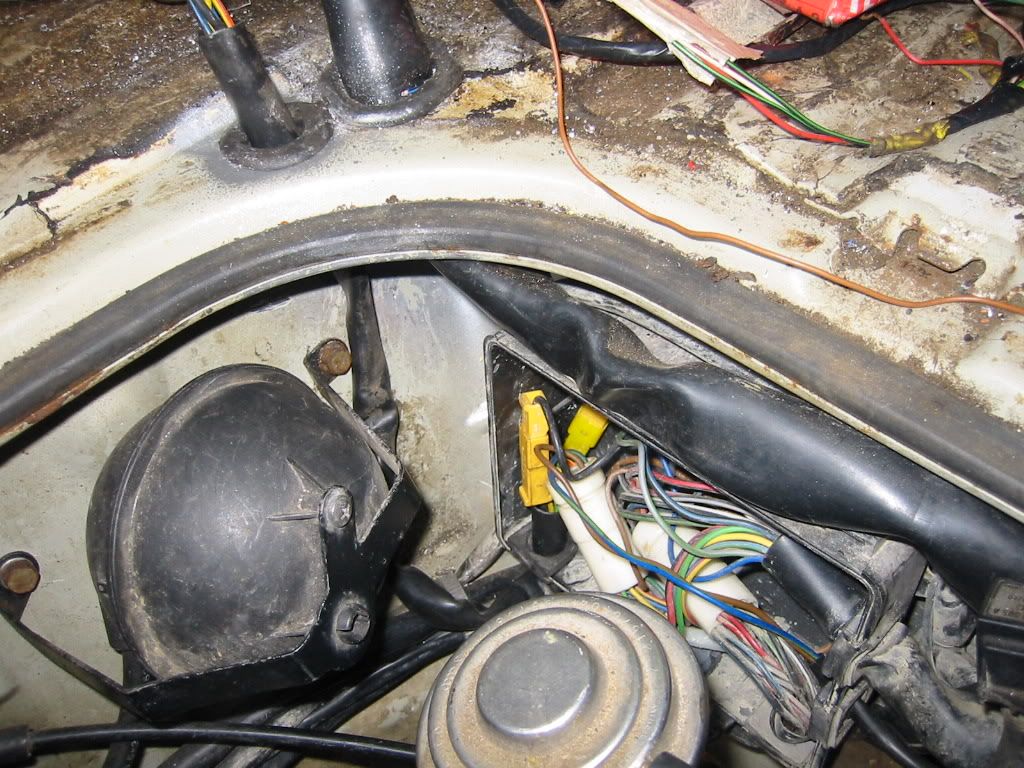
Sorry about the blurred pic. 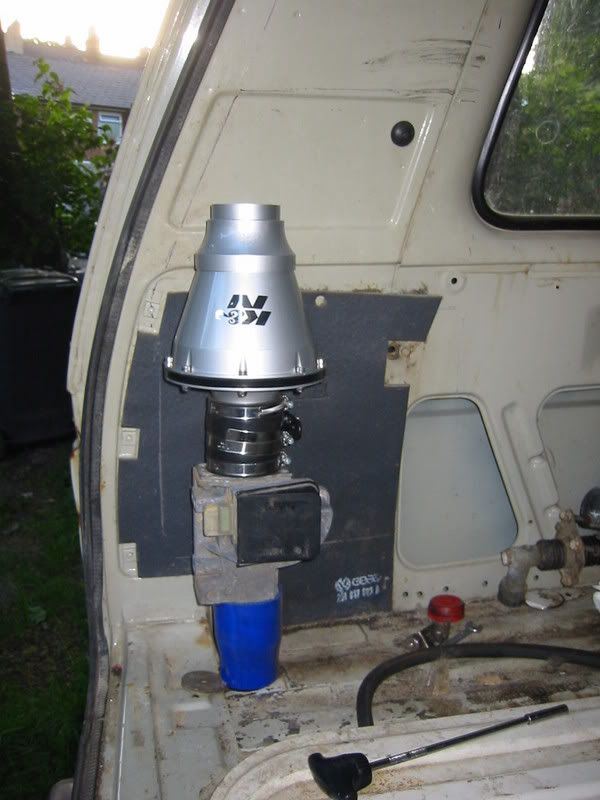
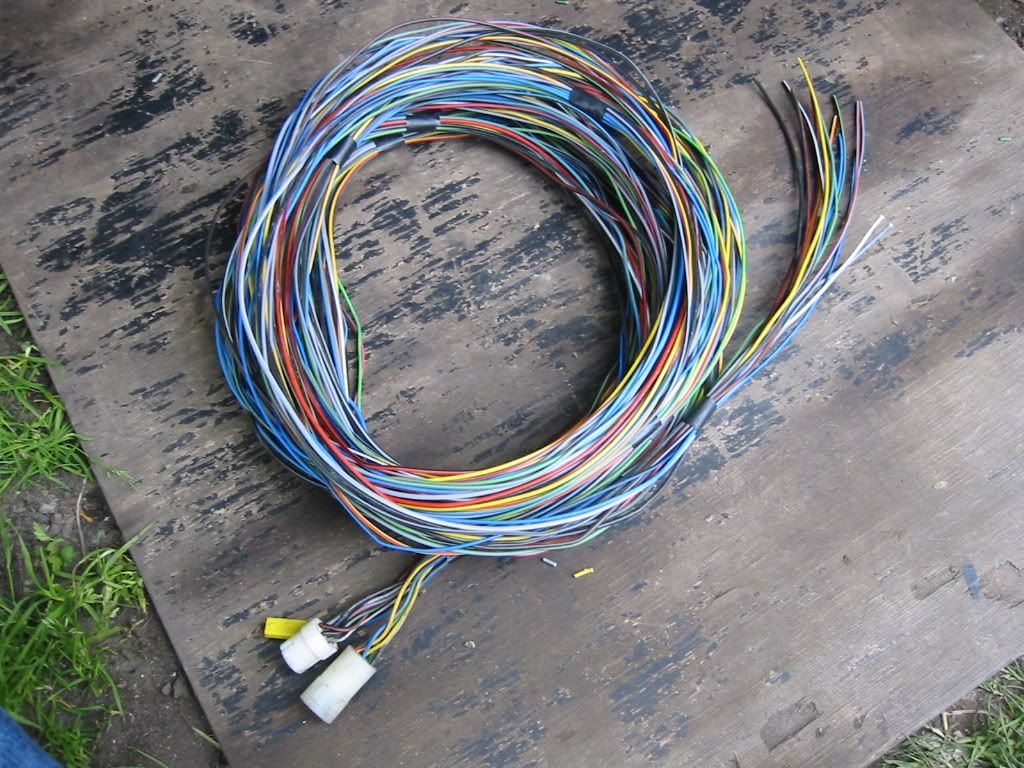
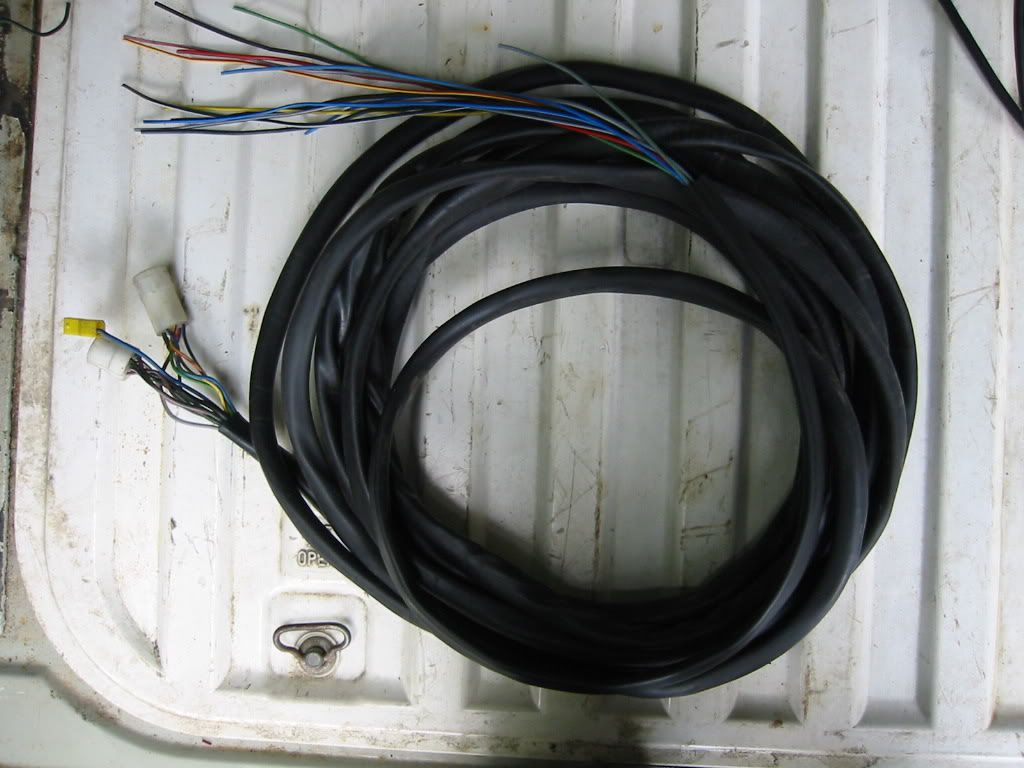
Next I figured it was time to get the loom, ECU etc out and start working out where it was going to fit. I had already tidied up the loom (hence the masking tape!) but haven't wrapped up the loom in loom tape as I haven't finished shortening or lengthening sections yet to suit. 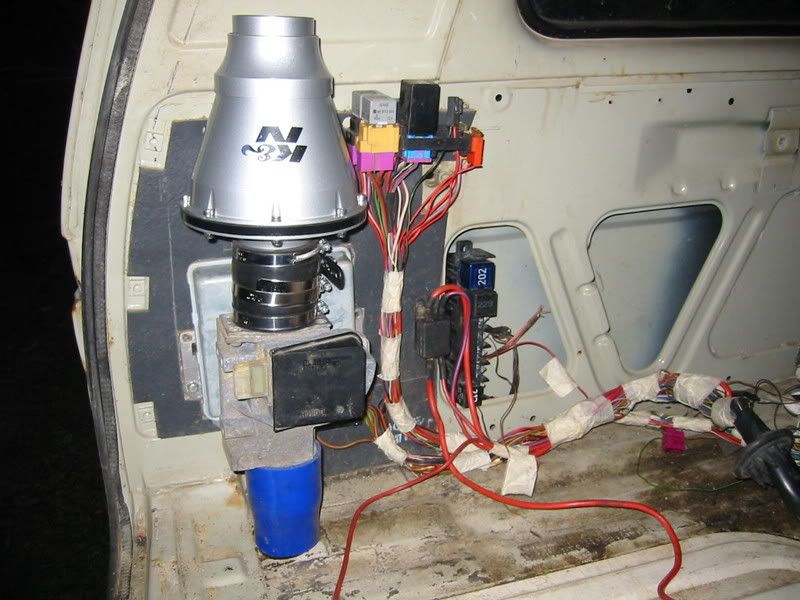
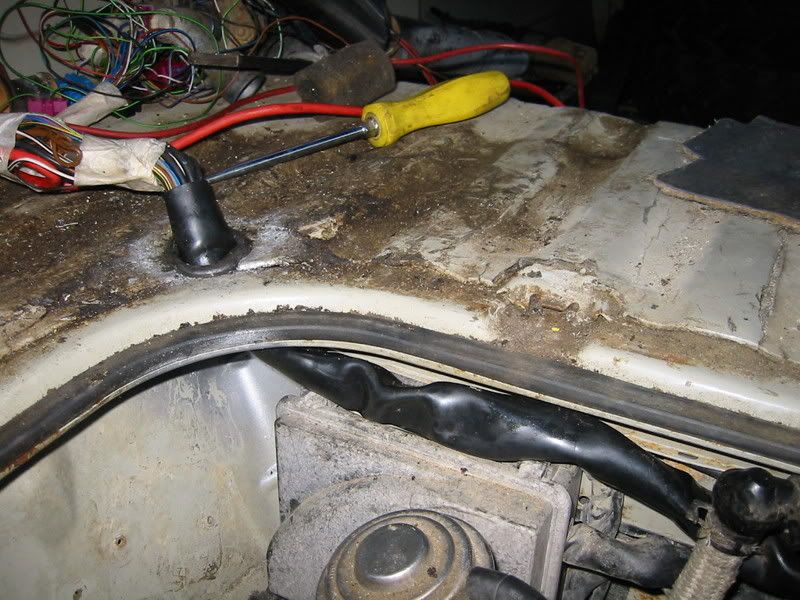
The ECU sits nicely behind the Air Flow Meter (again fixed with riv-nuts and bolts), large fuse box and the 2 relay boards allow the loom to have a nice flow without nasty kinks. I have yet to make up a plate for the 2nd relay board to mount to which I will weld into the inner panel. I also have to shorten to the 2 thick red wires as they connect to the 2nd relay board but in the Audi A6 it's mounted further away. Then I started looking at where the loom will run into the engine bay. Fortunately the loom falls just right so that it will fit nicely into the front left corner (with small grommet) and then the engine loom will run across the front of the engine bay wall tucked up out of the way. 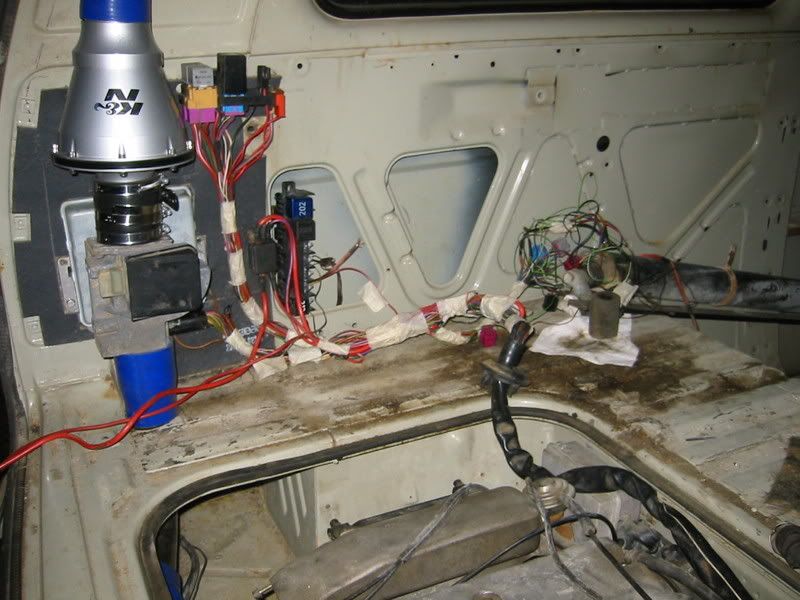
You can just make out the felt pen outline I traced around the inside of the stock westy rear cupboard Nige leant to me (thanks Nige) so I know this'll all fit inside it. I need to buy some P-clips to hold the loom up in place and will recover the loom with loom tape once it's all in place. MG |
Posted By: Full Throttle
Date Posted: 19 May 07 at 22:23
Thats cheating, putting a small jet engine in your van. 
|
Posted By: Ghia
Date Posted: 04 Oct 07 at 09:14
|
Small update as I've had a lot on my plate recently! Have tried fitting 2WD diesel front to rear water pipes but found that they won't clear the fuel tank at the back and sit in the proper place in the engine bay. Have now bought some Syncro Diesel front to rears instead and will try those on to match up to the SA water pipes. Eventually managed to track down 2 early style thermostat housings which the SA vans use. These have gone obsolete from VW/Audi so the only source now is breakers. Have fitted up the water pipes properly with VW/Audi spring clips so it's starting to come together. The coolant tank is in place although I think I may have to drop it down a little bit to clear the lid. With the 2.5TDi diesel filter and bracket removed, the water pipes sit quiet nicely and I've added a stock 1.6TD filter in it's stock position. Just need to find some fuel lines and fittings and it'll be connected. I've now bought my own set of hole saws in order to fit the remaining intake pipe through the rear wall which will come out through the left rear vent. My tig-welding is ok on stainless steel but for whatever reason, both myself and my friend (who's tig welder I've been using) have been unsuccessful in welding up the charge cooler or any aluminium so I may end up paying someone to do that. More pics when I get a chance. MG |
Posted By: rogerthecat
Date Posted: 04 Oct 07 at 09:27
|
It's coming on Mike.
------------- T3 Westy, T3 Syncro (the ScoobyVelle), New Beetle Cab, 2 x Polos - I have too many projects |
Posted By: Germman
Date Posted: 04 Oct 07 at 20:42
|
coming on nicely Mike ,getting all the parts together must b a pain ! keep it coming ,soon b out in the mud with it !  ------------- http://picasaweb.google.com/germmanmark Coventry near Vanarchy *Wanted mint early AC STUFF* |
Posted By: Interzone
Date Posted: 04 Oct 07 at 23:57
| Coming on very nicely...hard to believe that it's the same van that was coated in lime!!! |
Posted By: Ghia
Date Posted: 07 Oct 07 at 19:00
|
Right, Todays findings are that the Syncro JX uses the same front to rear pipes as the late Syncro petrol including all 2.1s... so I've bought aa 2nd pair of front to rears from CJ for nothing But on closer inspection the originals were both about to go The Syncro front to rears stop about a foot short of the engine bay and then use a rubber hose to go into the engine bay. I now have the choice of either using the 2WD Diesel pipes which are hard up against the tank or using the extension pieces as per Syncro.... MG |
Posted By: Baxter
Date Posted: 07 Oct 07 at 22:33
| I have a trial repair section at the machine shop, for replacing the ends when they drop off, maybe what you need?! |
Posted By: David Pickles
Date Posted: 09 Oct 07 at 10:23
|
Interesting link Go Westy Plastic pipe adapters http://www.gowesty.com/library_article.php?id=113 - http://www.gowesty.com/library_article.php?id=113 ------------- 1990 1.9td SYNCRO DOKA 1988 1.6td SYNCRO AMBULANCE 1989 2.1i LPG Camper |
Posted By: Ghia
Date Posted: 09 Oct 07 at 23:18
|
Thanks guys. I think I'll use the stock syncro pipes and then the factory extension rubber hoses etc. Interesting link re-Go-westy stuff. Not sure how they're supposed to stop the end of the pipe dropping off as the pipe usually disconnects right under the clip... MG |
Posted By: Ghia
Date Posted: 13 Oct 07 at 08:03
|
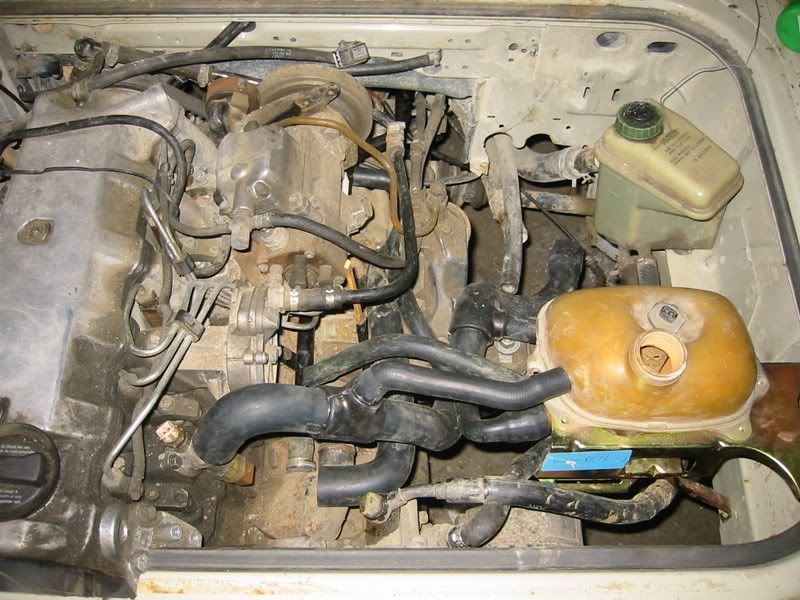
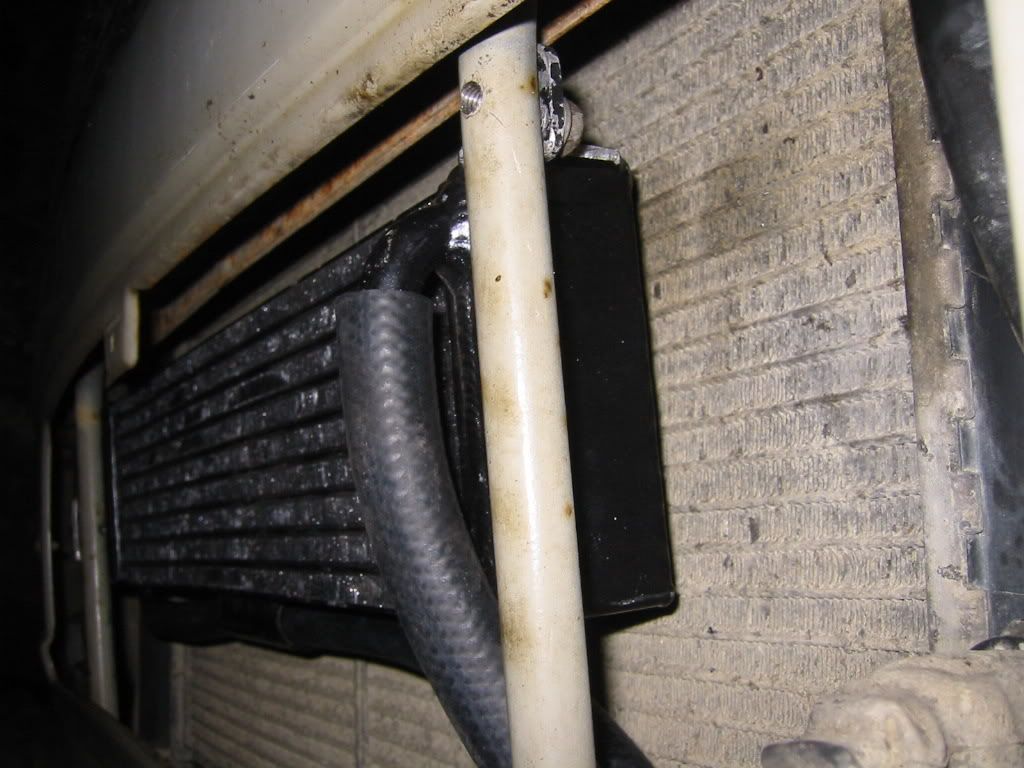
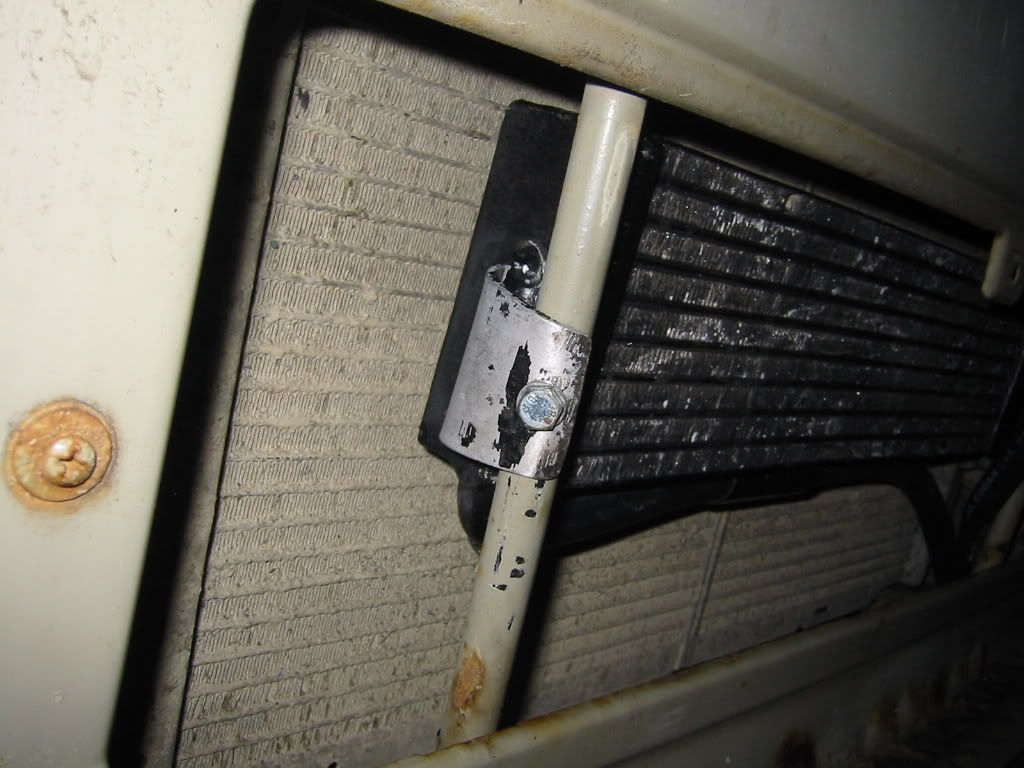
Ok now that the Bluestar has gone, all my work is being focussed on the 16. Again looking at the front to rear plastic coolant pipes, the main pipes in the engine bay are much bigger in diameter than the joining sections which VW use on the syncro diesel so back to the Diesel 2WD pipes! 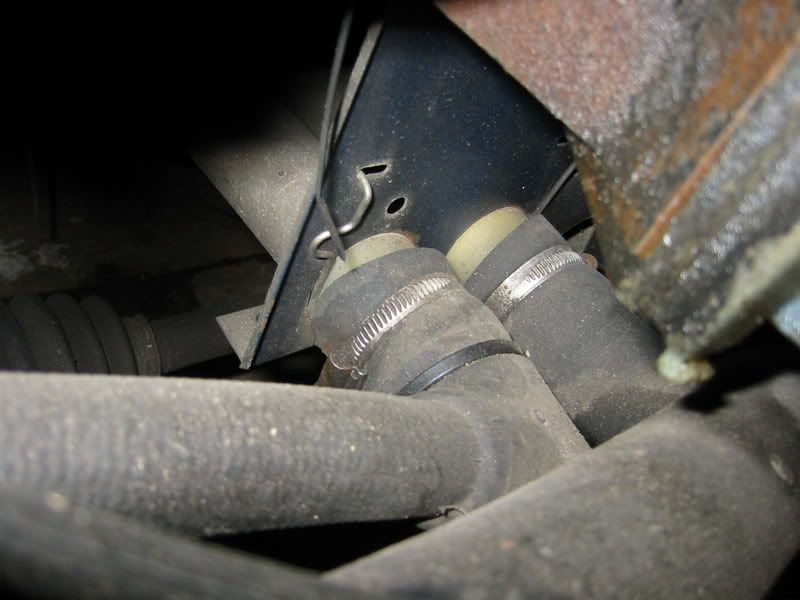
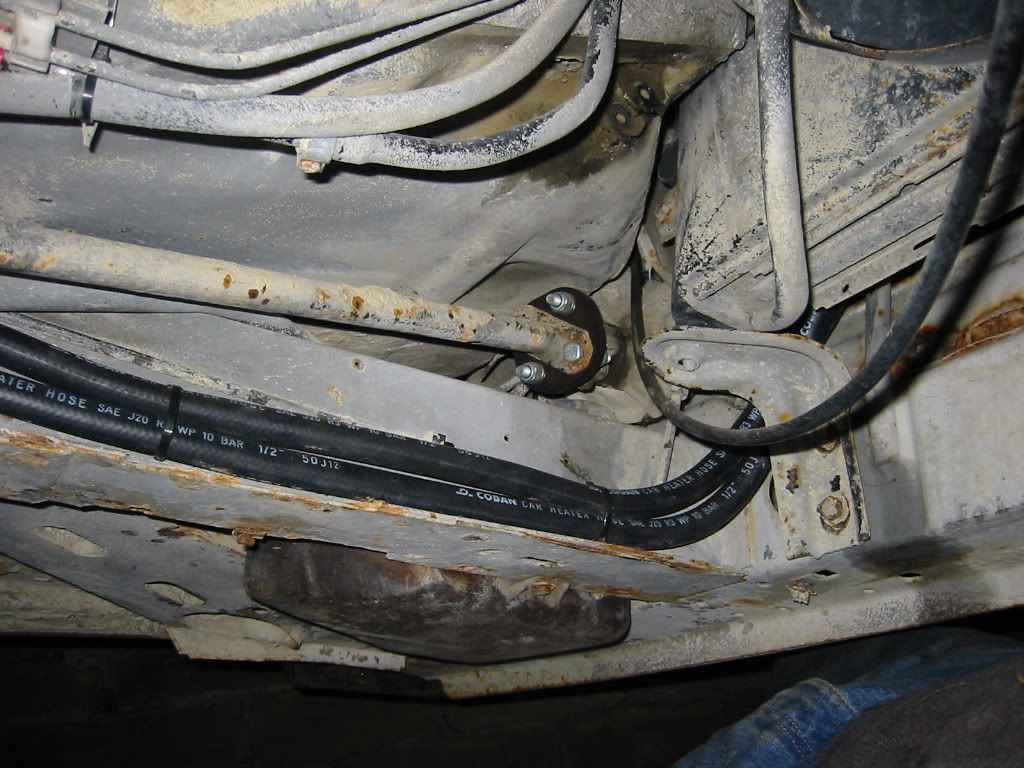
Here is a pic of where the coolant pipes enter the Bluestar 2WD Diesel engine bay and are held in place with factory clip. By moving them back an inch or so, I was able to get them to sit fairly comfortably next to each other and up against the tank but not under any pressure. They're not fitting up into the bodywork because of the interference of the tank but then looking at the way the rubber hoses sit coming off the engine, they didn't really want to fit there anyway. It hit me, the engine is sat lower than in a SA van... doah! ok so they're all connected up and fairly happy. I'll weld in a section from another van so that the pipes can be held in position rather than floating about. Up front, one of the rubber hoses was now too short so I replaced that with a new section of pipe and again used factory spring style clips. These are now used throughout the cooling system. Wow... the cooling system's all connected up! Next section is the wiring... I've been dreading this but hey it needs to be done. 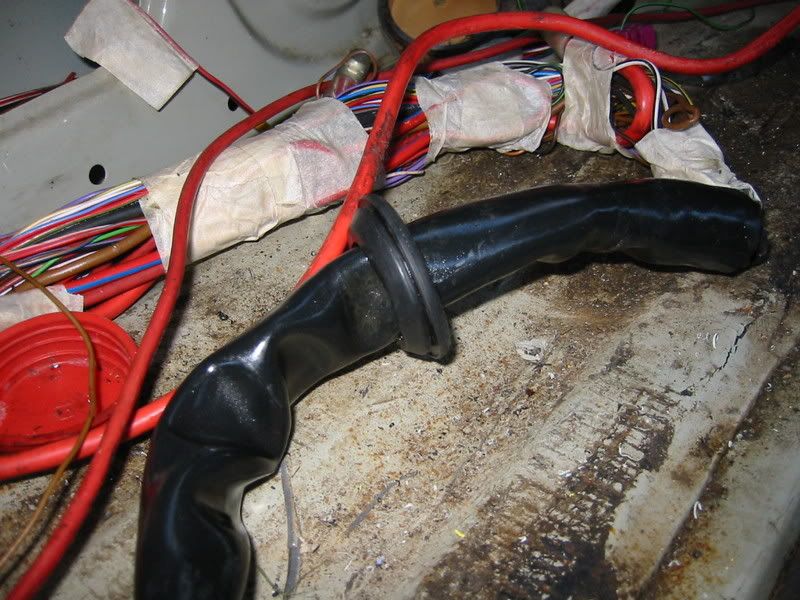
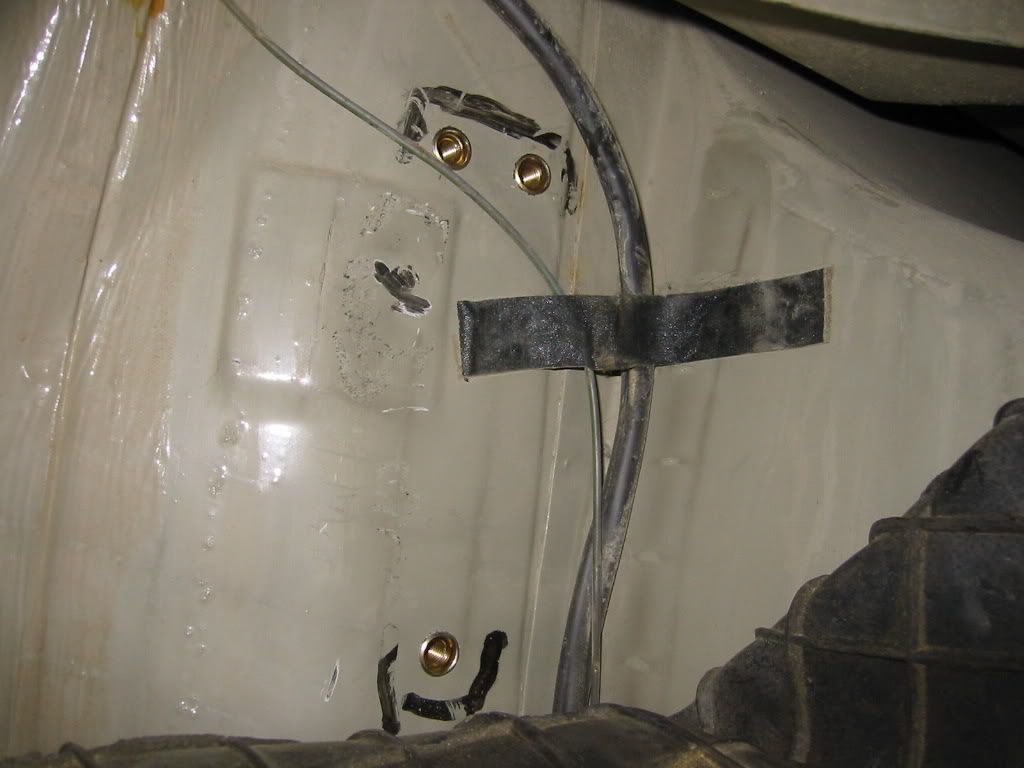
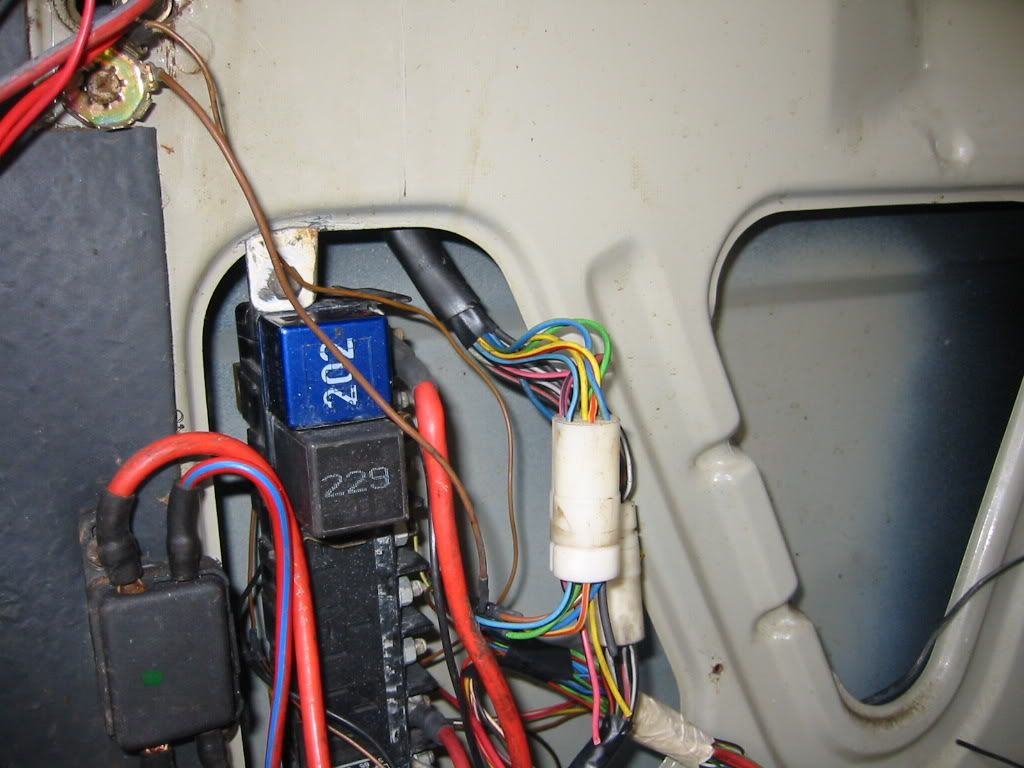
After an hour of struggling to get a smaller grommit over the main loom so that it fits nicely when going into the engine bay, and another hour of carefully threading all the plugs of the loom etc through a 38mm hole... the loom is in the engine bay and I've start connected things up. There are a few spare plugs on the loom so I'll have one for the aux water pump which I'll connect up to either an output from the ECU or a temp switch I'll fit later on. I will have to cut the original wires going to the airflow meter and then splice that section in further up the loom close to the ECU as the airflow meter now sits outside of the engine bay. 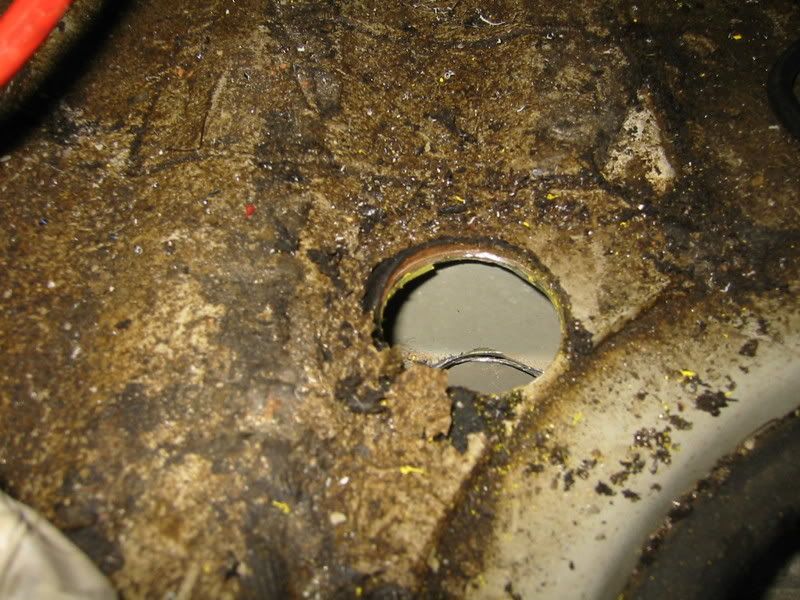
Using rivnuts again, the Audi electrical plugs are bolted to the engine bay wall and the loom sits nicely running along the back wall. 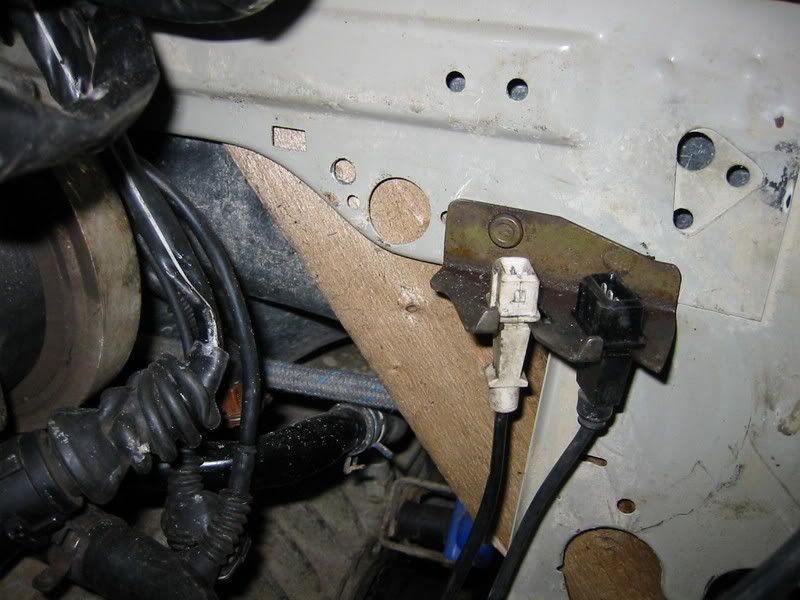
The wood is there to protect the tank which is directly behind where I'm drilling holes! 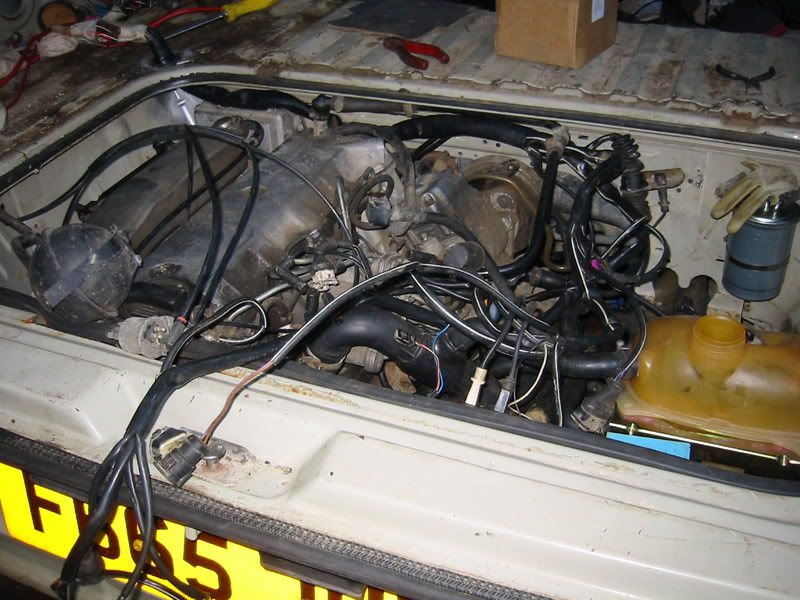
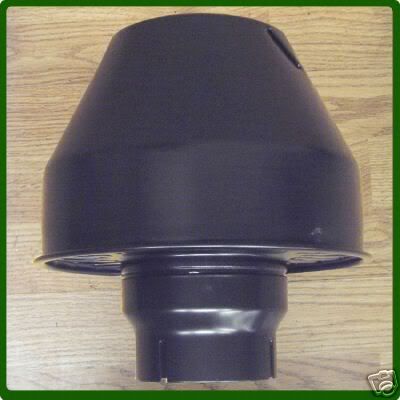
I've bought a set of hole saws, these are great! so the final hole has been cut for the snorkel/inlet pipe to go through. I'll be adding another 90o section outside aswell and then welding the whole of that s-bend section to the body so it's a permanent feature along with a mushroom snorkel on top outside. 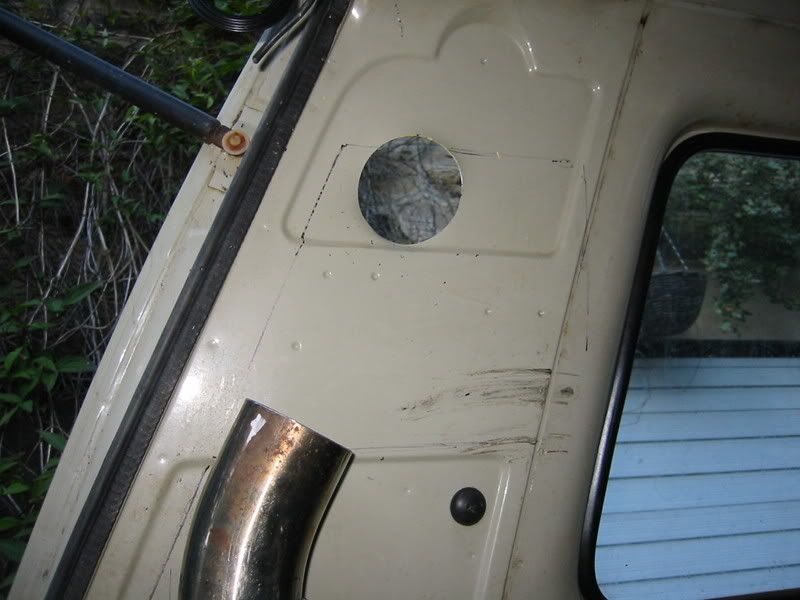
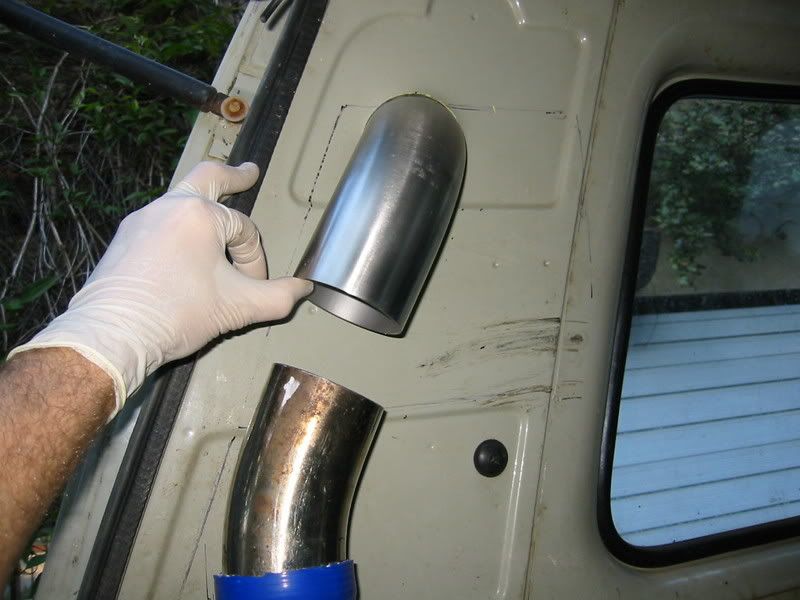

http://www.innovation4x4.co.uk/snorkels.htm - http://www.innovation4x4.co.uk/snorkels.htm MG |
Posted By: poshbuggers
Date Posted: 13 Oct 07 at 08:19
|
Can't wait!
Very interested in the snorkel. |
Posted By: Ghia
Date Posted: 13 Oct 07 at 14:44
|
Small update while I drink my cup of tea! Finished with the wiring in the engine bay and fixed up all the small ancilleries, vacuum reservoir, boost pressure sensor, vacuum line solenoid etc etc... there's not a lot of room for anymore! 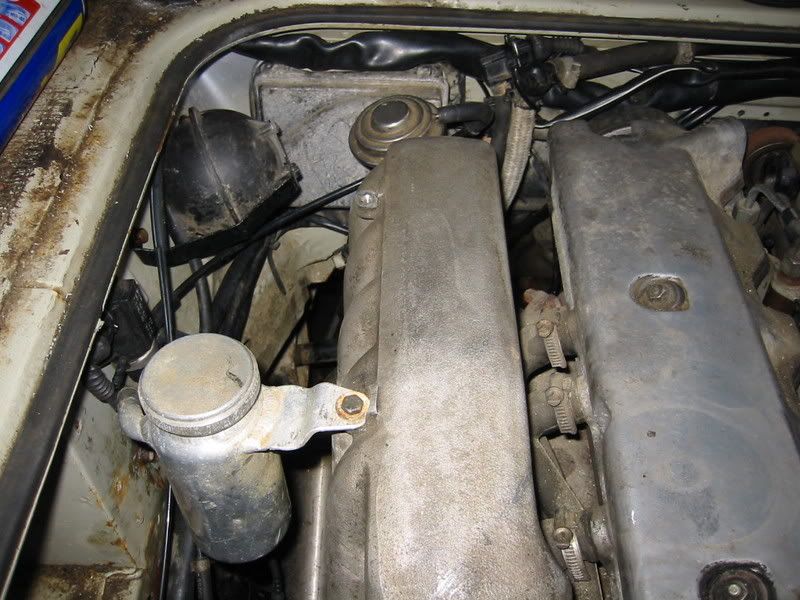
Engine bay staring to get tidier if that's a word. Charge cooler head tank mounted to the inlet manifold and the pump will be directly below for easy pipe routing. MG |
Posted By: rogerthecat
Date Posted: 13 Oct 07 at 15:28
|
Looking good Mike - inspired me to go off to the agarage and fettle the Scooby engine.
------------- T3 Westy, T3 Syncro (the ScoobyVelle), New Beetle Cab, 2 x Polos - I have too many projects |
Posted By: Ghia
Date Posted: 13 Oct 07 at 22:52
|
Hope that engine is nice and clean The little bits and pieces on a project really take up time! After another days work, I've almost finished off the wiring in the engine bay, connected the airflow meter wiring up next to the ECU with solder and heat shrink. I removed the old accelerator cable, mechanism up front in readiness for the Golf Throttle pedal assembly. There's no room on a RHD van for it but there's a big space above the throttle pedal on a LHD. We'll see when I get one! The list of things to do is large! Tig up the charge cooler and clean out thoroughly Tig fittings onto it so it's bolted down to the body, Tig new water pipes to it so they face in the right direction, Make a new bracket for the Charge cooler water pump so it doesn't sit so close to the exhaust Heat wrap exhaust and tighten to turbo fully (allen nuts) Check routing of all vacuum pipes etc Buy lots of 1/2" pipe for the charge cooler system and plum it in, Replace the plugs on the wiring for the pump and the loom as they're not water resistant, Have all boost pipes bead rolled so they hold pressure, Add (tig) necesary take off pipes to boost and inlet pipes for breather system pipes Fit wiring plug to spare wires in loom for aux cooling system pump, trace up in main loom and research if ECU has function to switch it on, if not fit temp sensor and wire up. Fit front to rear wires for the throttle potentiometer, immobiliser, speed sensor, clutch/brake pedal switches. Fit oil cooler system with radiator up front Finish wiring off with feed to the Audi loom and integrate that into the VW loom Connect up rev counter wiring and adjust Fit power steering bracket, tank, rack and pipes (not necessary for MOT) Make bracket for aux water pump Fit fuel return line from filter to tank Fit fuel lines in engine bay from and to filter from the diesel pump Fit coolant system cap and mount coolant tank bracket so it fits under the lid Fit remaining bolts to the bell housing and torque up Seal bell housing to engine and fit breather pipe Reconnect gearbox breather pipe and check all bolts for tightness Fit prop shaft and protection bars Make engine/gearbox protection bars to incorporate rear engine mounting support Weld snorkel pipe work to body and finish snorkel Fit new plastic vent and cut to go over snorkel Fit clips to all boost/inlet pipes Fit gauges to cab (boost, oil temp, gearbox oil temp) Build 4.57 gearbox (with mods) and fit 4.57 front diff Will add more when I think of it. That should keep me going for a week minimum! MG |
Posted By: Ghia
Date Posted: 15 Oct 07 at 19:18
|
When chatting to a friend earlier this evening, he was asking how much I'd spent so far on the engine conversion... I did a very quick calculation in my head and decided that I could have done a Subaru Turbo conversion using all the Small car parts for less money! These things aren't cheap! Ah well, I've got this far etc etc and it should be great offroad. Todays update is fairly small one but another step closer... 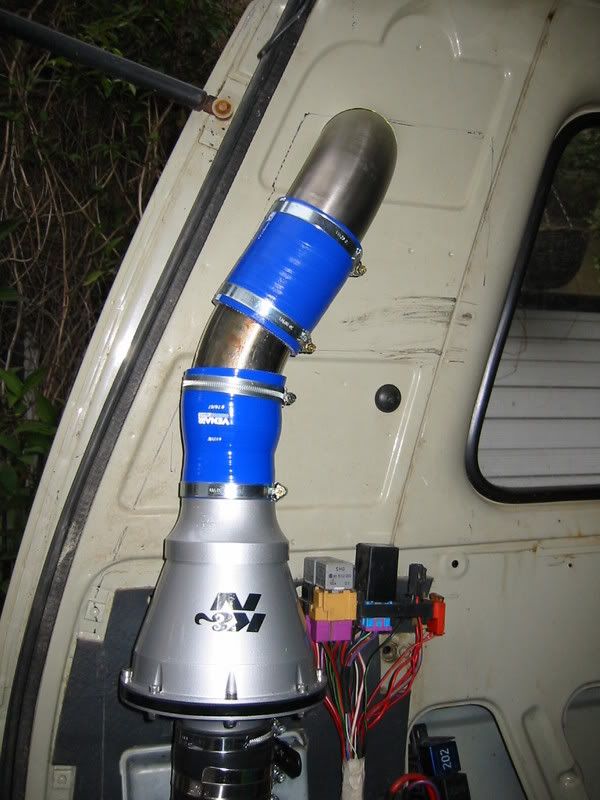
My latest bit of kit is this lamp which is fantastic and comes well recomended from both Baxter and myself! 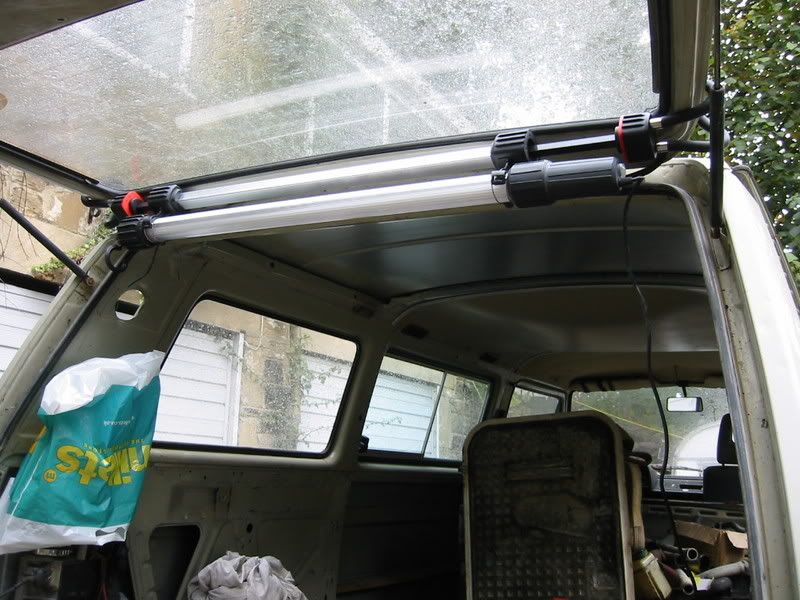
And just a small pic of how the van is looking at the moment on wheels which really need painting! 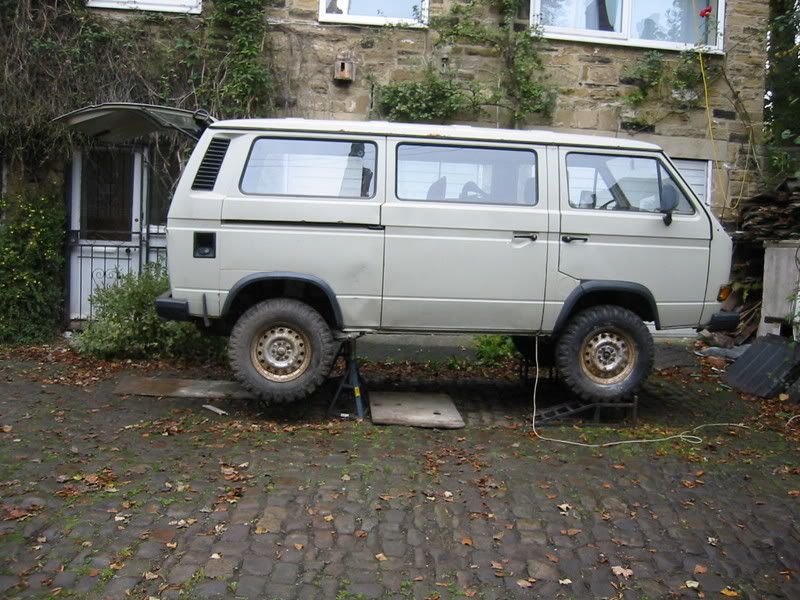
MG |
Posted By: shapey
Date Posted: 15 Oct 07 at 21:45
what a beast!  looking really good! looking really good!
|
Posted By: Ghia
Date Posted: 15 Oct 07 at 23:16
|
Thanks Shapey. It seems to be taking a very long time even for me! After buying silicone hoses, stainless steel/aluminium pipes and bends from all over the country, I find a place less than 3 miles away from me which could have supplied everything with ease! Ah well now I know for future projects. http://www.venairsport.co.uk/ - http://www.venairsport.co.uk/ I bought this earlier from ebay... a bargain and just what I need for the 16. Innovation didn't seem that bothered about selling anything!
MG |
Posted By: rogerthecat
Date Posted: 16 Oct 07 at 07:00
|
Wow mike - beginning to look the business- had to do a double take on the van shot until I realised that it was on axle stands!! Thought you had gone uber tall. PS: Got the ScoobyVelle back from the bodyshop - you will be seeing it later! ------------- T3 Westy, T3 Syncro (the ScoobyVelle), New Beetle Cab, 2 x Polos - I have too many projects |
Posted By: vlux
Date Posted: 16 Oct 07 at 11:26
|
What size are those wheels and tyres Mike? They look massive ------------- Alan Hayes - Campervan Culture e:al@campervanculture.com m: 07967 010140 http://www.campervanculture.com" rel="nofollow - WWW.CAMPERVANCULTURE.COM |
Posted By: Aidan
Date Posted: 22 Oct 07 at 16:40
|
won't get many clothes in the wardrobe when it's built eh ?
|
Posted By: Ghia
Date Posted: 23 Oct 07 at 22:25
|
Aidan, Nah the wardrobe will be unaffected by the wiring etc, it's just the rear cupboard which will take a hit space wise. You'll be telling me I need to add a hightop to it next! Vlux, I'm running 7.50X16's. They're fairly big MG
|
Posted By: Ghia's Wench
Date Posted: 25 Oct 07 at 23:04
|
Wot, no space for clothes?!! Right, I'm off!!!! ------------- I may be his Wench, but hey, I chose to be! |
 Beaker wrote:
Posted By: Ghia
Date Posted: 21 Nov 07 at 10:58
|
I can see me designing an extending wardrobe for you
Not much going on with this atm due to the Tristar work. The wheels (another ebay bargain) will be going on with 245/75/16 tyres once I have the Tristar wheels. http://cgi.ebay.co.uk/ws/eBayISAPI.dll?ViewItem&rd=1&%20;item=190166085868&ssPageName=STRK:MEWA:IT&ih=009%20 - http://cgi.ebay.co.uk/ws/eBayISAPI.dll?ViewItem&rd=1& ; ;item=190166085868&ssPageName=STRK:MEWA:IT&ih=009
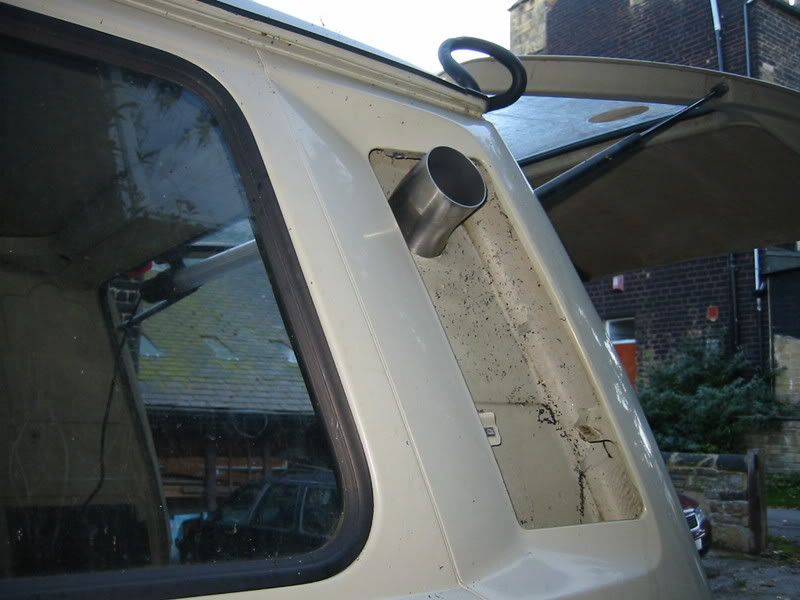
Got the inlet pipe finished, just need to add the mushroom top. 
MG http://i.expansys.com/i/b/b141579.jpg - |
Posted By: Dub4life
Date Posted: 24 Nov 07 at 11:34
|
Wow, Inspired! That's a serious project, respect!
------------- Motexion, not cheap plywood! |
Posted By: BUS.BOY
Date Posted: 25 Nov 07 at 22:26
|
its comeing on well now , how long till shes up and running ? also did you have 2 vac pipes on the old audi air box ? what was the engine out ov ? engine code ? ------------- ************bristol t3 racers************ |
Posted By: Full Throttle
Date Posted: 25 Nov 07 at 22:57
|
I'm curious, whats the plan for covering the rear vent with the snorkel pipe in the way. |
Posted By: Ghia
Date Posted: 26 Nov 07 at 07:25
|
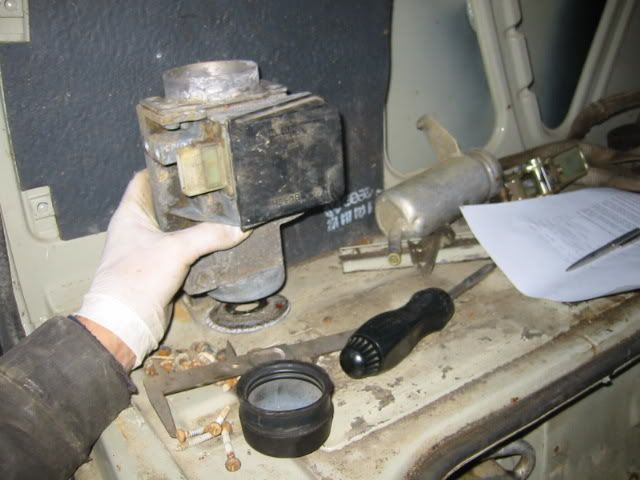
Bus Boy, yes it had 2 pipes coming out of the air filter housing which then went into one (y-piece) and they were connected up to the EGR control solenoid which is now defunct as I've blocked it off so I can delete those although the EGR solenoid will stay connected to the ECU so I don't get any error codes. The engine code is AAT. Once it's up and running I'll be fitting some 175bhp injector nozels and having the ECU chipped. As to how long... er that piece of string is long Nige, The rear vent will have a hole cut in it with the same hole saw and will slide over it etc. I had thought about making up a blanking plate but we'll see how it looks with an original vent cut to suit. Dub4life, thanks dude... I'm looking forward to doing some serious offroading in it. MG |
Posted By: BUS.BOY
Date Posted: 26 Nov 07 at 18:31
|
why so many wires ?? my loom dont look like that !! did you remove it from the doner car your self ?
------------- ************bristol t3 racers************ |
Posted By: Ghia
Date Posted: 27 Nov 07 at 00:10
|
I think your 2.5 is a TD rather than a TDi. I removed the loom from the car myself after having test driven it. I have to remove just about all of the interior including the dash. MG |
Posted By: BUS.BOY
Date Posted: 27 Nov 07 at 18:28
when i striped the audi for my doner engine it took 2.5 hrs to get the engine out then 7 hrs to remove the loom and pedal box etc !!!  ------------- ************bristol t3 racers************ |
Posted By: Ghia
Date Posted: 28 Dec 07 at 22:55
|
I've added a few pics on the first page of the 5 Cylinder specific parts needed. MG |
Posted By: Tim Hamnett
Date Posted: 29 Dec 07 at 13:57
|
MIke, what angle does the Audi engine sit at with the SA bellhousing ? Is it standard car format, or punted further over. Does the same housing work with a V6. Obviously a V6 needs to sit straight up. |
Posted By: Ghia
Date Posted: 29 Dec 07 at 15:37
|
Tim, The 5 Cylinder, the V6 and V8 Audi engines (not the VR6) all use the same bolt pattern so you can use the SA Bellhousing for all. The 5 Cylinder sits at the same angle as per factory in Audi's. It's leans over slightly but not much. Audi use the same gearbox casings for the 5, 6 and 8 cylinder engines so the angle will be correct no matter which engine you fit. Oh the Porsche water cooled flat six engine also uses the same stud pattern as they started off with Audi gearboxes in the Boxster and it grew from there. MG |
Posted By: Tim Hamnett
Date Posted: 29 Dec 07 at 16:39
|
Taa, I know SA buses have a slightly raised platform. Is it possible to fit the AUDI TDi under the standard hatch of a bus/van. same go's for the V6. Never had a look under a boxter. Being effectively mid engined, is the gearbox in front or behind the engine. I'd imagine behind, as it would be with front engine vehicles. I made a contact ages ago with an SA parts dealer, who seemed seriously cheap. Have you got the part numbers for all the requisite bits? How do you find the shipping costs? |
Posted By: Ghia
Date Posted: 29 Dec 07 at 17:03
|
Tim, Yes the platform is raised by about 4 inches. The 5 Cyl TDi has a lower inlet manifold than the petrol and no dizzy (which is what gets in the way). Also I have lowered the engine another 20mm from syncro height (which is already 20-25 mm lower than 2WD) to get the engine under the stock lid. I have a few pics of a V6 petrol install but not from above but I expect that he raised the floor slightly. The V8 wouldn't fit in a van, it only just fits in a Syncro Pickup so I'd expect the V6 would be similar. The parts when bought in SA are not expensive. It's getting them back to UK which is expensive. I have imported 2 lots of parts from SA myself and both times the shipping costs (inc import duty) were more than the parts themselves. Porsche engines, Boxster is mid-mounted with gearbox at the back but the 911 (996 and 997) use the same mounting and are rear engined. They're extremely expensive to fix though and do go wrong. MG |
Posted By: Tim Hamnett
Date Posted: 29 Dec 07 at 23:44
|
There goes the get rich quick scheme then! (SA parts) I've seen the V6 tiptronic install pics, in the links section, very impressive, very very expensive by the looks of it! Just cant quite get that V6 noise out of ma head . I presume the rear engine Porker box is a completely different animal, no interchangeable parts (as in direction of final drive). I know I've seen pictures of a V6 under a standard lid somewhere, may have been in a rather sad dream though. |
Posted By: Ghia
Date Posted: 30 Dec 07 at 17:47
|
The Porsche gearbox (from 911) is particular to Porsche. Nothing changes over. MG |
Posted By: sportwomble
Date Posted: 13 Jan 08 at 15:55
|
Good work fella Can't wait too see it in its finished Glory!!! |
Posted By: Ghia
Date Posted: 18 Jan 08 at 15:37
|
V Small update due to the fact that it's pissing down and I don't have a garage or lean to big enough to put this thing under Sorted modding the coolant tank bracket so that they sit under the lid and don't catch any of the engine components. I welded a few spacers onto the frame so it would sit in the right place. 
I'll have to shorten a coolant pipe a little ( MG |

Posted By: Ghia
Date Posted: 26 Jan 08 at 17:56
|
Another small update. Cut down and test fitted the last silicone boost pipe again supplied by http://www.venairsport.co.uk/ - Venair . I need to buy a few small ally pipes and make some brackets to bolt the charge cooler down in situ and then take everything to my welder. 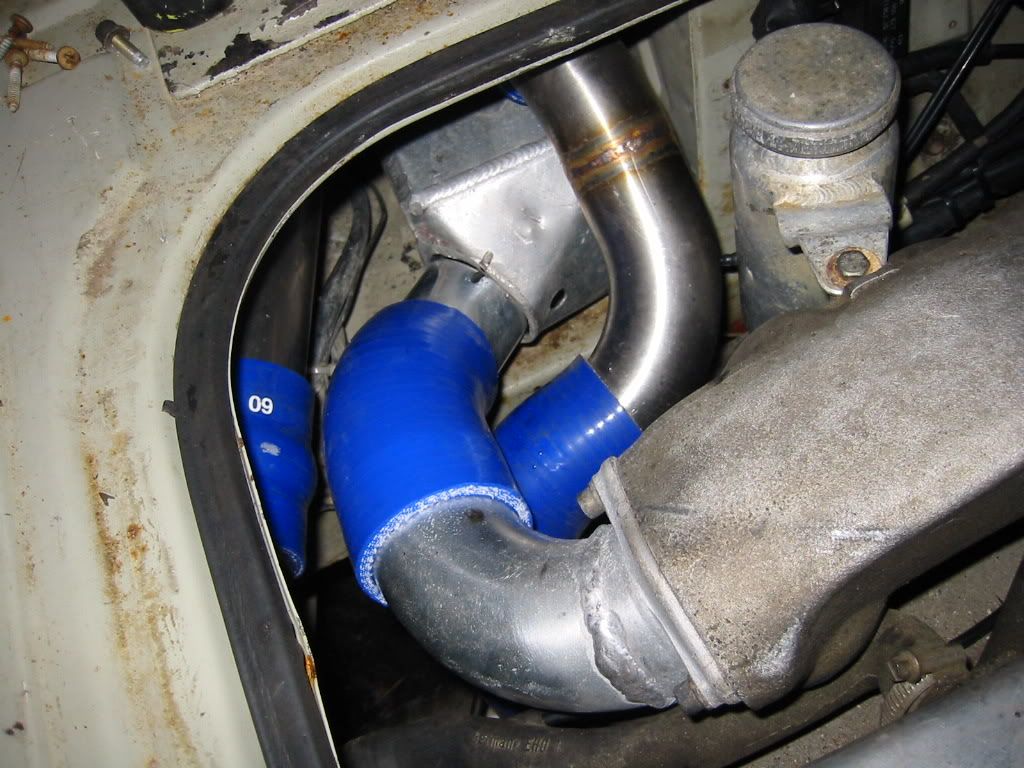
Bought a TDi throttle pedal assembly which I was hoping might fit behind the dash tube but it won't 

I think I'll have a good stint at the wiring etc tomorrow. MG |
Posted By: Full Throttle
Date Posted: 27 Jan 08 at 22:01
|
Nice work there mike.
|
Posted By: Ghia
Date Posted: 27 Jan 08 at 22:41
|
We've had a good day today. I had a helping hand from a good friend (Byron take a bow!) who works for Lotus. First on the menu was to replace the gearbox mounts which I stole for the Tristar as they were missing. One of the bolts made a mess coming out when they were removed so a Time-sert later and they're back on and bolted up properly. Next was looking at the throttle potentiometer again and with ideas between us, Byron fitted up the potentiometer block, heavily modified the throttle arm by cutting and welding it and finally welding the pedal back on. I think results speak for themselvse. I might make up a cover to go over the potentiometer but haven't decided yet. 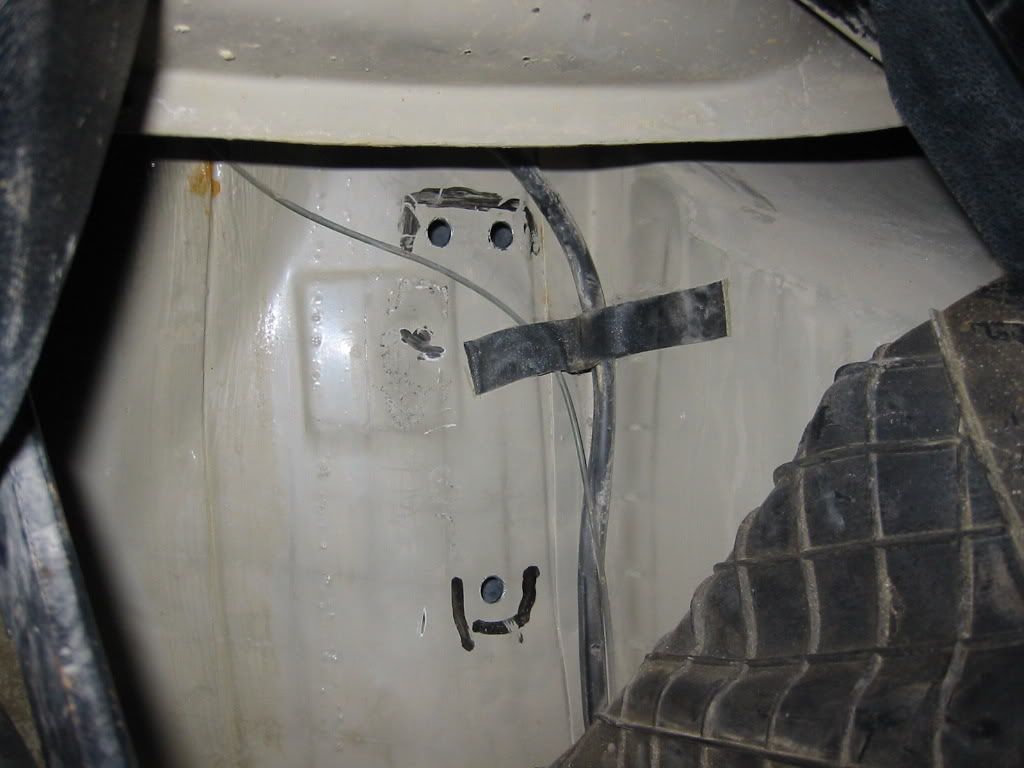
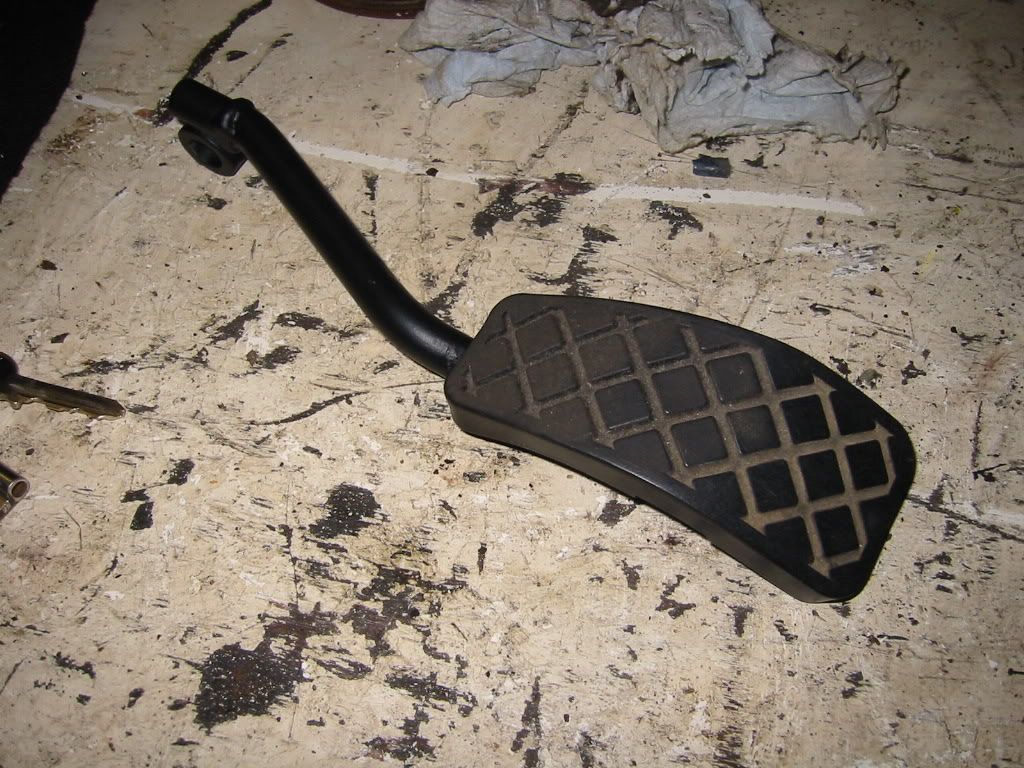
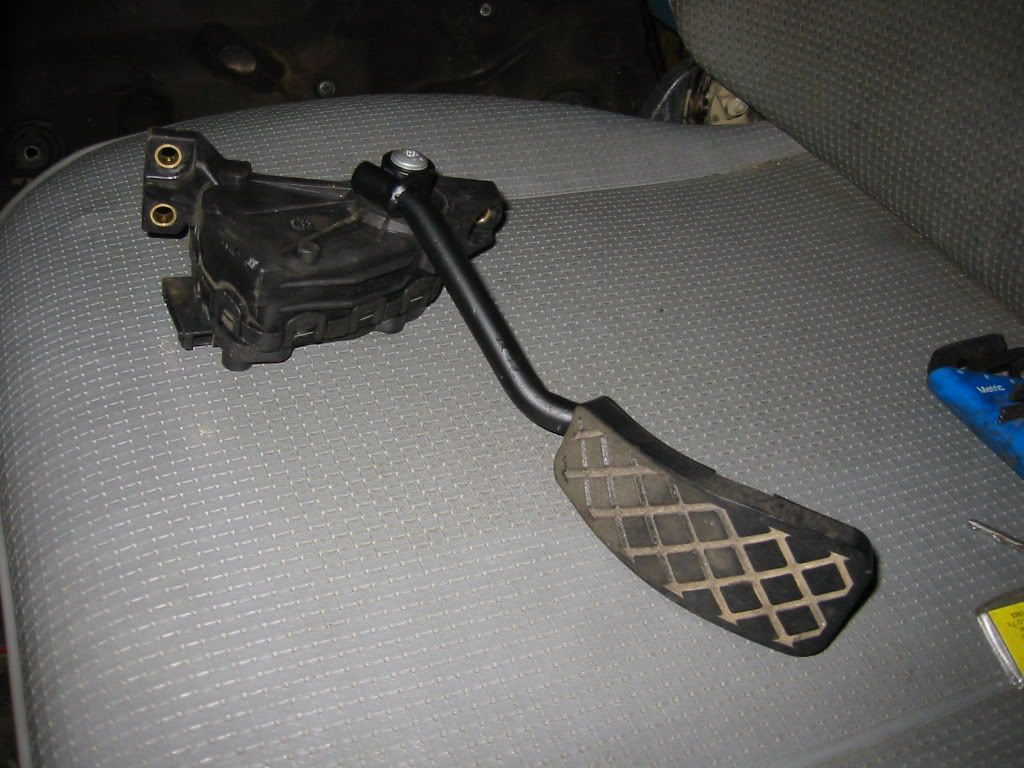
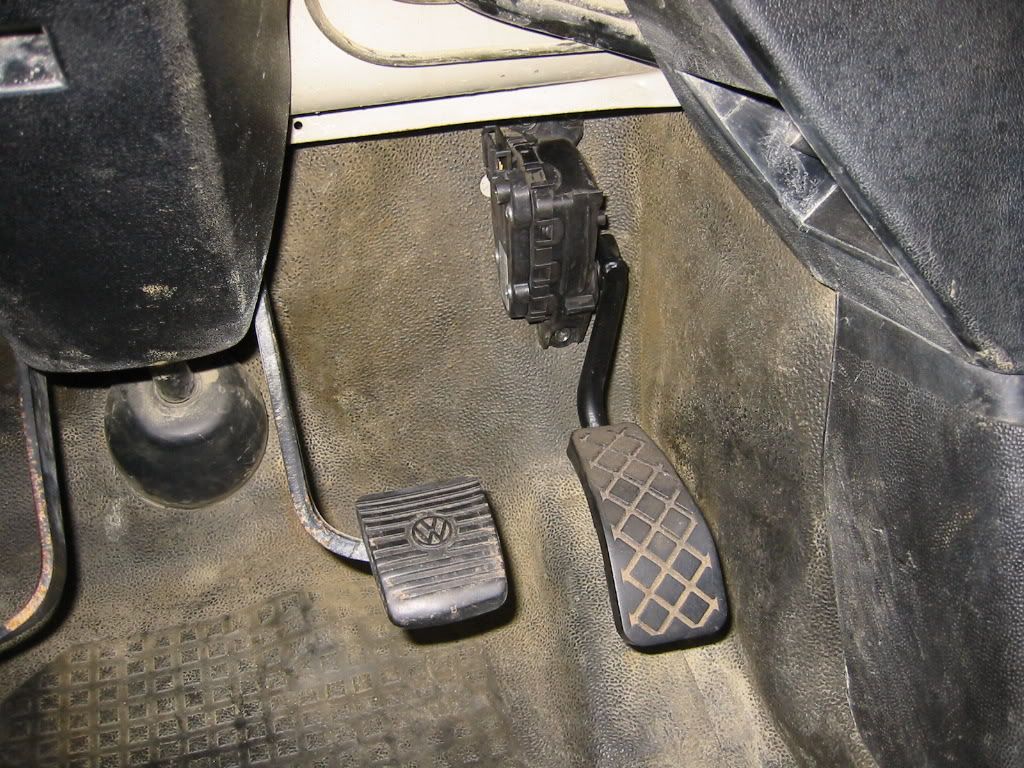
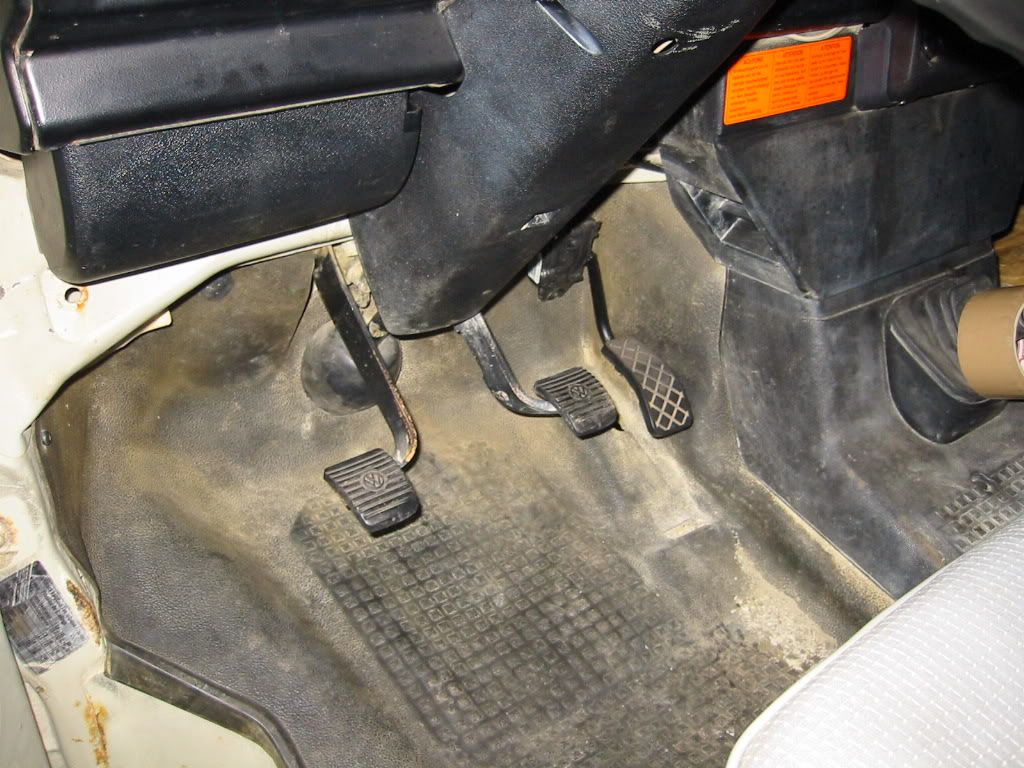
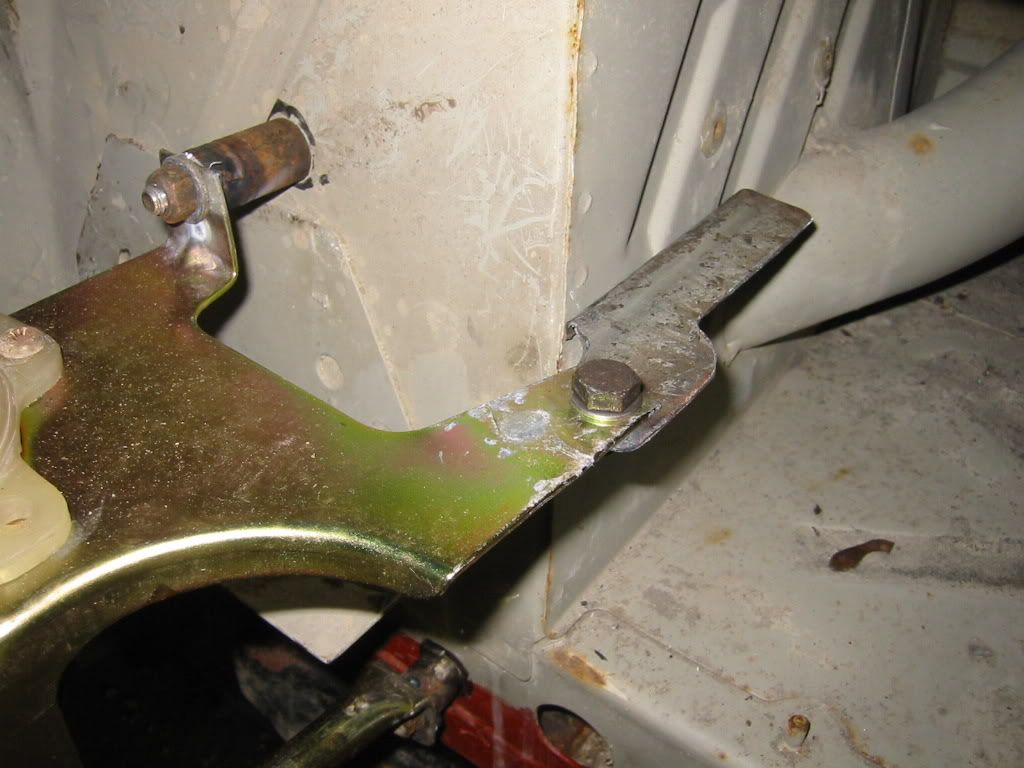
This setup has several advantages over other TDi conversions. You can remove the original pedal completely and weld up the floor. You don't have the potentiometer somewhere else like under the floor up front or in the engine bay where it can get wet (they don't like getting wet! I know from experience!) and you don't have a cable to worry about. I'll run the cables from the rear to the front in the roof frame along with the immobiliser wiring. Next was to make up a bracket for the 3rd bolt of the cooling tank assembly. 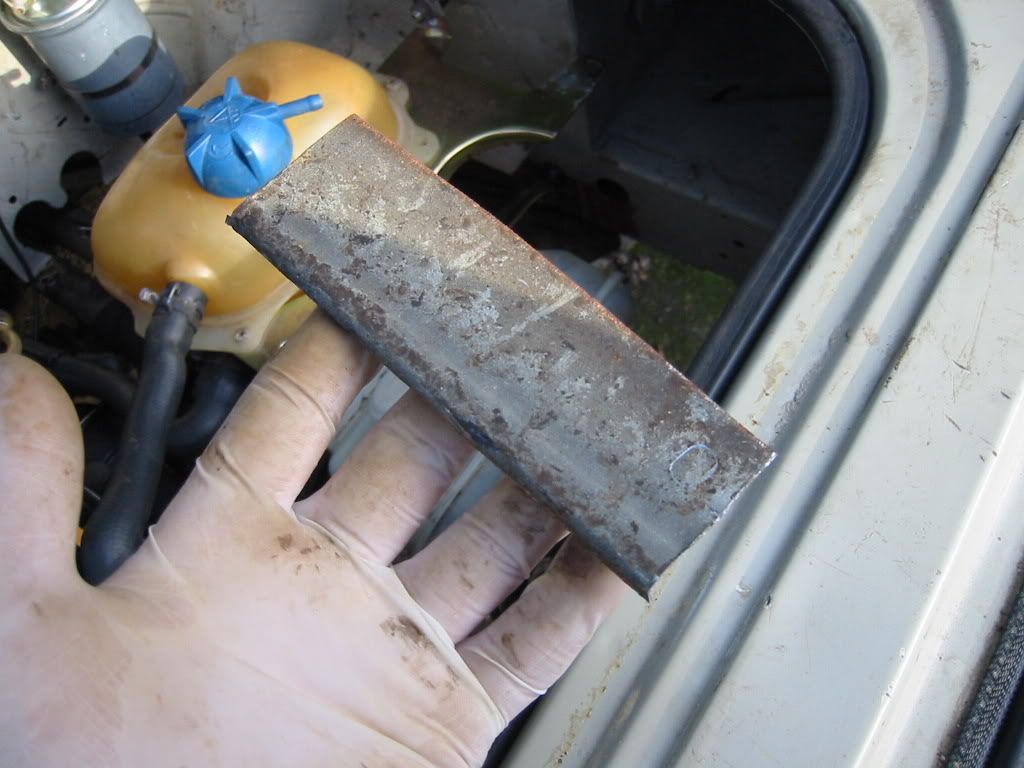
Start with a bit of plate... 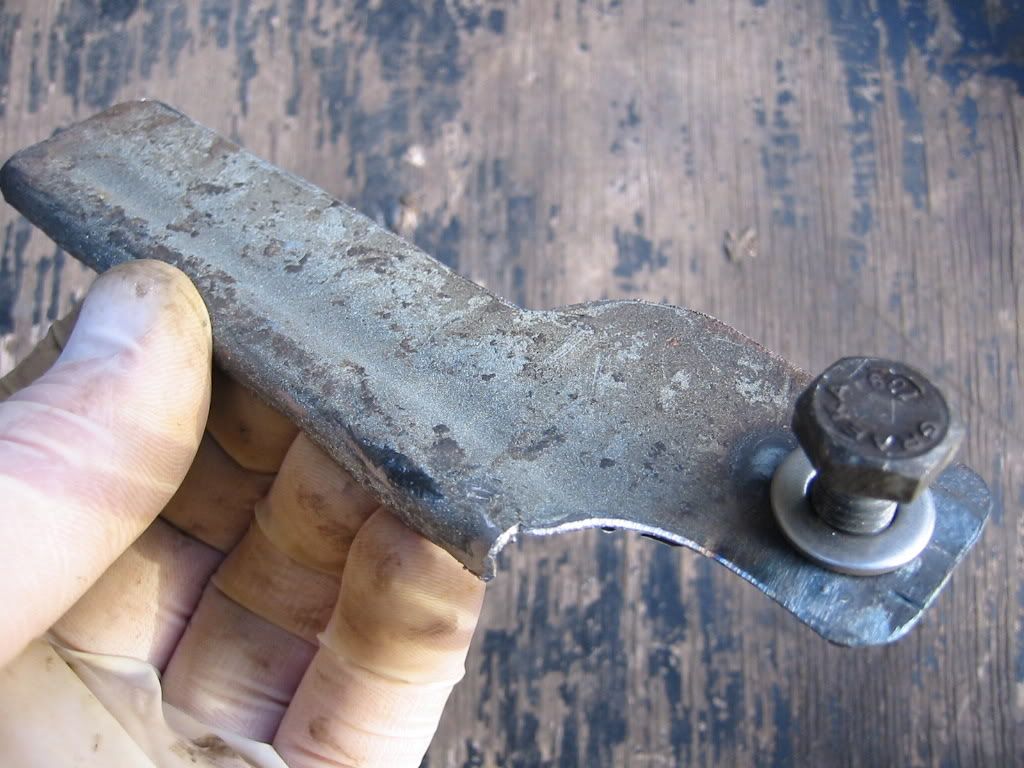
A bit of cutting and grinding and then a nut welded on the back... 
And bolted in place. I'll run a seam of weld along the bottom of it in the van when I weld in all the other little brackets I'm making for various things around the engine bay and it'll get painted body colour when the van is painted.
A couple of small brackets made up for the relay box.. 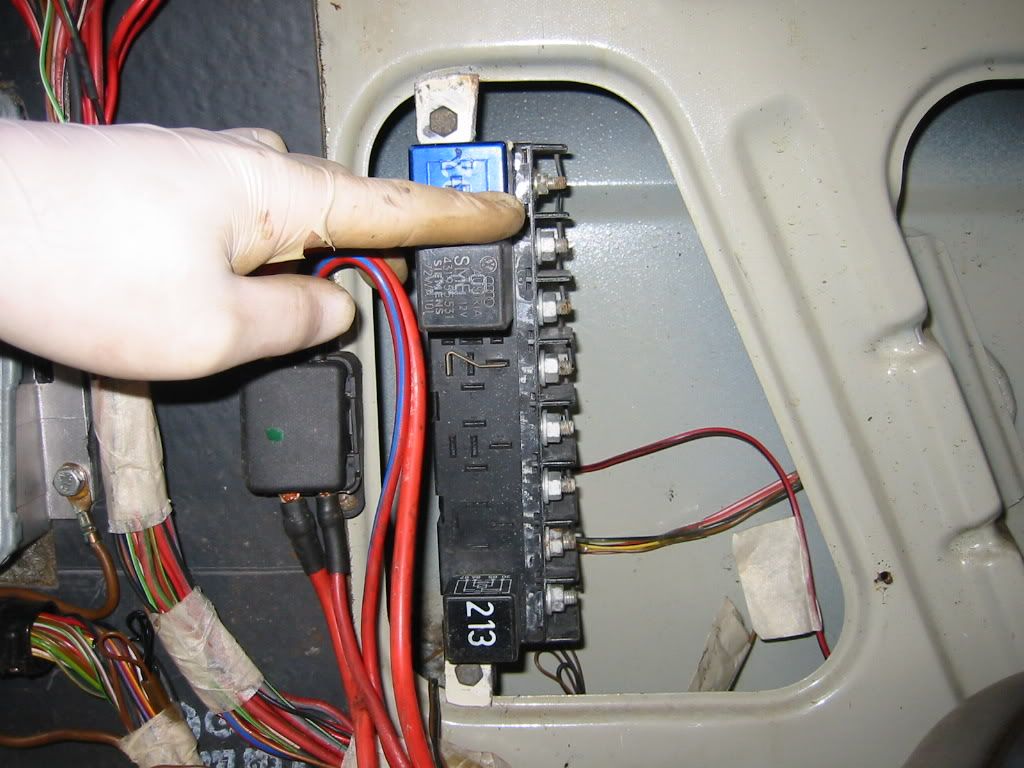
Then back to the Chargecooler to finish off fittings and water pipes.. 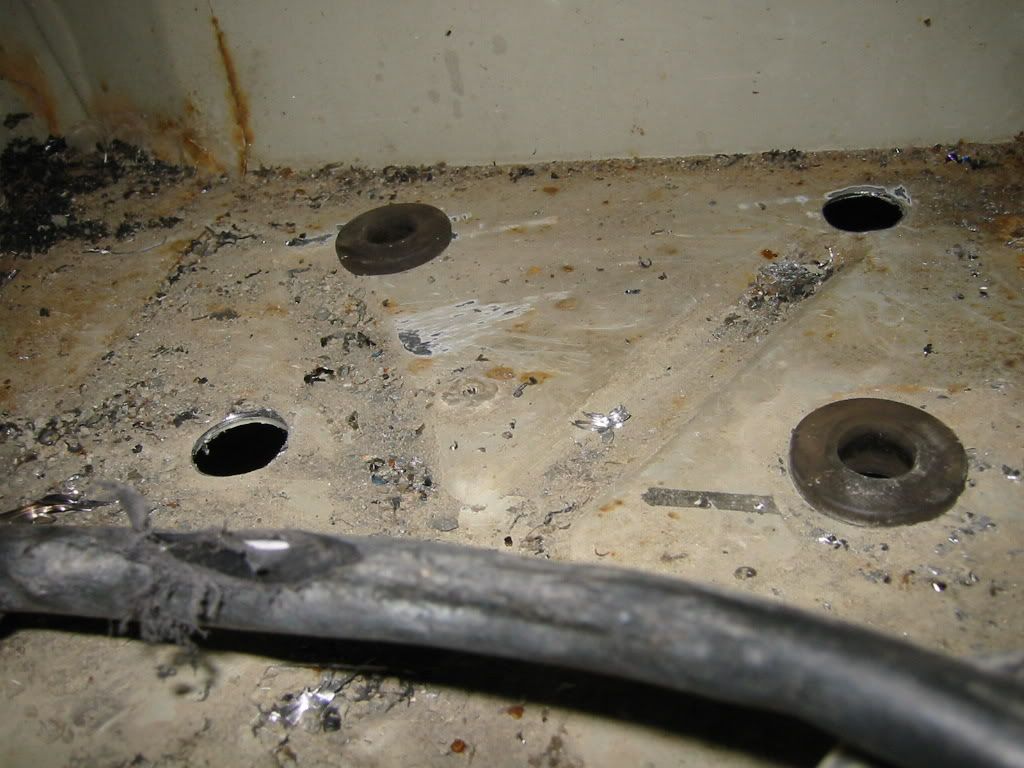
I've drilled 4 20mm holes through the floor and the chargecooler with have 4 lugs welded on underneath which in turn will be tapped out to M6. That way it'll be rubber mounted so as not to vibrate as the engine rattles to van to pieces! I made up the water pipes, in and out.. pics of these when I get the chargecooler back from welding. Here's where the lugs will sit. 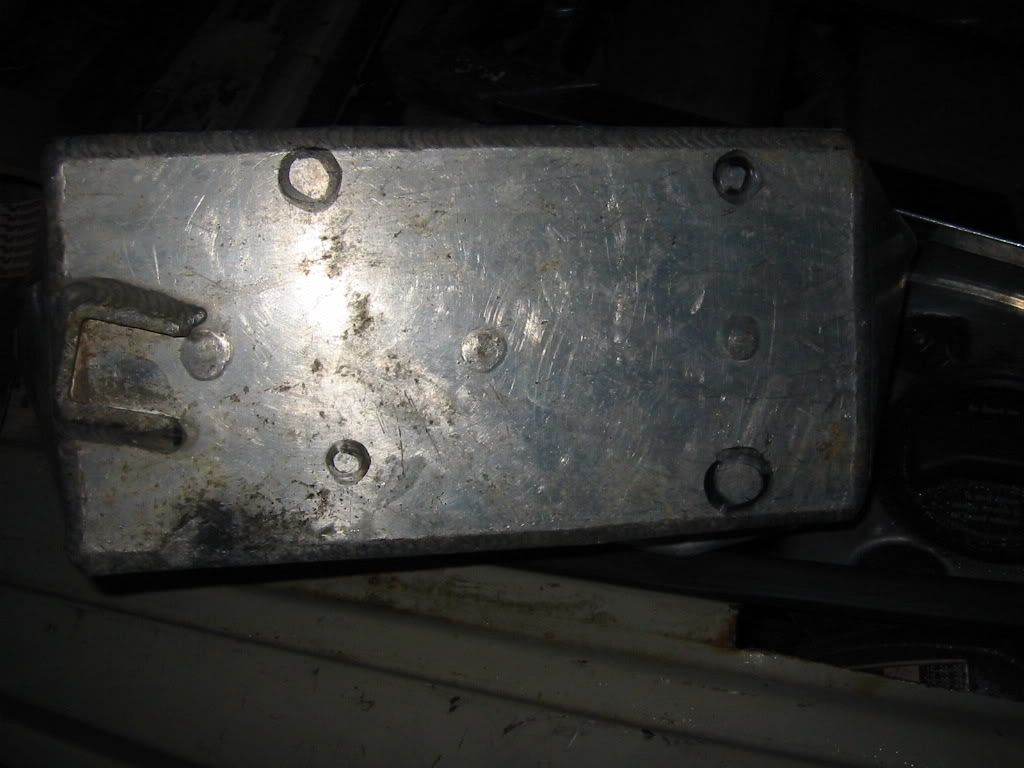
Right now I'm looking for a bead roller. At this rate I'll be making my own. If anyone has one kicking around or knows of anyone who I can borrow one from, please let me know. MG |
Posted By: Ghia
Date Posted: 27 Jan 08 at 22:48
|
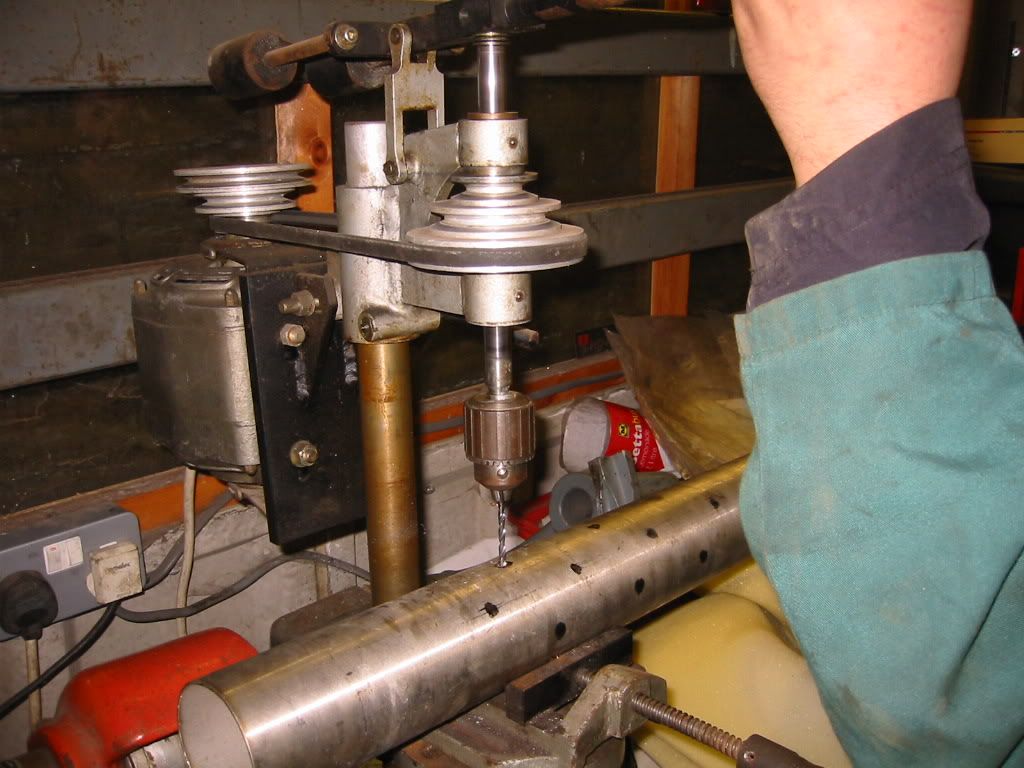
Oh yes I almost forgot, I have bought a section of 5 inch Stainless tube to make a silencer out of. It might not quieten it down much but atleast it's an attempt! Of the 3 foot or so of 3 inch pipe which comes from the turbo, turns 180o and then straight out the back, I'm going to use 12 inches of it, drill lots of holes in it and then use the 5 inch section over the top to create a muffler. Byron is drilling pilot holes here. I need to buy some stainless sheet metal for the ends. 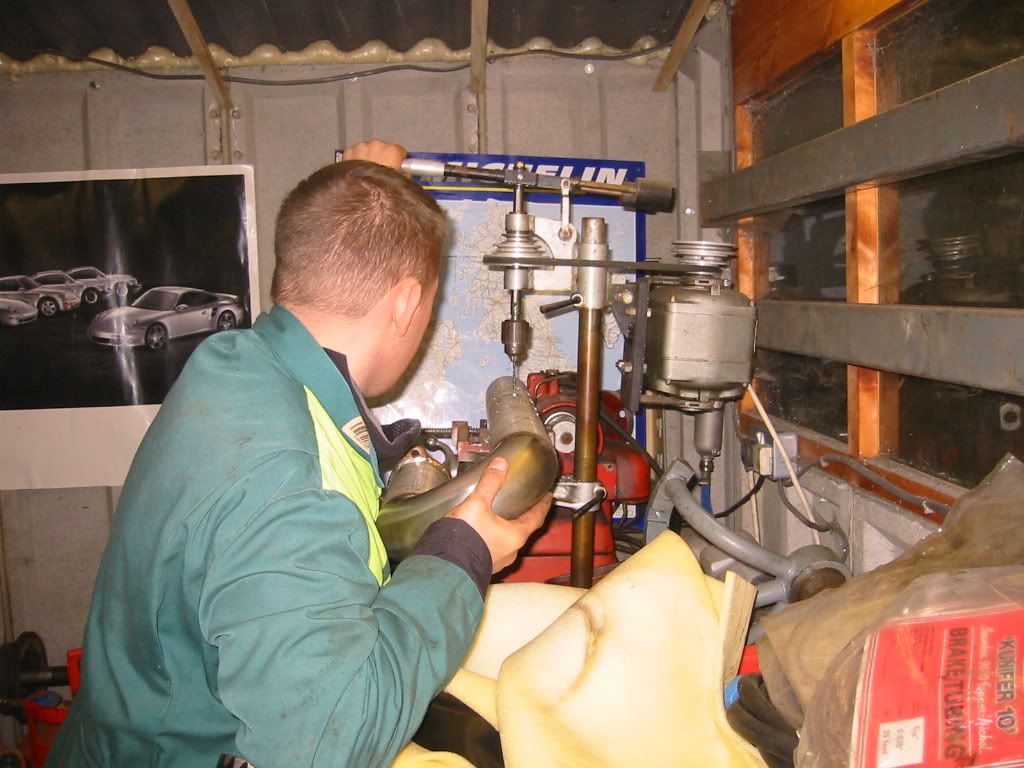
MG |
Posted By: mr bricolage
Date Posted: 28 Jan 08 at 15:09
|
If you want to fabricate your own exhaust you can always look at http://www.dynflow.co.uk - http://www.dynoflow.co.uk
------------- Euramobil Terestra |
Posted By: lee.
Date Posted: 28 Jan 08 at 22:52
|
nice job mike it looks like a massive amount of work to get everything right but it will be awsome when its done. if you ever need anything from down my way give us a shout will be glad to help. lee.
. |
Posted By: Ghia
Date Posted: 06 Mar 08 at 19:17
|
Well it's been a while but I'm mega busy working back with Baxter (back hurts from that whip! 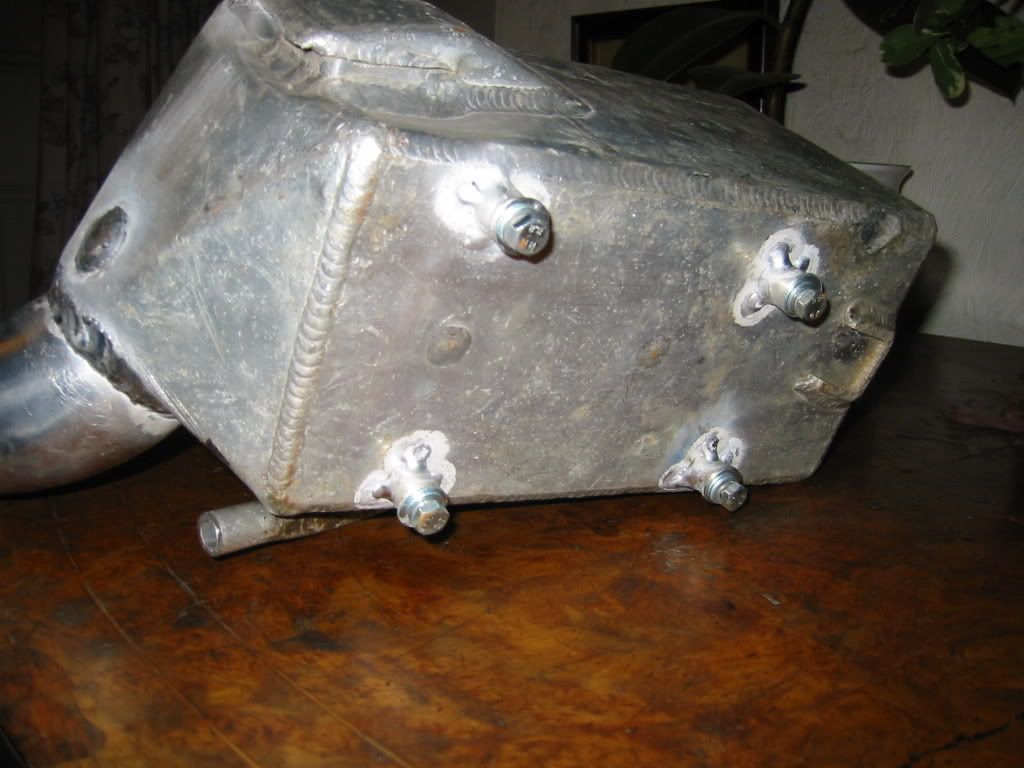
Now this is done, I can bolt it in and get the rest of the Chargecooler water system connected up and running. I've still not managed to find a sensibly priced bead roller to roll beads into the ends of the pressure pipes but at the moment I'll be running stock pressure which is no more than 7-11psi.. hopefully everything should stay put. Once I start upgrading, I'll have to bite the bullet. MG |
Posted By: Ghia
Date Posted: 06 Mar 08 at 21:13
|
Fitted! 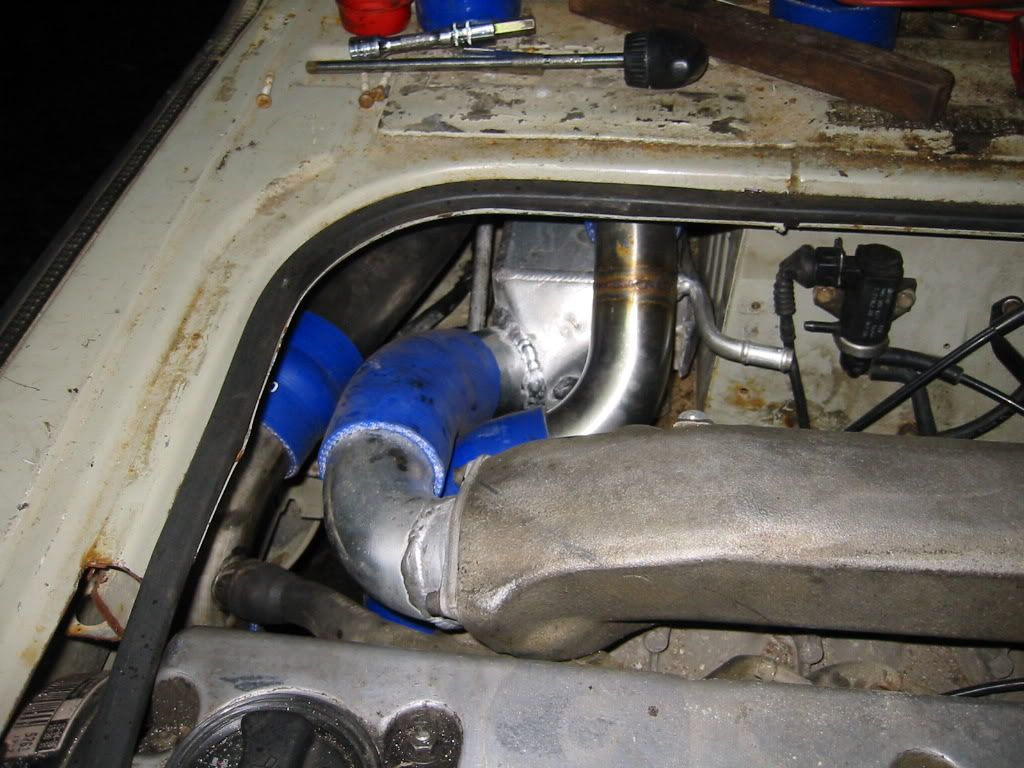
I've got the do some more tig welding on the main inlet pipe for the breather to connect to. 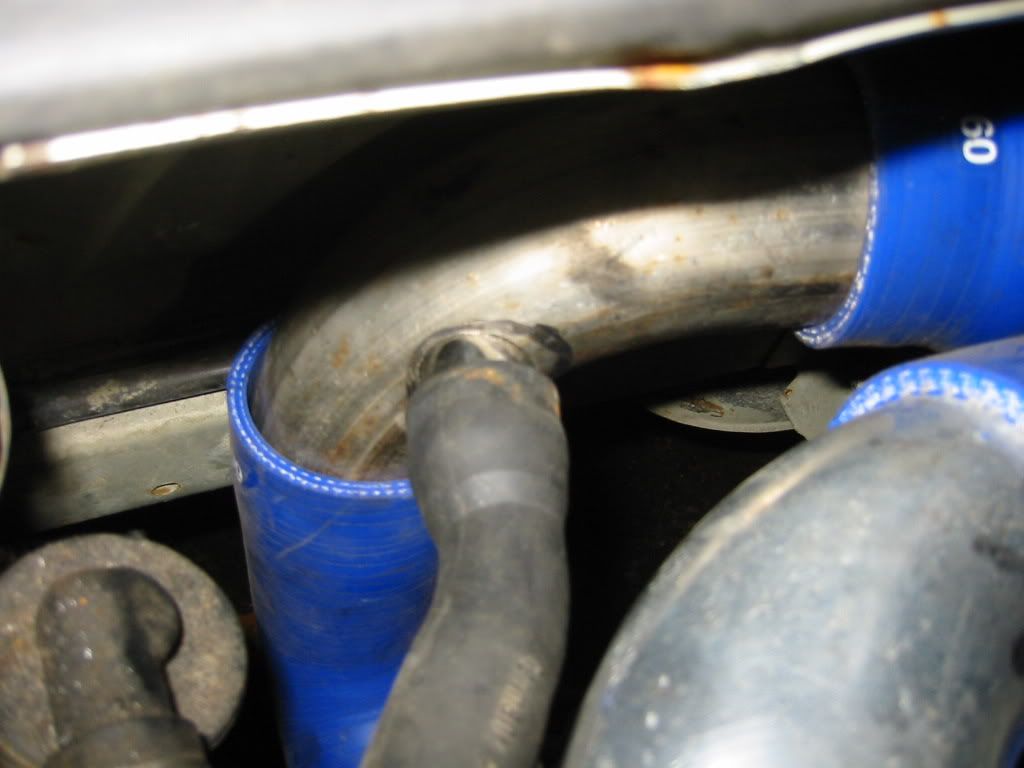
I'll be fitting lots of stainless steel hose clamps soon and some bigger M6 washers! The chargecooler water system will run as follows: (The catch tank runs in the system rather than just being there for topping up so it also acts to self bleed rather than the system creating air locks.) Catch tank out --- to --- Water pump in Water pump out --- to --- Radiator in Radiator out --- to --- Chargecooler in (lower pipe) Chargecooler out --- to --- Catch tank in MG |
Posted By: Cliffbase
Date Posted: 06 Mar 08 at 21:15
|
Man, hats off to you MG. Top Job. ------------- The bigger the Orange, the bigger the peel. |
Posted By: Full Throttle
Date Posted: 06 Mar 08 at 23:26
|
Nice work mike.
|
Posted By: Baxter
Date Posted: 06 Mar 08 at 23:30
|
Congratulate the slack f**ker when he's doing the End to End, John o Groats to Lands End and not before.
Tenner says he doesn't go.
|
Posted By: T3ADICT
Date Posted: 07 Mar 08 at 11:41
all we used to do when we had to make coolant pipes at my old job was a nice neat run of weld round the pipe to make a bead round the end.. sometimes that was enen used on high pressure hyd systems (normaly on water systems though for cooling tests). ------------- WHY T3's.... because they are just so adictive, and having one just aint enough |


Posted By: Ghia
Date Posted: 12 Mar 08 at 19:04
|
Update on Limey. I used half of today to visit my friend with his Tig welder again to try to get the stainless stuff finished. For whatever reason me and tig weren't getting on very well today but I got most of it done. The main inlet pipe breather pipe is now finished along with the Snorkel top piece. I'll be painting this body colour when the van gets a paint job. 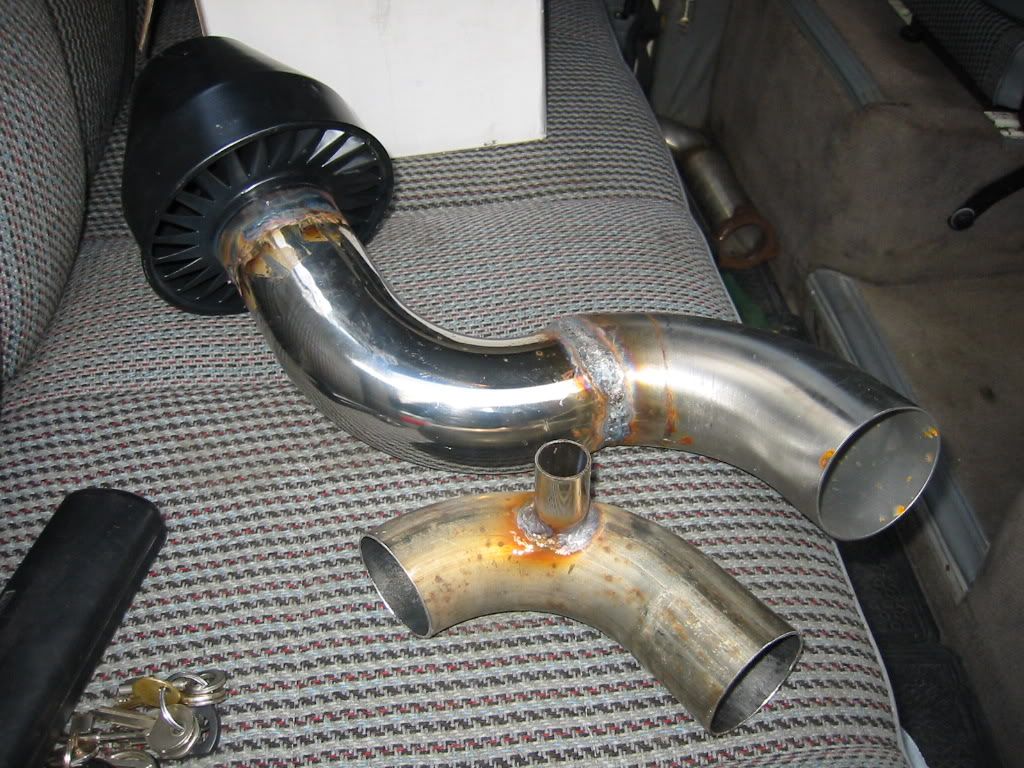
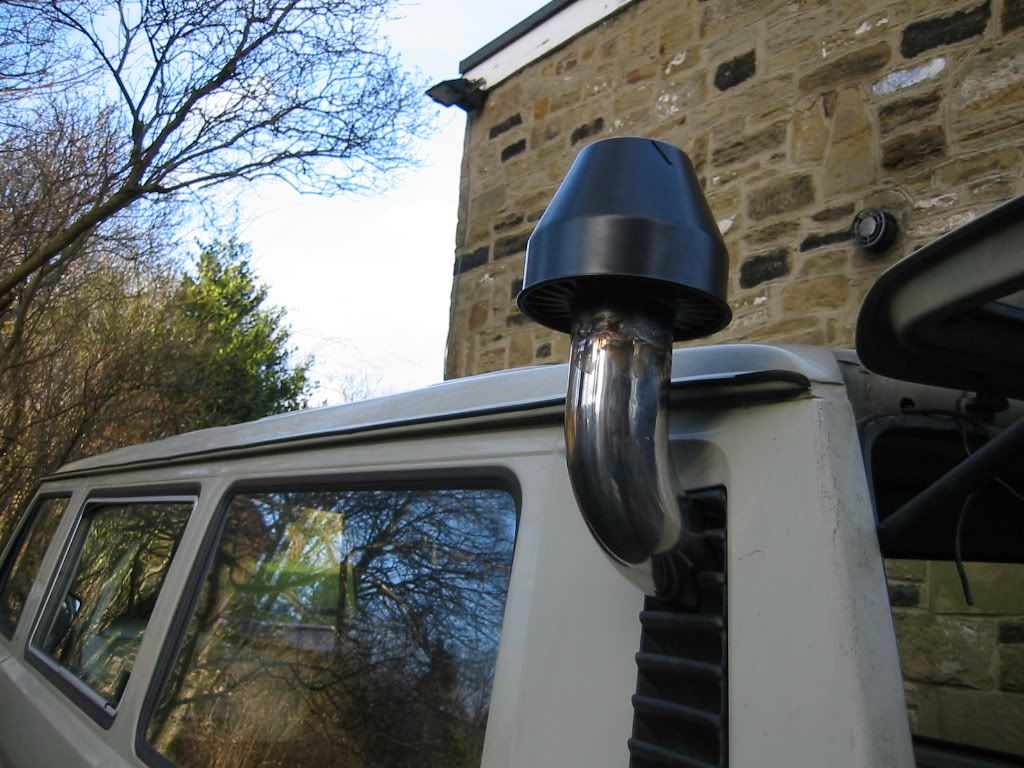
I had a rethink on the exhaust after having drilled many holes through the stainless 3 inch bore pipe and bought some exhaust bits from Milner Offroad to make my silencer and got as far as possible with the tig welder. I think I'll be buying some stainless wire and straight Argon gas for the my mig welder from now on. 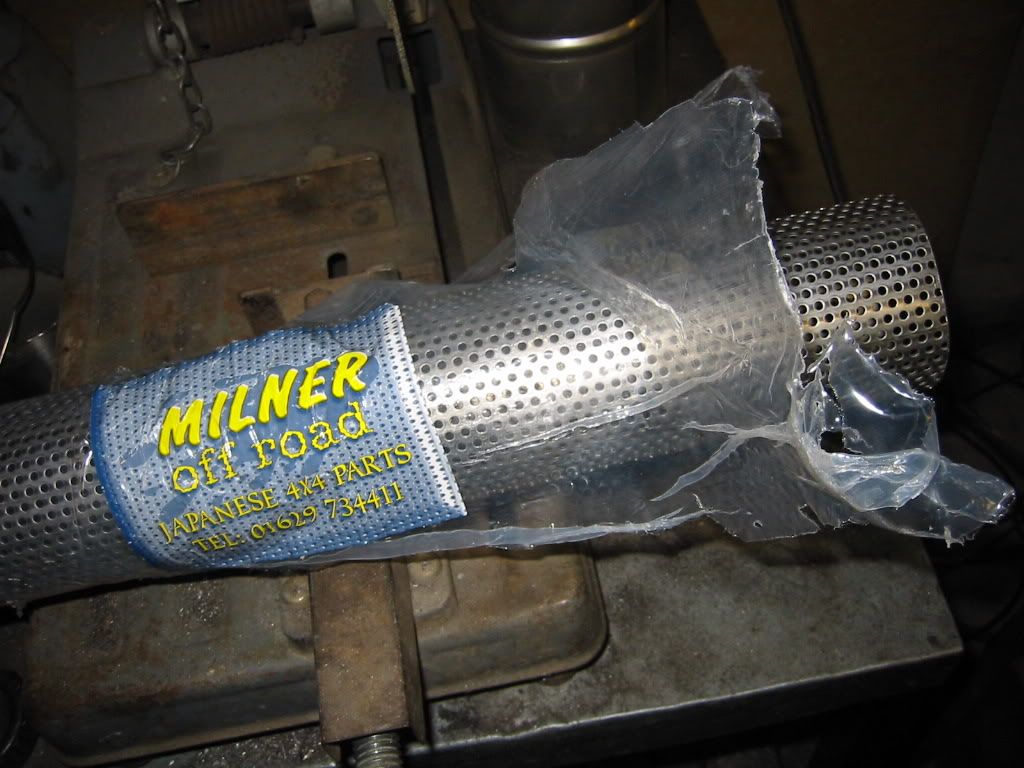
With help from the chop saw, things got shorter... 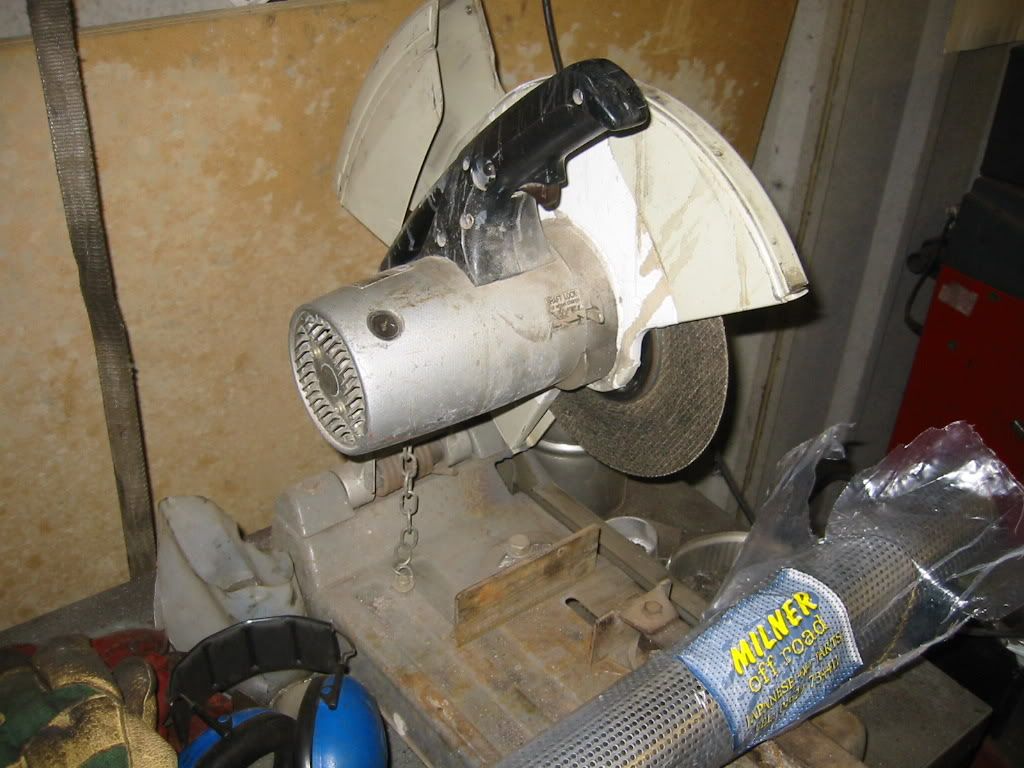

And then longer again with a section of the new exhaust silencer centre added. 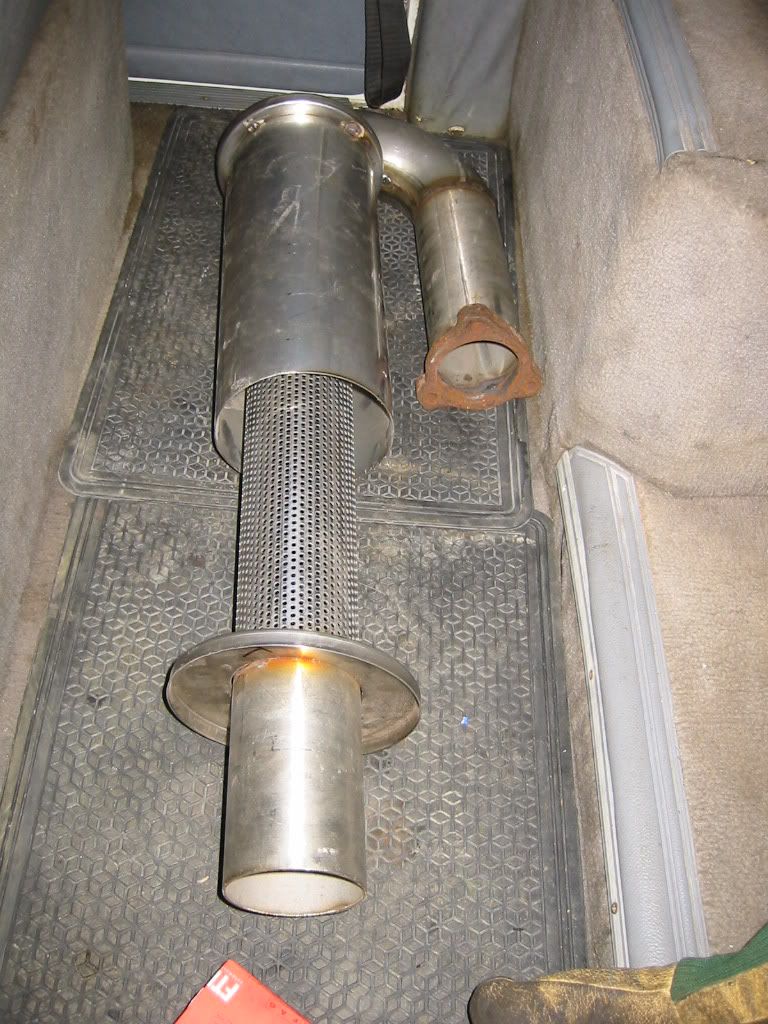
The silencer is only 12 inches long and 5 inches in diameter. With the ID bore being 3 inch, that only leaves an inch all the way around for the stainless steel wool to absorb sound. Hmmm I think it's gonna be noisey! MG |
Posted By: Ghia
Date Posted: 21 Mar 08 at 15:44
|
Another update of lots of small things. It's amazing how long it takes to do all these little bits! I have bought a new power steering bottle and bracket from VW, a bargain at �28 all in! 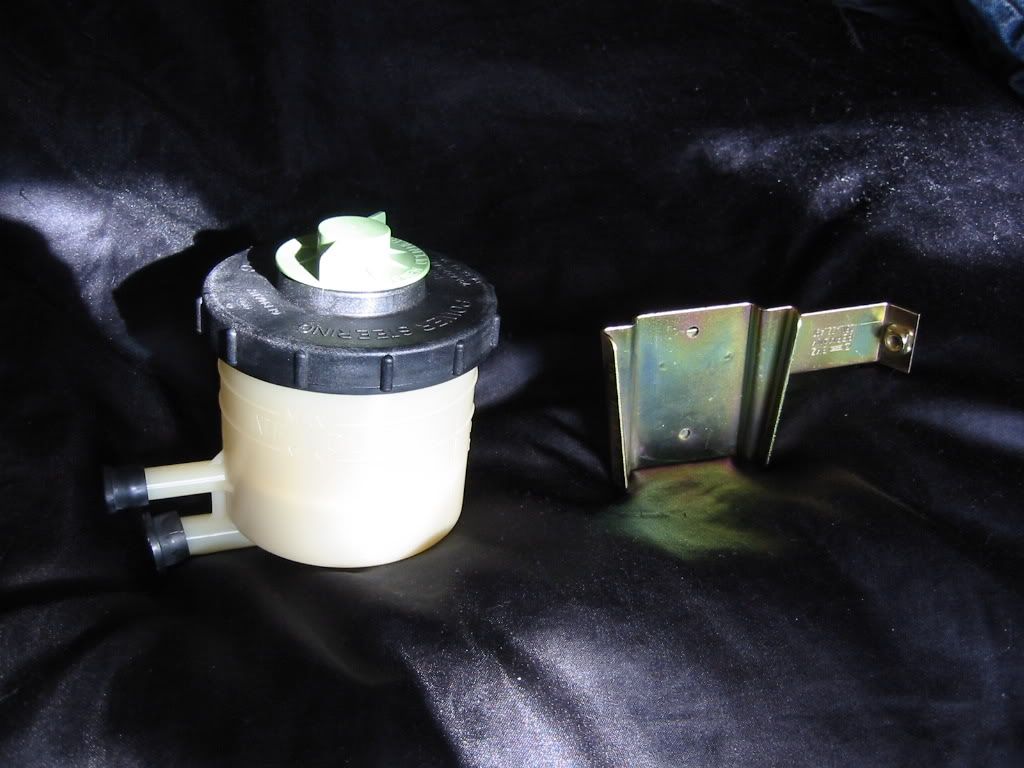
The factory position is just to the left of the diesel fuel filter but I'd already used one of the mounting holes for a wiring socket bracket. I couldn't find anywhere else where it would fit nicely so the socket got moved again. 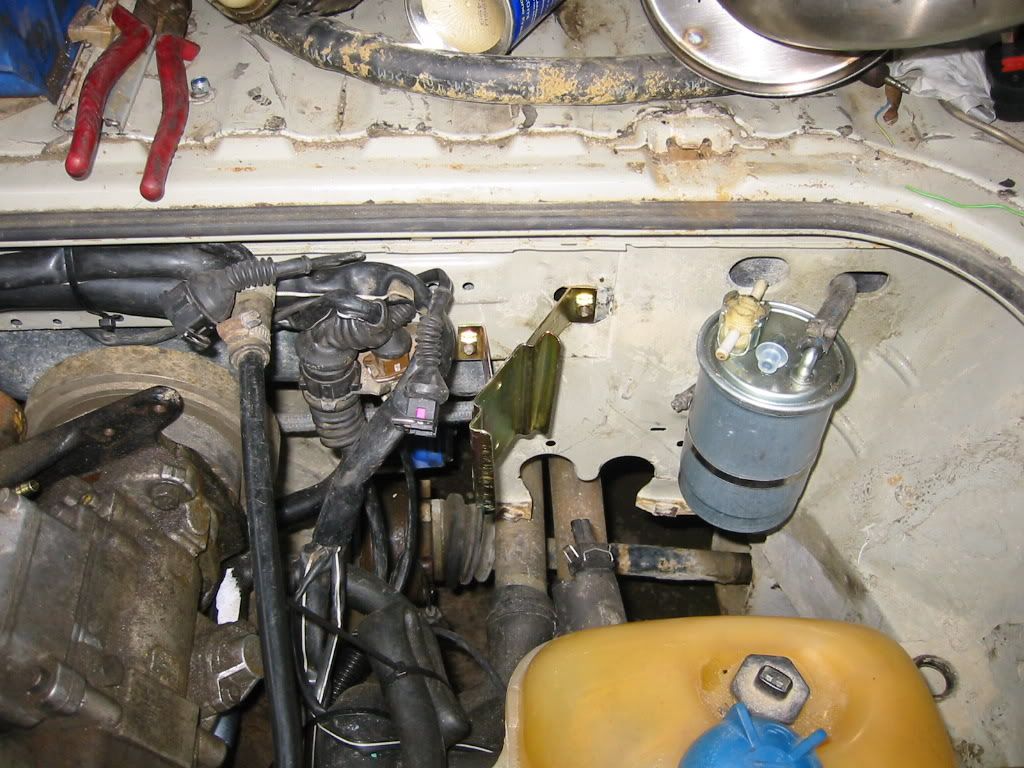
Once bolted into position (not easy as the bracket has captive nuts but on a syncro, the fuel tank is in the way of getting into fit bolts. I figured that I could turn the wiring socket bracket through 90o and bolt it to the new bracket. Great but that meant drilling a hole in it and I really didn't want to spend another 1/2 hour fiddling with finger tips on spanners trying to undo bolts I can't even see. Hmmm, ahah that last drill I bought but hardly ever use will finally get used! 
Yey for Snap-on 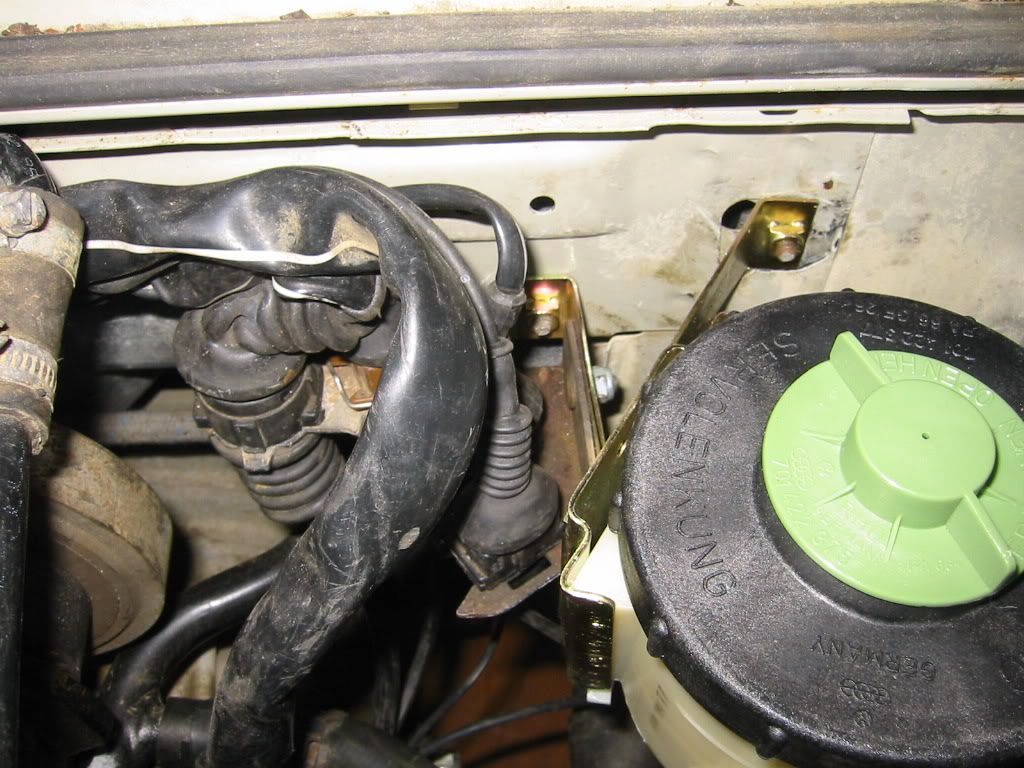
Now that the bottle is fitted, I could start on the pipework. I've manged to use the Audi A6 bottle to pump pipe and Pressure pipe (after some heating up and tweeking for the right angle) from the pump and I'll have a feed pipe made up to go from that to the rack. The return is low pressure so I'll use stock hose. 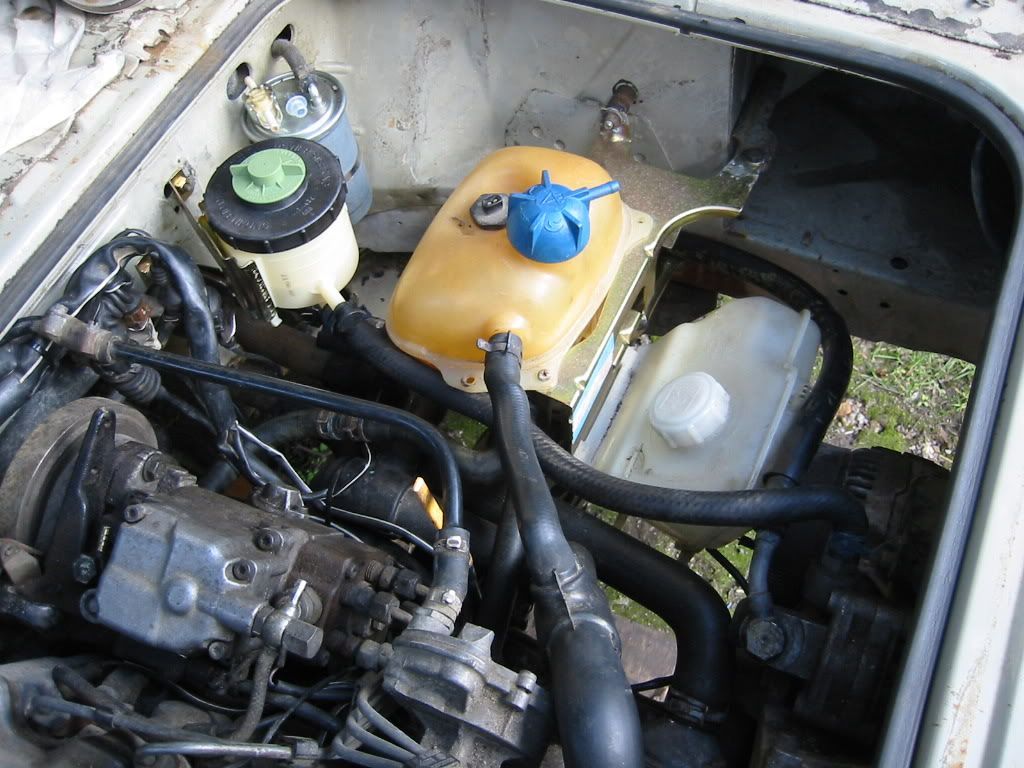
You can also make out the coolant pipe just below the servo pipe which now has a VW joining piece (from the heater matrix front to rear pipes on a T3) in with spring clips. This was the last of the mods needed for the cooling system so it's ready for coolant now. 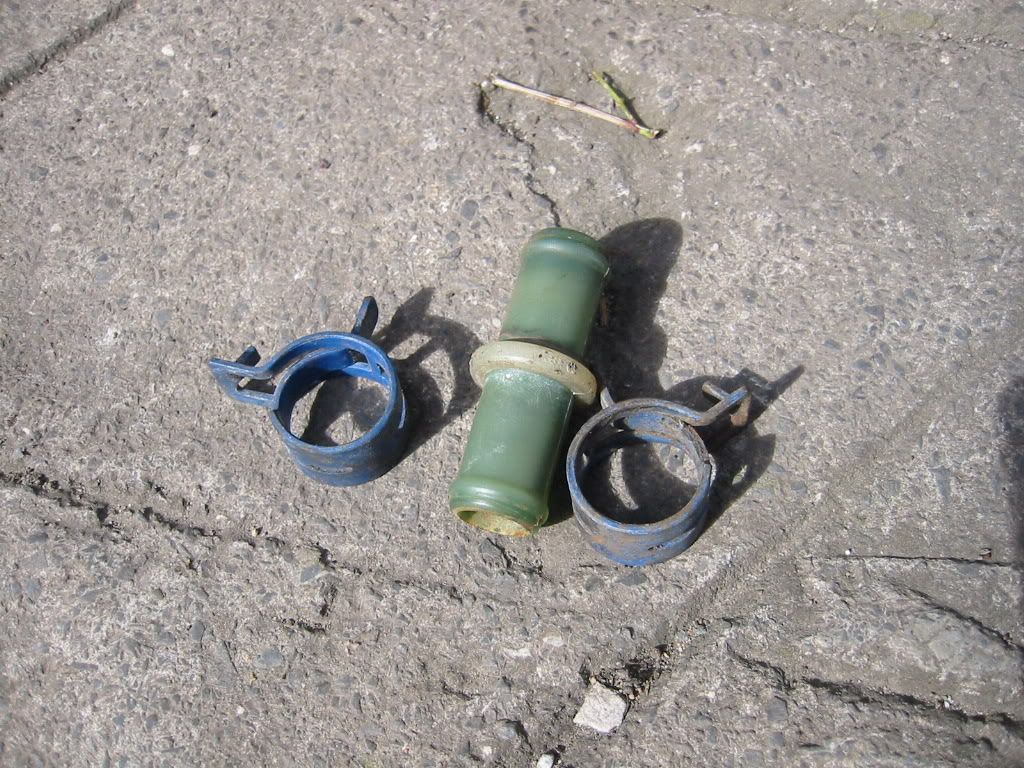
I've made up a list of the remaining things needed to get it running. It's getting closer and it's taken even longer that I anticipated. MG |
Posted By: T3ADICT
Date Posted: 21 Mar 08 at 16:10
|
dont worry you will get there... and when you do it should be spot on... just think you should have a t3 syncro that will go most places, quickly, and good mpg... hard combination to better.. ------------- WHY T3's.... because they are just so adictive, and having one just aint enough |
Posted By: Ghia
Date Posted: 12 May 08 at 17:57
|
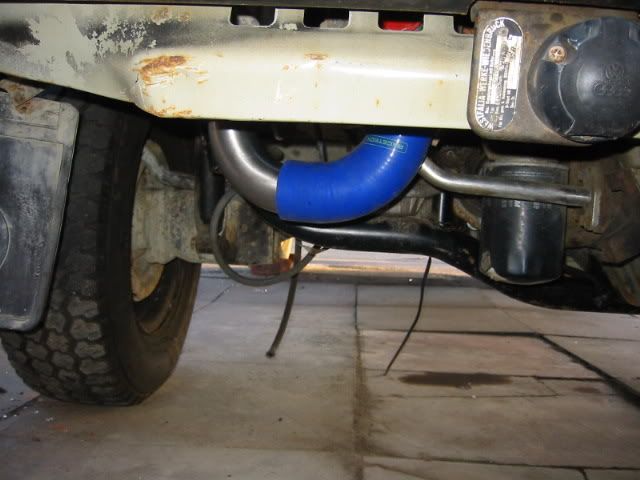
Small update but I'm getting there slowly. I need less projects!
The exhaust is finished and bolted on.
The heat wrap should keep the temps down in the engine bay.
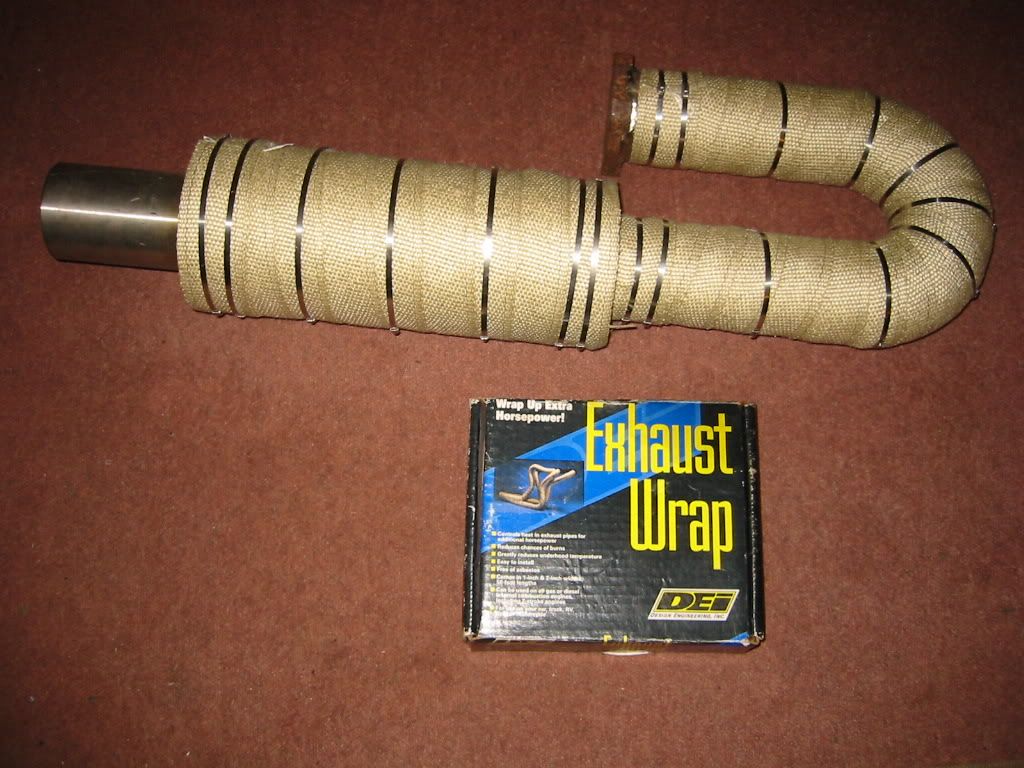 MG
|
Posted By: Lewis
Date Posted: 12 May 08 at 21:33
|
This is looking pretty damm cool so far Mike...lots of work gone into it! And I thought having a car and a van as projects were bad enough!
|
Posted By: Ghia
Date Posted: 19 May 08 at 08:51
|
Wiring update.. boy does this wiring ever end?!
I've used the connector from an old engine loom to connect directly into the van loom which then passes up into the van to connect to the TDi loom. All the relevant oil pressure, water temp, rev counter (connected to W terminal I had fitted to the alternator), Alternator idiot light, Glow plug light, feed for chargecooler pump, ign feed, and starter trigger have been connected up.
 Also managed to get the final high current wire (feed to the relay box) connected onto the back of the alternator and it happened to be the right length.. phew!
 The remaining wires which need to be connected are speed sensor, brake/clutch switches, throttle potentiometer, oil presssure (guage), aux water pump feed, (will be connected to first speed of cooling fan) oil temp and immobiliser are now wired up to pass through the roof section of the van and down the N/S front pillar to behind the dash. I'm using the bulk of an old loom for the front to rear section I'll be fitting. It's only when you put a wire through the route which you're planning out, pull it back out again and then measure it that you realise just how long they have to be! 7 1/2 meters long!! X15..
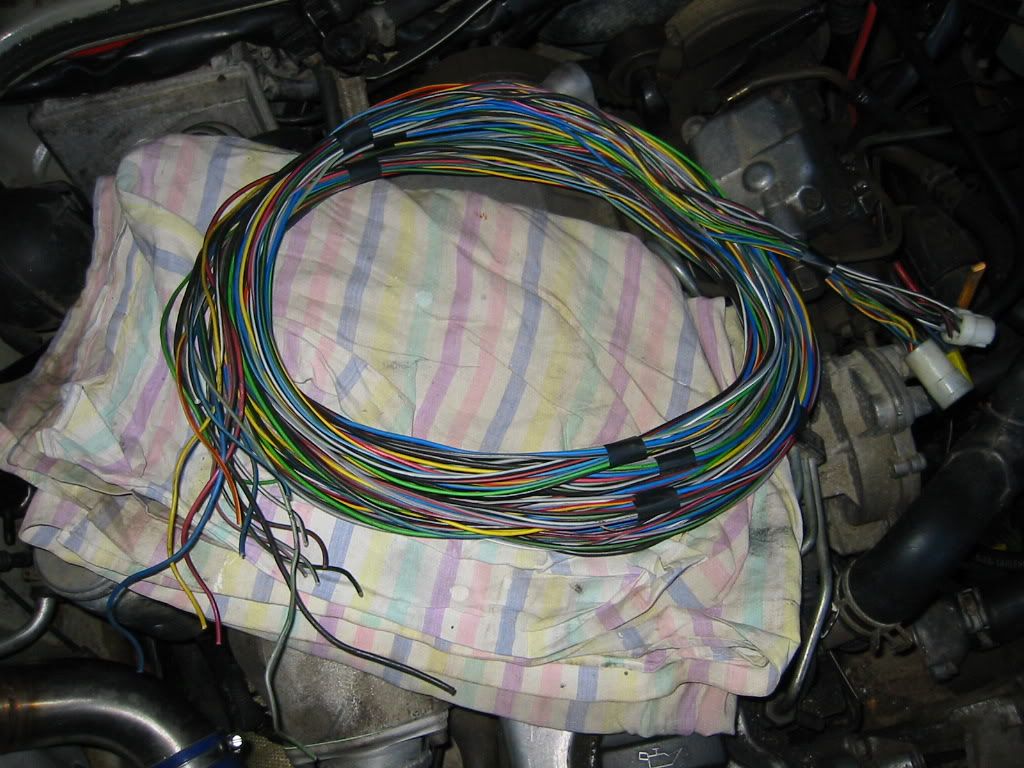 I need more wire to finish the loom so if anyone has broken a van and has the remains of an old loom, please get in touch
The 16 now starts and runs (for more than 1/2 a second now that I've remembered the immobiliser box
Other little jobs finally done are the wastergate pipe on the turbo (as I'd re-indexed the compressor housing of the turbo), alternator wiring for rev counter, wiring for oil pressure sender (for guage aswell as idiot light).
MG
|
Posted By: taigagreen
Date Posted: 19 May 08 at 10:08
|
You are a brave man! ------------- Tage is my name :D Too many T3's... |
Posted By: Dai01
Date Posted: 19 May 08 at 22:17
|
Nice to see it coming on Mike,`s looking good ------------- 2.1 DJ
|
Posted By: Ghia
Date Posted: 19 May 08 at 22:51
|
More bits'n'pieces done today.
I've managed to get the chargecooler all plumbed in, just hose clips to finish and wiring the pump up to the engine loom to go.
As Limey was originally a 2.1DJ engine'd van, the remains of the fuel pump brackets were still on the N/S tank strap. After 1/2 an hour of careful work on removing the remains of the original rubber bobbins and cleaning the threads with a tap, I bought new clamp halves and bobbins from (clamps £1.30 each, bobbins £5 ish each). The Chargecooler pump is the same diameter as the stock fuel pump so after a bit of black insulation tape to stop corrosion, it was bolted up in place.
   Oh yes the bottom of Limey still needs a damn good clean, yes the gearbox is the original (hence the colour) and it leaks, and yes I'm missing a brake flexi fixing!)
The pipes run tucked up next to the loom and using existing bodywork/cross member holes.
 All tiewraps were trimmed just after the pic (wish I'd taken it after now!).
A Pace Chargecooler radiator from one of my other chargecooler setups has been used and I've managed to modify the brackets which were on it to fix the radiator to the 2 vertical bars which sit in front of the main radiator while still leaving room between the 2 radiators and enough room for a small oil cooler underneath.
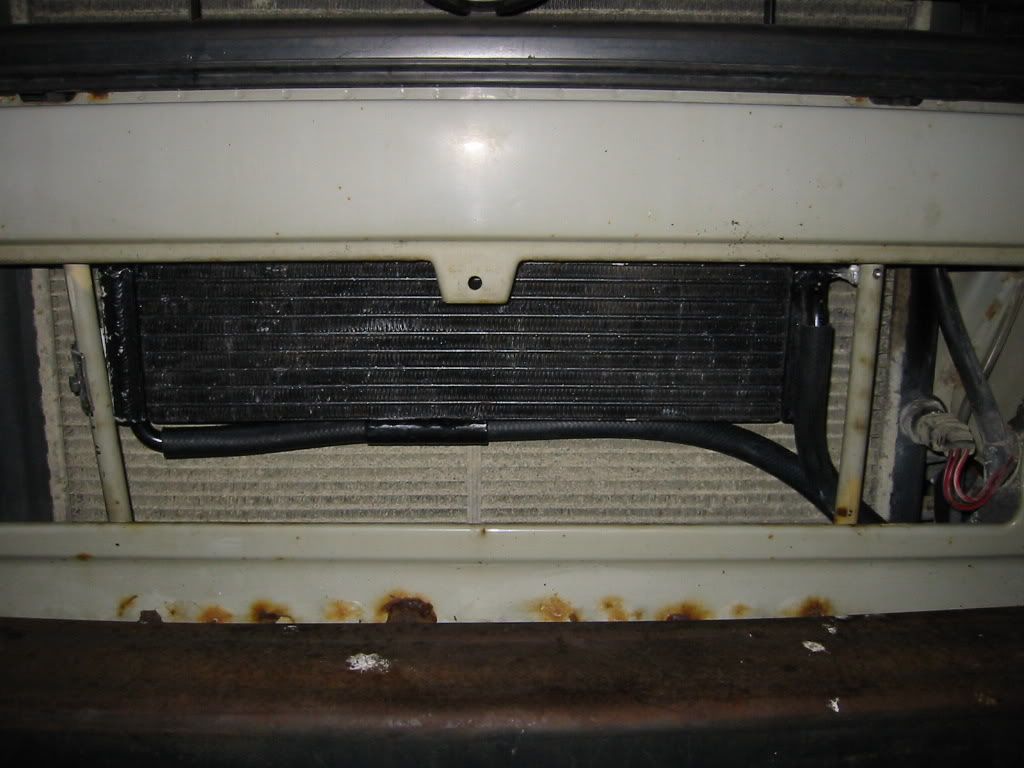   The pipes run nicely under the front keeping them out of harms way when offroading, also they're away from other coolant pipes to help keep temperature stable.
 I'll be adding a heat sheild in the engine bay over the return line (and wiring) which runs close (about 6 inches away) to the exhaust.
I've just ordered a load of wire sleeving and crimp on connections from http://www.autoelectricssupplies.co.uk - http://www.autoelectricssupplies.co.uk . We'll see how long the bits take to arrive and quality etc. They cheap though
MG
|
Posted By: Ghia
Date Posted: 19 May 08 at 22:58
|
Thanks Dai it's coming along. Looking at the main radiator, I think it would be a good idea to change it for a new VW one!
Taigagreen, thanks! I think crazy is probably closer though
MG
|
Posted By: Ghia
Date Posted: 20 May 08 at 22:41
|
Small update as I've been running around fixing family cars again grrrr...
I've finished the chargecooler system, all hose clipes fitted, wiring finished on that including water proof connections and it's filled up with anti-freeze and circulating well. It'll take a few journeys around to get all the air out of the system but as the tank is in the system, it'll self bleed. I can put the grill back on now
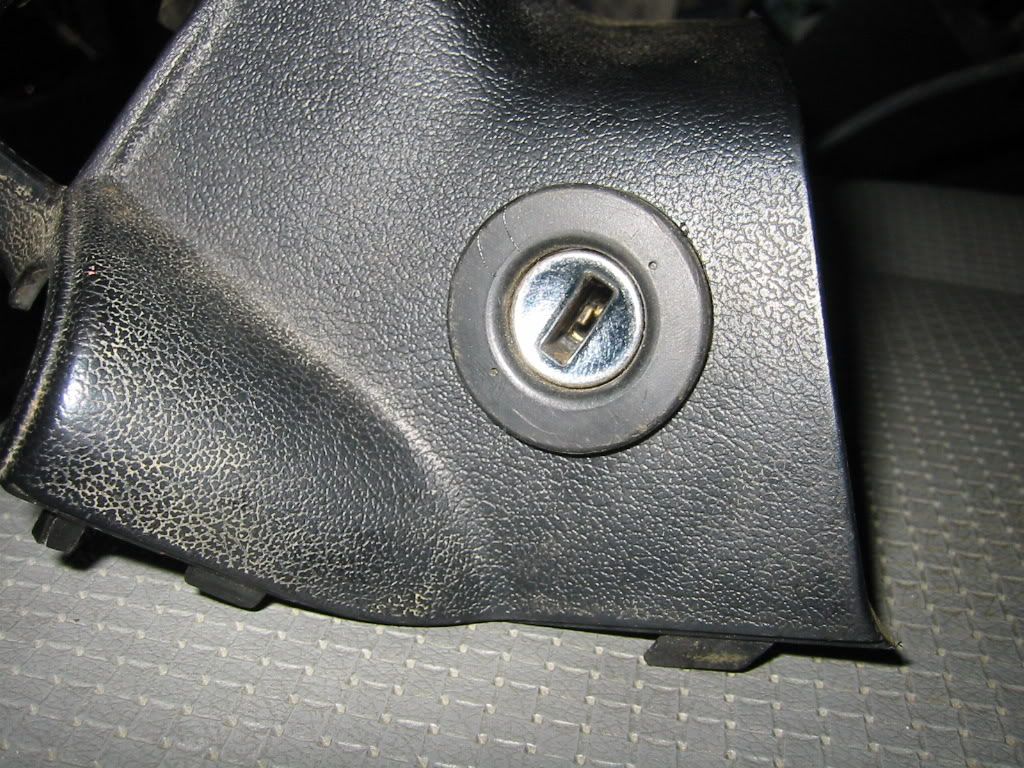
The wiring to the front of the van is still ongoing. Thanks to Markpark for coming up trumps with another loom for me to canibalise
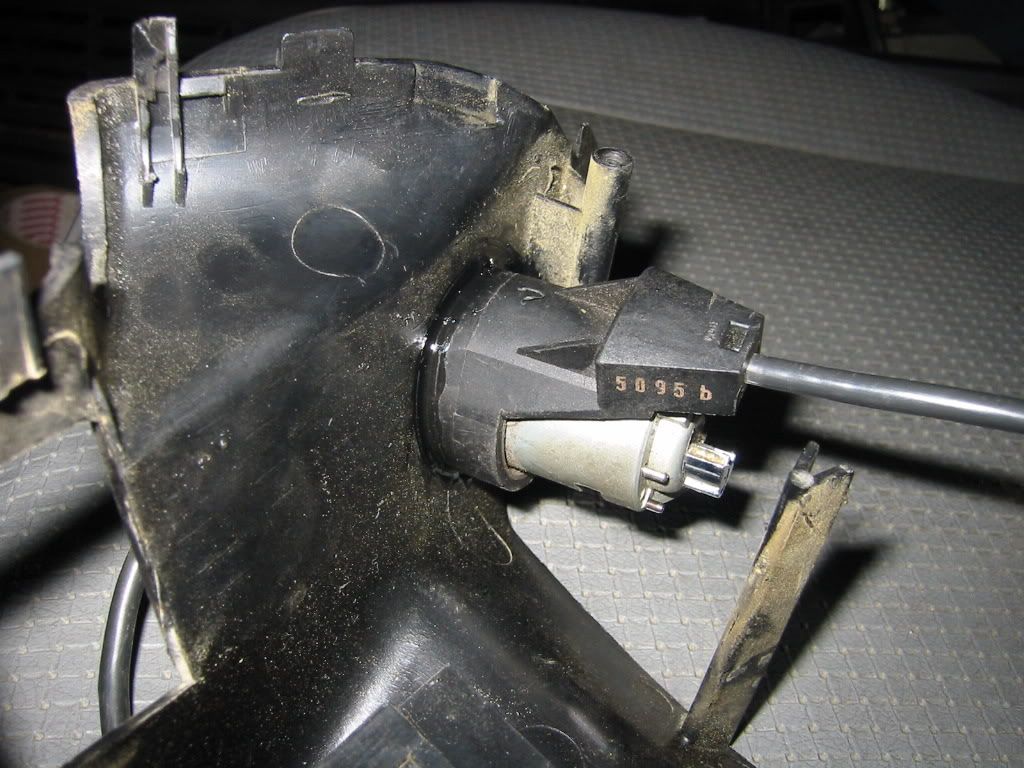
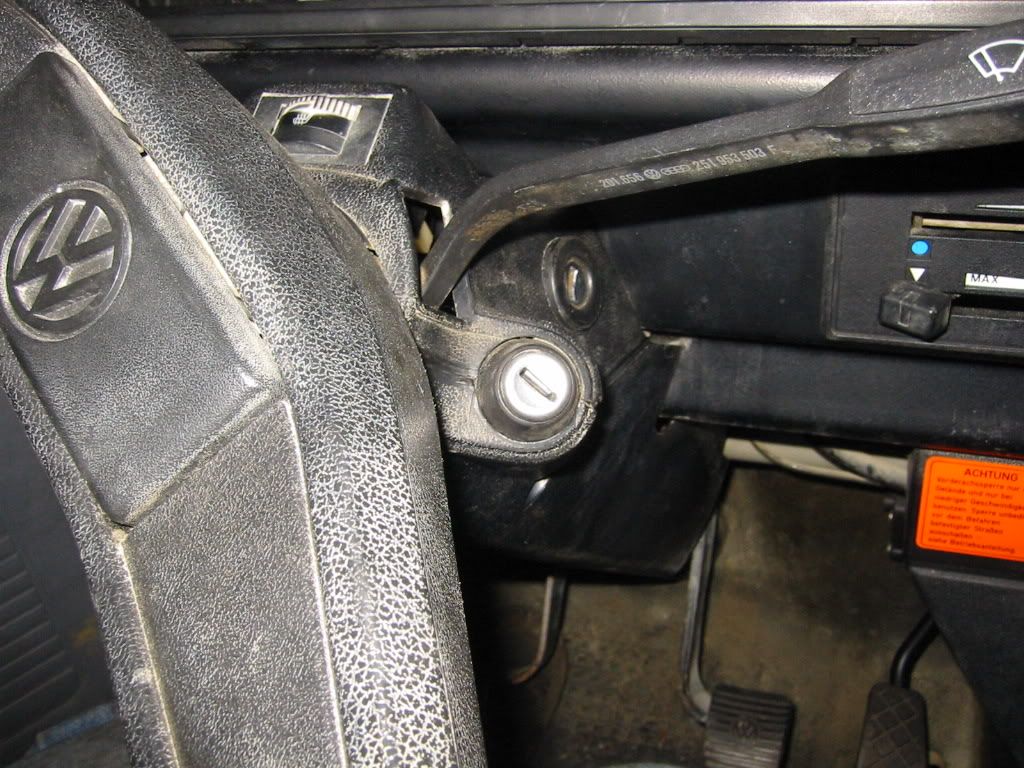
 Something which has been bugging me about the last time I had this engine in a vehicle (Poshbuggers Doka Syncro), I had to have the Audi ignition switch in the system for the immobiliser but I also wanted to be able to use that function, i.e. take the key away with me so I knew it couldn't be stolen. On my old doka I had the ign switch dangling around by the steering column. I looked very carefully into trying to incorporate the immobiliser ring (which surrounds the ign switch) onto the van ignition switch but it doesn't come apart. So I decided to drill a hole into the steering column housing and glue the Audi setup in place so that I can use the key and it looks fairly neat.
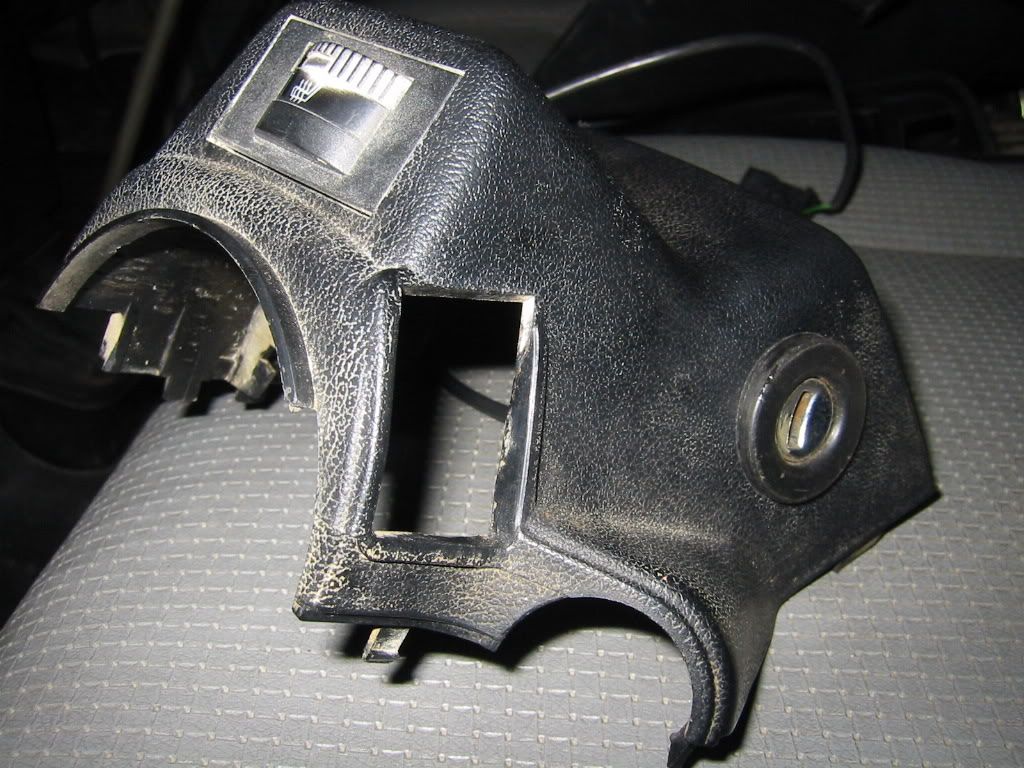 Yes Limey has a heated drivers seat!
   MG
|
Posted By: CdnVWJunkie
Date Posted: 22 May 08 at 02:44
|
Wow. I've just read this post start to finish. Very nice work indeed.
I've had a T4 150PS engine/trans sitting idly waiting for a recipient. This is a motivator to say the least.
Keep up the good work.
Cheers.
Rob
|
Posted By: Ghia
Date Posted: 22 May 08 at 22:50
|
Well it's been a very long day finishing off the wiring and an even longer time coming to this point where I can finally drive it.
For the first time in 19 months, Limey has moved under his own steam!
The wiring sleeving and fittings turned up as promised this morning, great stuff!
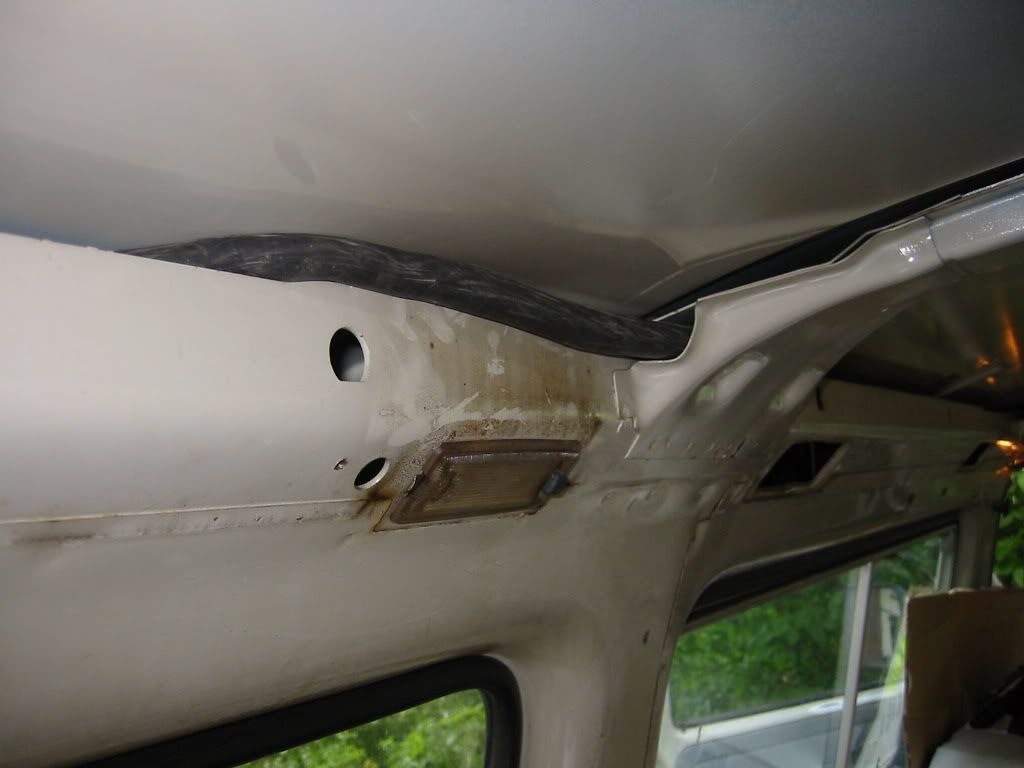
 I spent the next 2-3 hours getting all that wire into the sleeving and then another couple of hours or so feeding it through the roof and down the front pillar to behind the dash.
  Once I've driven around with no error codes in the ECU and I don't want to modify any of the wiring, I'll be using loom tape to wrap everything up neatly. This is the stuff which is used from the factory on looms under dashboards etc. Very sticky and horrible to get off so I don't want to be trying to remove it later.
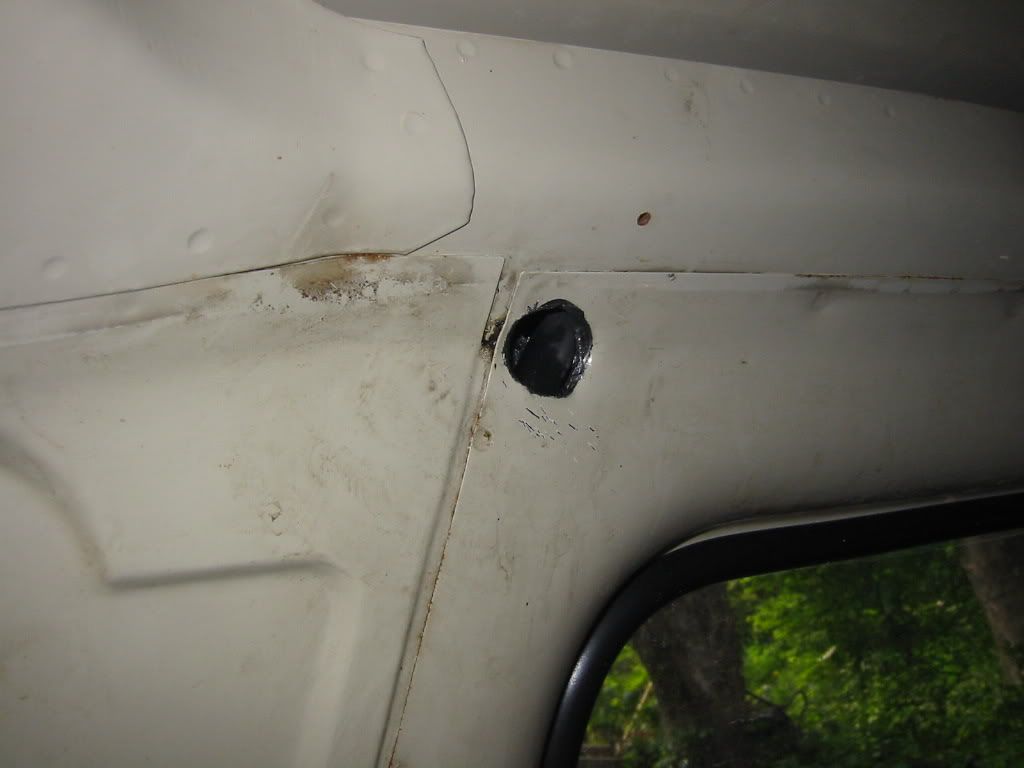
The loom had to pass through from the rear pillar to the room. As stock this isn't possible as there's no hole through the several skins of metal. I drilled a fair size hole through into that area and then into the panels behind to allow the loom to pass through. I'll probably put a grommit in the hole once it's painted up to allow for later access if needed.
     I took the opertunity to drill the A-pillar for a grab handle as I wanted access to where the wiring was going and LHD vans don't get them.
  I have 3 spare wires unused from front to rear for future upgrades etc like gearbox temp, intake charge temp etc etc (or anything I've forgotten!).
Once there, I connected up the throttle potentiometer, immobiliser and started him up. Hmmm, no throttle response. Checked it with the old throttle potentiometer, works ok. It turned out that the pins aren't numbered the same and after 20 mins checking what pin did what with the multimeter, a quick rewire and we're in business!
After that I figured while I was doing wiring and as I'd wired in the sensors for oil temp and oil pressure guages, it would seem silly not to fit them now. So with all that lot connected up and damn good clean up, I took the helm and boy does it move off the mark quickly. The throttle response from tickover is great.
I haven't wired up the clutch and brake switches yet (haven't fitted them yet!) so they'll be error codes from that and as there's no front diff in at the moment, the speed sensor will come up as another error code. As a result I'll not get the full hp until they're sorted.
I'm dead chuffed with it. Just some work on the brakes and we're up for an MOT. Then the Tristar can go into storage and I can start on one of the other vans
MG
|
Posted By: Ghia
Date Posted: 22 May 08 at 23:21
|
A couple of short vids just to prove it runs! Otherwise some would wonder!
Also the exhaust is suprisingley quite to say it's a 3 inch diameter system with is a total of 18 inches long with a straight through silencer!
http://s58.photobucket.com/albums/g250/performanceghia/?action=view¤t=Syncro16041.flv - http://s58.photobucket.com/albums/g250/performanceghia/?action=view¤t=Syncro16041.flv
The glow plug light flashing is a (I'm not happy, have error codes, sort it!) message from the ECU I think. Unless someone else knows better?
http://s58.photobucket.com/albums/g250/performanceghia/?action=view¤t=Syncro16042.flv - http://s58.photobucket.com/albums/g250/performanceghia/?action=view¤t=Syncro16042.flv
MG
|
Posted By: ELVIS
Date Posted: 22 May 08 at 23:38
|
mikey , there have been a few posts on audi forums about this IIRC i *think* it had something to do with IQ settings and/or brakelight/switch issues of all things. will try and find some linkys for ya. ------------- Www.justgiving.com/ELVIS-SUMMERS |