1980 VW T3 DoKa
Printed From: The Brick-yard
Category: The Brickyard
Forum Name: The Bus Park
Forum Description: Post pickies of yer wagon here. You can post multiple images (Max size 100K each) in a single post. Requires no outside hosting. Be nice and keep it clean please. PHOTOS ONLY.
URL: http://www.brick-yard.co.uk/forum/forum_posts.asp?TID=77552
Printed Date: 20 Apr 24 at 10:39
Software Version: Web Wiz Forums 12.06 - https://www.webwizforums.com
Topic: 1980 VW T3 DoKa
Posted By: surf dude
Subject: 1980 VW T3 DoKa
Date Posted: 22 Nov 12 at 22:51
|
Right, lets see if this works. This is my thread from Retro-Rides, I'll drag stuff across, so it may be a bit disjointed, but I thought it was about time I got it up here Welcome to my Double Cab! 28 July 2010 I've had this for a while now, haven't done a lot to it yet, but allow me to introduce the 'Fish Van'!! (Might be a good idea to grab a brew, this could take a while ;) ) I bought the van when I was serving in Germany and imported it back to the UK when I moved back here in 2000, this is what it looked like back then, 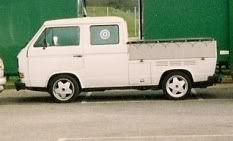 It's a very early van, but had much more modern running gear fitted, like a 5 speed box, 2.1 fuel injected DJ engine (112 BP) and power steering and had been 'customised' with a checker plate load bed, stainless side panels and a nice load cover, lowered on 17" Borbet A's. I loved it, but my then girlfriend (now wife :) ) wasn't quite so keen, hence the name of the fish van ::) So we ran it for a while, I was commuting weekly in it 125 miles each way, bit pricey at 20 to the gallon but hey ho, I still had money from my Germany days so all was good. I'd left a 2 door Taunus (Mk 5 Cortina) in Germany that I was mid way through restoring so I decided to drive over, buy a trailer and bring it back and that was when it all started to go a bit wrong ::) It broke down about 15 miles outside Calais, I had no tools no phone and wasn't even sure I had roadside cover. Fortunately my mate who was driving over at the same time drove past and stopped, lent me his phone and the long trip back home via 3 recovery trucks, a tractor and a lamp post began. The engine was trashed, so ideas of ever getting the Taunus back were binned ( It broke my heart ringing my mate who was storing it and asking him to get rid of it. It was solid as a rock and I'd had it for 8 years :'( ) and had a brand new engine fitted to the van. It never ran right even with a new engine and with too many visits to the garage and swiftly running out of cash I eventually sold it to a mate for the cost of the engine. I've always had a van since,   but always said if the DoKa came up for sale I'd have it back. And then, on this very site last year there it was http://retrorides.proboards.com/index.cgi?board=FSW&action=display&thread=69830 two weeks later, it was back on my drive, looking a bit sorry for itself, and it's been attacked by the old rust a bit, so there's plenty to do, but now the new garage is built and the Pug is 'nearly' done ::) and the Merc has sold I don't have any excuses not to get cracking on it. Anyway, Pics ;) Now in silver, not the best spray job, it's pretty thin in places and will need redoing 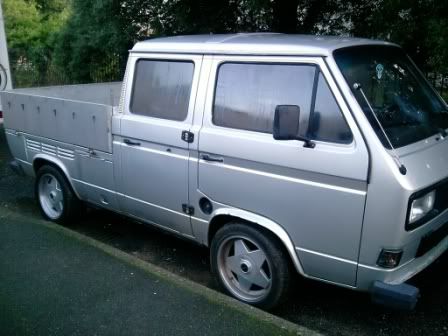 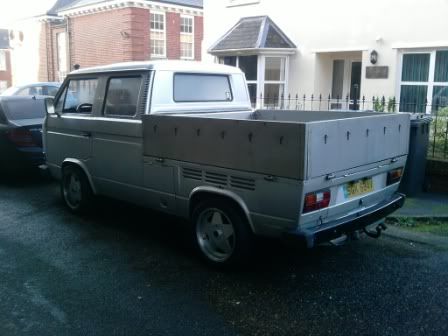 Golf GTI interior, Mk 2 I think, Projekt Zwo steering wheel, horrendous wiring and carpeting and hideous gear knob. Comfy though, but the new seats are a bit higher than before so can't see the dash properly ::) 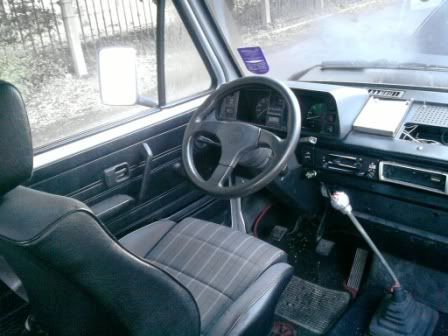 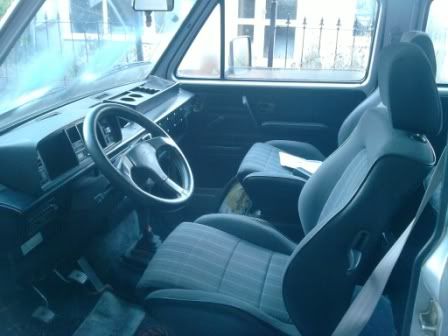 Ermm ??? 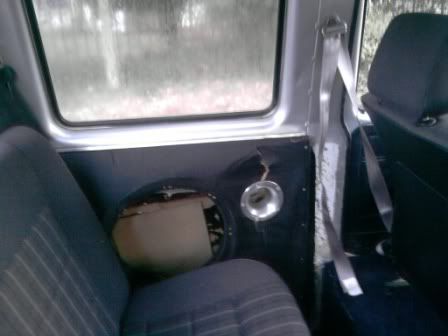 And rust :( (Interestingly I've never seen another van with more than one set of vents, so need to keep them)   I think these front arches are extended, so this repair should be interesting as well. 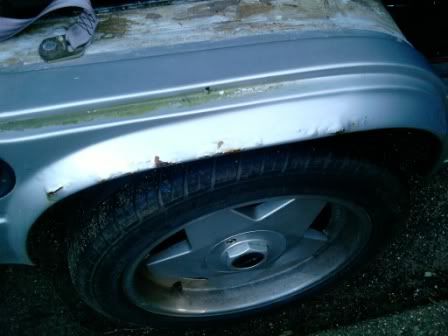 There's more rust, some of it quite bad, but the underside is thick with underseal and when I sold it it was immaculate so I'm hopeful that its solid and the rest is . I love how it sits, looks mean ;D 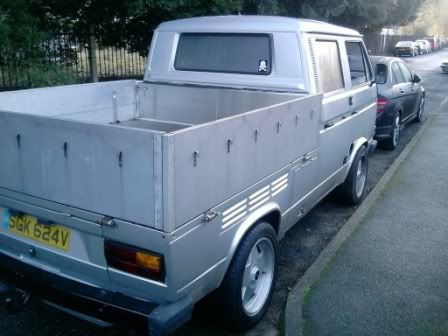 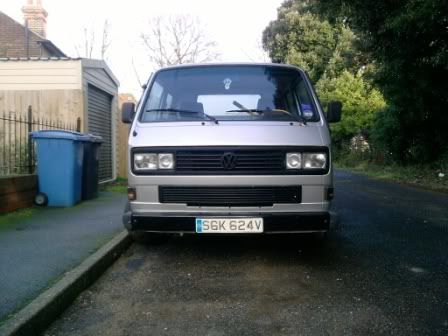 I have lots of plans, but at the moment I'm waiting to hear back from the garage to see if they've fixed it yet ::) I've just had to replace the water pump, and now it's started randomly cutting out >:( I'm seriously hoping that it isn't going to be a lemon, but I have a sneaking suspicion that it's a bit intoxicated that I got rid of it in the first place ;) 20 Sept 2010 So, time to make a start on this as the 205 is 'nearly' done and I need to make the most of being at home for a bit. So first off, the back has 4 nice bits of stainless steel on for the bed, 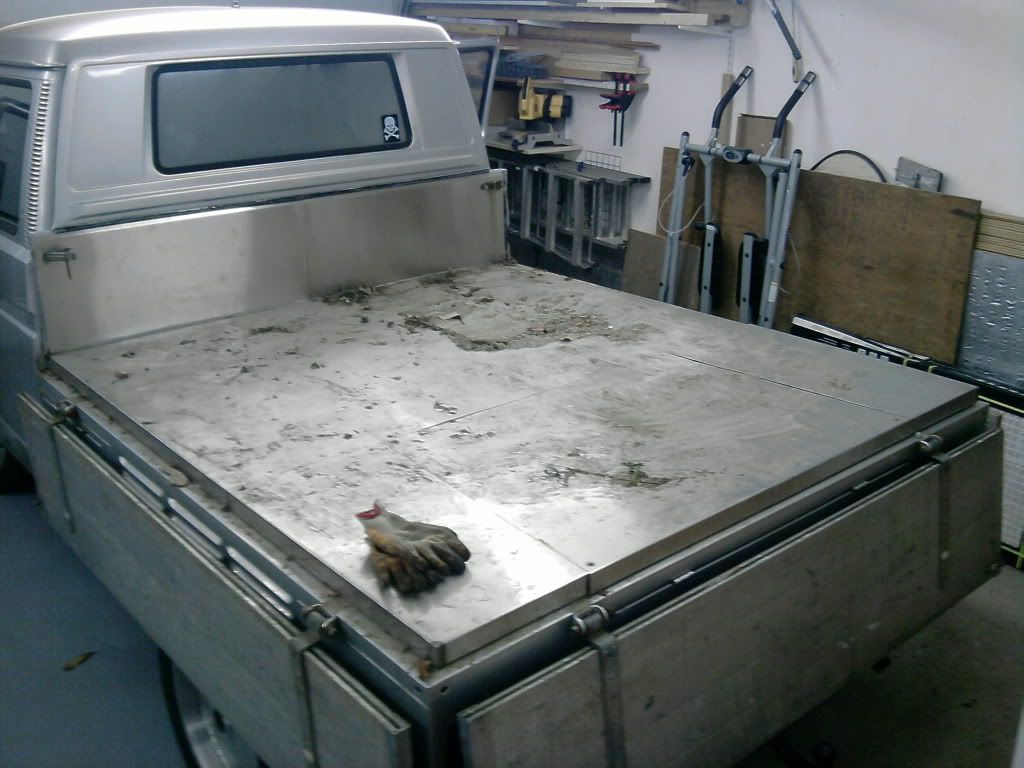 Stuck down with entirely too much mastic! Didn't do a very good job of keeping the water out though and whoever thought it was a good idea to use MDF to seal the roof of the locker needs their head examining! 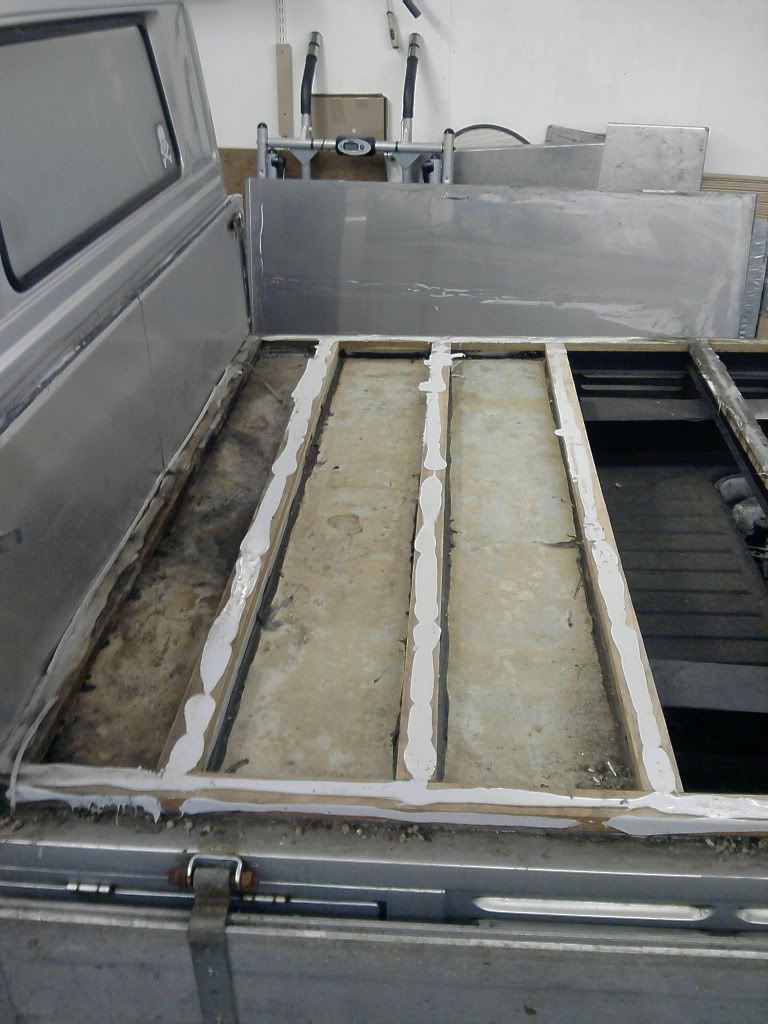 And it stank! So, crowbar, saw, screwdriver, drill and obligatory swearing saw the stripping begin ;) 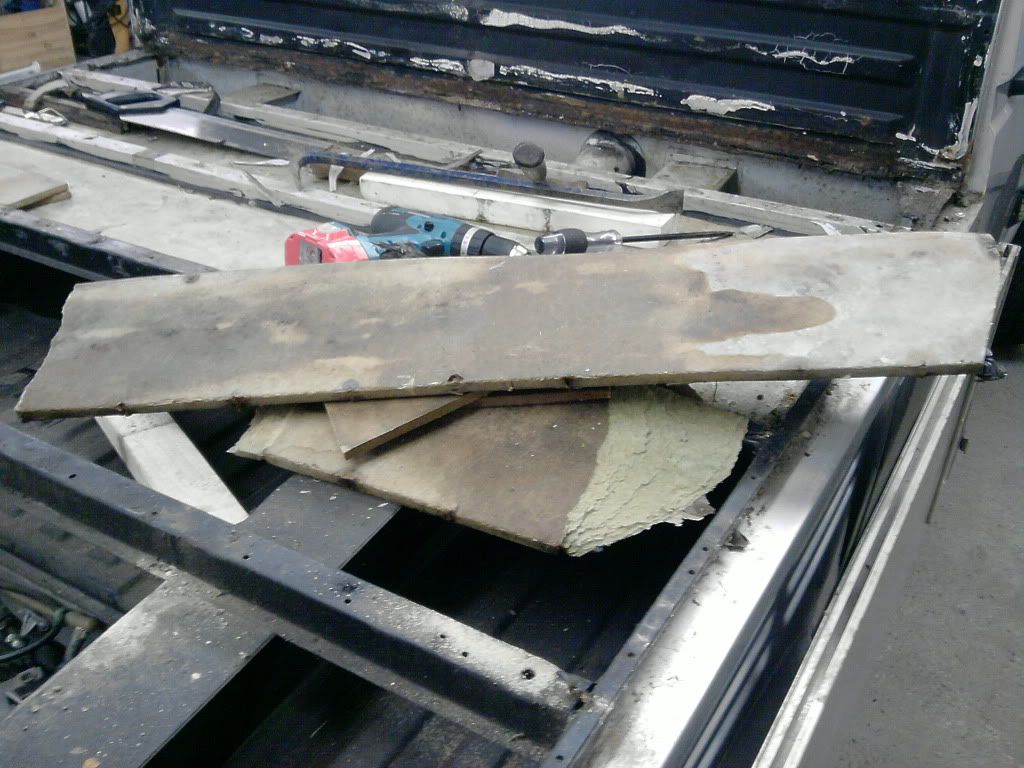 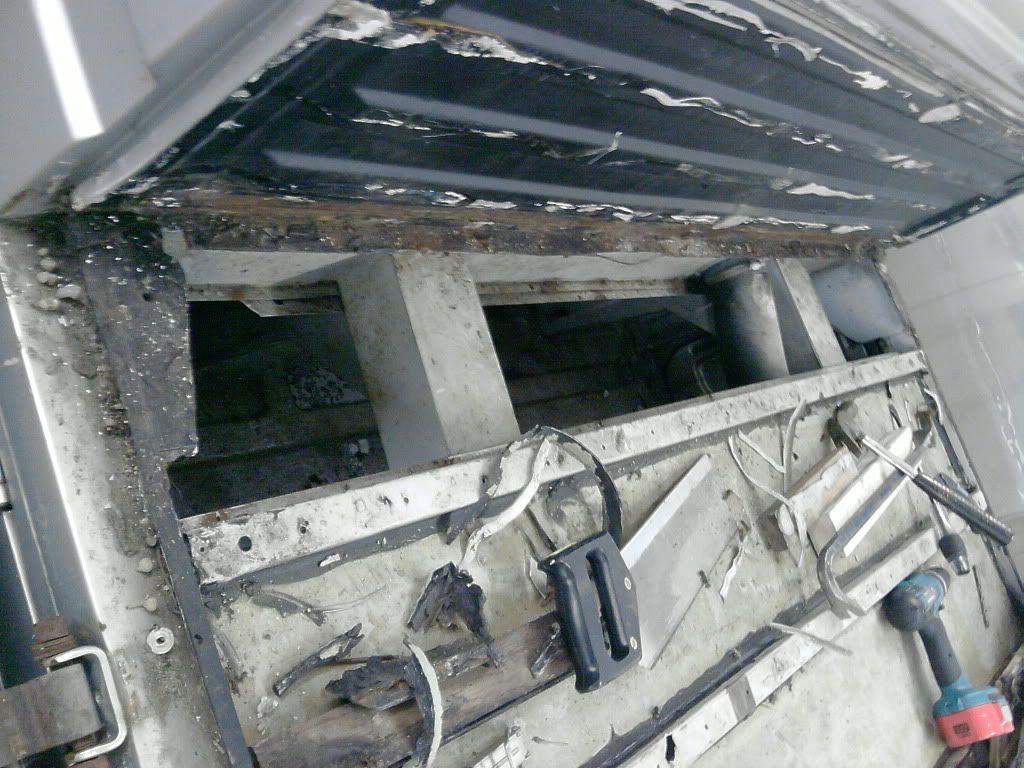 All wood stripped off and binned ;) 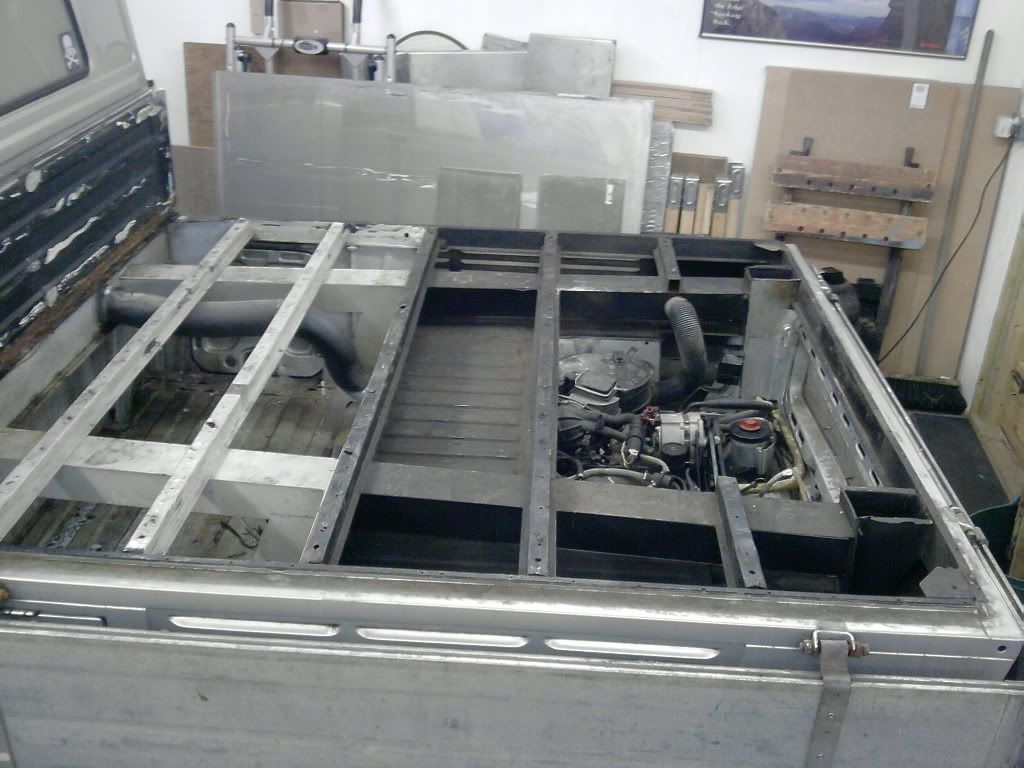 This is in really good condition, and the underbed locker has minimal rust as well. The mould from the damp wood needs cleaning, and then it'll be mint :D 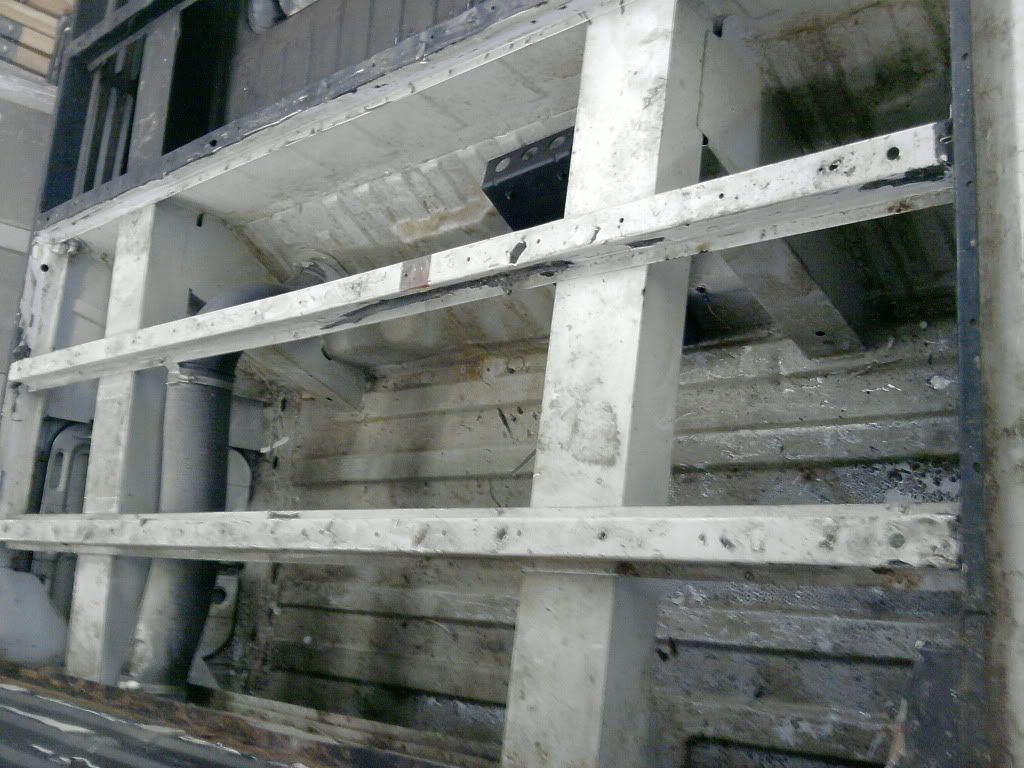 This is the worst bit so far, where the water ran down the bulkhead and rotted the wood above it ::) still a quick whizz with the wire brush and it should be fine ;)  So good to finally be making a start on this. More to follow 24 Sept 2010 So, a bit more done, I've started to tackle the scabby bits, first bit was the locker door opening, 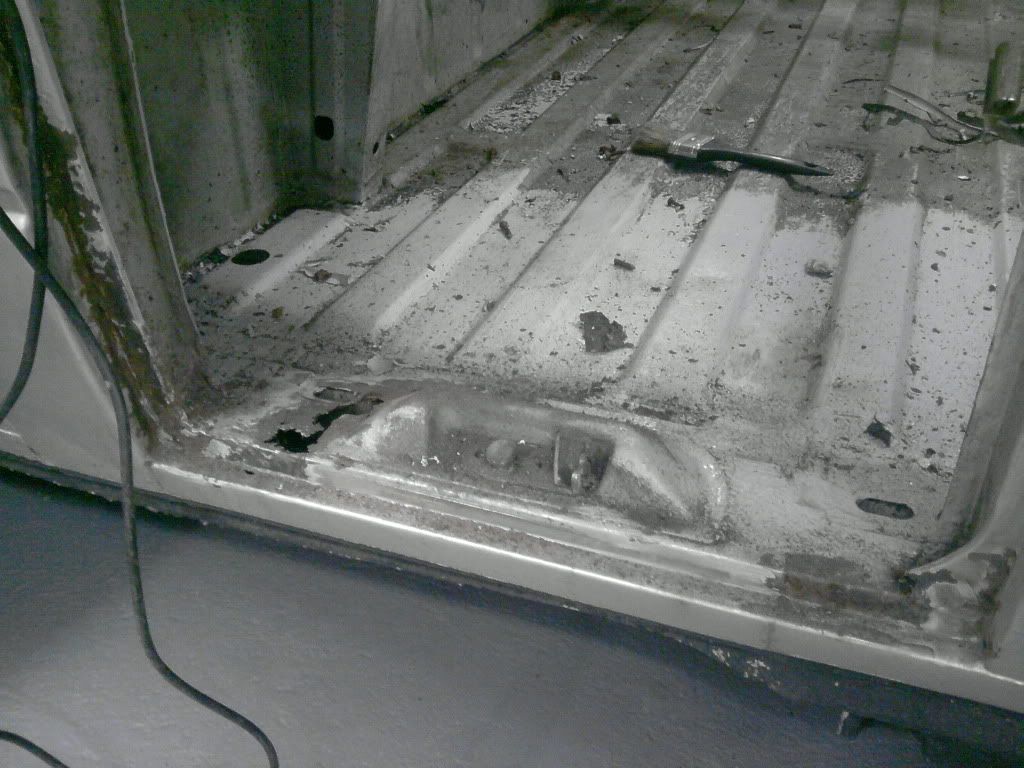 Not to bad, it'll need a bit of welding, I just need to dig some sheet steel out, and get some etch primer and stuff, so moved to the wheel arch, 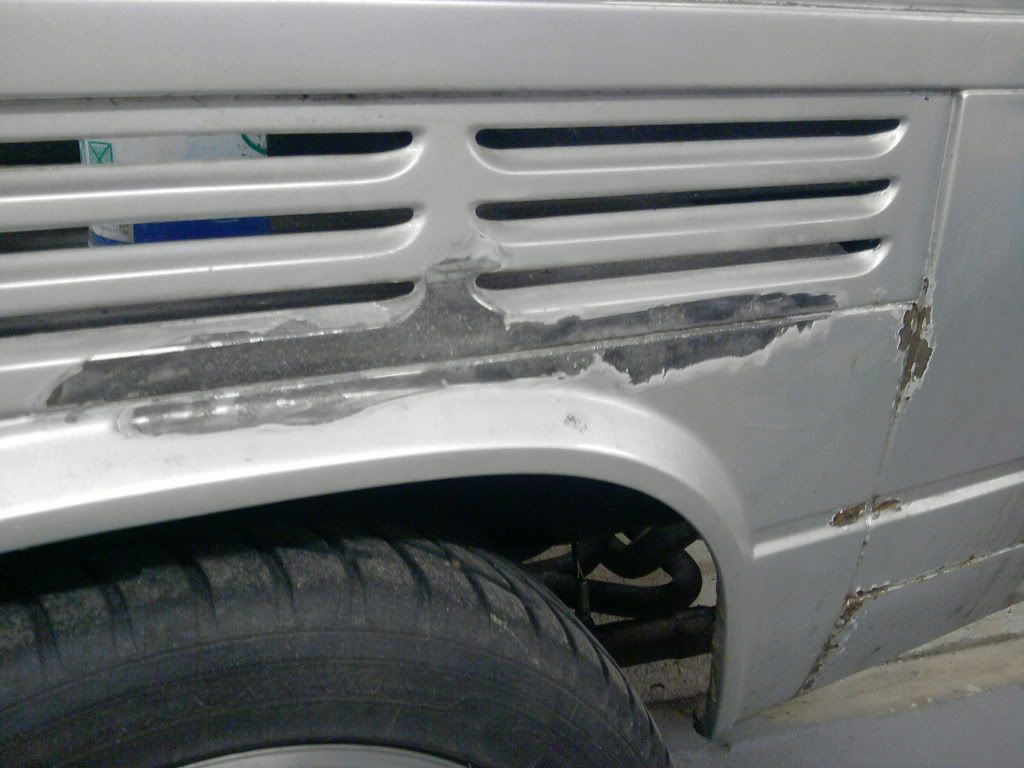 Actually not looking too bad, and only really surface which bodes well for the rest (Fingers crossed) Then as it was getting late, I had to ditch the drill, so thought I'd have a look at the doors and door panel, as that was pretty shagged, 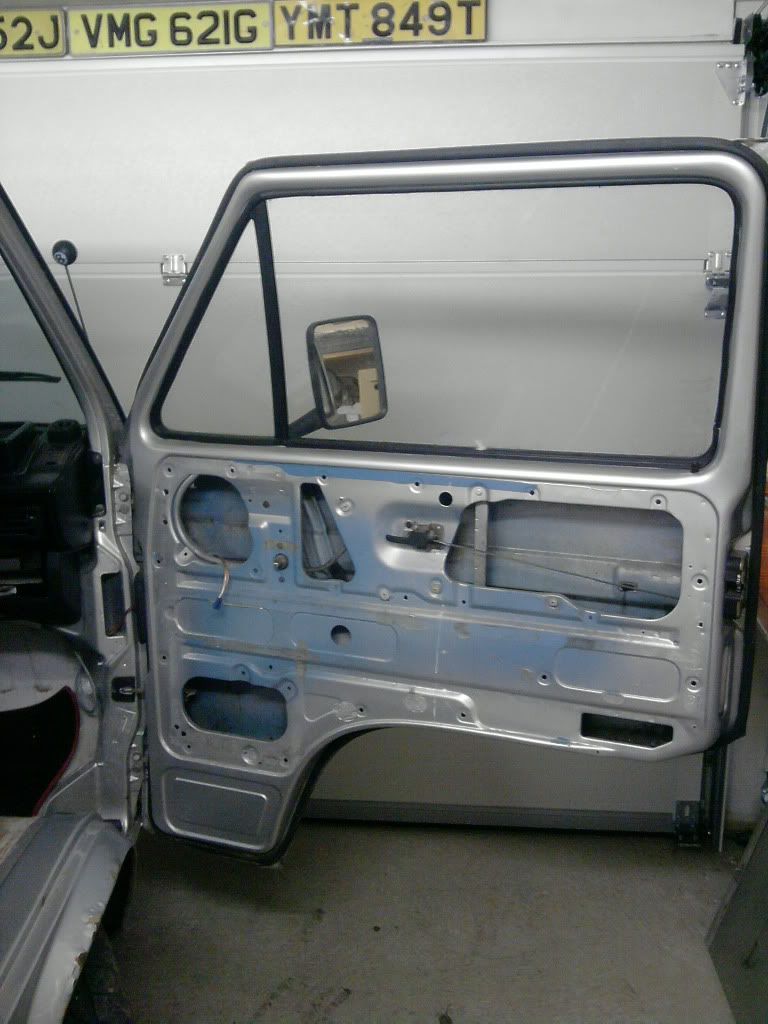 Door is mint, shame about the panel ::) 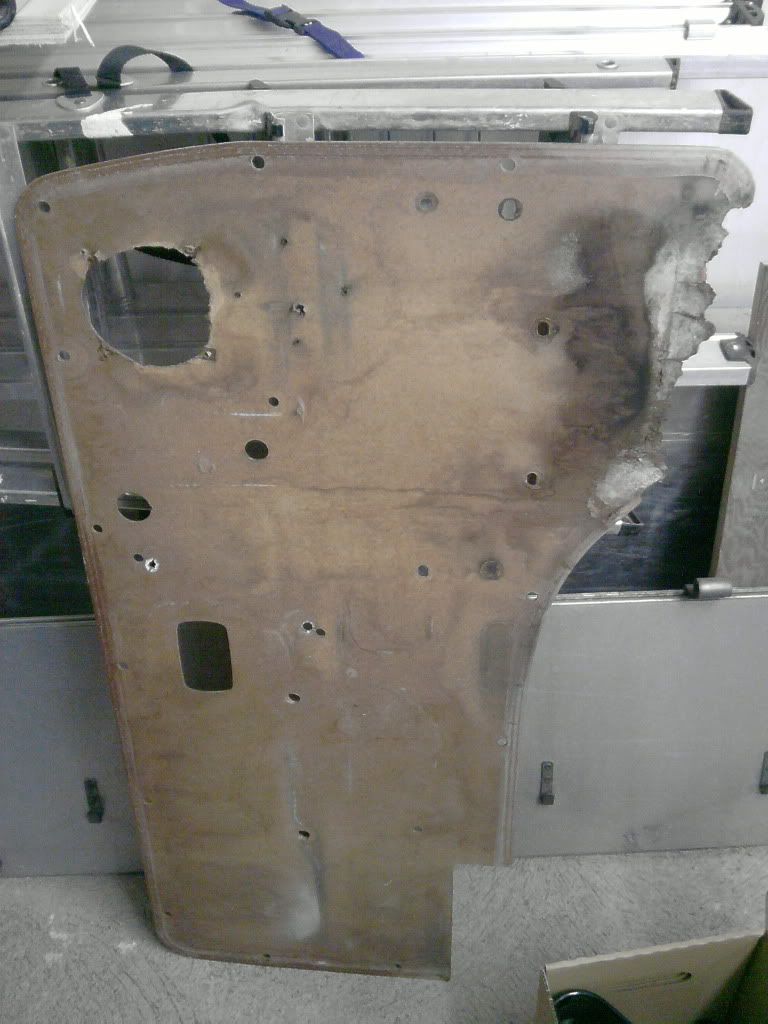 Then had a shift around to make room for the new arrival ;) 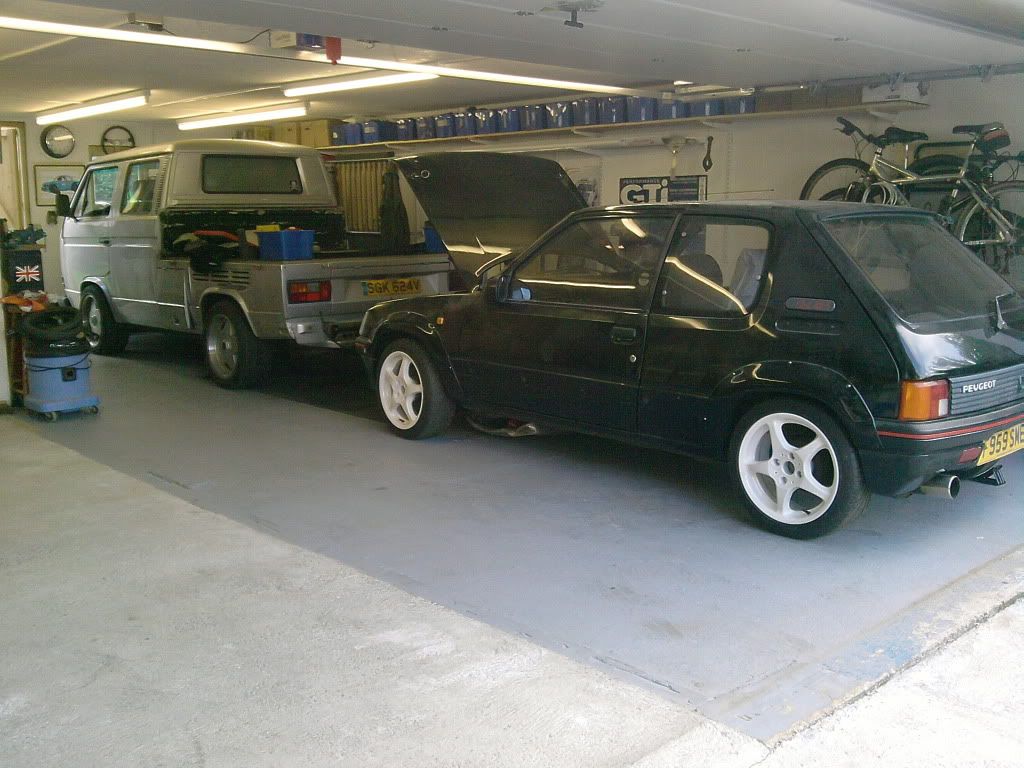 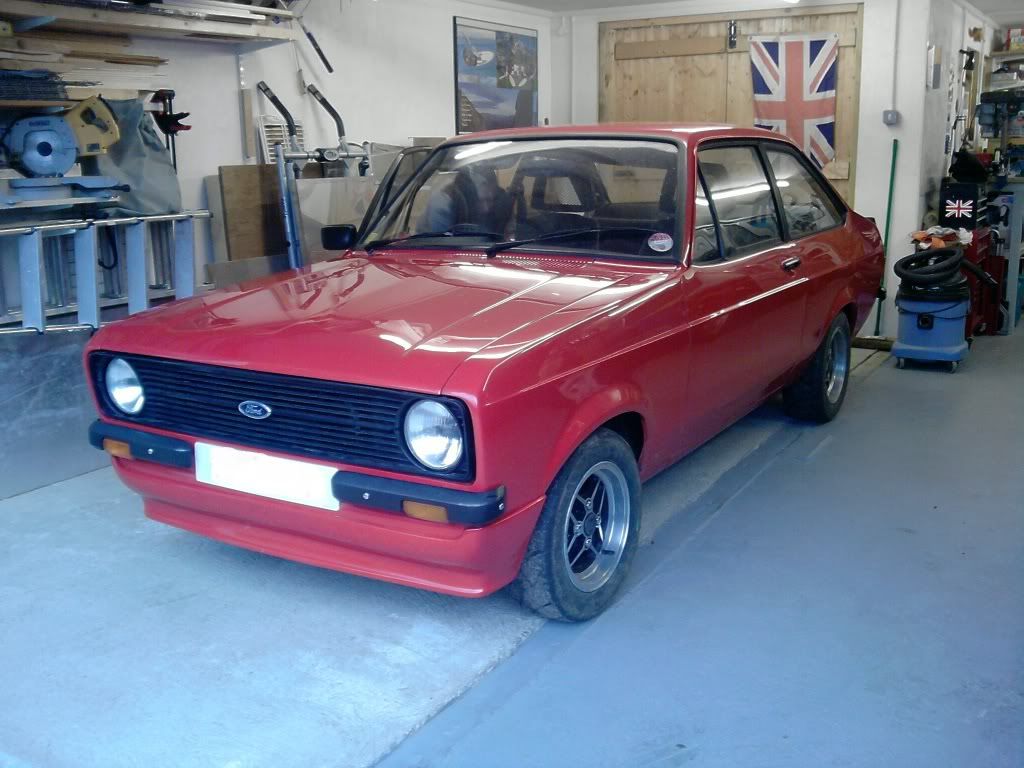 More to follow ;) 23 Jan 2011 So I've been thinking about the interior a lot and what I want to do with it so thought I'd make a start..... No I haven't done any more to the outside but I don't like to work in a logical order ::) First thing was to take the rear seat frame out. 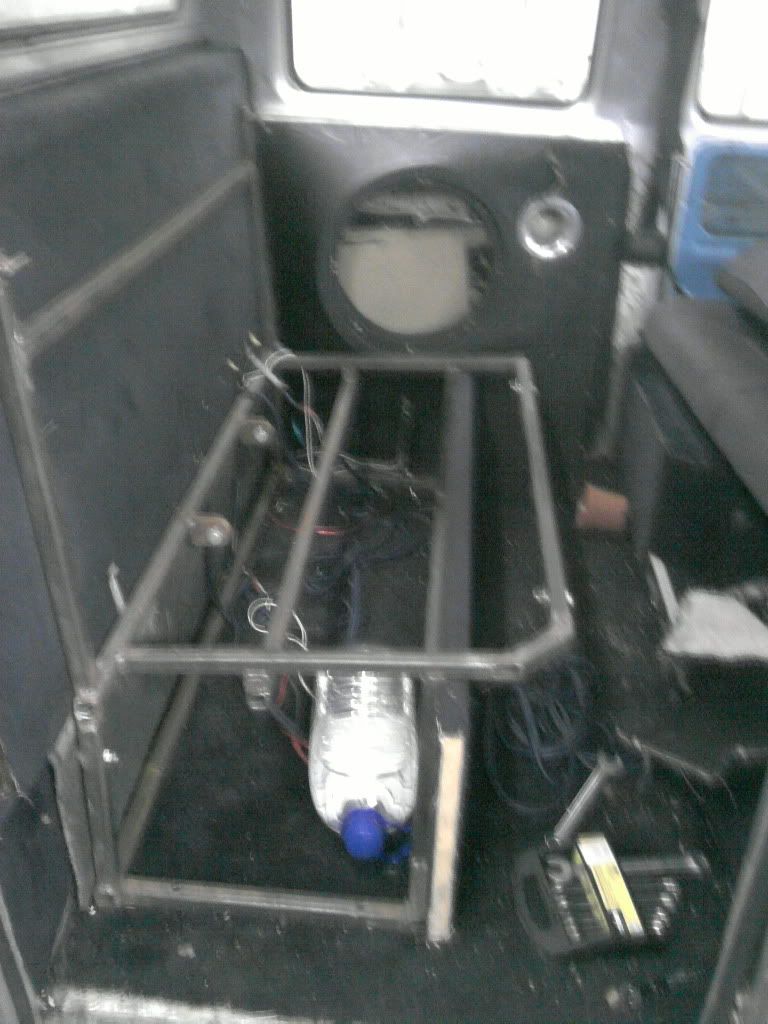 It was bolted through the floor, which means the side with the door is easy but the other side, on your own isn't ;) RR ingenuity :) 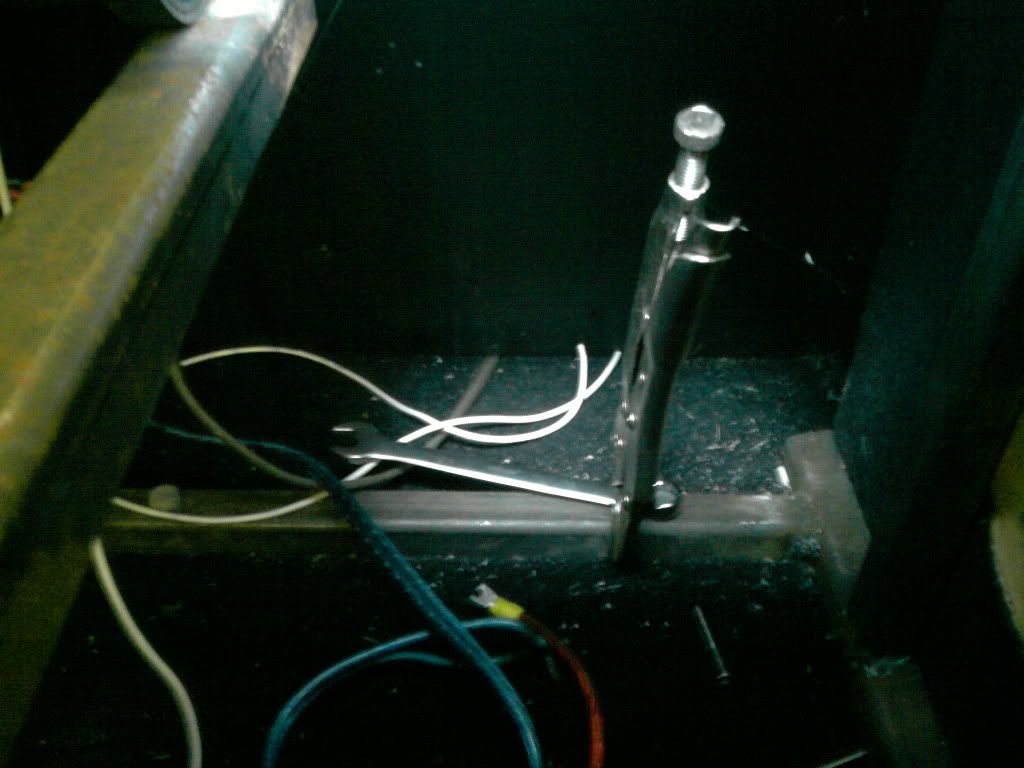 Remember this? Well it was glued, screwed and masticced in, what a PITA to get out ::) But out it came, carpet and wooden floor up and it doesn't look too bad ;) 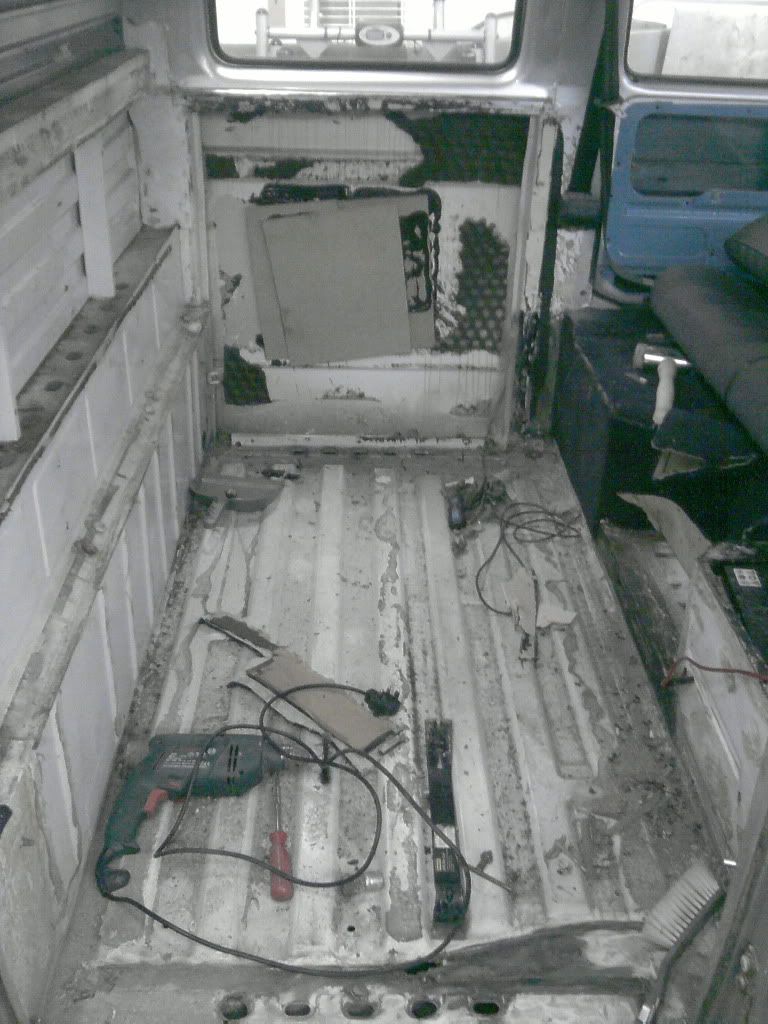 Bit of wire brushing bought this out, but overall I'm pretty pleased with the condition of it :) 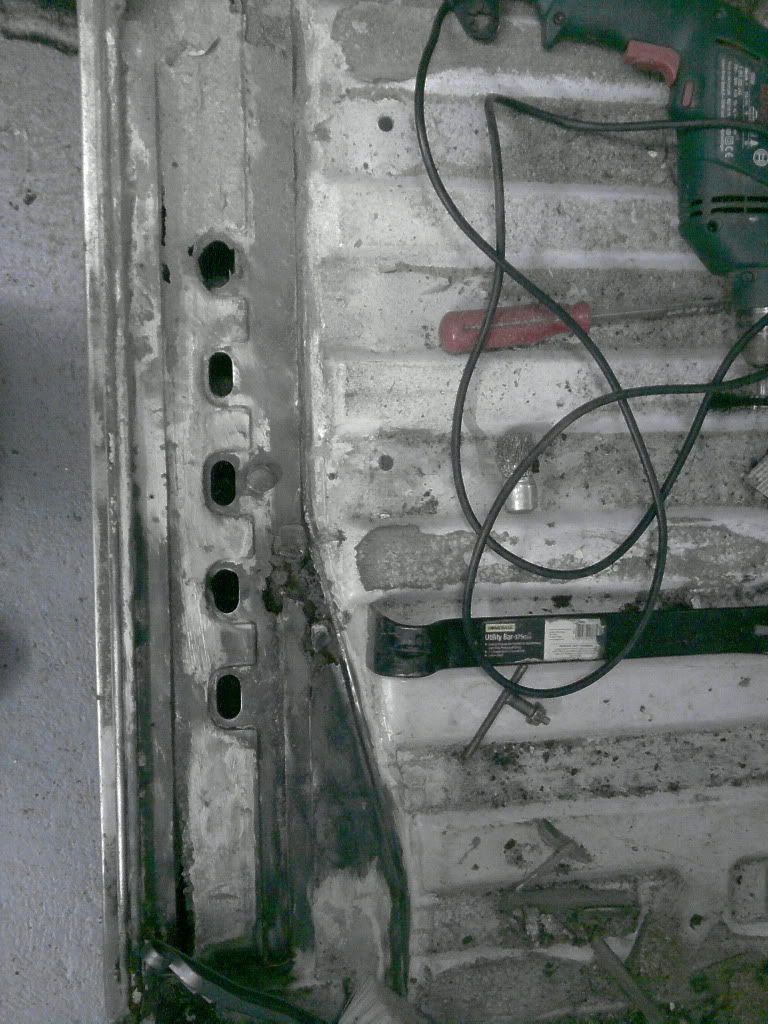  Couple more weeks till I'm home again ::) but more to follow then. 24 Jan 2011 So, managed to get a bit more stripping done. Now all the carpets are out, and most of the dashboard plastics are off as well. Need a new fuse box cover and some repairs to the steering cowling, but I'm thinking of getting them flocked so some superglue/araldite should sort that out. 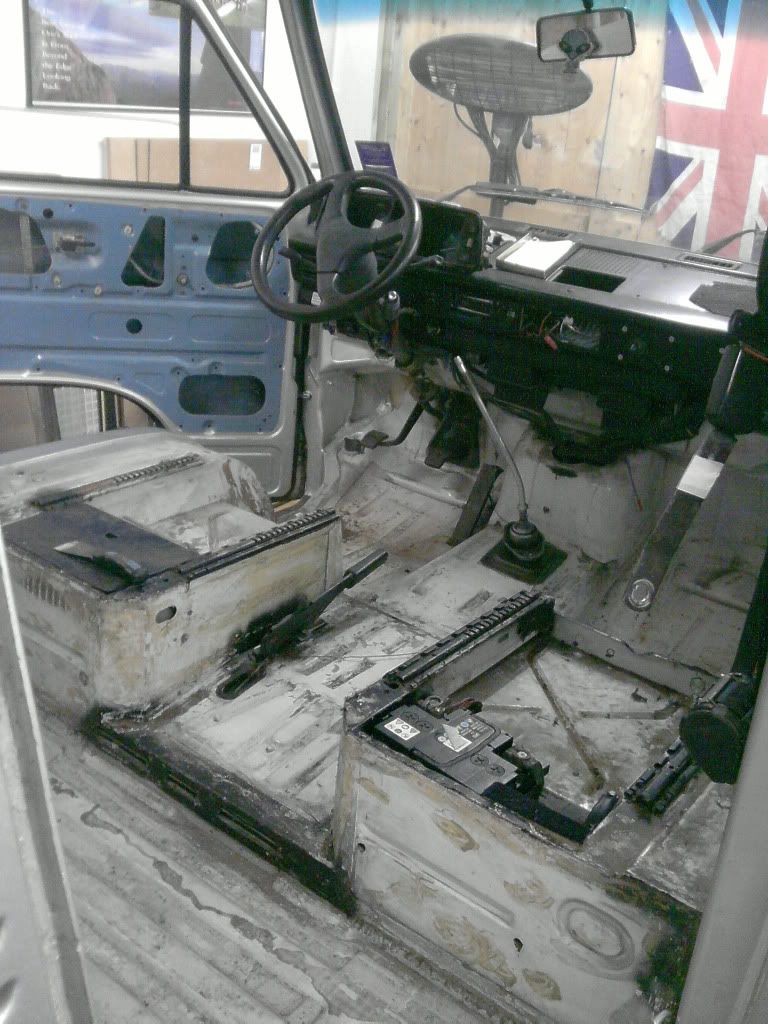 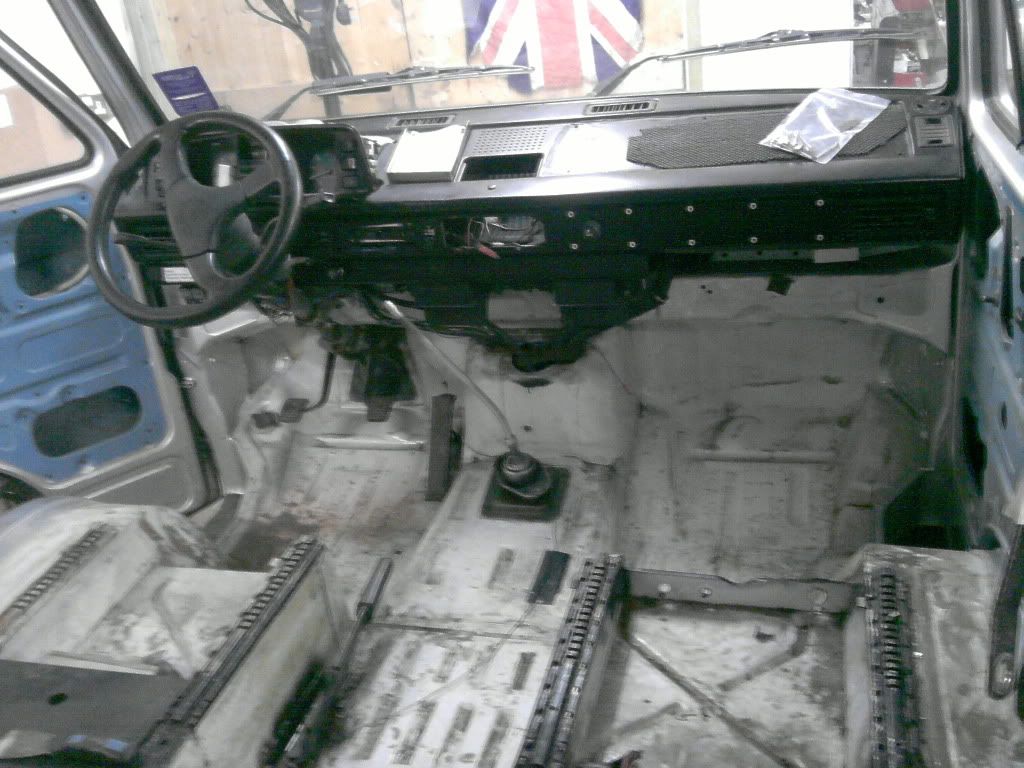 Dashboard is in a right state, holes, dents, rivnuts, you name it! Still, that needs to come out but not right now! Wanted to try the Subaru seats in there to see if they'd fit, and with a bit of jiggery pokery I reckon they will. So, sit one on the drivers side, with the small piece of moulded carpet for the footwel.... ;) 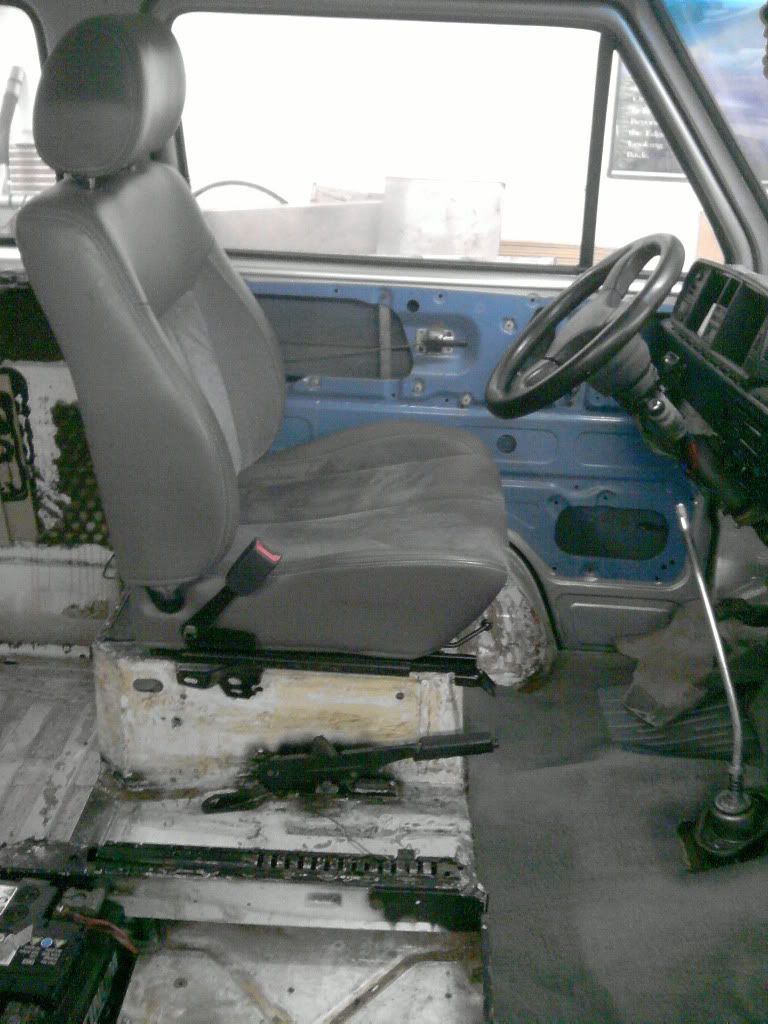 Mojo booster :D 3 more weeks til I'm home again though ::) 22 Feb 2011 So, I set to the van with various methods of rust removal... The screwdriver!  And the angle grinder with abrasive pad! 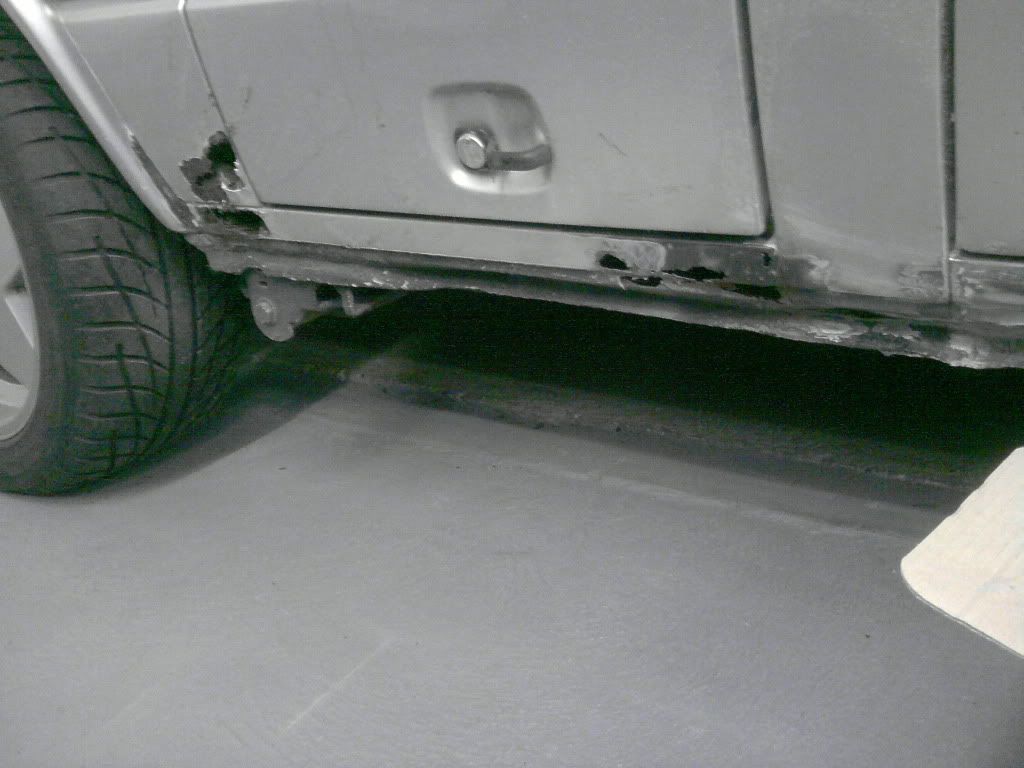 Its all a bit scary! Then I got sick of breathing in dust so locked the garage up and took the Escort down to the 8 Ball opening night in the lashing rain! I'll get back in there next weekend :( 02 June 2011 My 205 takes up most of my tinkering time, so, sick of it I evicted it into the rain (behind my Scooby donor) Onwards...... 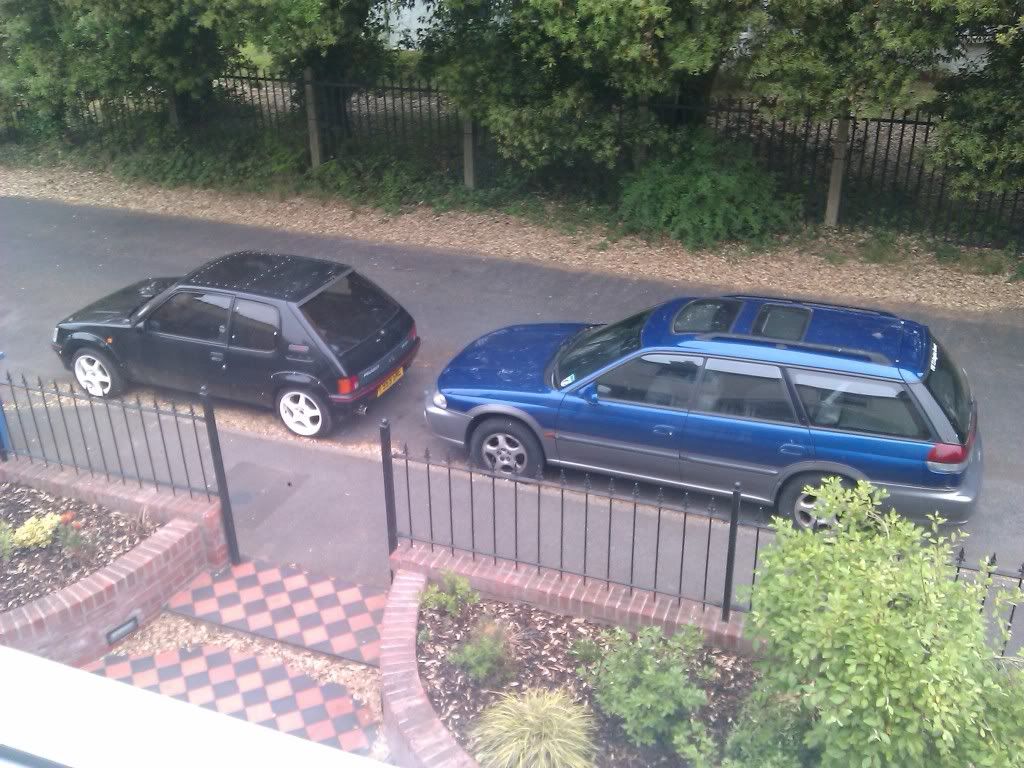 So, remember this? I thought it didn't look too bad..... Oh dear, it would appear that I was wrong ::) 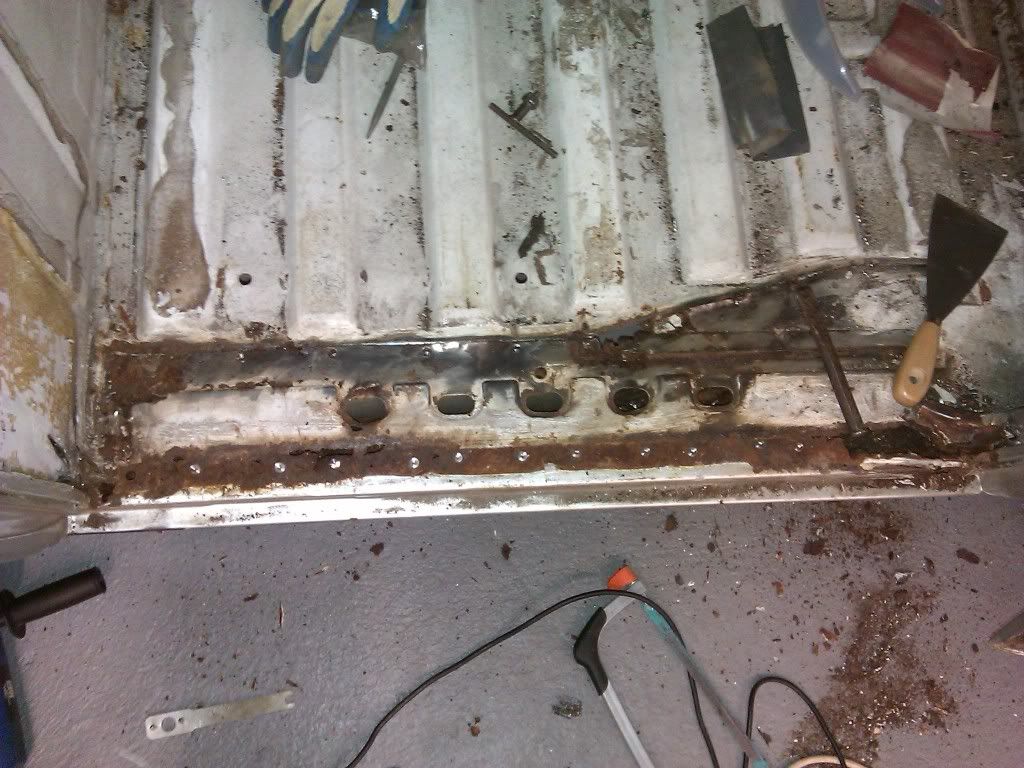 First off, I got a spot weld drill and started taking the floor out, Underneath, well its a bit rustier than I thought! The piece above the jacking point looks like it was repaired, and I use the term loosely, with stainless steel, held in with a couple of spot welds and a lot of mastic ::) It's completely rusted out the chassis rail and the bottom of the B pillar. Damn und blast as the Germans would say! Pics 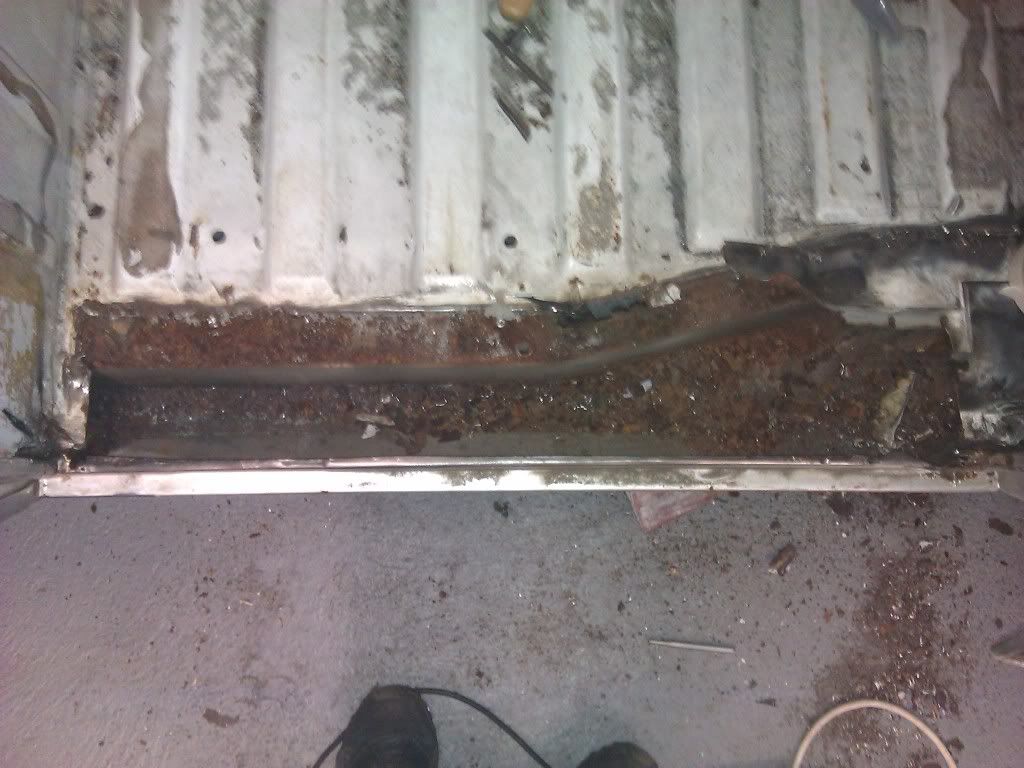 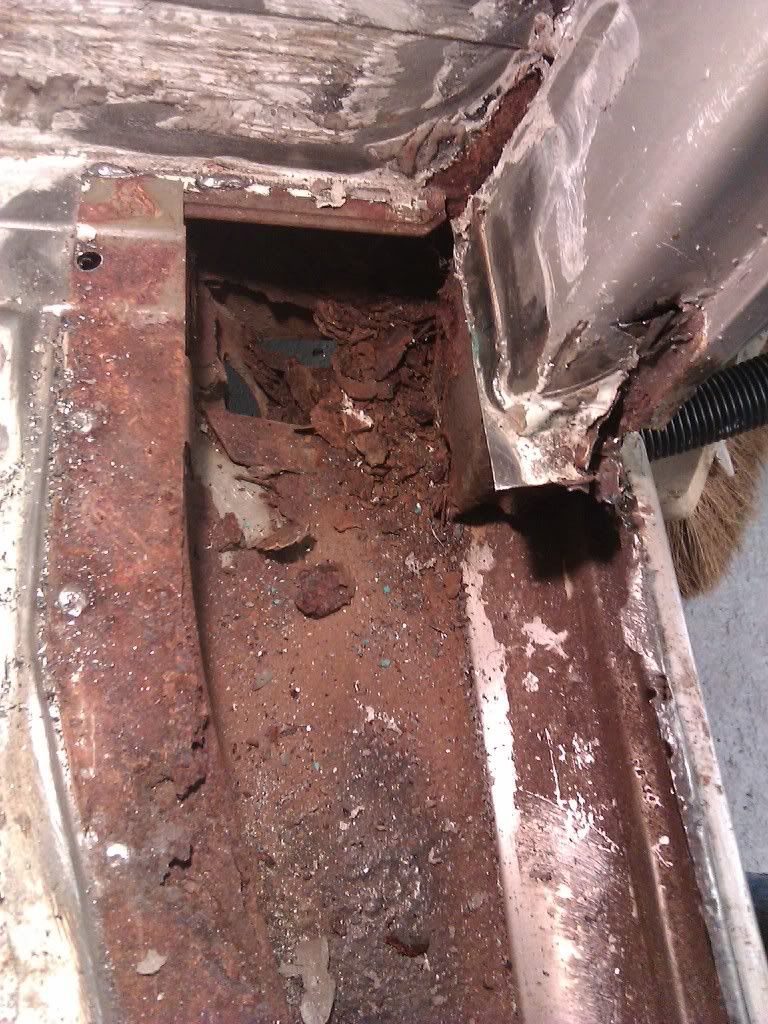 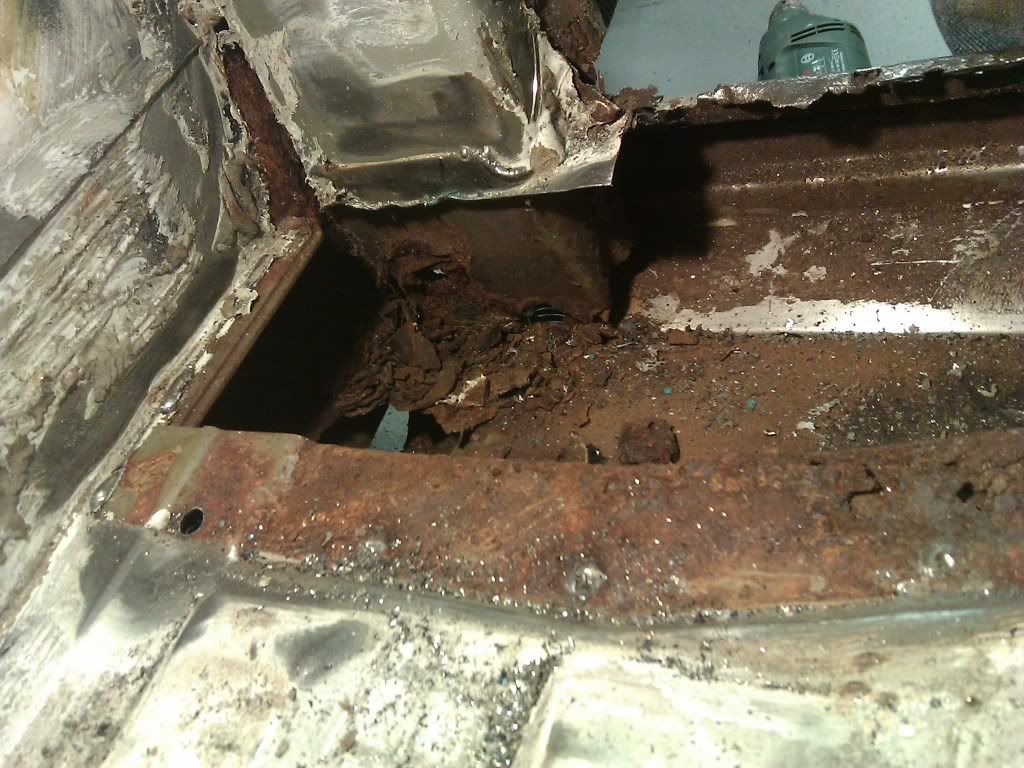 I've done a bit more digging, mostly of filler and Mastic. Seems the sill was repaired with the same stainless steel as the back was covered on, but the garage now has a fine coating of filler dust ::) I thought I'd dig around the floor in the locker while I was at it! Big mistake :( 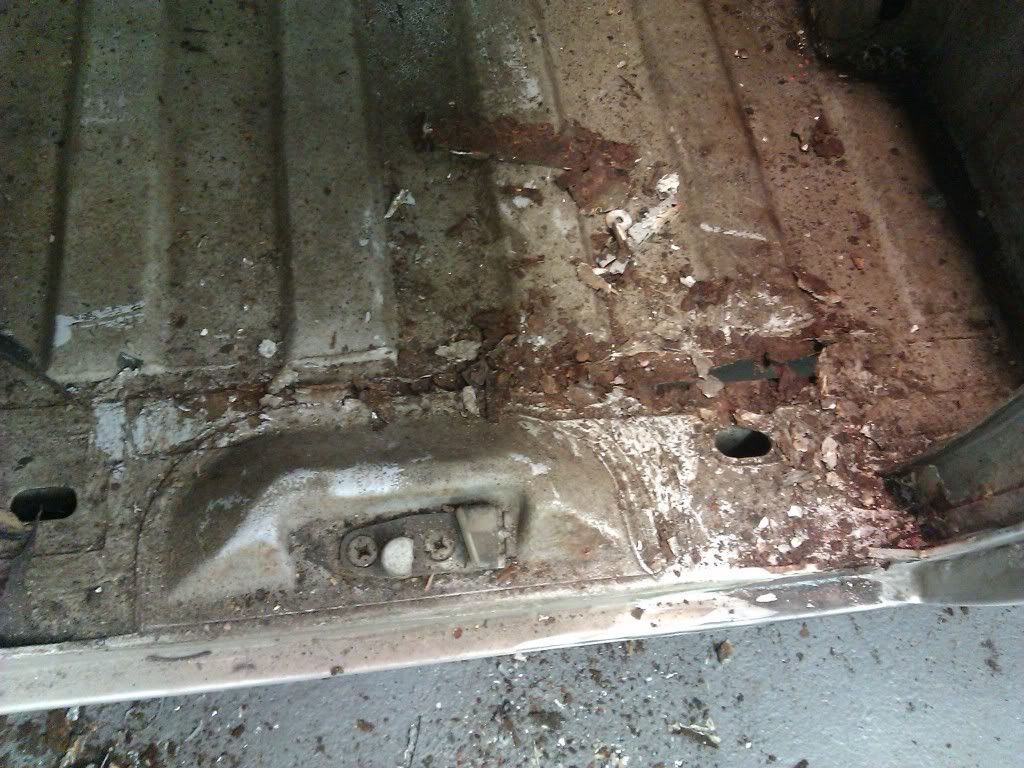 And as if that wasn't depressing enough I thought I'd take a look (read, the wire brush) at this.... 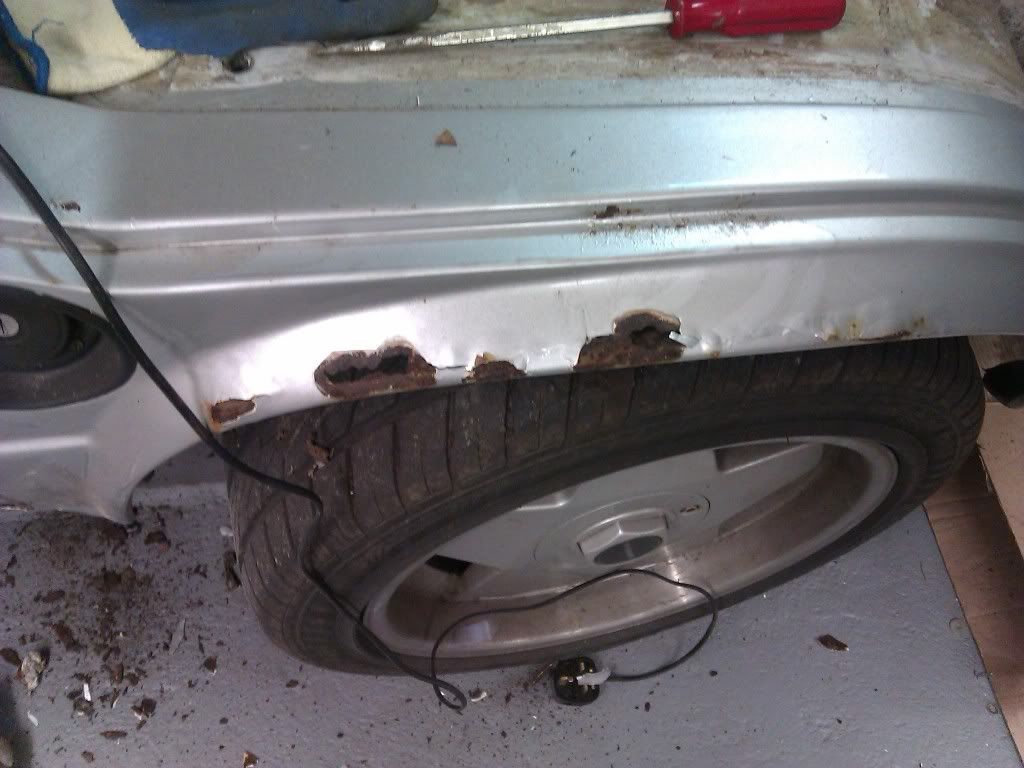 Oh dear 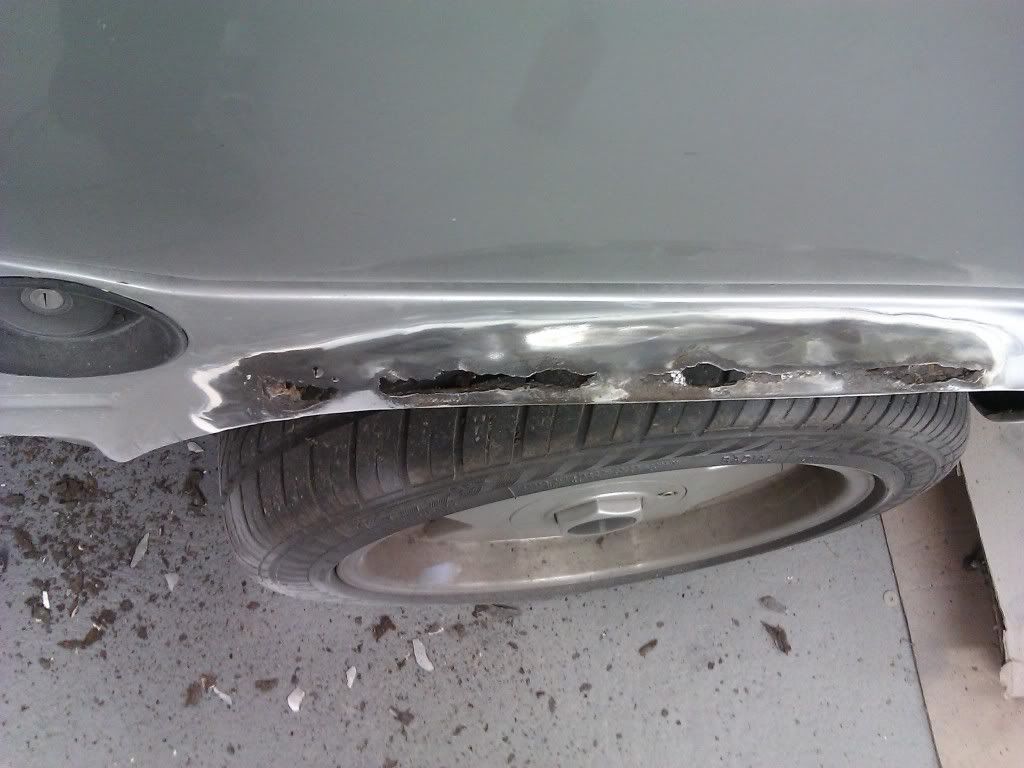 I was dreading this as they're extended by about half an inch over standard! No idea how, but standard ones aren't wide enough to cover the wheels so I'll need to repair or replace.... 27 Aug 2011 Blimey, been a while but between dropping the engine on the Escort, keeping trying to get the 205 running and life, this has taken a bit of a backseat ::) But, I want to take it to the Gathering next year so I need to get on with it. I did some more rust removal 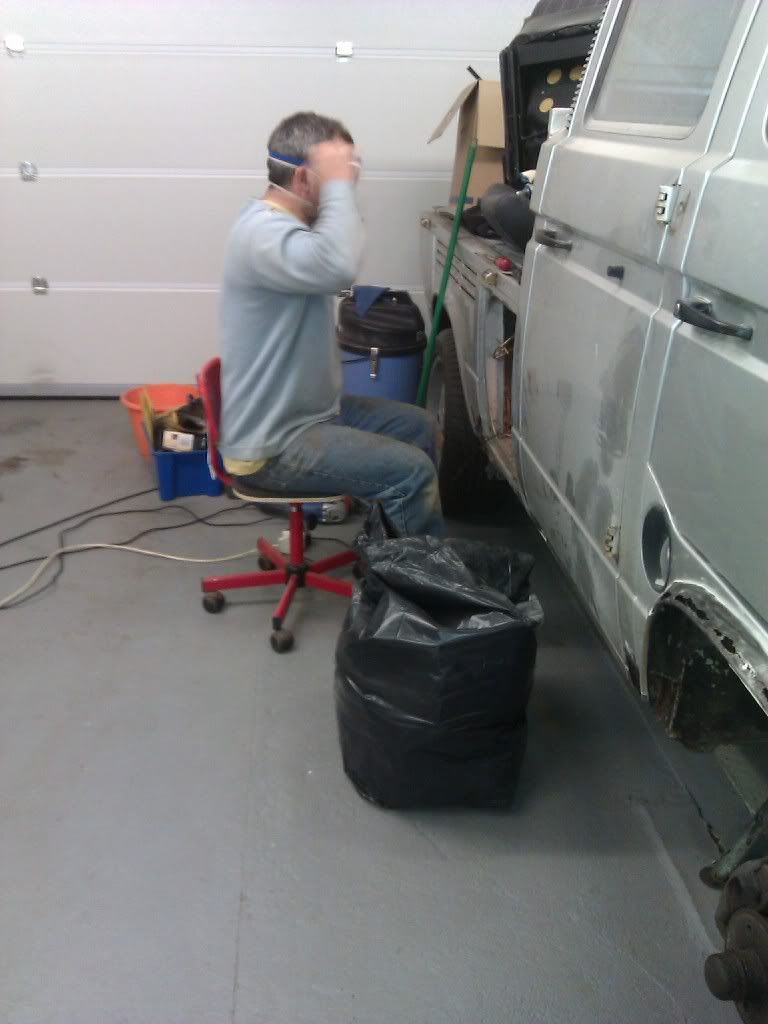 drilled out the welds on the locker door stop, 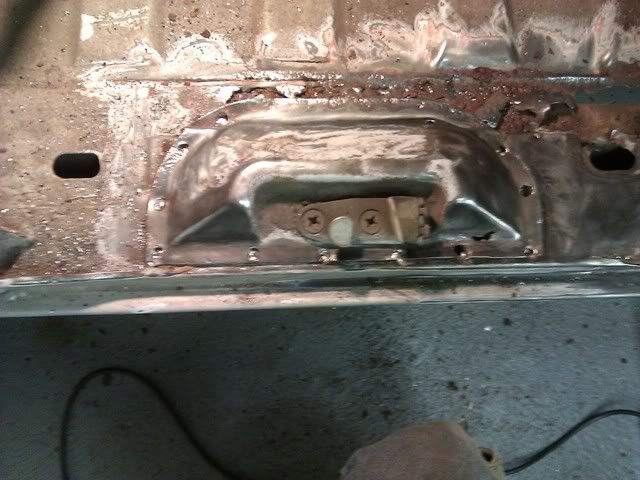 Oh dear :( 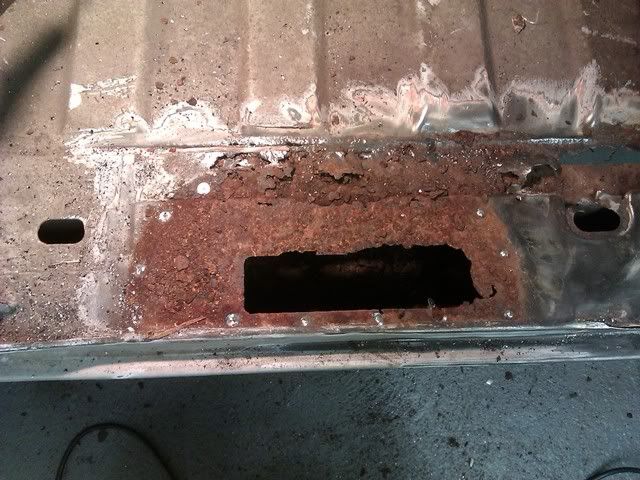 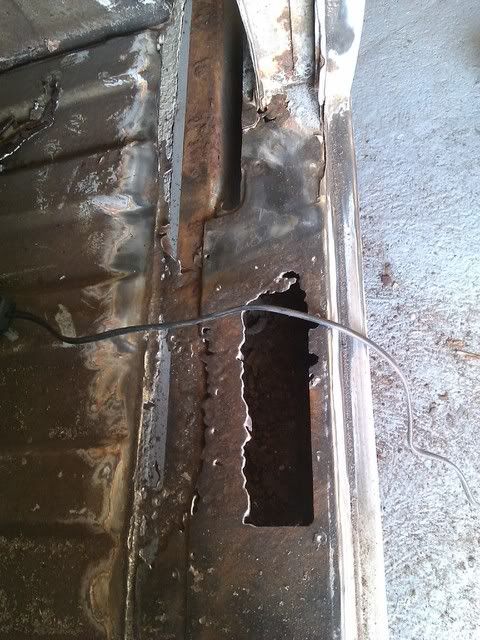 Then decided to slice a hole to connect up the holes :o  We're here now, with me looking at it, and repair panels thinking where the hell I go next! 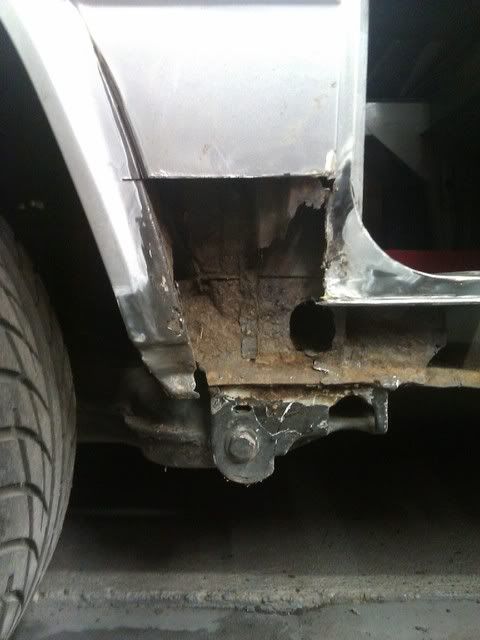 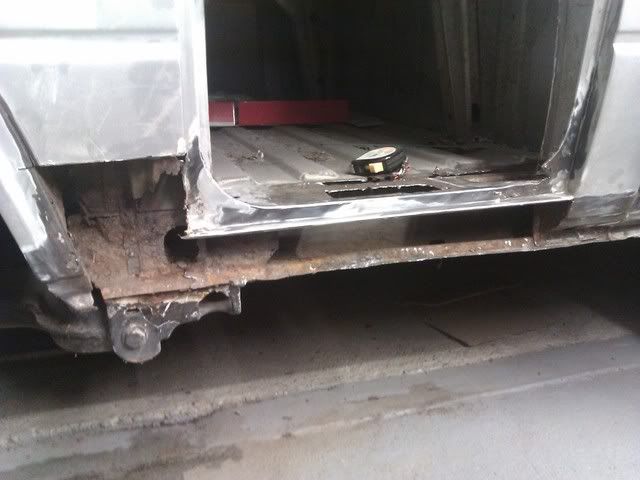 I've made a few decisions on stuff, but you'll just have to see how it pans out ;) That'll do for now. I'll do a bit more cut and paste in a minute. Enjoy. Pete ------------- Too many projects..... Not enough time! |
Replies:
Posted By: surf dude
Date Posted: 22 Nov 12 at 23:14
|
Right, I'll skip some stuff now, and bring it up to date. Stripped the Subaru for its engine, seats and stereo. 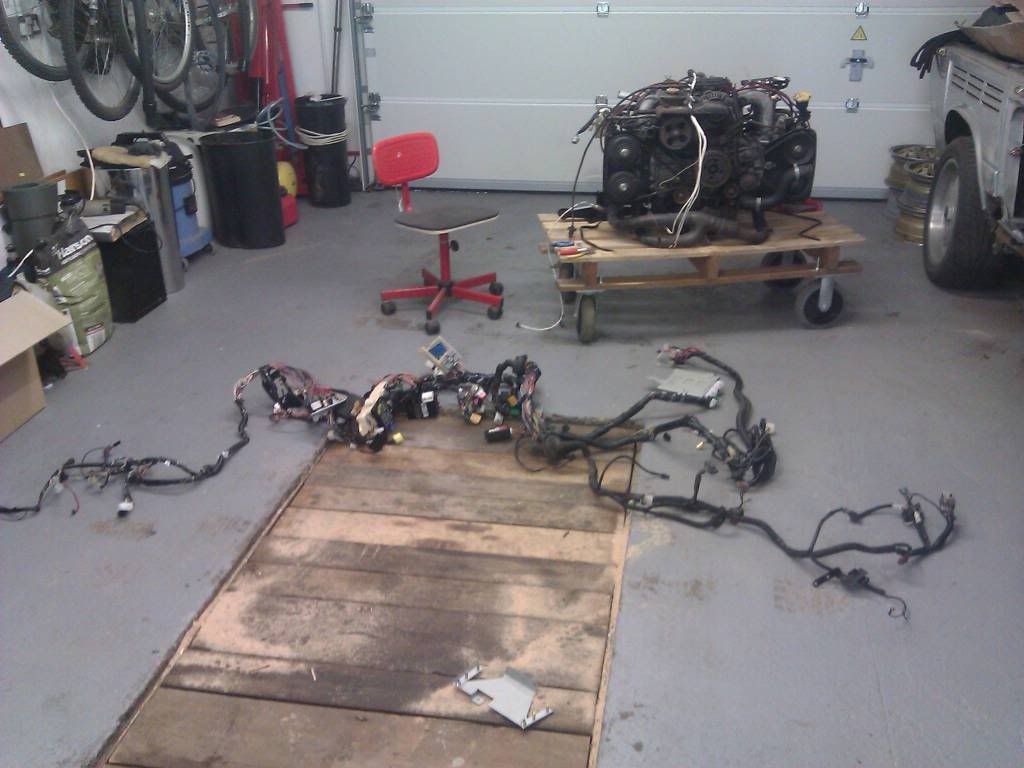 So managed to do a few bits and pieces after sorting the 205 (well, actually, I'm sharing time between the 2 ::) I just change when I've had enough of one or the other ;) ) First of all I bit the bullet and chopped the wheelarch out :o 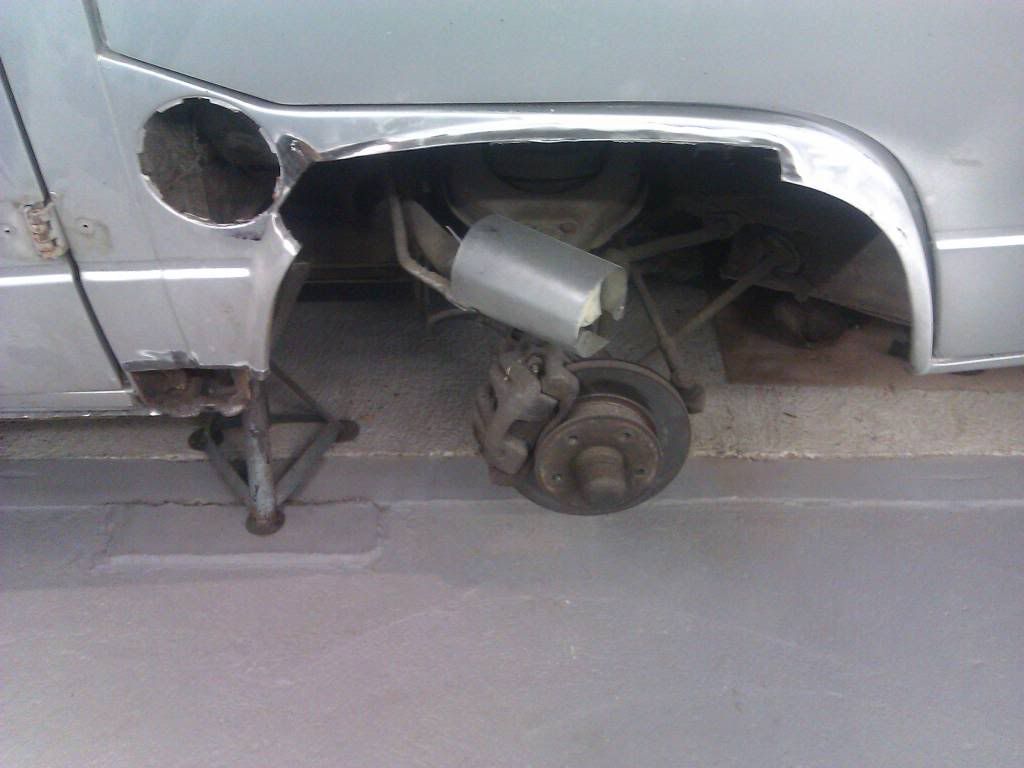 I have a spare, which I've cleaned up. It's still in need of a tweak, and the old arch was rolled, so I'm contemplating whether to try and do this before or after fitting. 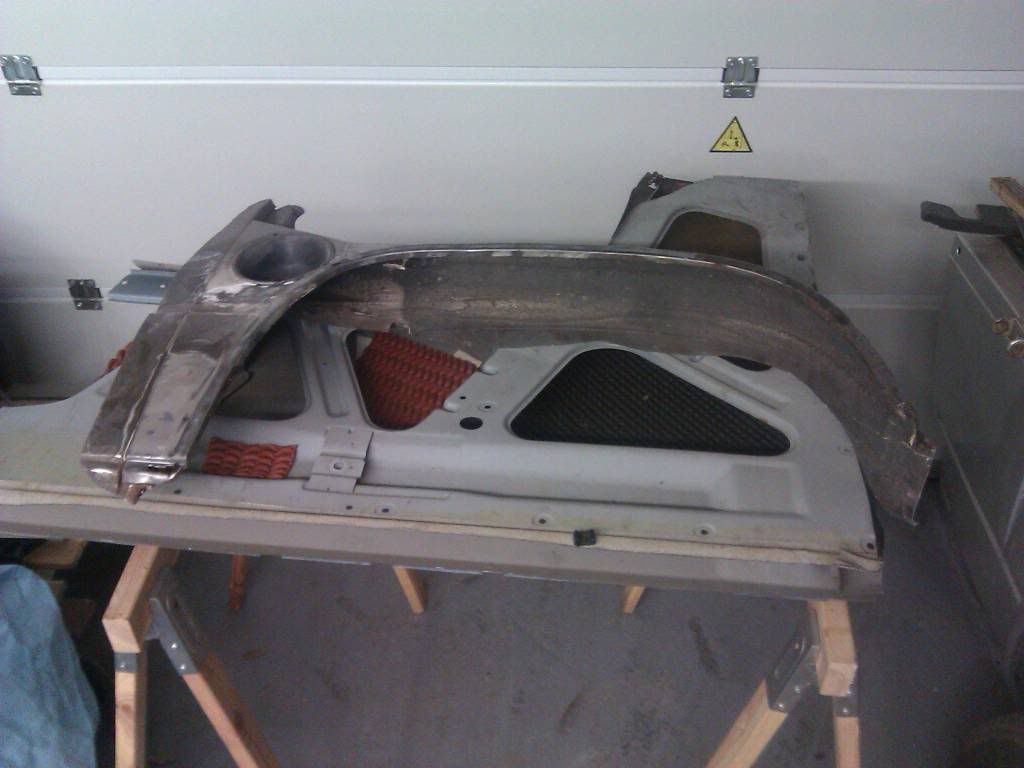 I've also been looking at the rest of the side and I have come to the conclusion that I may have to chop some more bits out :( The rust is pretty bad and I figure why patch when I can replace? 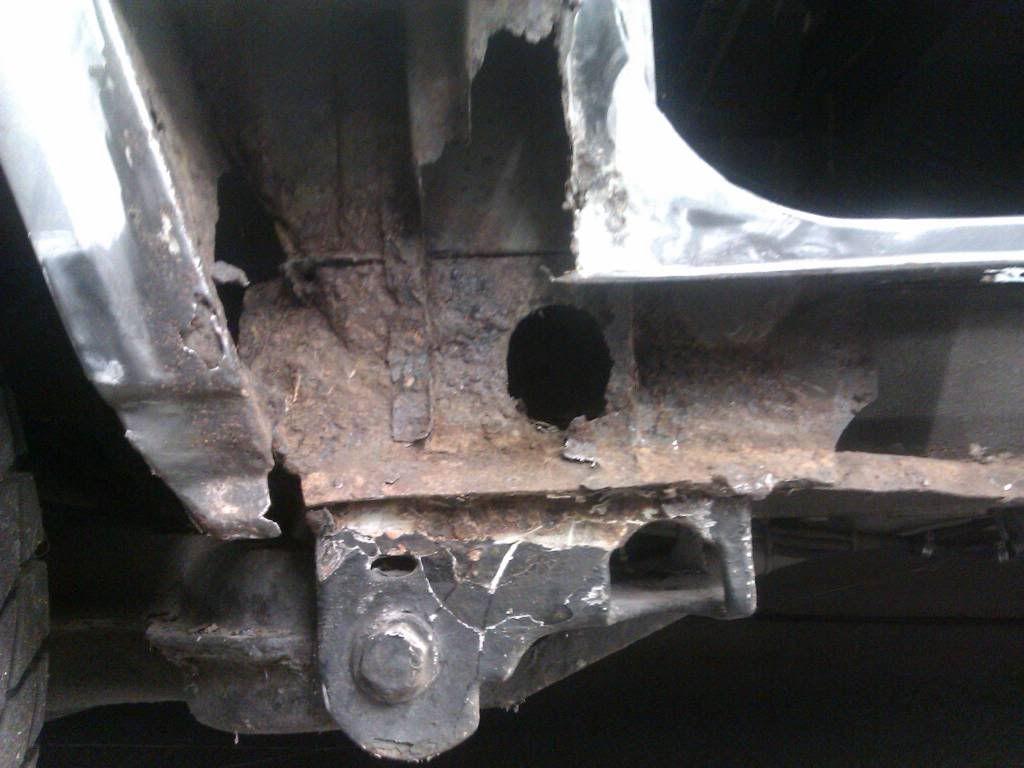 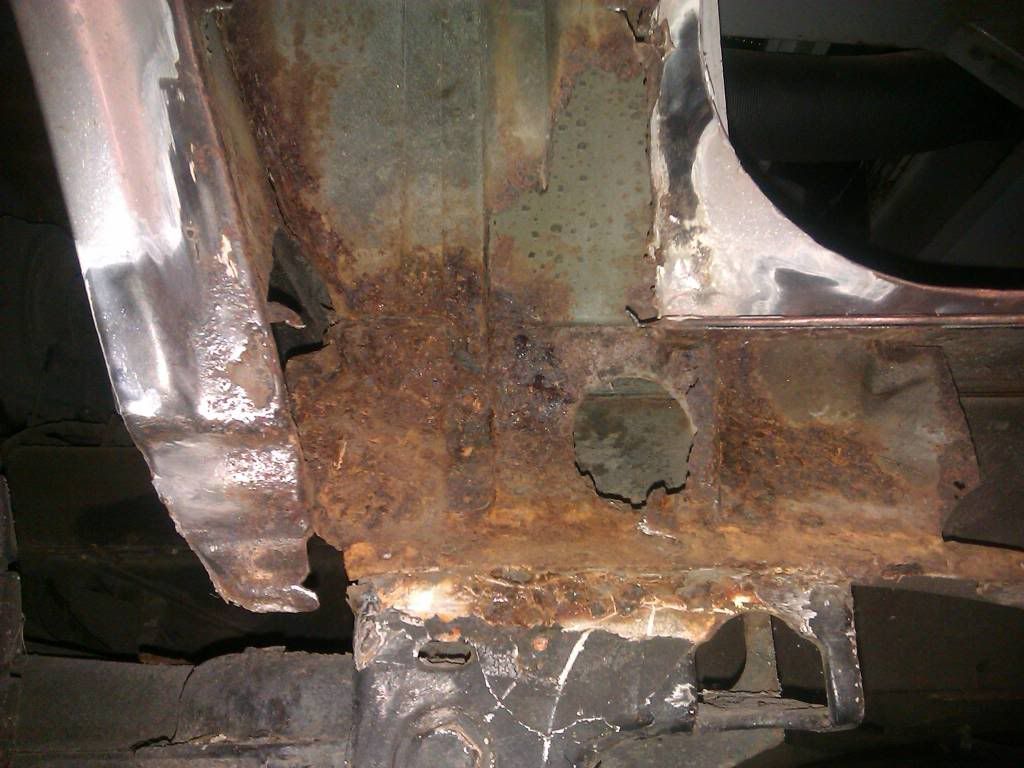 I dropped the door, as it was just getting in the way, and had a dig round the chassis leg 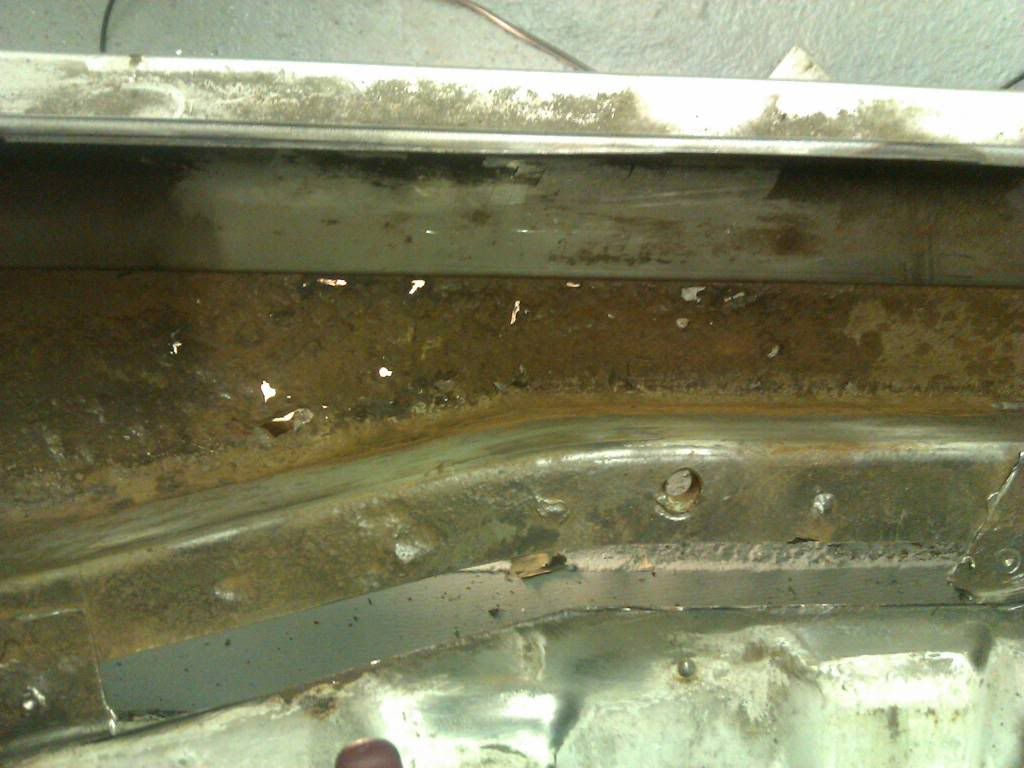 Yep, there are a few holes there ::) Its a shame as when I had the van before it was all like this underneath, 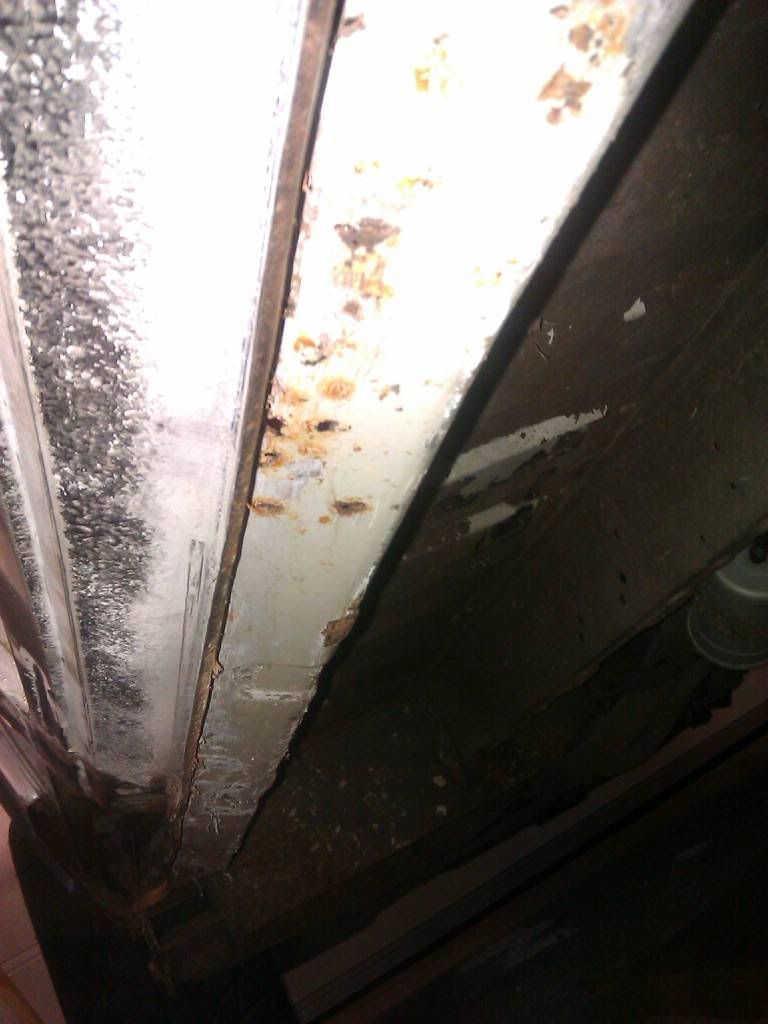 but where its been painted with that horrible black crap (no prep, just plastered on) I think it's retained the water and rusted from the inside! :( 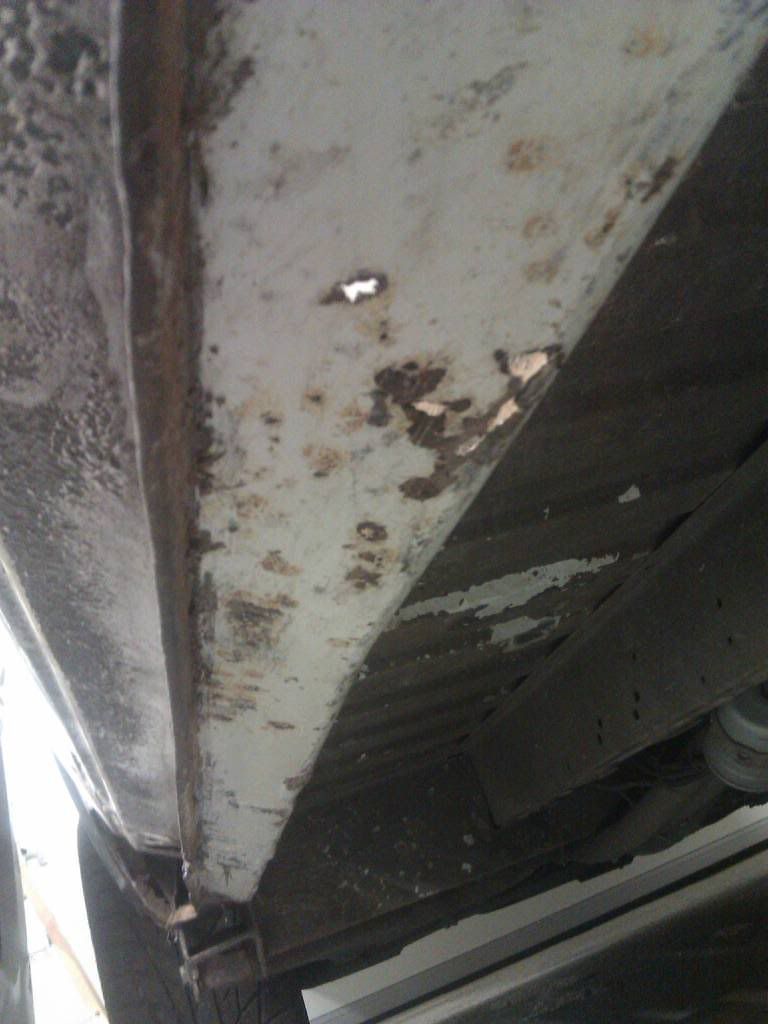 22 Nov 11 I have the week off, so after having a bit of a clear up, I started inearnest on the van! First thing though was to build a metal folder using Tony BMW's plans over on the "making panels" thread! 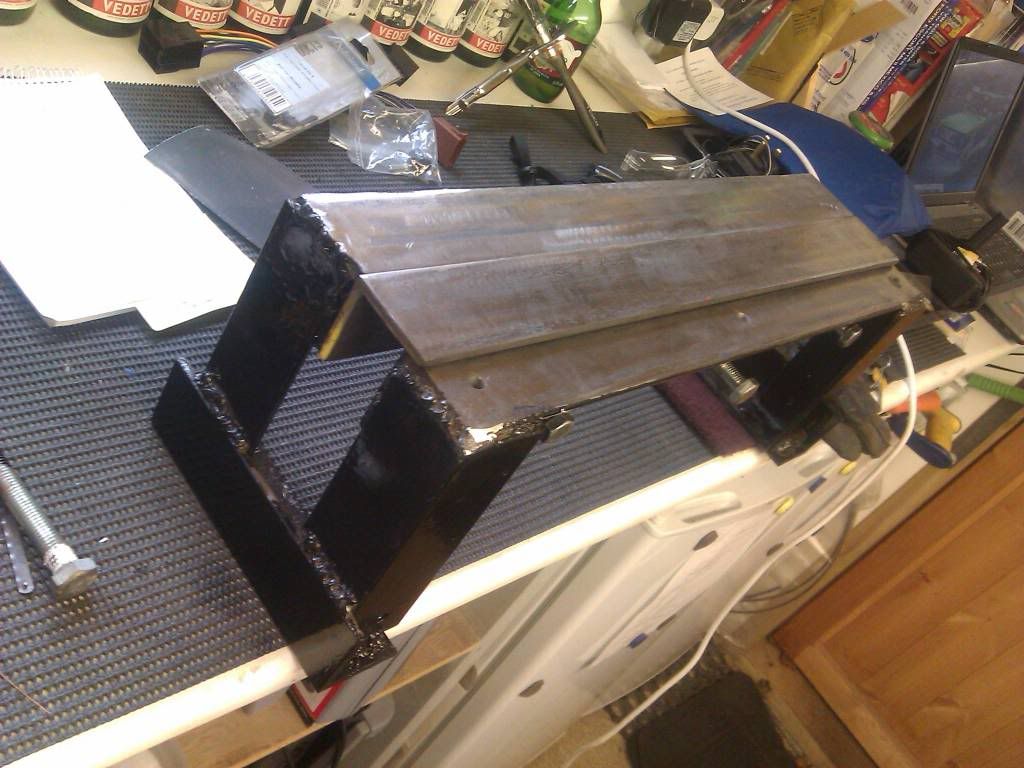 Had a few issues but I'm well happy with the result, and I got the chance to warm up the welder without worrying too much about the welding ;) Not pretty but more than capable of doing the job :) I've been running the grinder round the bottom of the B post, not to mention spending a lot of time staring at it! I looked all over the net to see what the jacking point looks like, but no joy. In the end I swallowed (Gulped) and bought a new chassis rail. Now this might seem a bit excessive, but I spent so long prevaricating about it that in the end I just thought sod it! Here it is 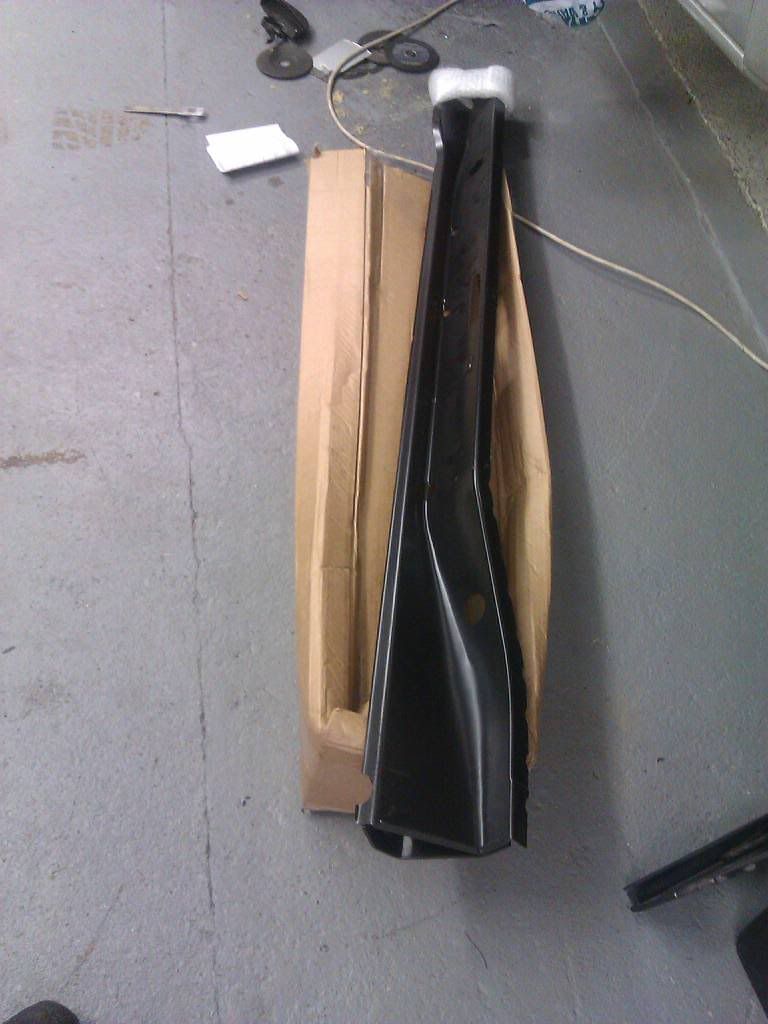 I just need to have a look at the back end as I'm pretty sure it's nice a solid, which is good, it'll save me doing the rear suspension :o I made a decision yesterday though that I would start at the front and work my way back. I'd already chopped the rusty front wheelarch out, had a new one (which went back as it was shocking) and got hold of a chopped one. I started to get it apart to see what sort of nick it was in. 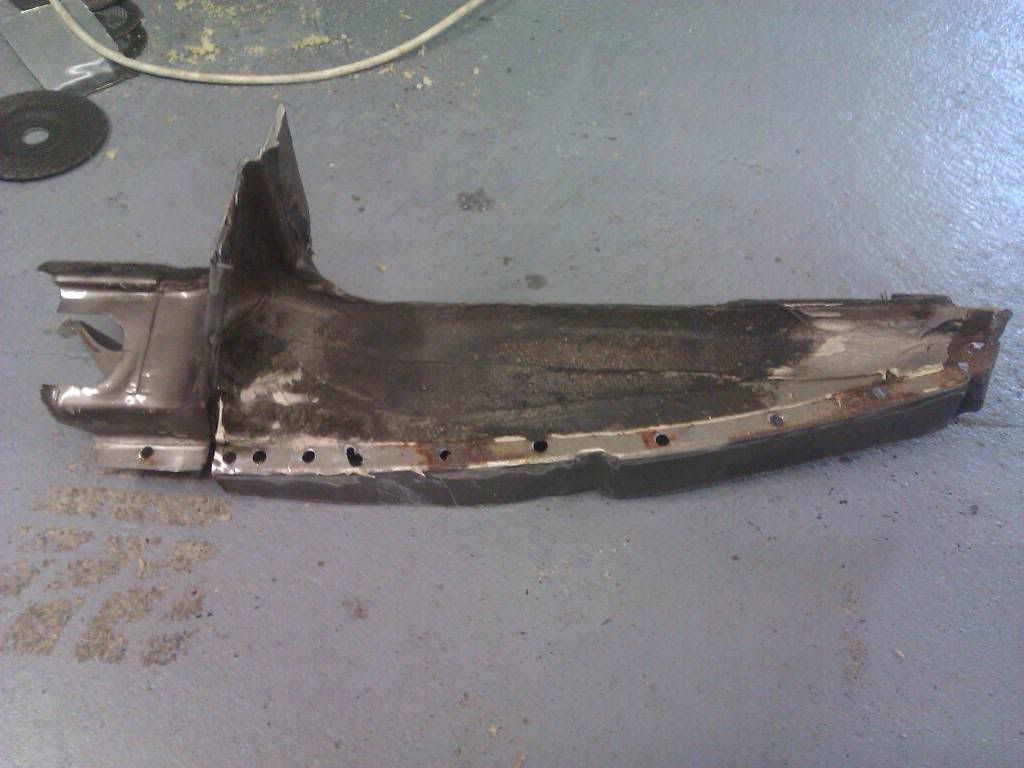 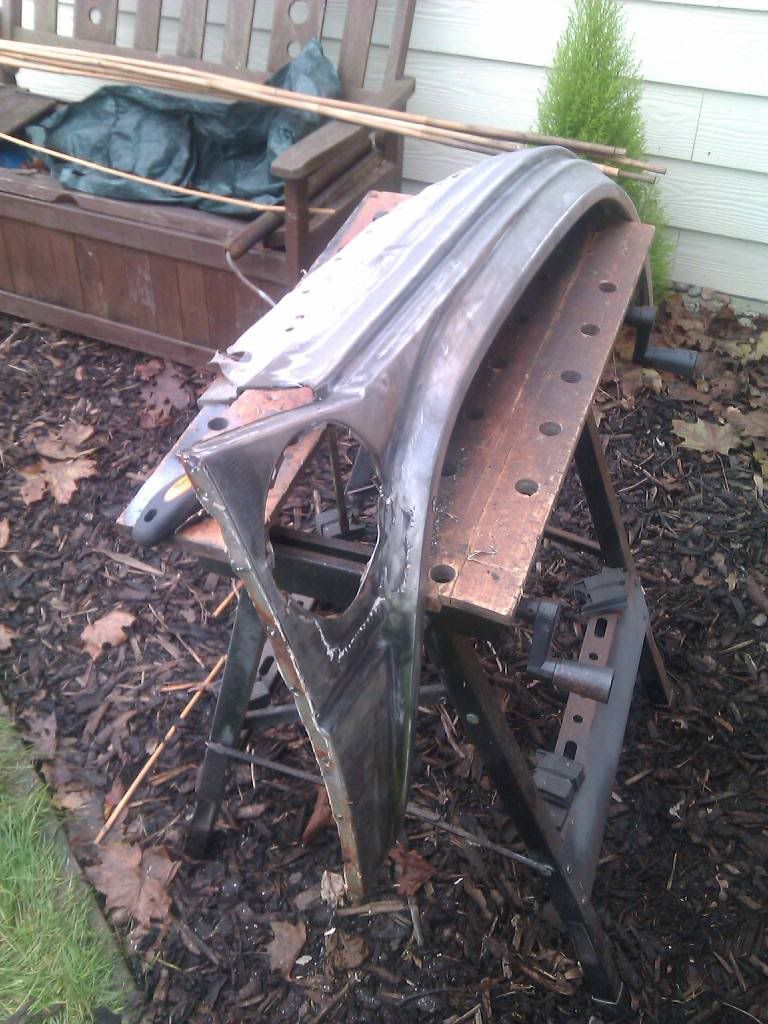 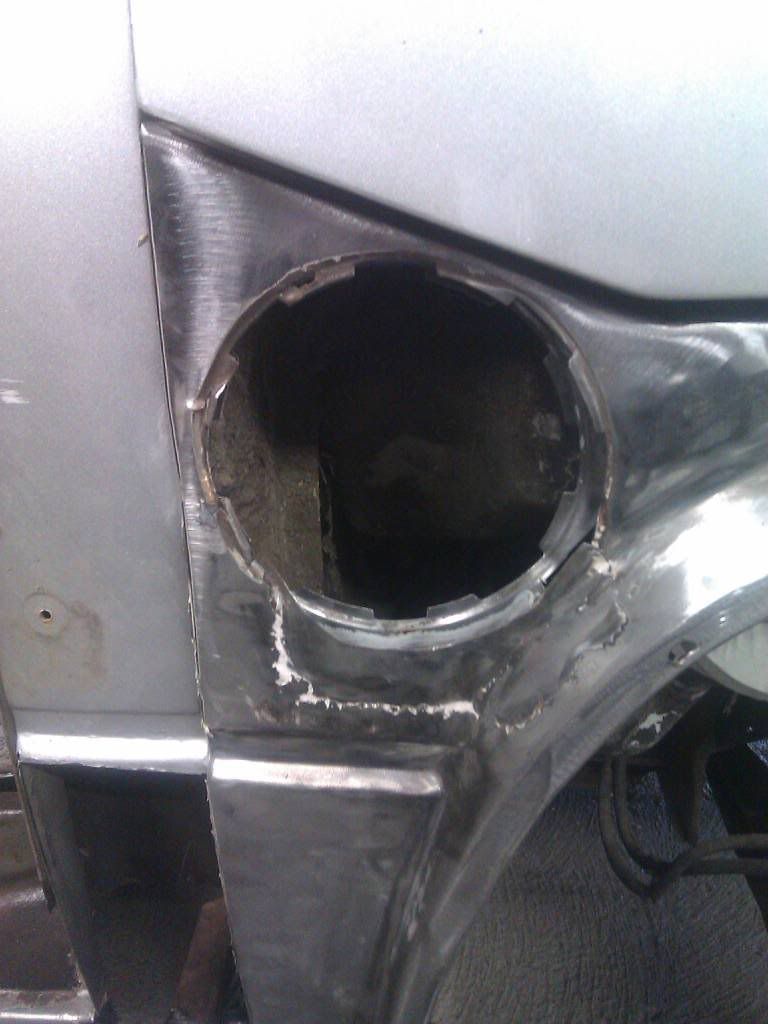 One problem with buying chops! They tend to be just as rusty as what you already have ::) Anyway, I stripped it down, gave it a tickle and decided that this was the ideal opportunity to get rid of the fuel filler (No, it won't run on air sadly :( I'll be fitting another!) Template, chopped a bit out, then did it again, fettled, welded and ground down. I'm actually pretty happy with it, I even got to use my new panel beating hammers to put in the curve! 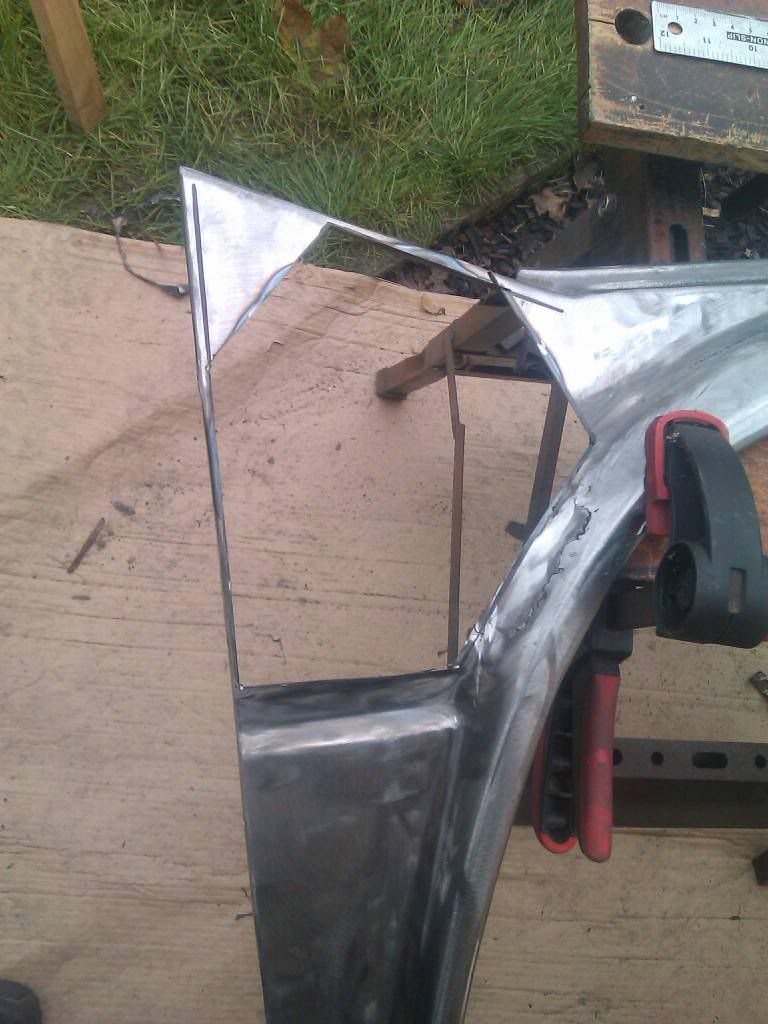 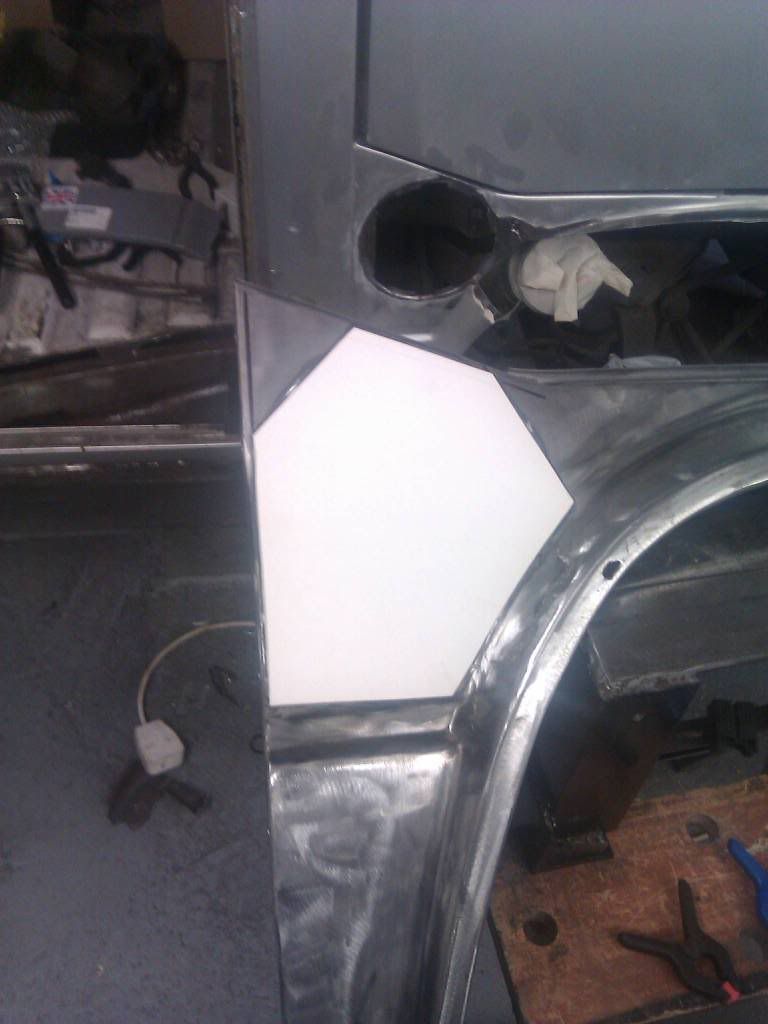 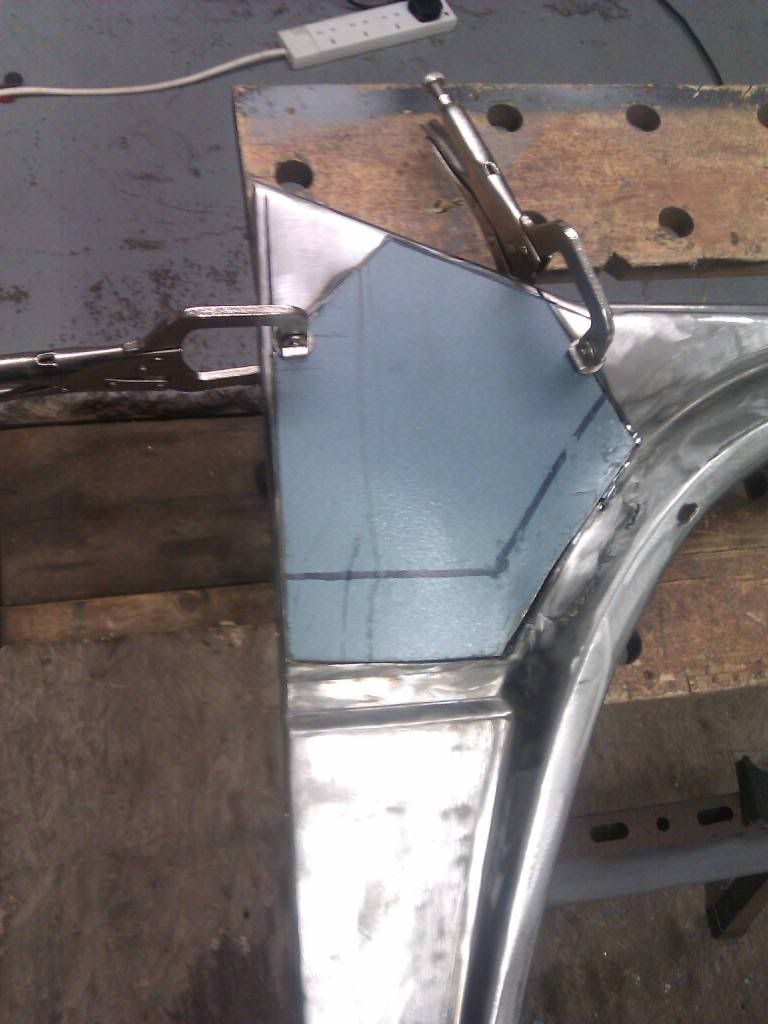 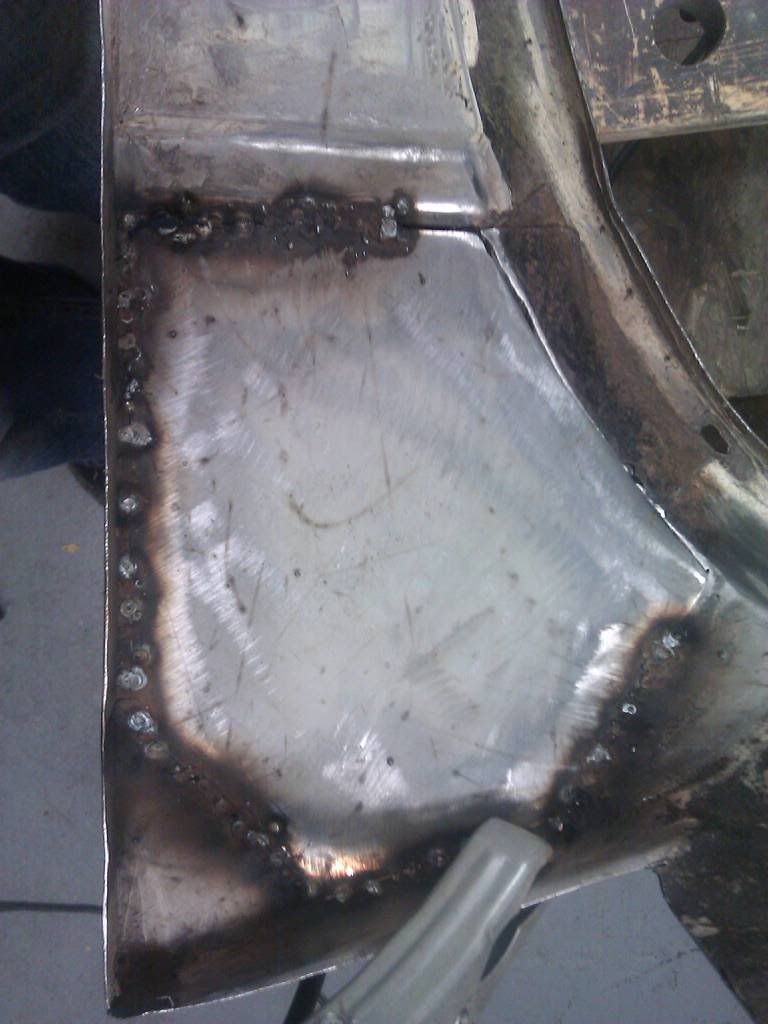 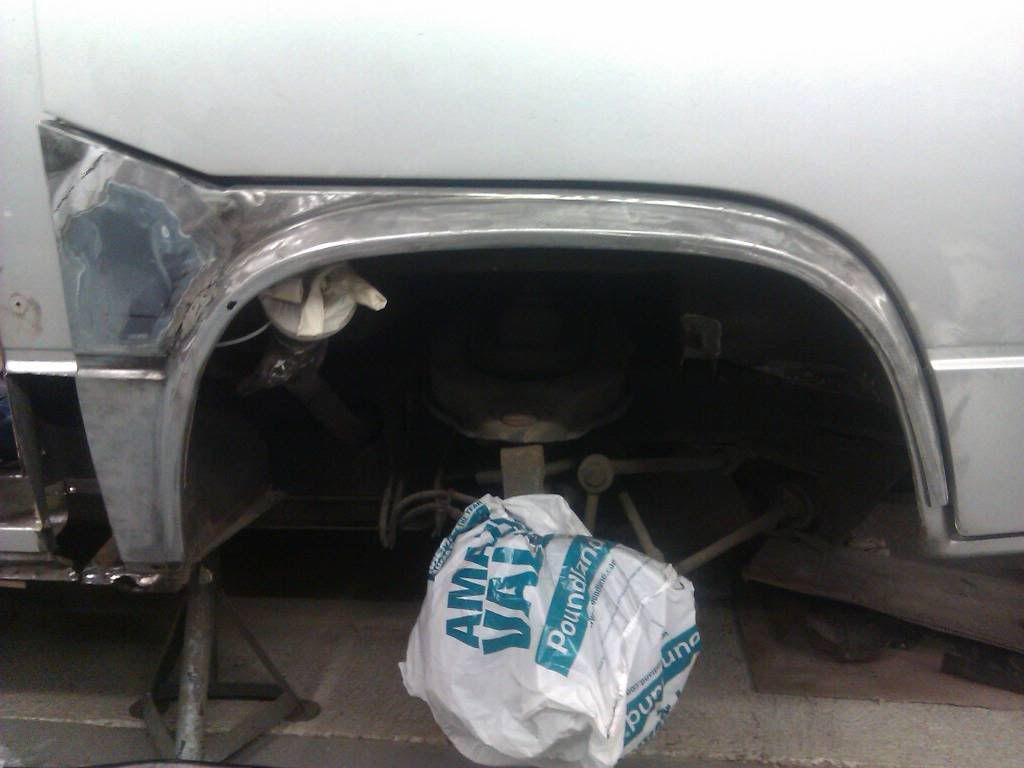 Sadly, I'm not to happy with that bit so I may chop it out and take a piece from a rear wing I have. I'll look at it tomorrow and see how it looks with a fresh set of eyes. It's not welded in yet, just sitting there. Mojo booster ;D Oh, and this arrived!! 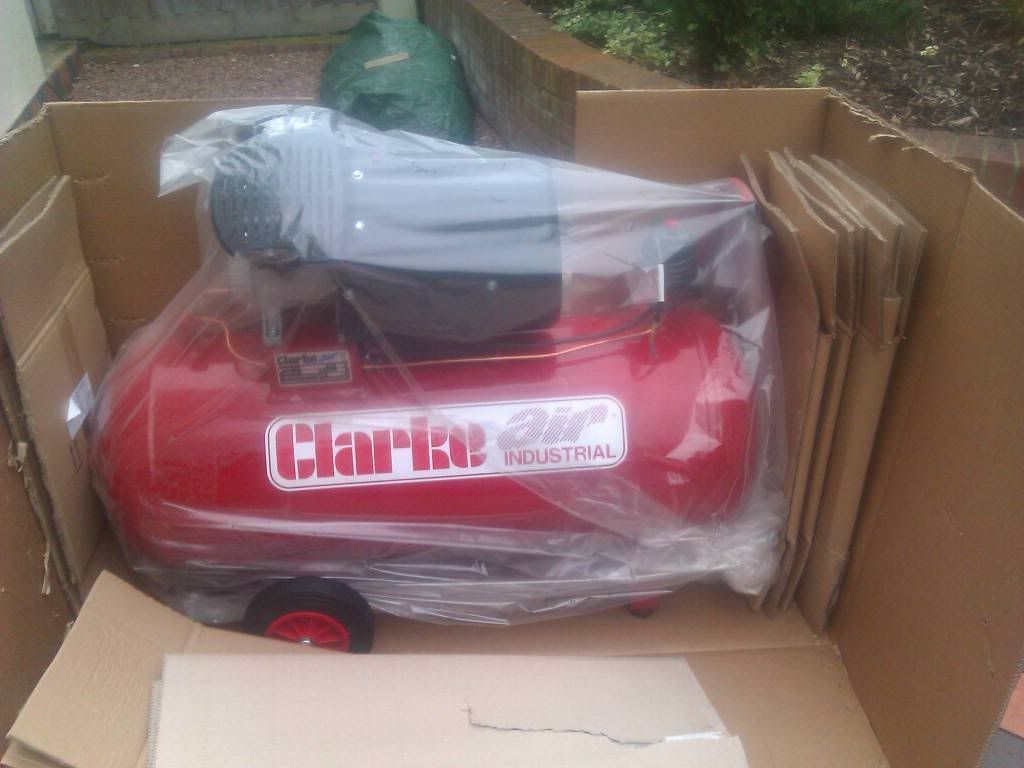 19 Dec 2011 Quite frankly, the more I look at this the more petrified I am at what I've taken on. Still, I took a large dose of "Brave" and got stuck in! I started here 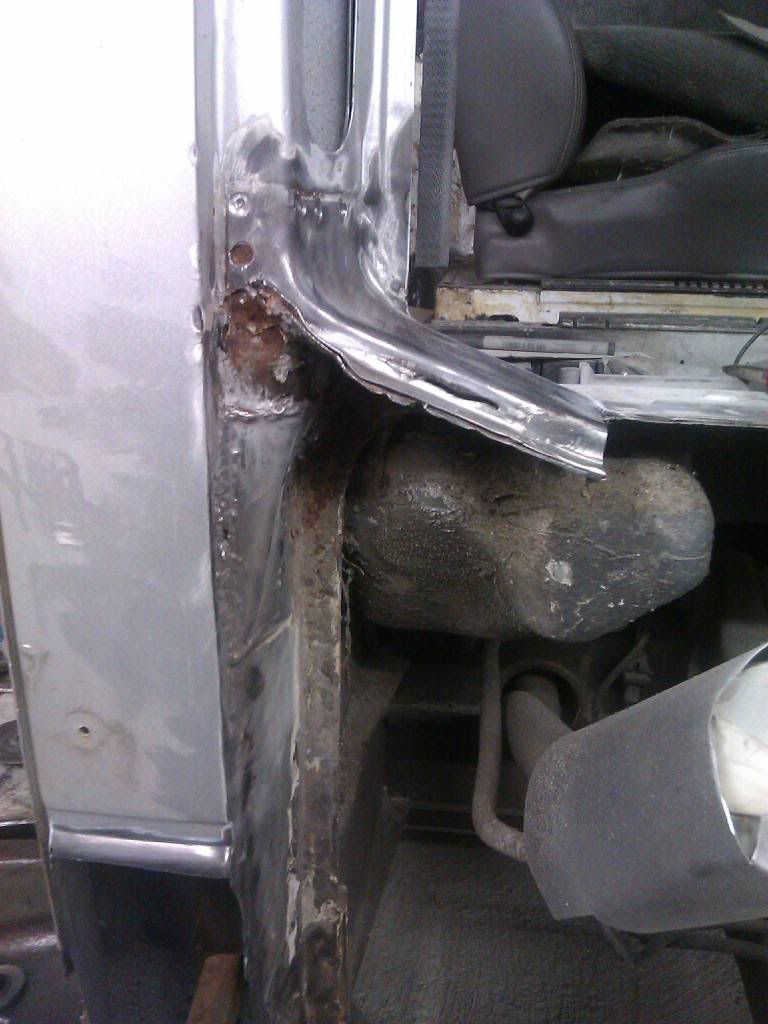 Then got the grinder and hack saw out an chopped out the offending piece. Yep, I could have repaired the holes but I just didn't know what was behind it! Now I know!! 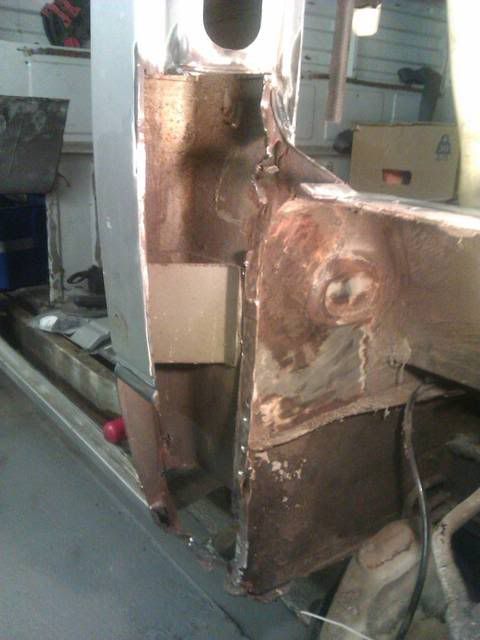 And that appears to be no rust :) Now I understand how it goes together, I tickled the hole and the repair piece, 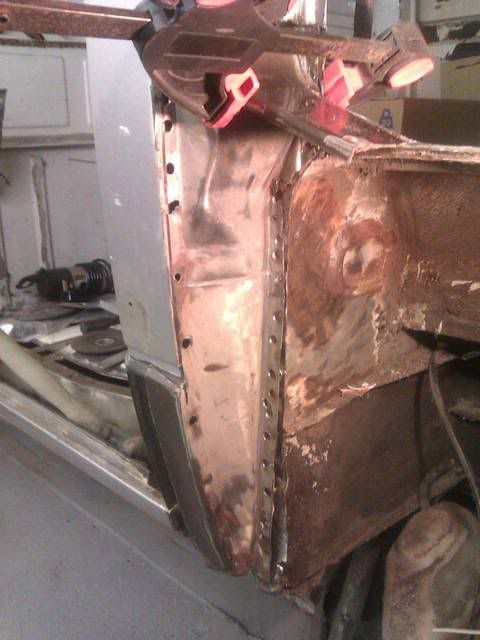  12 Apr 12 Well, more chopping today. I've had a variety of tools out to try chopping bits of rusty metal. The grinder's just too big ::) I took some pics with a decent camera as well ;) The wheelarch is all out now, didn't take a picture of that, no idea why, but here are a selection. The random strip above the inner wheel arch? It looks like it was ripped, seriously, even I can cut straighter than that!!!  Then the front piece had to come out. It's rusted out at the bottom, but also on the inside, there was no other way to get to it (honest) so more choppy choppy cutty cutty ??? 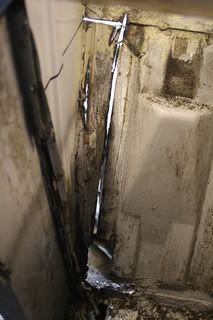 This bit has me worried, it's where the panels all meet, but it also forms a major part of the chassis structure. Problem is, it's going to have to come out which means new jacking point, which the back wheel swingarm attaches to...... 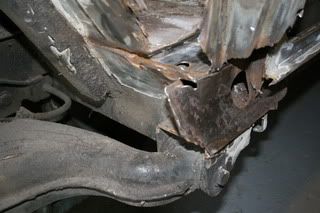  I keep loooking at it thinking "I think I might have bitten off more than I can chew here" Oh well, you live and learn right? I had a bash at the door yesterday, 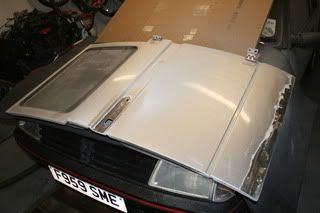 I'm thinking about getting the doors dipped? What do you think? I'd like to get the whole thing done really, but I don't think the budget will stretch to that, not to mention the fact that if I strip it to the point where it can get dipped, it will never go back together ::) To drag myself away from just staring at it, I had a play with the fuel cap I bought off of eBay. It's for a Golf, I thought it might fit! Yeah, right. 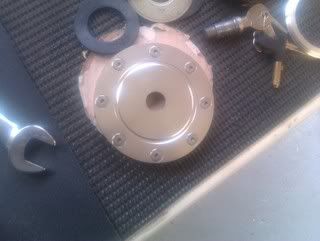 After dismantling the old locking cap and putting the insides into the new one, I couldn't get the key out when it was locked, only when it was open ??? After much staring, I tried another tack. Take the old cap, put it in my lathe (read, pillar drill) and start to thin it down using various methods so it can go inside the alloy cap. 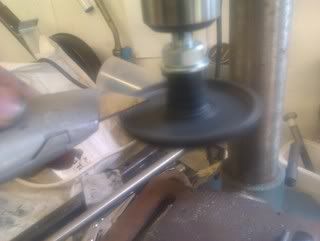 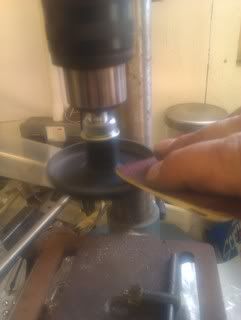 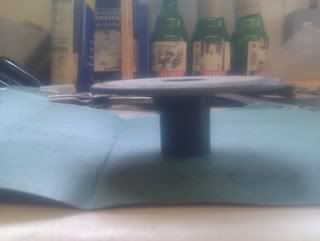 After a bit of faffing, it's done. 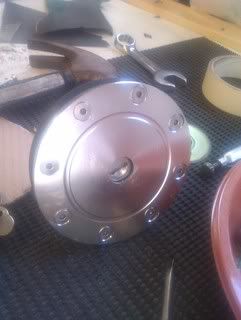 This is locked onto the inner part that connect to the fuel filler pipe  I'm happy with that although the key hole is a bit too far in. It still works though ;). It'll get recessed into the wing where I have already deleted the old hole. One day ;) 07 Sept 12 Back from Australia a month and there hasn't been a lot of progress either ::) I have a man coming to give me a quote on some of the repairs and it'll be off to their shop soon! I have done a few little jobs on the hack job wiring and cleaned it all off so the garage can see it properly. It was a bit of a mojo booster, and I have time now to crack on with it. Updates will be coming soon ;) 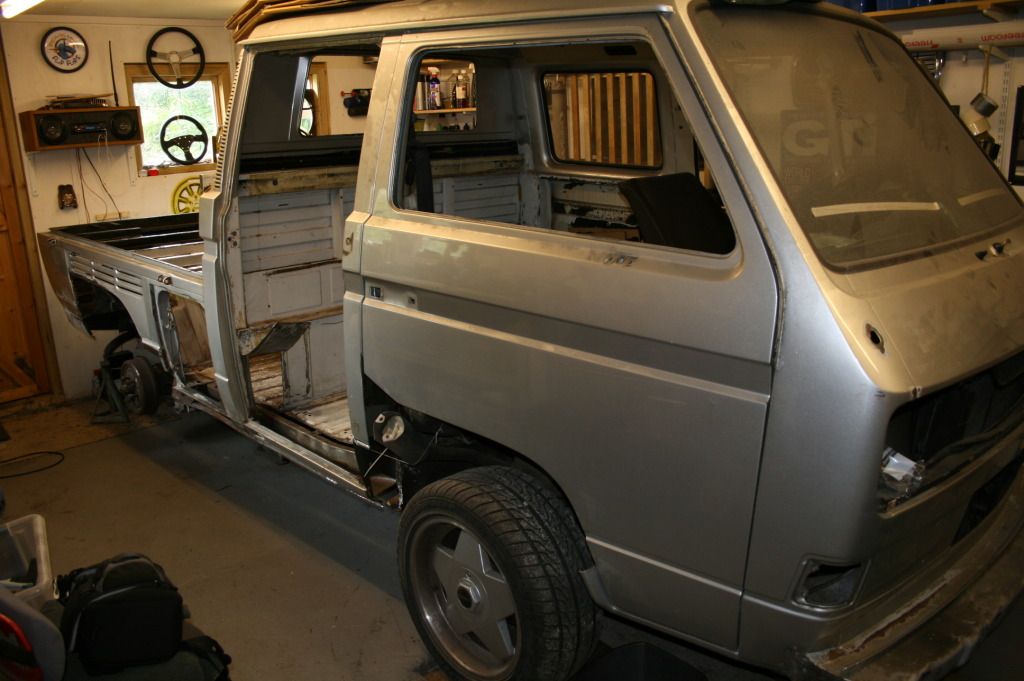 and the album of the rust is here if anyone's interested. http://s1204.photobucket.com/albums/bb405/Transglobe2010/DoKa%2030%20Aug%2012/?start=all" rel="nofollow - http://s1204.photobucket.com/albums/bb405/Transglobe2010/DoKa%2030%20Aug%2012/?start=all 11 Sept 12 Well, I'm still waiting on the body man ::) Meanwhile I've carried on tinkering whilst doing the list of 'Jobs' SWMBO left me as she headed off to China for work ;) I've been trying to take out the back door glass, and after some not very helpful advice on the internet, I was looking at it last night and at the extension lead next to it thinking 'maybe that will work'. I got the lead into the rubber enough so that it wouldn't hold the window in and gave it a shove. Well quite a bit of shoving actually, but it worked. 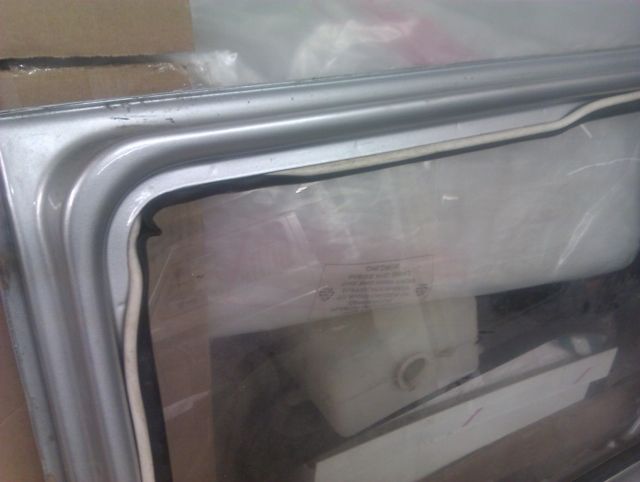 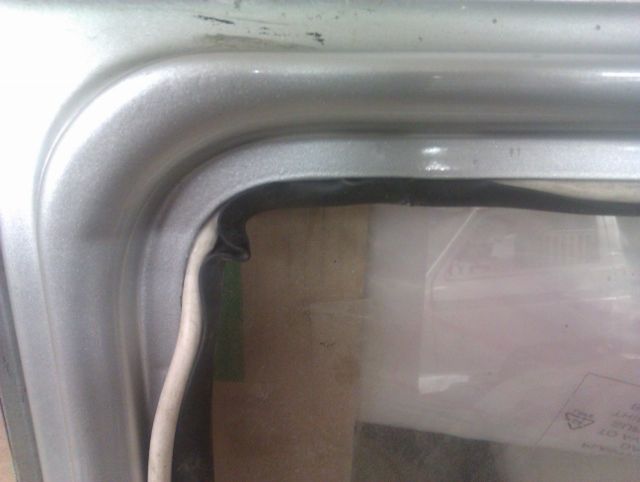 Result. But why have you taken the window out Pete? Well, because, many moons ago they were tinted, and with many years of sun they have now faded away to clear. And I want them tinted again. Obviously tinting over the top of the old stuff isn't an option, so I have employed various methods to try and peel it off. Heat gun, white spirit and the sharp blade. A combination of all seems to work best, but it takes forever and is a bit painful on the old fingers ::) Nearly done, only 4 more to do!! 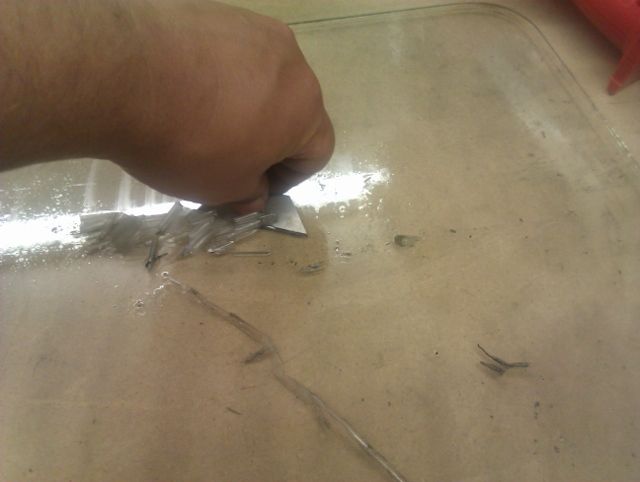 25 Sept 12 I've had a couple of days on the van, refitting the doors so that the bodyshop have something to line up the new stuff on as well as sorting out the smaller patches of rust as I go round the van. Both side windows are out, so gave them a tickle with the Dremmel (my new favourite tool) the drill and the angle grinder as they had rust coming through in the bottom of the frames. 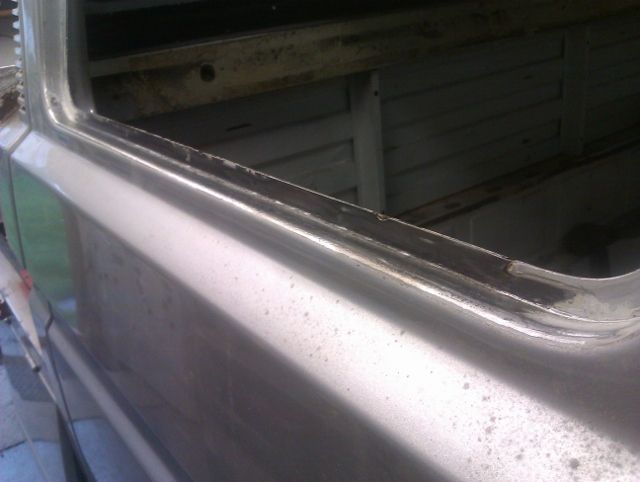 Front panel 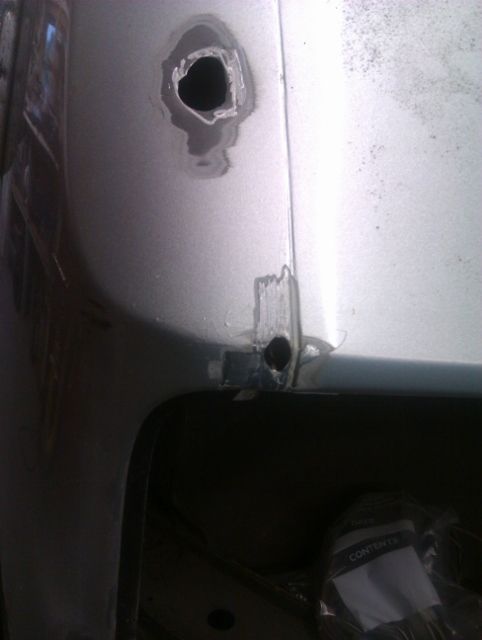 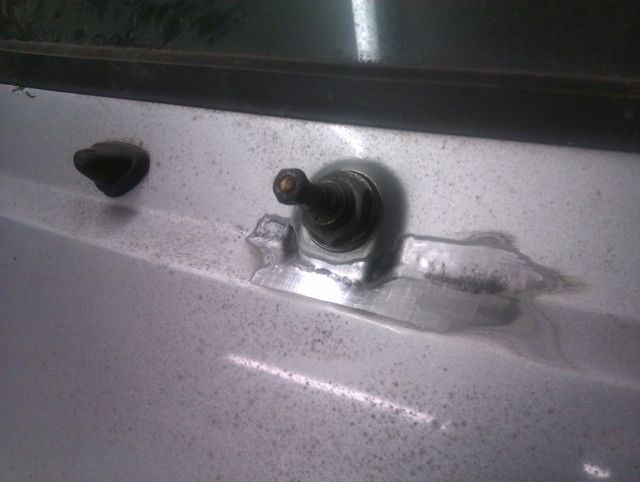 There was a bit of rust poking out under the windscreen seal, and as these are well known for rotting out I used the foot against screen method to remove it. Turned out badly >:( >:( 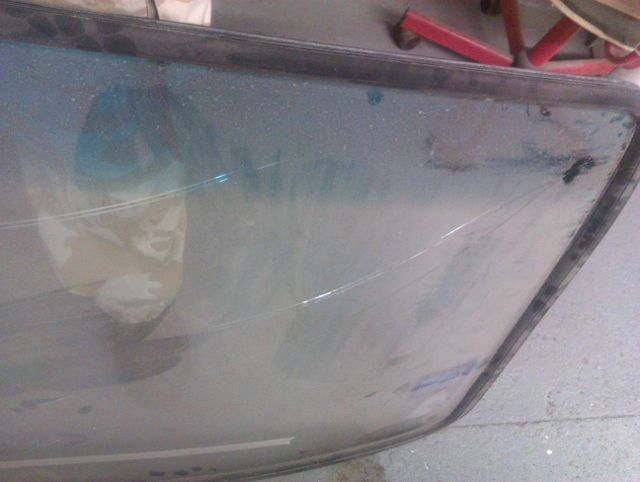 Not happy, a tinted top screen is a, expensive and b, like rocking horse pooh. I can get one with a tint and aerial, but that's £380 out of the budget. I am a little bit pee'd off! Still, it wasn't all bad as the rust was fairly minimal. 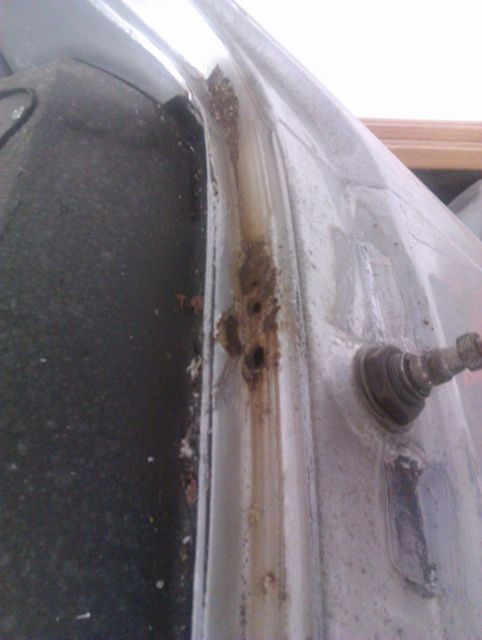 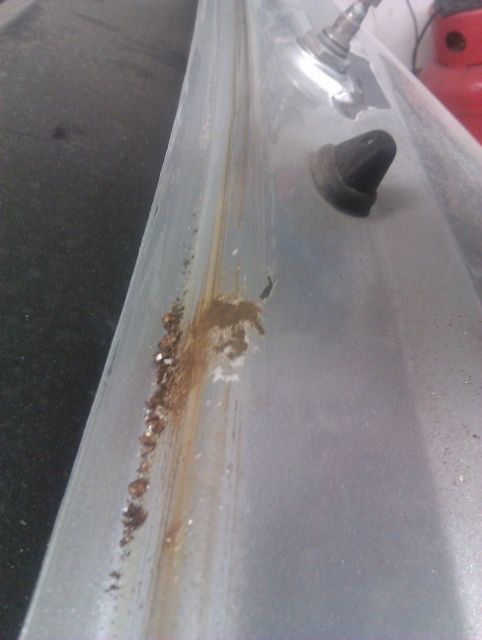 I've ground it out, now I'm undecided on how to repair them. Actually, I know full well what I need to do, I'm just putting it off!! I also drilled through the spot welds on the LHS locker door catch to have a look at the chassis rail etc on that side. 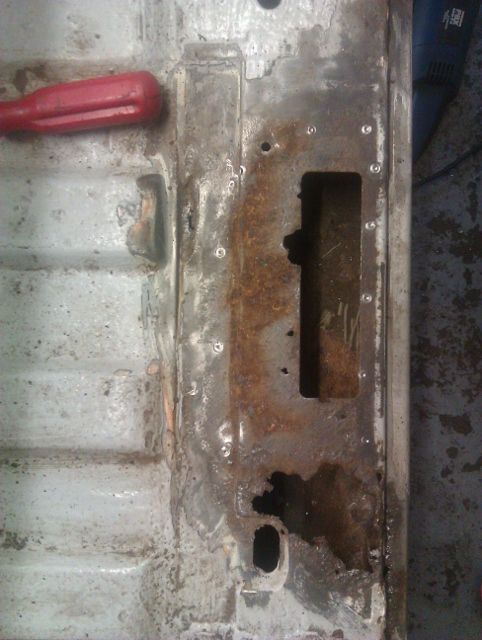 Mmmm,looks familiar ::) But, 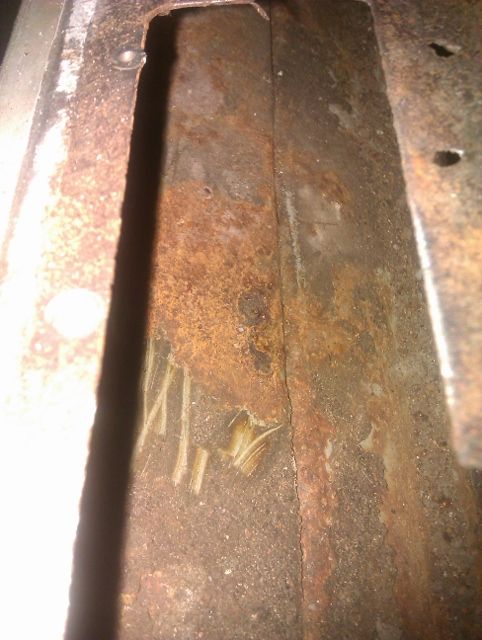 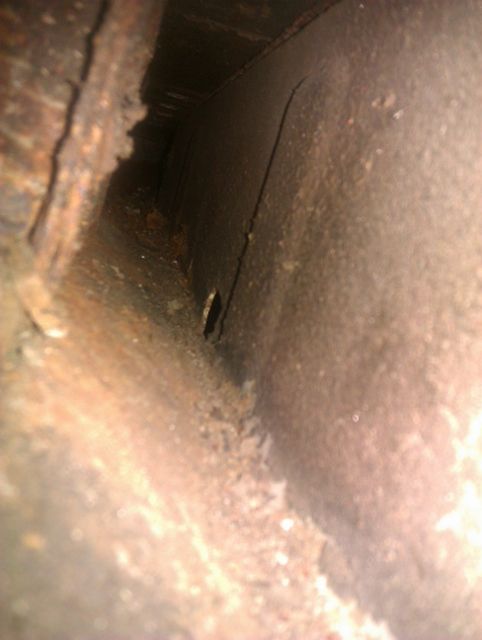 Looks more like surface rust, so I'll finish off the other bits and then cut a bigger hole and get in there with a brush! Oh, last bit. I whipped the headliner out to have a quick check on the rust up there. It all looks good apart from 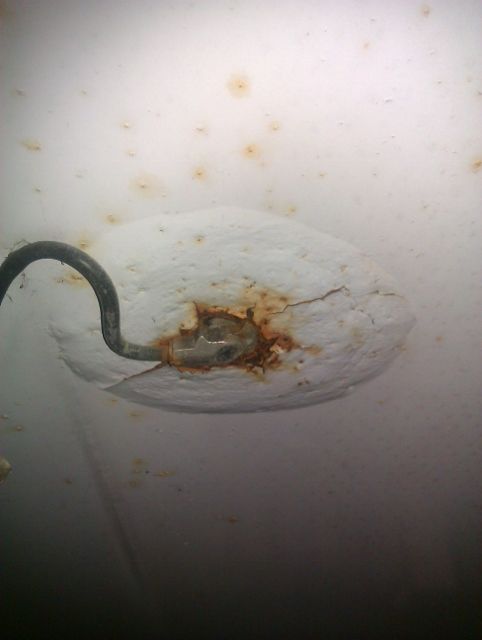 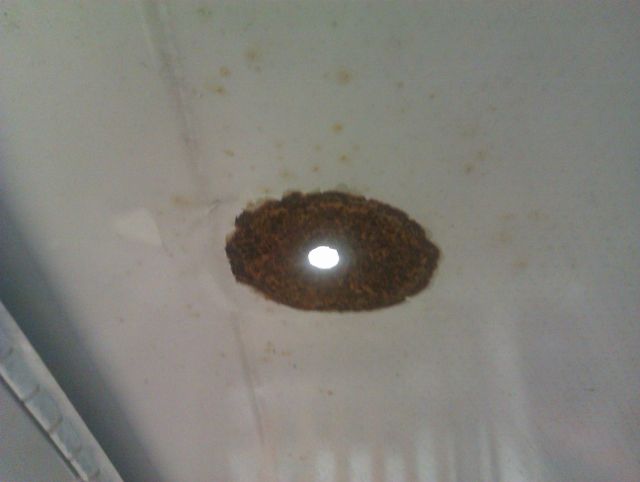 Aerial hole ::) The rest is all pristine though, and this is only surface rust I think. More digging later! Been fettling the 205's exhaust today, mainly so that I could get it out of the way of the pit (I need to get under the van to take off the fuel tank) so I took the opportunity to give the garage a good sweep out and tidy up the boxes of crap! Pug out of the way, I turned the key and it fired up straightaway! Sounds like a bag of nails mind, not sure if it's the exhaust blowing or something more sinister.... Still it moved under it's own steam! Looking good ;D 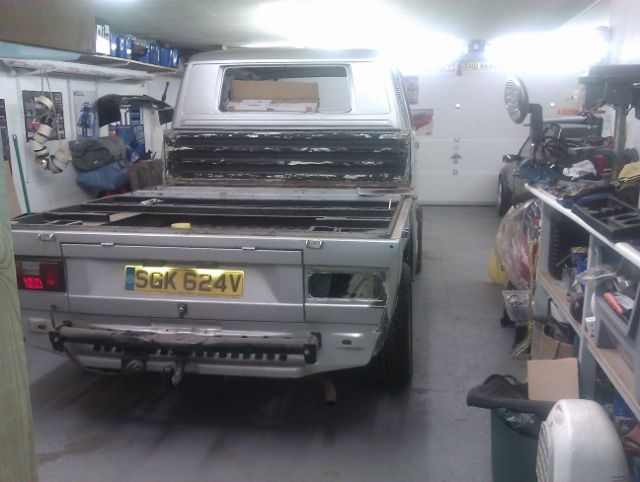 Forgot how low it was at the back! Been so long since it's been on it's wheels, and been able to get round the back too!! More tomorrow. 15 Oct 12 Well, a very nice guy came today to take it away...... 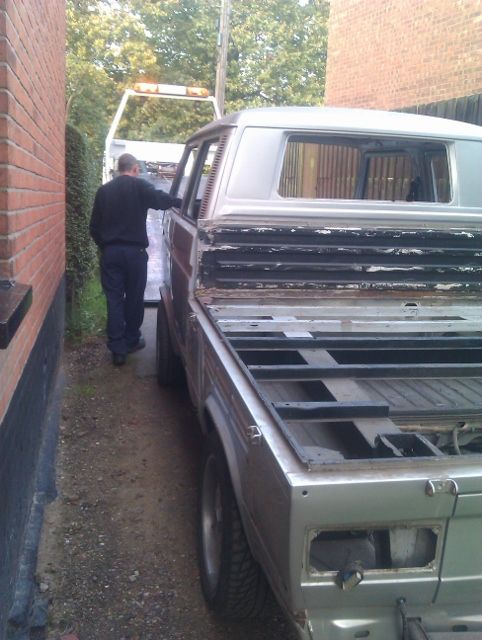 To the bodyshop. 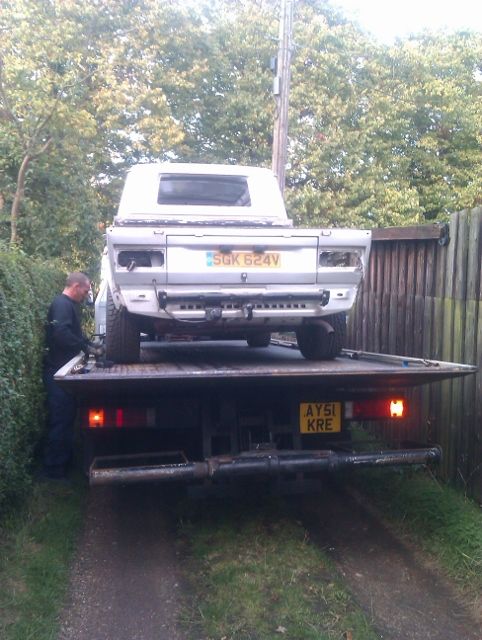 It's a bit tight round the back of my house ;) F@#k knows how I'm going to get it back in the garage! I guess I'll be trying to fit the new fuel tank outside the front of the house!! (Or a plastic bottle substitute, should get me round the back before conking out!) 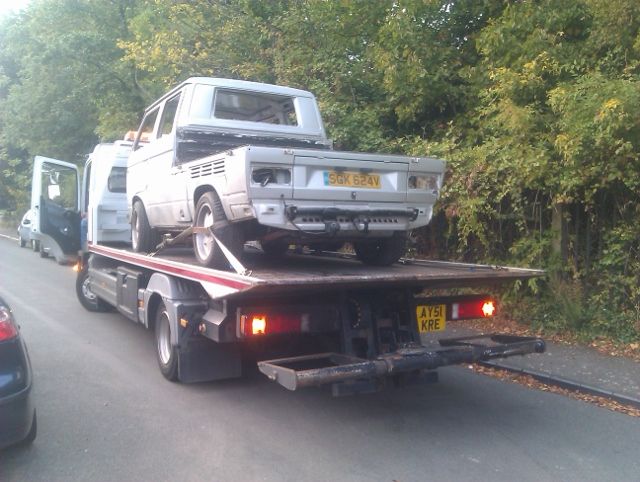 Don't worry, he did tie it down properly before he left ;) He brought the body man as well, so I could tell him what I had done! He looked a bit ::) (He was probably thinking, oh no, another wannabe with an angle grinder went too far!) He's probably right ;) So, They have it for 50 hours of labour and I've said to them to see how far they get. TBH, as long as the RHS gets done I'll be happy. We'll have to see. So, that's us up to date! It's still at the body shop, the RHS is doen and they're now on the LHS. No pictures, although I think they've been taking some as they go along. There will still be some small jobs to do, but the big and scary stuff will be done. Hope to have it back before Xmas (fingers crossed) Thanks for looking in, Pete ------------- Too many projects..... Not enough time! |
Posted By: Ladybird
Date Posted: 22 Nov 12 at 23:16
| Surf dude nice work and cool history keep it coming |
Posted By: surf dude
Date Posted: 22 Nov 12 at 23:25
Thanks mate, you read that all pretty quick  I'll add stuff as it happens, there is other stuff going on and I'll keep those updates coming! I'll add stuff as it happens, there is other stuff going on and I'll keep those updates coming!Pete ------------- Too many projects..... Not enough time! |
 Ladybird wrote:
Posted By: asw75r
Date Posted: 22 Nov 12 at 23:55
| my cc looks the same around the rear, the seams before had no rust in them to indicate what was under the surface, but once you start digging . . . . when its done though you will know its good for a good while |
Posted By: T3Panel
Date Posted: 23 Nov 12 at 00:31
Wow, finding rust like that would make me want to throw in the towel. Fantastic job! It's going to be great when it's all done, keep up the good work  ------------- 1987 T3 Panel 2.0 T3i! 1990 T3 Atlantic 1.8T Conversion sat on an engine stand waiting for spare time. |
Posted By: StvC
Date Posted: 23 Nov 12 at 00:41
|
Finding rust like that would make me stop looking. Fook that. Fair play to ya though. ------------- Die Deutsche Doppelkabine ist sehr gut. 150bhp planned |
Posted By: surf dude
Date Posted: 23 Nov 12 at 10:12
|
Lol, yep, I kinda felt that way and if I didn't have such an emotional attachment to it , I would indeed have thrown in the towel!!! It's a keeper though, so I might as well get it done properly, then, like you say, it'll be nice and solid. More to come over the weekend. Pete ------------- Too many projects..... Not enough time! |
Posted By: max and caddy
Date Posted: 23 Nov 12 at 18:12
| Interesting stuff....makes me hungry for more rust....! |
Posted By: T3ADICT
Date Posted: 23 Nov 12 at 20:55
|
the lower 4 to 6 inches of my tristar has lots of rust. more than yours..
your crewcab started out life as a aircooled, only the aircolled crewcabs had the 3 sets of rear vents.
you dont see many aircooled crewcabs or single cabs..
most of the ones i have seen here in the uk are breaking only, there was one on ebay for a fair while that never seemed to get any bids.
while you are doing lots of welding maybe think if you would like to ad the 4 door.. yours being a lhd makes it easier here in the uk.
i think i have even seen someone selling the complete cut out section on ebay.
------------- WHY T3's.... because they are just so adictive, and having one just aint enough |
Posted By: surf dude
Date Posted: 23 Nov 12 at 21:55
[
Ha, well, there's more where that came from! Hopefully I can get some images from the bodyshop soon. QUOTE=T3ADICT] the lower 4 to 6 inches of my tristar has lots of rust. more than yours.. your crewcab started out life as a aircooled, only the aircolled crewcabs had the 3 sets of rear vents. you dont see many aircooled crewcabs or single cabs. most of the ones i have seen here in the uk are breaking only, there was one on ebay for a fair while that never seemed to get any bids. while you are doing lots of welding maybe think if you would like to ad the 4 door.. yours being a lhd makes it easier here in the uk.i think i have even seen someone selling the complete cut out section on ebay.[/QUOTE] Yep, figured that it was previously air cooled, like you say, you just don't see many of them around. I had thought about doing the other door but I have plans for that side involving amp, speaker and maybe a tv! Oh, and if your van has more rust, I feel your pain  Is there a thread on it? Is there a thread on it?------------- Too many projects..... Not enough time! |
Posted By: surf dude
Date Posted: 29 Nov 12 at 20:59
|
Sooooo, the 50 hours has been and gone, the RHS is finished ::) and they have now moved onto the other side and front panel!! They reckon another 5 or 6 hours should have it done, so the budget is now.......... Well, growing!! Still, it's a keeper, but I'm still stood here thinking that I could have bought a better base!! (BUT, we do have history together!!) So, no pictures yet of the van, the guy has done a nice job though, I'm going to have to try very hard to replicate his work on the other side ;) A shiny new fuel tank arrived. Bit bent, but hey ho. A quick tap with the hammer, and it looks a bit better. It'll get some more paint too, It needs to last another 30 years..... 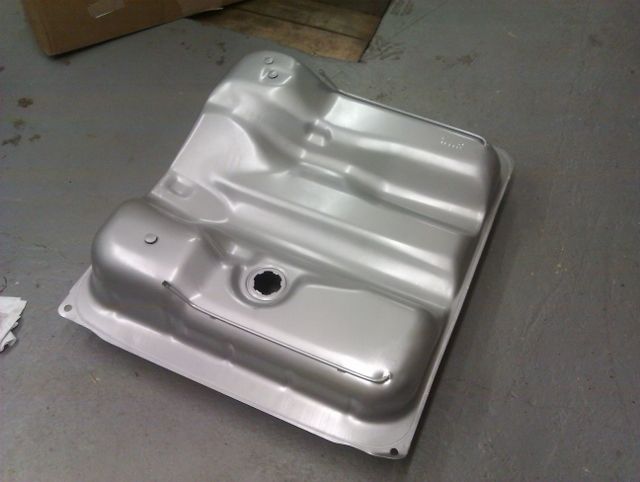 Meanwhile, surfing the interweb a couple of weeks ago threw up an advert for an Ej20 Subaru engine, fitted with all of the necessary bits and running Megasquirt. Removed from a T3 to be used in the guys van but never used, he was selling it for what was a pretty good price. So a quick chat with the bank manager (SWMBO) who suggested that I price up the parts I'd need for my current Scooby lump and megasquirt, EDIS etc and exhaust for the WBX 2.1, both of which would be about the same........ So, I went and picked this up. 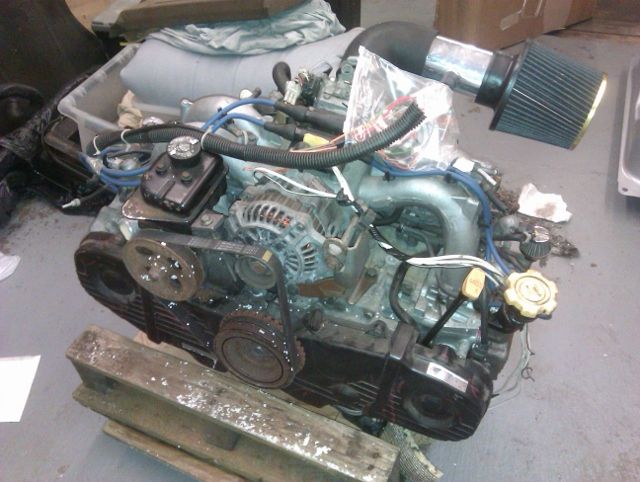 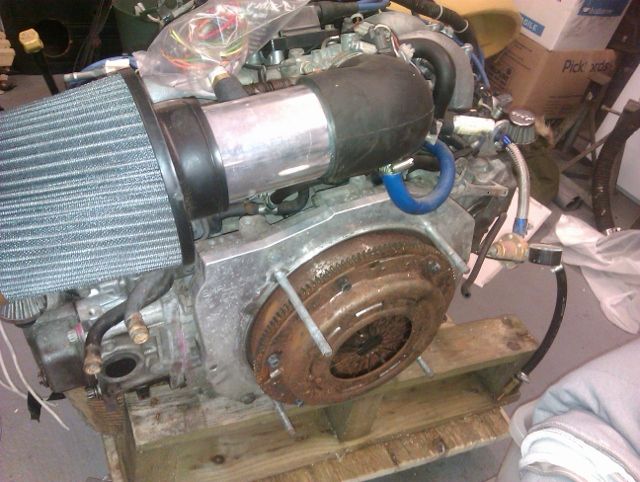 I now have a box of bits, lots of wires (fortunately they are labelled!!) and a certain amount of trepidation about making it work ::) Nothing new there then ;D
------------- Too many projects..... Not enough time! |
Posted By: surf dude
Date Posted: 29 Nov 12 at 21:01
|
So, as well as doing a ton of DIY, I've spent a bit of time in the garage. The bumpers were looking a bit iffy in places, 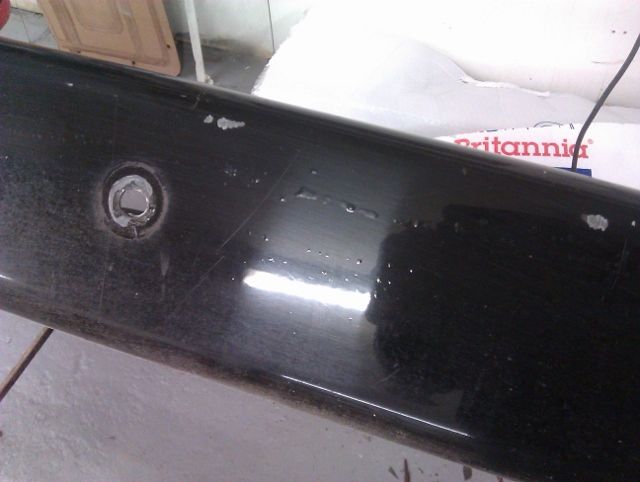 and it looks like they're plasticoated, 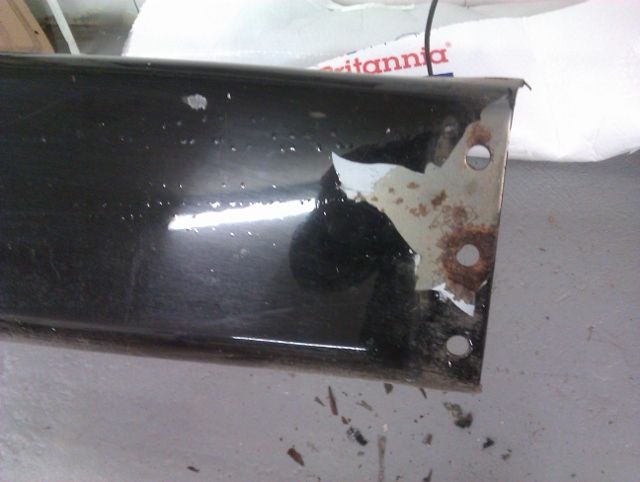 And that looks like they're galvanised too ;D After a bit with the heat gun and scraper the back bumper is stripped. 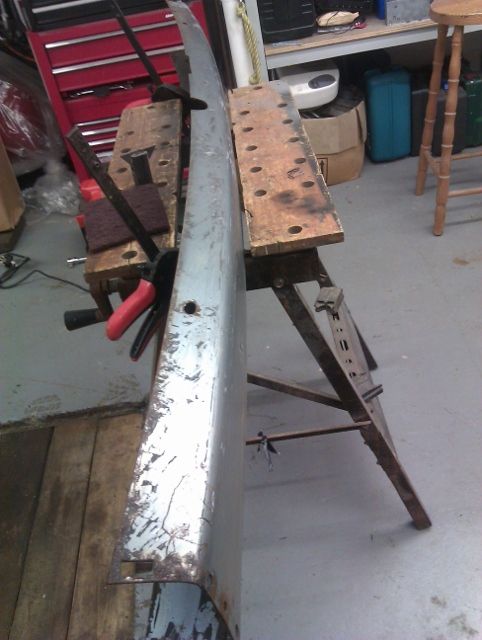 I've done them both now, and hit them with the paint stripper in the grinder. back bumper looks spot on, but the front is a bit 'dented' and rusty!! (Haven't stripped the inside yet either!) Should be alright though. Typically, I'd just polished the Golf and it's now covered in a thin layer of dust ::) Luckily, I sprayed these before though ;) 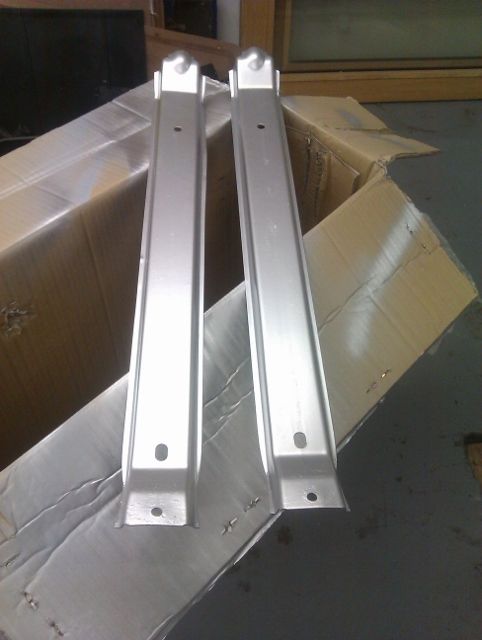 They're the straps that hold on the new fuel tank.
------------- Too many projects..... Not enough time! |
Posted By: Mooch
Date Posted: 05 Dec 12 at 21:32
|
Liking this..... Erm, obviously nice van stuff going on there too, ahem...!! ------------- Mooch 1983 T3 Vanagon Westy, 1.9i Watercooled Petrol (Vege recon) |
Posted By: surf dude
Date Posted: 05 Dec 12 at 22:21
|
Erm, yes, not too van like but very very awesome. Away in storage at the moment, but every time I see a pic of it I want to rush up to where it is and get it back!! Maybe when I've finished sanding the van down and painting it, when it won't get covered in shit!! In other news, I made a start on the bumpers. I'll stick some pictures up tomorrow. ------------- Too many projects..... Not enough time! |
Posted By: ELVIS
Date Posted: 06 Dec 12 at 00:04
|
tell your supplier to do one. sourced a top tint and 99.9% sure it had an aerial for a SA bus a while back, change out of £200 fitted! (and was Pilkington) ------------- Www.justgiving.com/ELVIS-SUMMERS |
Posted By: surf dude
Date Posted: 06 Dec 12 at 19:46
Good to know. Who was it from? ------------- Too many projects..... Not enough time! |
Posted By: ELVIS
Date Posted: 06 Dec 12 at 19:53
|
will find out tomorrow chap. think it was about £185 fitted. where abouts in uk are you? ------------- Www.justgiving.com/ELVIS-SUMMERS |
Posted By: surf dude
Date Posted: 06 Dec 12 at 20:36
Thanks dude, I'm just outside Ipswich, Suffolk. ------------- Too many projects..... Not enough time! |
Posted By: Gtavalanche
Date Posted: 07 Dec 12 at 14:23
|
Where abouts? I'm at wattisham. If you ever need a hand. ------------- I taste Hurty! |
Posted By: surf dude
Date Posted: 13 Dec 12 at 09:17
Hi there, well I was there too, until I left in March,but live in Shotley Gate. We probably already know each other  don't drive a twin turbo'd panel van do you? don't drive a twin turbo'd panel van do you?------------- Too many projects..... Not enough time! |
Posted By: Gtavalanche
Date Posted: 13 Dec 12 at 10:31
|
Nah. Thats james. Mines a gti'd carravelle. Jame's van is fookin fast! You reme then? ------------- I taste Hurty! |
Posted By: surf dude
Date Posted: 13 Dec 12 at 10:37
|
No, ex AAC. Was the GSM Now I'm a civi!! ------------- Too many projects..... Not enough time! |
Posted By: Gtavalanche
Date Posted: 13 Dec 12 at 11:10
|
Ah. I remember. Pete isnt it. You'll probly not remember me. Been at wallop for two years. ------------- I taste Hurty! |
Posted By: surf dude
Date Posted: 13 Dec 12 at 12:42
|
Try me was in Wallop on Monday catching up with a few peeps. Yep, Pete. Anyway, in other news, I now have a shiny dashboard in the garage courtesy of nick1973. Much much better than mine, which is full of holes. Off to the garage now to start on it's transformation ------------- Too many projects..... Not enough time! |
Posted By: Gtavalanche
Date Posted: 13 Dec 12 at 12:58
|
Sounds good. Im leroy glover. Was 663 then troop then wallop now 653. Got plenty of bits and bobs in the spares pile if you need anything. ------------- I taste Hurty! |
Posted By: surf dude
Date Posted: 13 Dec 12 at 13:14
Name rings a bell (but I do have a shit memory  ) I'll let you know if I need anything. Patch still there? Might need a hand with my Scooby conversion!! ) I'll let you know if I need anything. Patch still there? Might need a hand with my Scooby conversion!!------------- Too many projects..... Not enough time! |
Posted By: Gtavalanche
Date Posted: 13 Dec 12 at 14:12
|
Patch is still about. But he's 6 regt now. What engine you going for. ------------- I taste Hurty! |
Posted By: surf dude
Date Posted: 13 Dec 12 at 14:15
|
Got a 2 litre lump on Megasquirt and if that doesn't work I've got the 2.5 from my old Legacy Outback!! ------------- Too many projects..... Not enough time! |
Posted By: Gtavalanche
Date Posted: 13 Dec 12 at 14:34
|
Sounds good. 2.5 would be nice. You doing it all yourself. ------------- I taste Hurty! |
Posted By: surf dude
Date Posted: 13 Dec 12 at 20:02
Yep  Til I run out of talent Til I run out of talent ------------- Too many projects..... Not enough time! |
Posted By: surf dude
Date Posted: 13 Dec 12 at 21:30
|
Well, I'm expecting the van back tomorrow from the welders. It's cost a few quid, but it's now solid on the bottom 2 feet or so, so it should last a few years!! So, I had a bit of a tidy and then got stuck into a few jobs. First up, I got a new dashboard as mine is full of holes and dents. 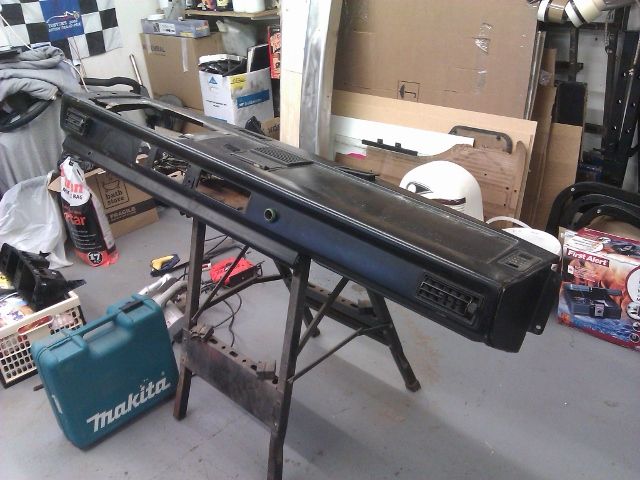 It had this little grille fitted over the centre speaker bit which I actually quite like 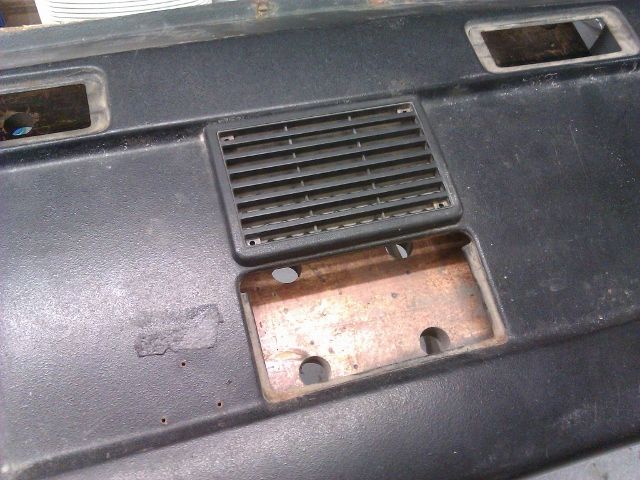 Might keep it and mount a central speaker under there. Anyway, I've attacked it with the stripper and it's looking smooth now. It'll get a coat of satin black I'm thinking and maybe a filler piece on the inset bit on top. I'm also looking for different windscreen vents as the fitted ones are a bit pants. Thinking Mini or something similar. Then I got on with the new door panels as mine were shagged. Picked up some 6mm hardboard and had it cut roughly to size, then, using the old one as a template, i Marked up, drilled and cut out 2 new ones. 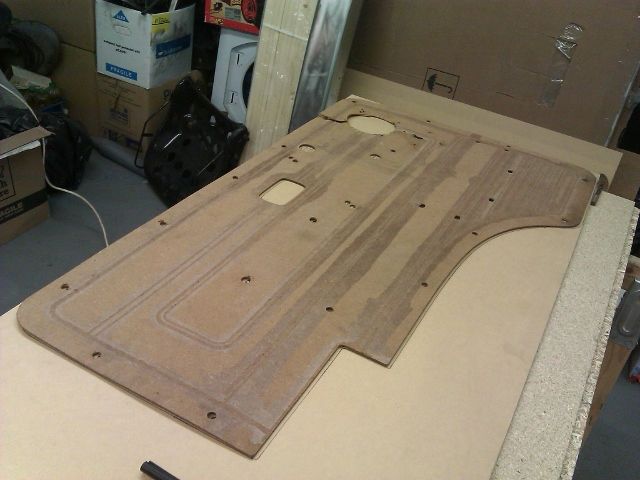 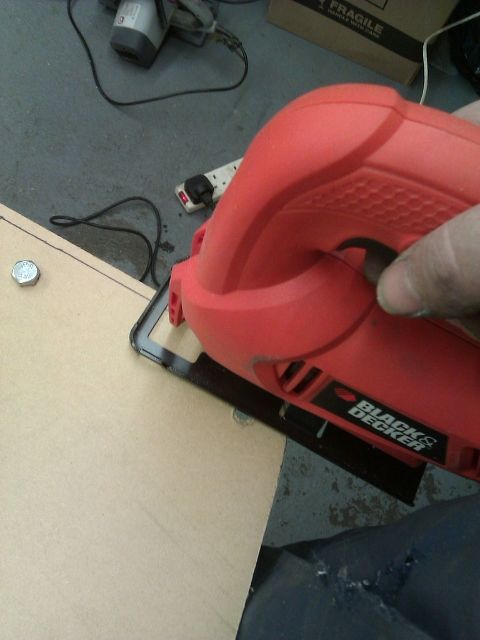 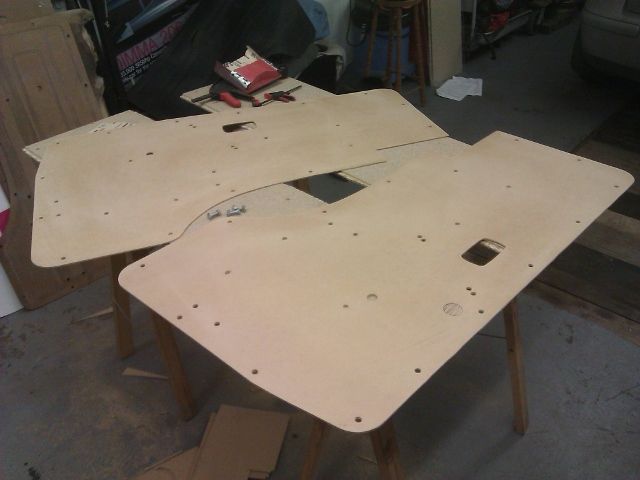 Pretty pleased with the way they came out actually. I fitted the old vinyl over one to see how it fits, They're slightly to big, but I'd rather they were that way round TBH. I'll try them on the van and see what they're like when it's back. Finally, I decided to fit a clock in the new instrument pod in my usual ham fisted way ::) I now have some repair work to do with some filler and imagination!! Sure it'll look good when it's done though ;) 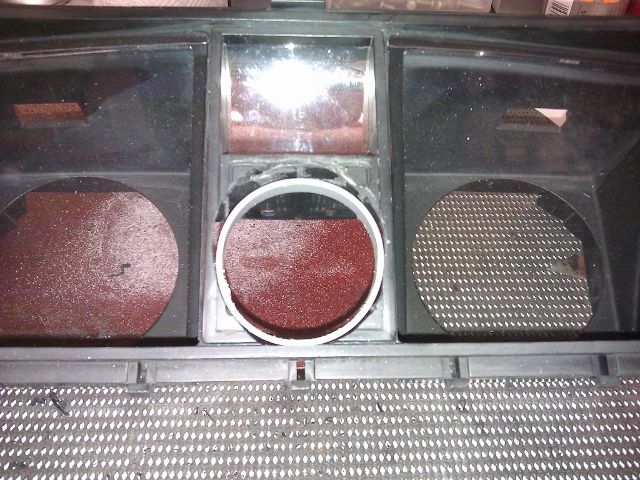 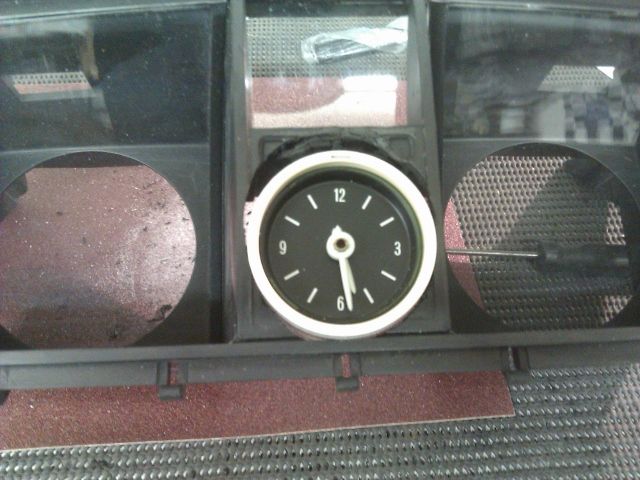 Hopefully, there'll be some pics of the van tomorrow. Pete
------------- Too many projects..... Not enough time! |
Posted By: surf dude
Date Posted: 14 Dec 12 at 20:15
|
Well it rained ::) So, the body shop have kindly kept hold of the van until Monday (Fingers crossed it'll be dry) I've had a pretty productive day though. Finished stripping the dash with a variety of electric paint removal tools and finished off with a dose of Nitromors which did nothing at all apart from mean that I had to spend time getting rid of it all before painting. 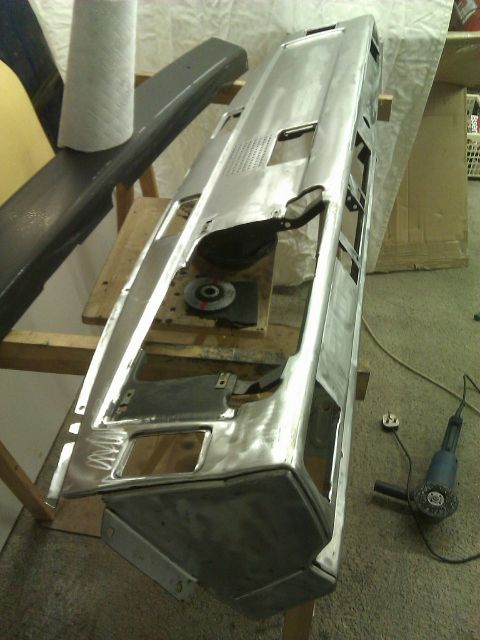 Before paint though I filled a couple of holes. This one is the additional fan for the back which mine doesn't have. 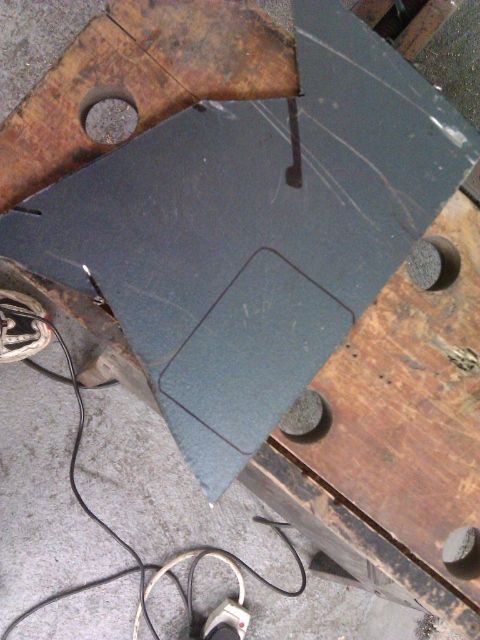 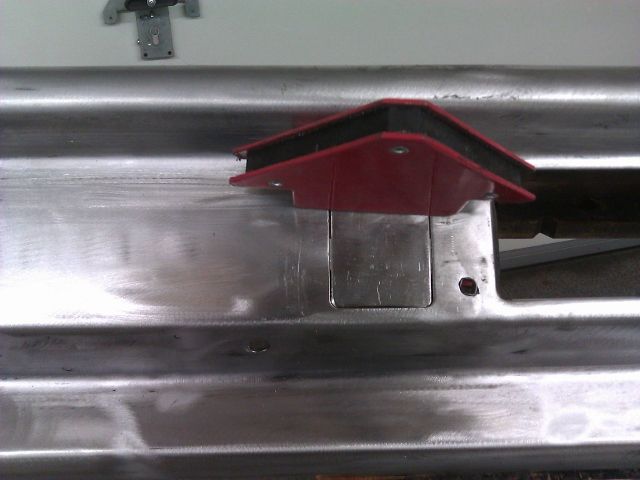 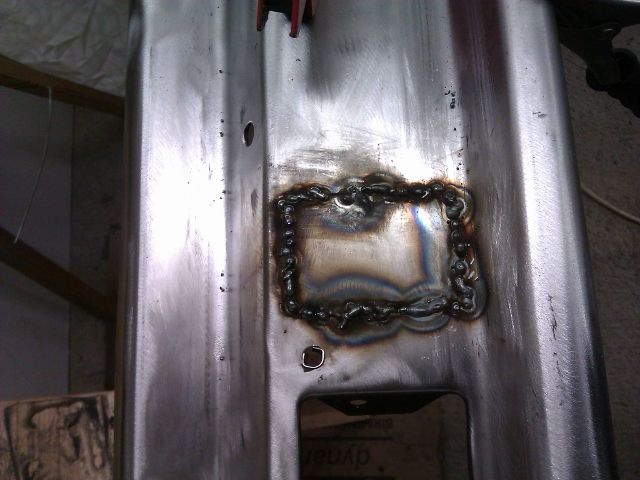 And the lighter hole as I'll be fitting a 3 way jobber in the ashtray. Used a ground down washer, and then flattened copper pipe behind to fill in the hole ;) 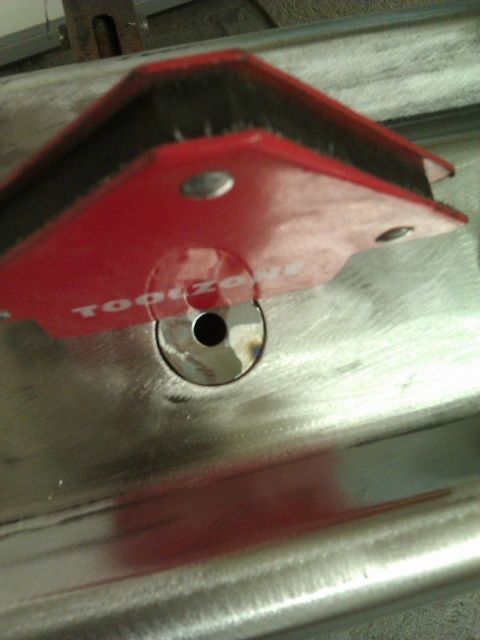 Came out OK and with a bit of filler I'm sure they'll disappear nicely (Well, maybe!!) 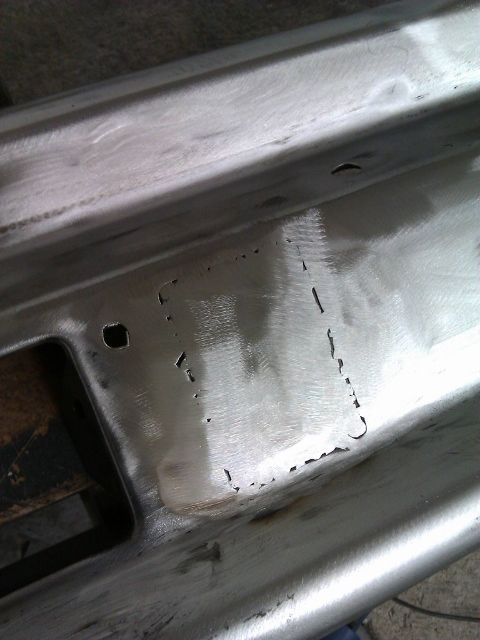 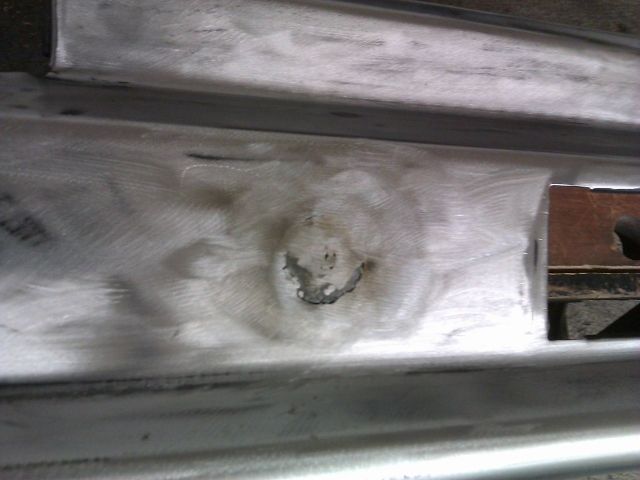 Primer and matt black. Hasn't gone on too badly for a first coat but need to get some satin to finish it off. Filled holes don't look too bad, but I think they'll need another skim before it's right. 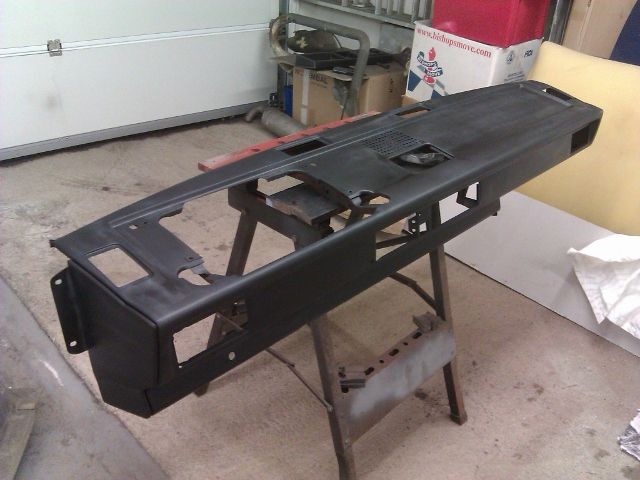 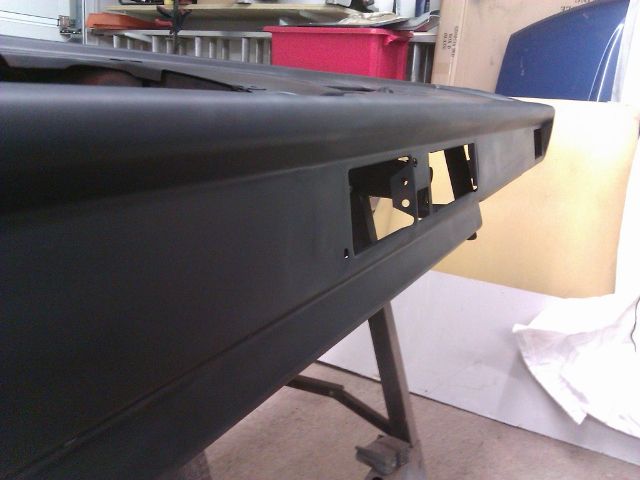 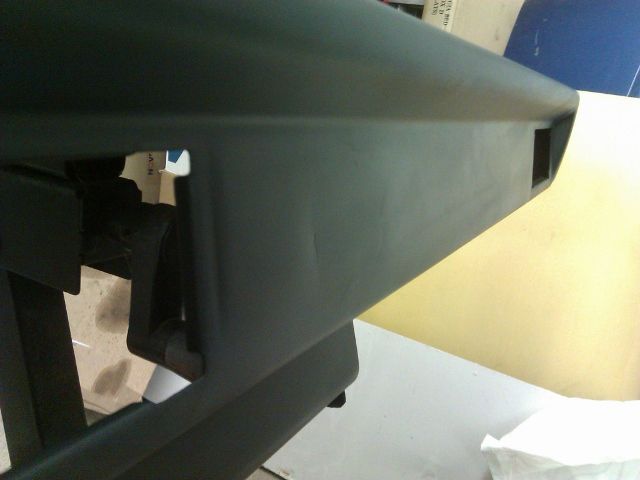 Then moved onto the bumpers. I'd wet sanded the rear one after a bit of a gash job, so this time I mixed the paint and thinner properly and applied it with a better roller. Looking pretty good so I bashed some of the dents out of the front one and did that too. They're drying in the garage now, although that may take a while as it's pretty nippy out there and I threw the last bit of paint on the top of the new fuel tank to give it a bit of extra protection. 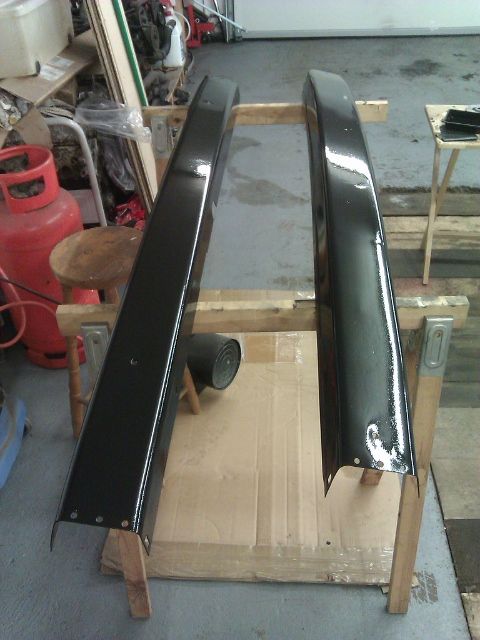 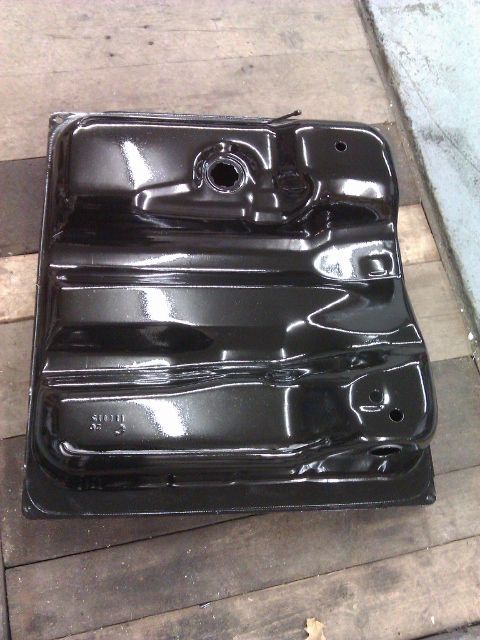 Finally I spent a bit of time filling in the chop job I did on the clocks. Needs more, but getting there now. Bit of black on to show up how I'm getting on.  More tomorrow. Pete
------------- Too many projects..... Not enough time! |
Posted By: bananaman
Date Posted: 14 Dec 12 at 21:03
|
awesome thread pete-keep up the good work! ------------- T5 T32 SWB Kombi 130ps |
Posted By: donecan
Date Posted: 15 Dec 12 at 10:44
| Cracking job! Keep it coming :) |
Posted By: surf dude
Date Posted: 15 Dec 12 at 11:23
Thanks guys, appreciate the support. I'll check on the bumpers in a bit (after obligatory Saturday shopping  ) )------------- Too many projects..... Not enough time! |
Posted By: surf dude
Date Posted: 19 Dec 12 at 17:21
|
Bumpers are looking good, bit of a wet sand and polish and I think they'll look pretty damn good! So, on Monday, as it was fairly dry, we decided to risk it and have the van delivered home. The driver bought a mate as we knew we'd have to try and get it up the slope into the garage! Good job too as the engine wouldn't start (no fuel tank, remember) but luckily the battery had enough juice to spin over and "drive" the bus up on each turn! Typically we had unloaded too close so had to do it in two goes ::) They deserved a cup of tea and a biscuit after that. 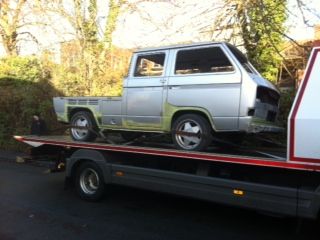 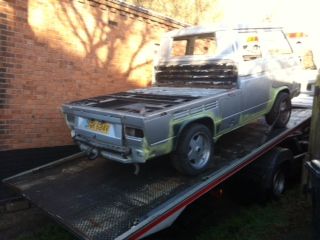 None of us getting it in the garage obviously!! As soon as they left I had a good look around and so far it looks very good, although I still have plenty to do....... Pics ;) New front right wheelarch with fuel cap blanked over! I do have a plan for that...... 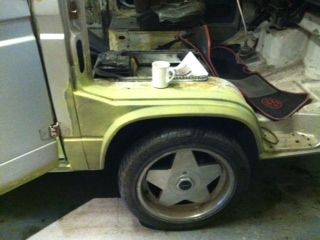 New rear passenger floor, and there's a new chassis rail under that. 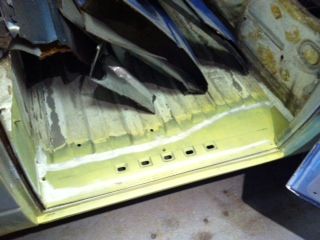 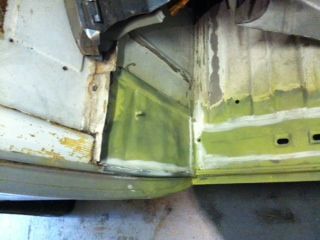 New locker floor and locker door catches 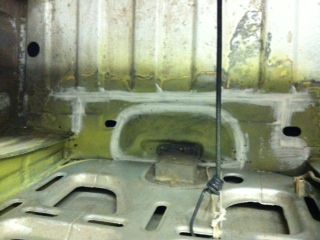 and a new rear right wheelarch 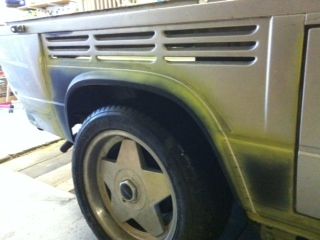 New front panel (there was a newish one on there. The only problem was that it had been welded straight on top of the rusty old one ::) ) 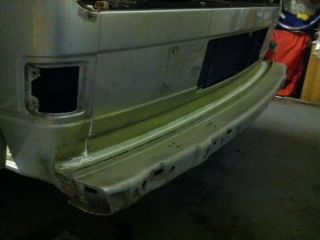 And onto the other side! New rear wheel arch, closing panel and bottom bumper panel 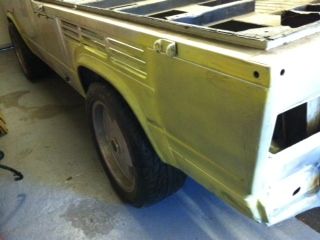 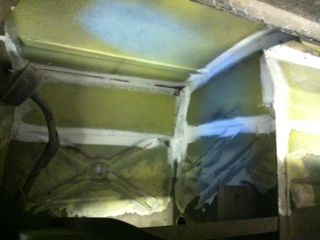 And a new front right wheelarch 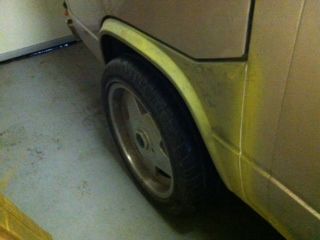 There's also repairs to the locker floor, bottoms of the B and C pillars on both sides, both jacking points front and rear, new sills under the locker doors, repairs to the front battery boxes and floors....... Still to do welding wise is windscreen repairs and rear screen repairs, a couple of rust patches in the engine bay and a couple of other small holes around the rest of the body! And that's what I'll be cracking on with when I get back home! There's a lot to do, but this has been a major mojo boost and now I just need to get stuck in :P Merry Xmas. Pete ------------- Too many projects..... Not enough time! |
Posted By: surf dude
Date Posted: 19 Dec 12 at 17:27
|
One more, under the left hand locker door. 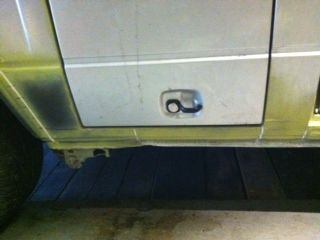 And just in case you've forgotten what it was like a couple of months ago........ ------------- Too many projects..... Not enough time! |
Posted By: rowlesy
Date Posted: 19 Dec 12 at 20:23
looks smart fella!  ------------- UberFukz broke another! sucky sucky five dollah! always out numbered never out gunned! RWS welding 07846 380 467 (worcs) |
Posted By: Gtavalanche
Date Posted: 19 Dec 12 at 21:42
|
Looks nice and solid now. Its an awesome feeling when they roll off the truck all sorted isn't it. ------------- I taste Hurty! |
Posted By: surf dude
Date Posted: 19 Dec 12 at 22:03
|
Thanks fellas, long way from sorted at the moment but a massive step in the right direction ------------- Too many projects..... Not enough time! |
Posted By: surf dude
Date Posted: 13 Feb 13 at 22:21
|
So, been mucking about in the garage. The van still needs some welding done so I wanted to have a little practice on something first. I turned an old Cobra bucket seat into a gaming chair. Practice welding, making some metal panels, filling and spraying. From this,  via this 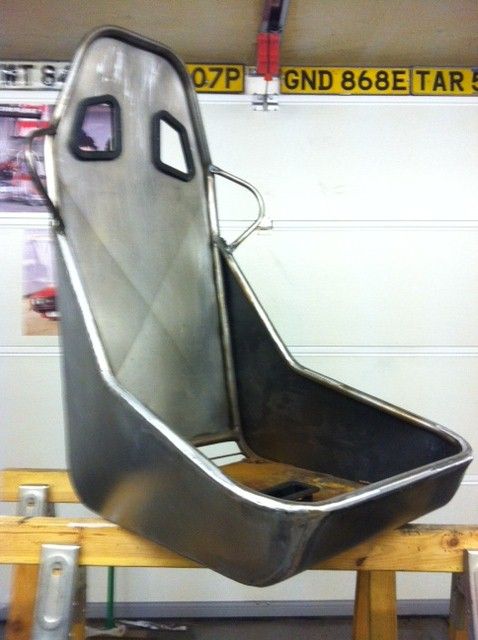 to this 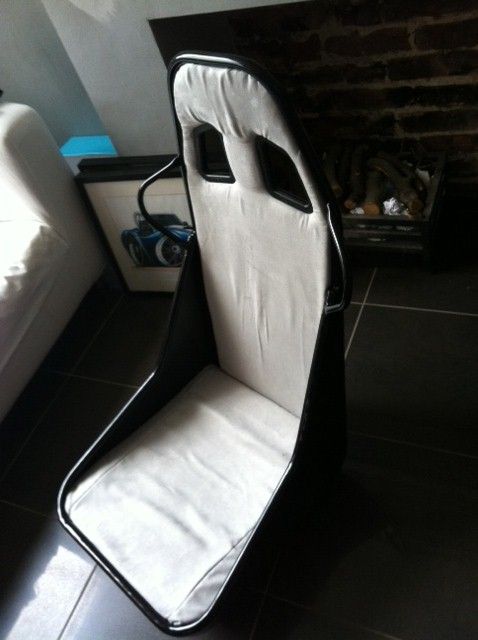 Pretty happy with it, but need to get cracking with the van, so this evening I decided to stop mucking about and get on with it. I'd already been underneath and removed all of the petrol heater gubbins. It still worked, but the ducting was all wrecked and I'm not sure I trust it anymore. Anyway, it's out now, but in the midst of doing that I noticed that the heater pipes were all mashed, everything was zip tied in place (pipes, fuel pump and filter etc) and it was generally looking a bit untidy! So I thought, bugger it, lets get the engine out!! 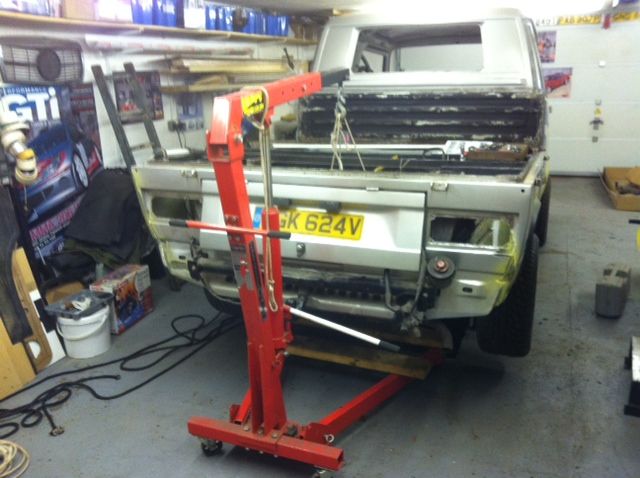 Forgotten how easy it was, even on your own, and after a bit of adjustment to get the van higher 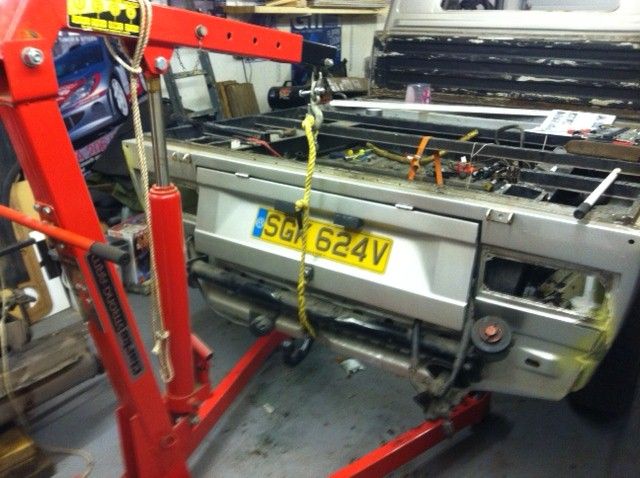 It was out. 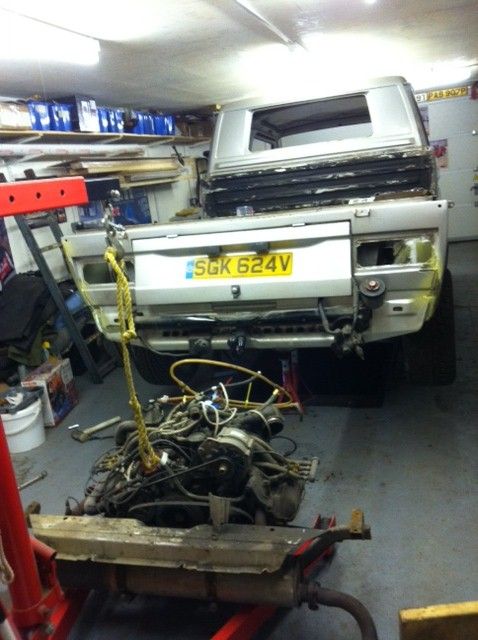 There's a bit of rust here too, so that will get sorted. and of course another engine to go in!! 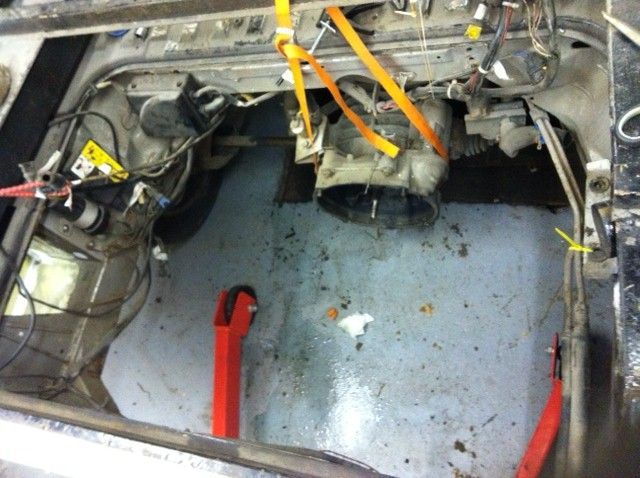 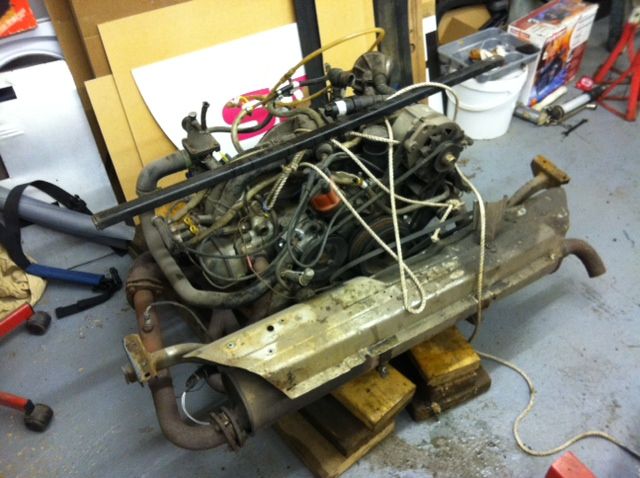 The 2.1 will be for sale soon, once it's had a bit of a clean up and I've stripped out all of the wiring for it (new Scooby lump is on MS) More tomorrow hopefully. Pete ------------- Too many projects..... Not enough time! |
Posted By: rhysdubber
Date Posted: 15 Feb 13 at 00:54
|
Im loving the amount of detailed work thats gone into this! You'll have a tidy looking Doka by the end which will be awesome! ------------- If my calculations are correct, when this baby hits eighty-eight miles per hour... you're gonna see some serious shit. "Better To Be Pissed Off Than To Be Pissed On" 1989 1.7D DK Box "Dylan" |
Posted By: surf dude
Date Posted: 15 Feb 13 at 09:00
|
Thanks mate, I certainly hope so. Just need to get my arse into gear and get on with it ------------- Too many projects..... Not enough time! |
Posted By: surf dude
Date Posted: 19 Feb 13 at 22:32
|
Well, another day in the garage (there are perks to unemployment ::) ) and after getting distracted cleaning up (all this grinding makes an awful lot of dust :( ) I started looking at the rust in the engine bay. I needed to remove various bolts that had been used to hold on the coil and electrics boxes. 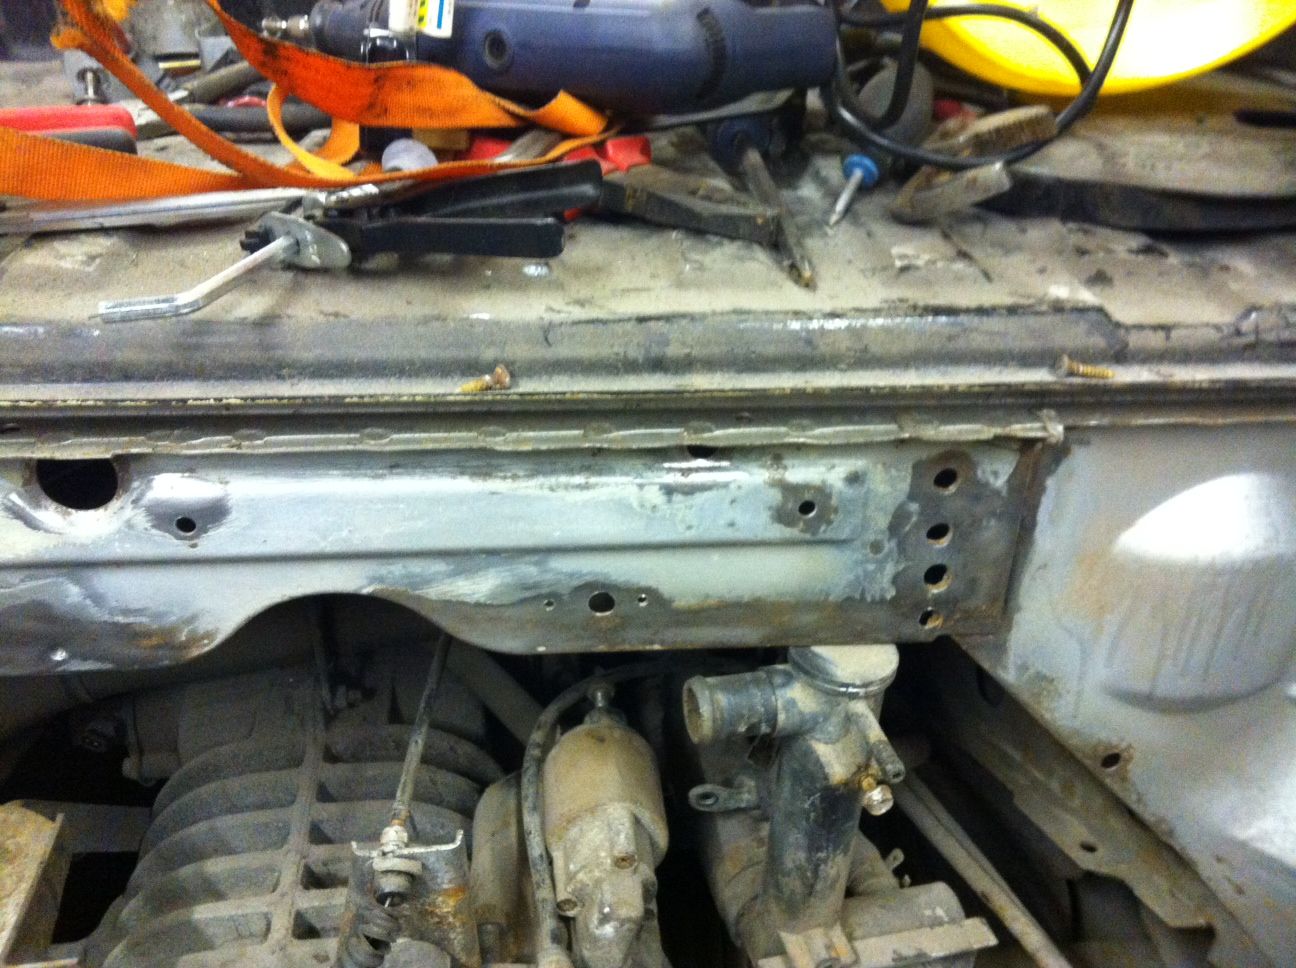 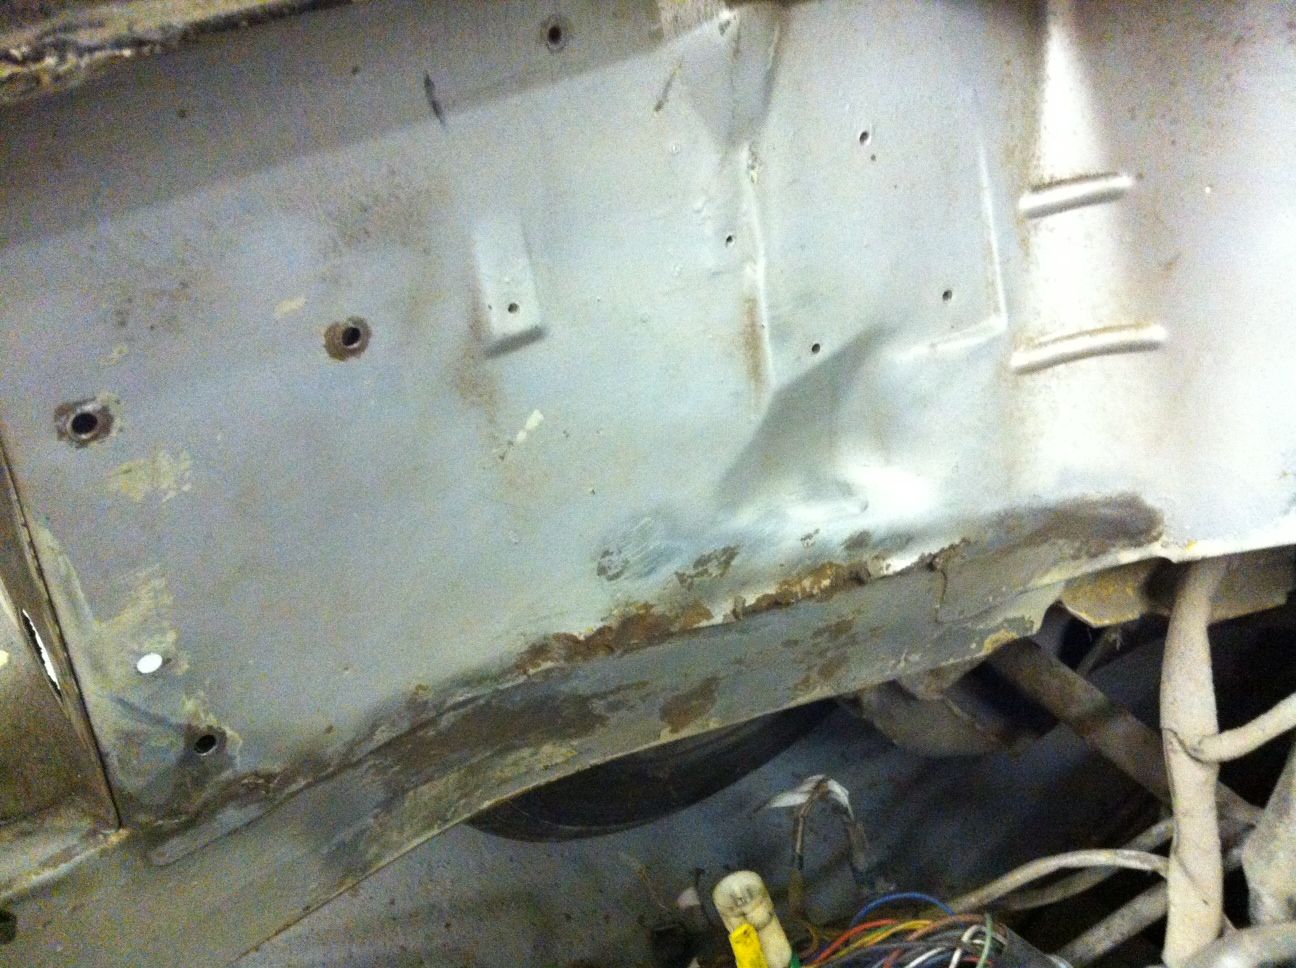 Inevitably, I found more rust ::) So, choppy choppy! 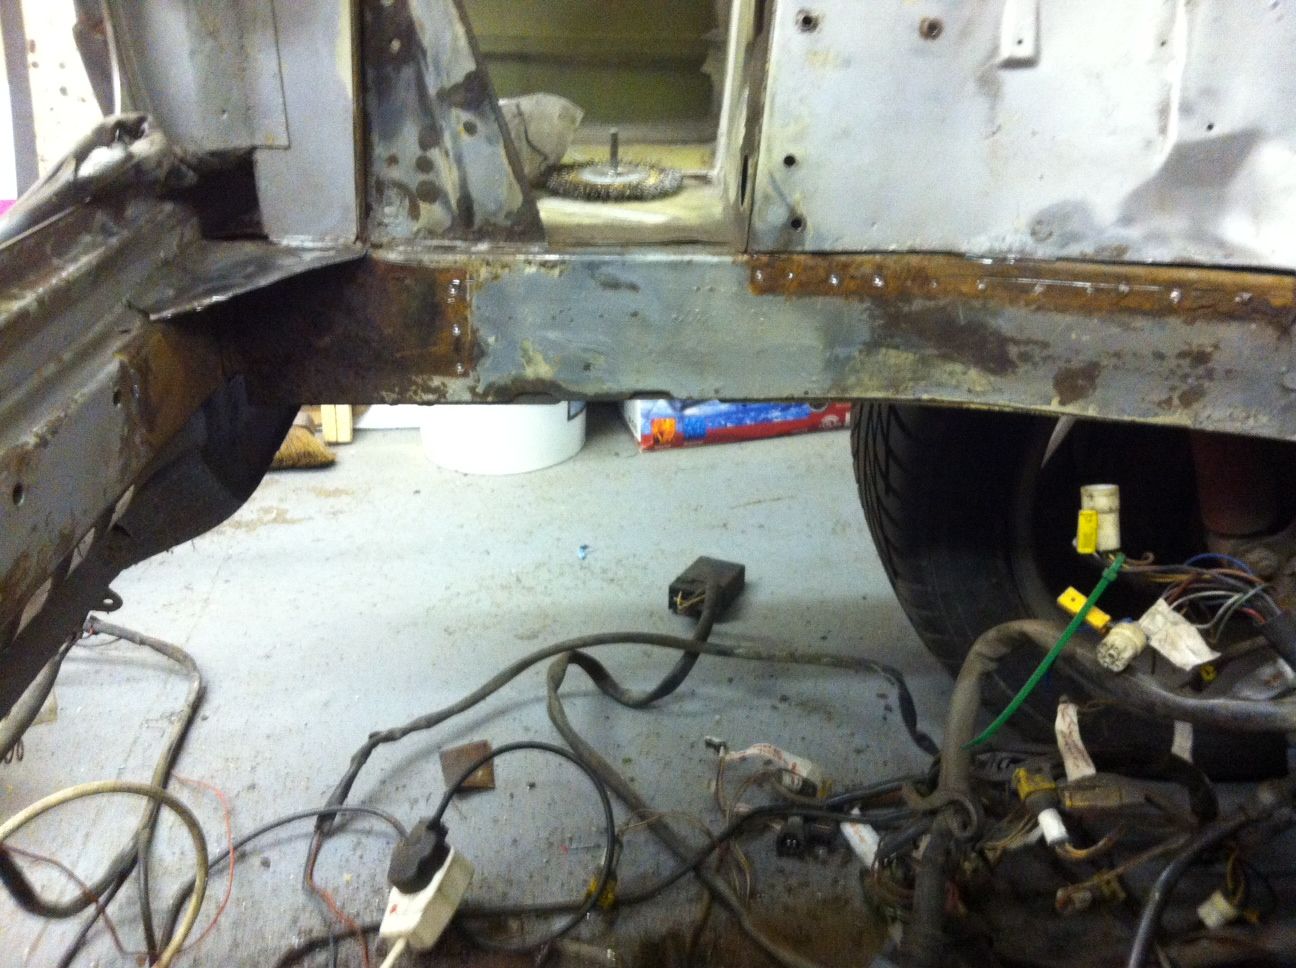 Ballcocks!! More welding then. That's all been ground down now but no pics. Then I dropped the gearbox. 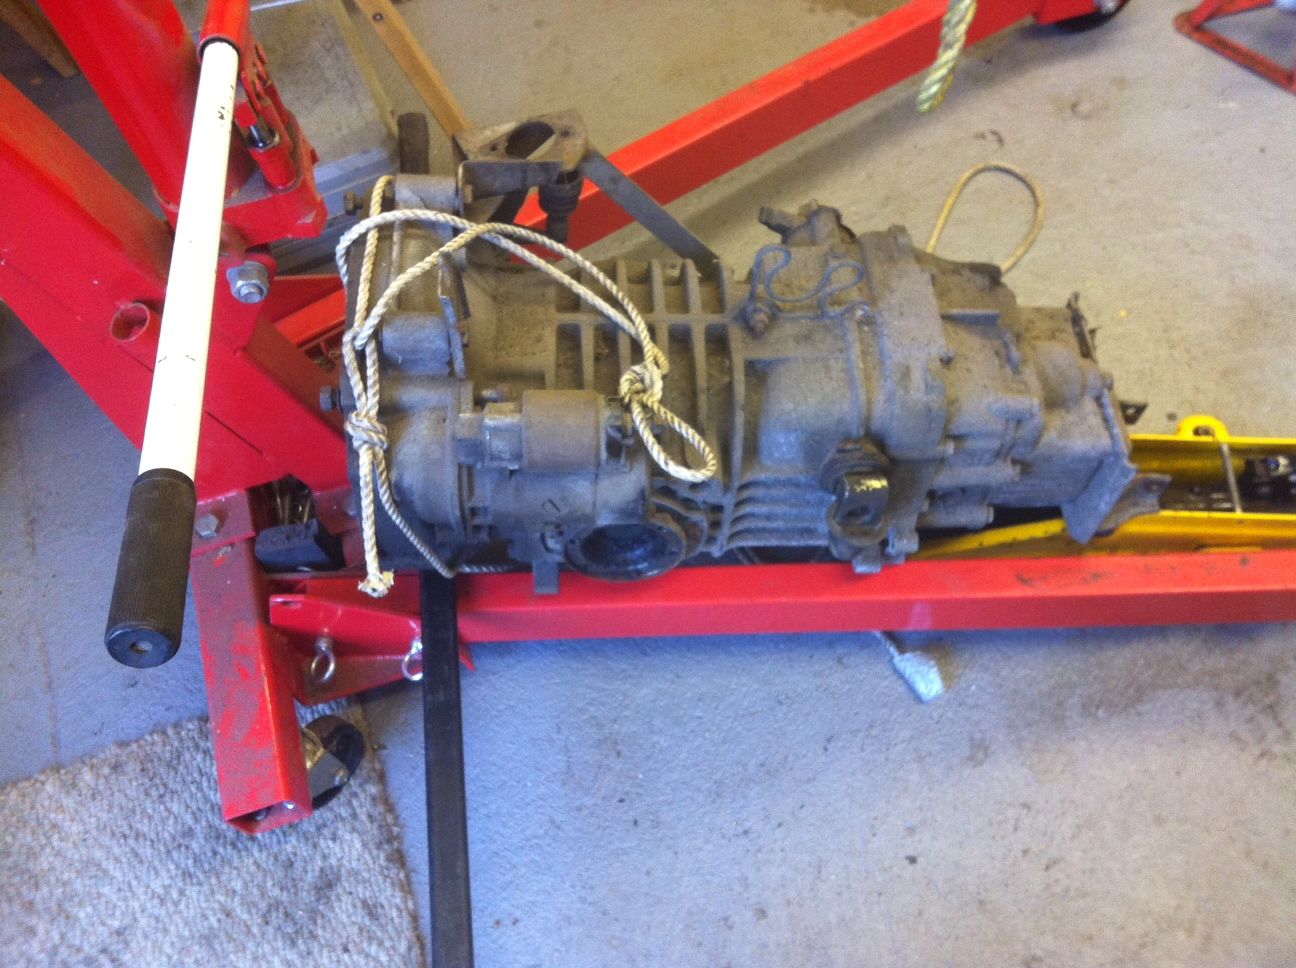 Makes it sound easy doesn't it. It wasn't, it was a ballache, but it's done now and on the floor. I've spent a bit of time underneath cutting cable ties, dodging coolant (trying to move the pipes underneath, a, because the heater pipes were crushed and b, because I am a bit OCD and want it to be tidy under there after I've thrown some chassis paint on) I really wish I'd been able to jet wash it underneath before I'd started, it is minging ::)
------------- Too many projects..... Not enough time! |
Posted By: surf dude
Date Posted: 28 Feb 13 at 20:13
|
So, a bit more time spent on the van this week. First off though I had to have a tidy up ::) There was dust everywhere (Denise pointed out that garages are supposed to be like that!) but it was doing my head in. After that, I wanted to make a bit of effort to keep the dust off the shelves so up went some cloths. 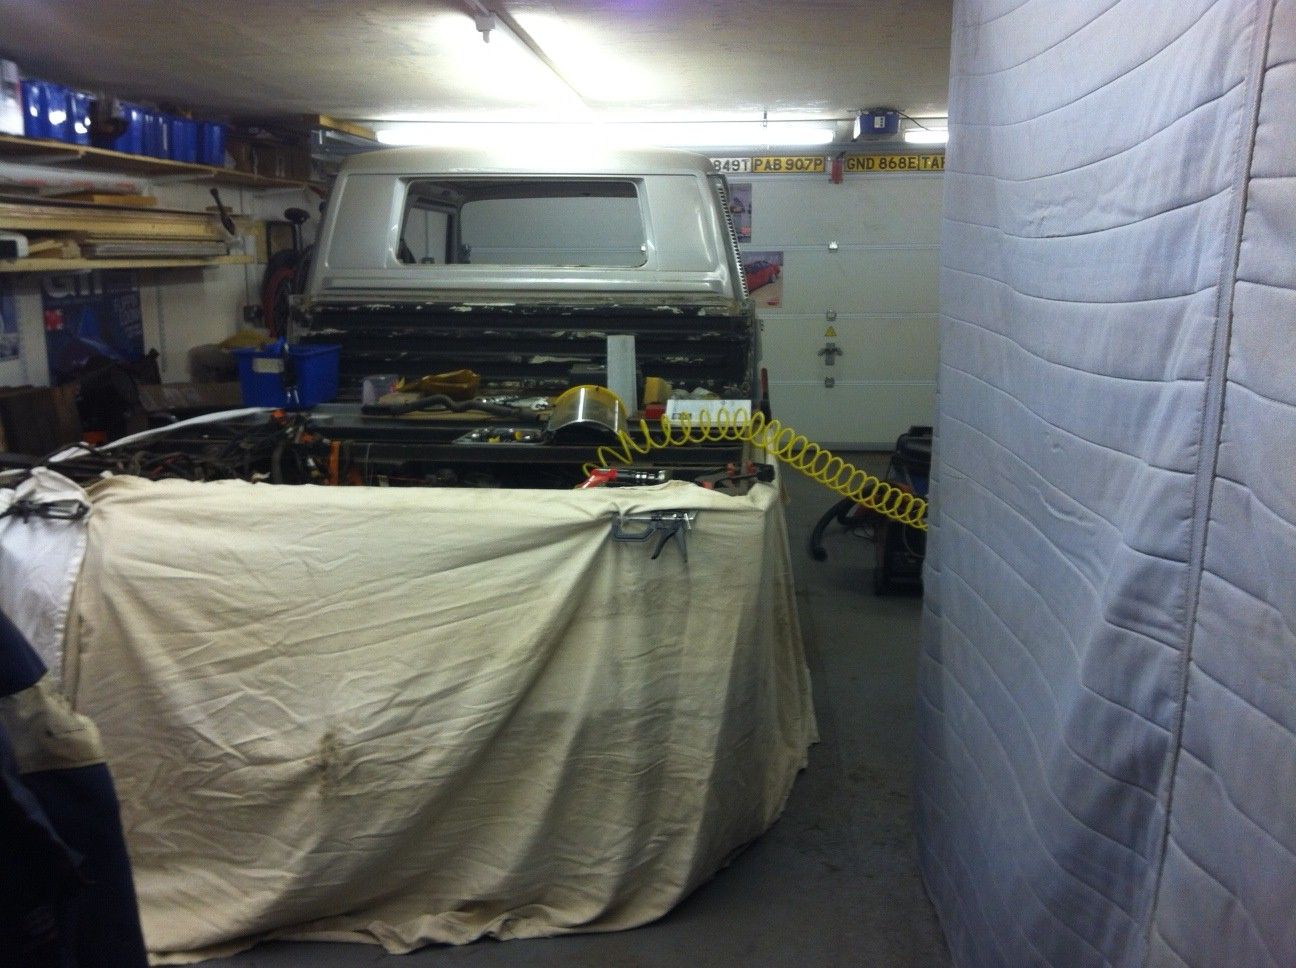 Then it was time to get cracking. Out came the grit blaster to start tackling this;  And after a few passes 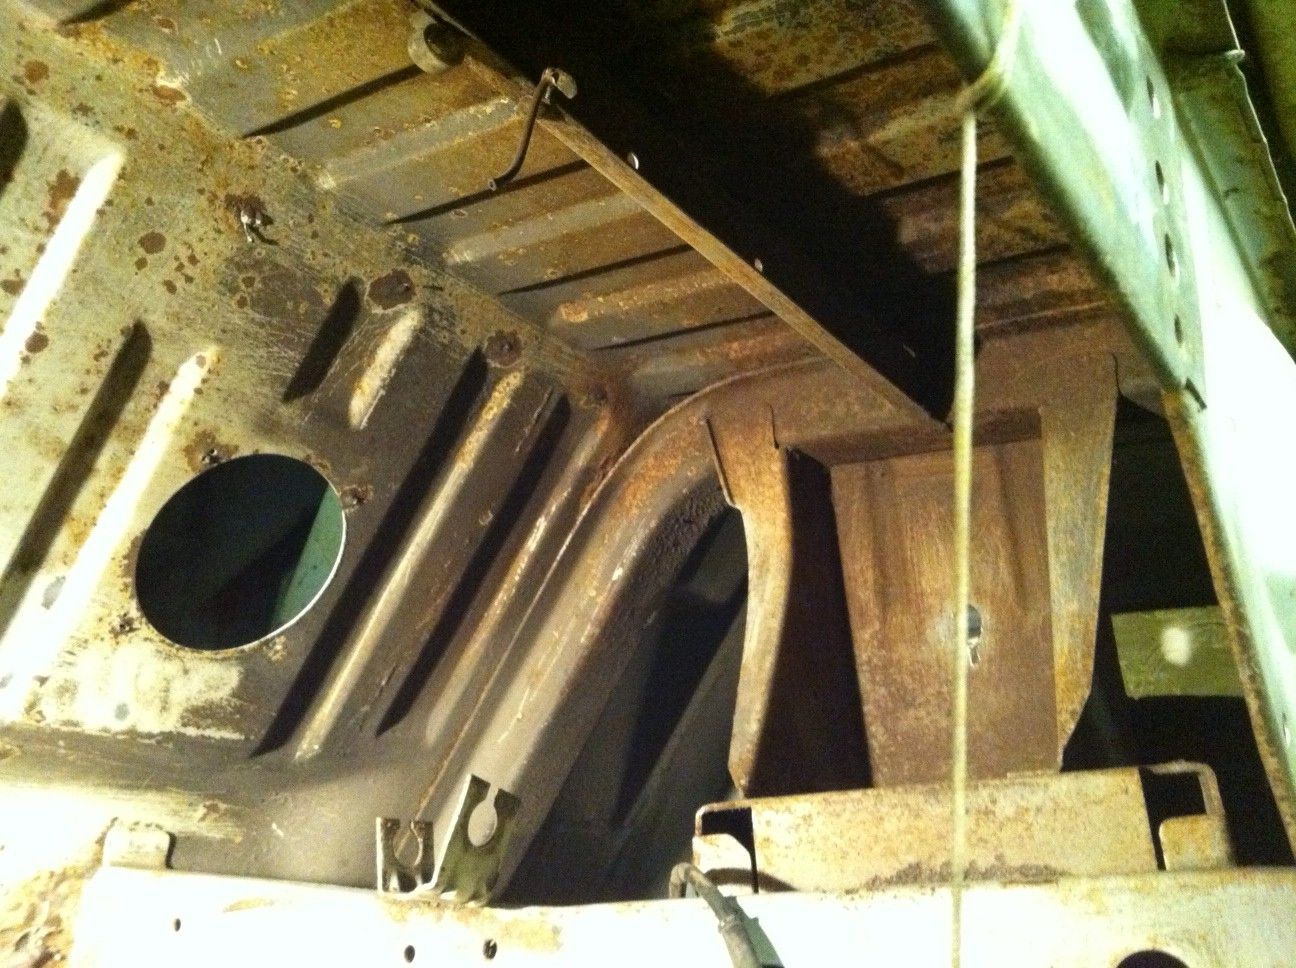 Different sides obviously ;) I didn't want to strip off all of the paint back to bare metal, just the horrible black stuff, which has clearly done nothing to stop the rust taking hold ::) It's all pretty much surface rust though so I'll treat it before I put some paint on (I've got chassis stuff, or I'll use some gloss black rustoleum that I used on the bumpers. Next up, I decided that to do the job properly I'd drop the driveshafts (easy) and the rear suspension (You all know where this is going don't you......?) So, bolt for the shock came out a treat, then the one form the inner side was the same. Brilliants thinks I, whoever did this before coated it with copperslip so no rusted in bolts for me. Nope! Typically, it was seized solid! On both sides ::) 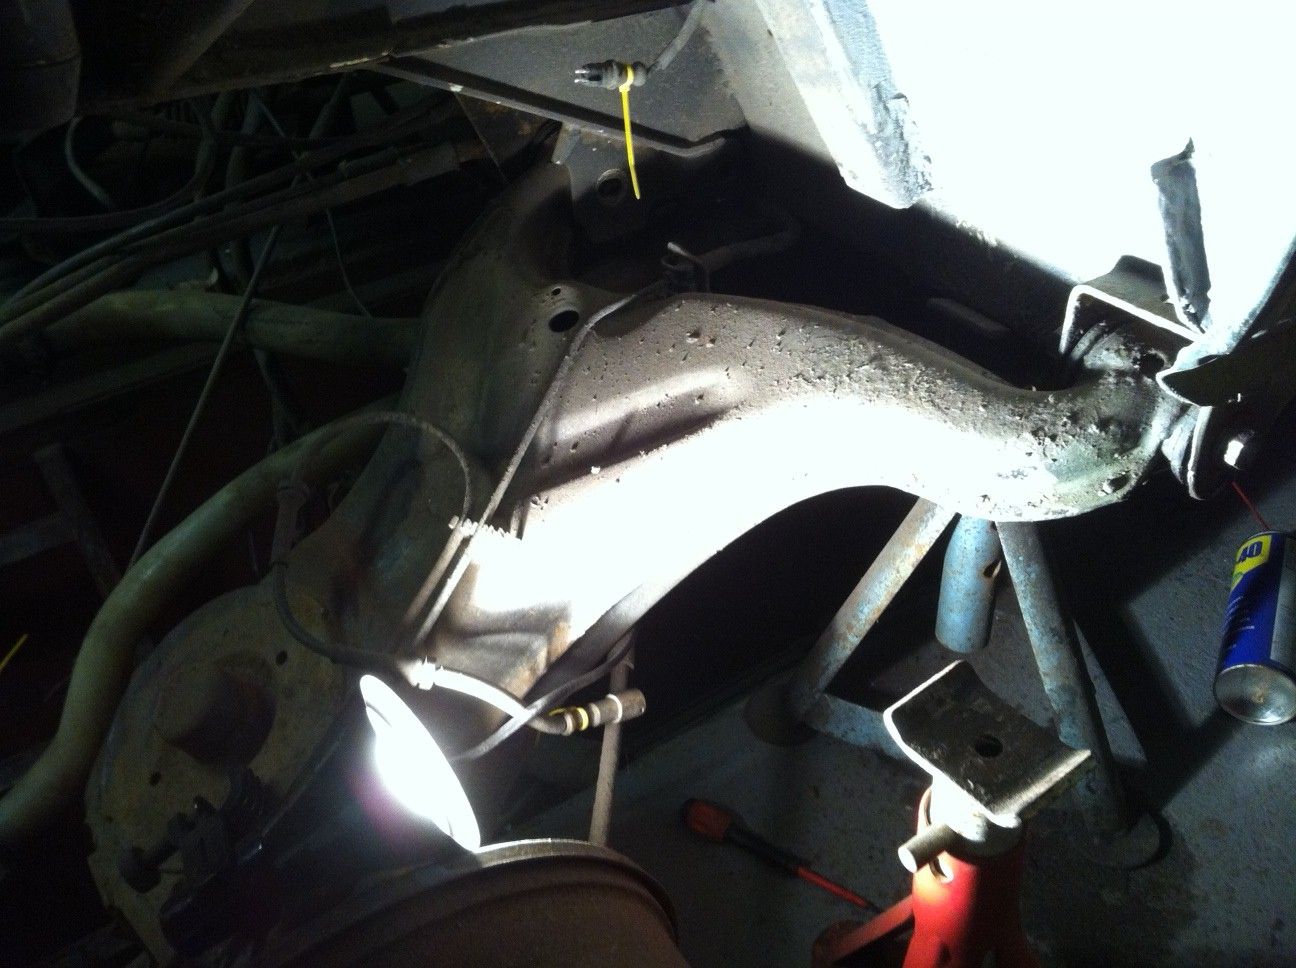 I've drilled out the bolt head on this side, thinking that I may be able to give it a good whack to get it moving. Erm, that'll be no then :( So, I've packed up for the night and am having some tea. Mainly because I have no idea how to chop off the other end of the bolt ::) Bloody van! Oh, I put the alloys back on the Golf (Insurance came up for renewal and I mentioned that it had larger alloys on and they wouldn't cover me ::) ) Thought it prudent to take them off until my renewal came through ;) One just happened to fall against the van ;D 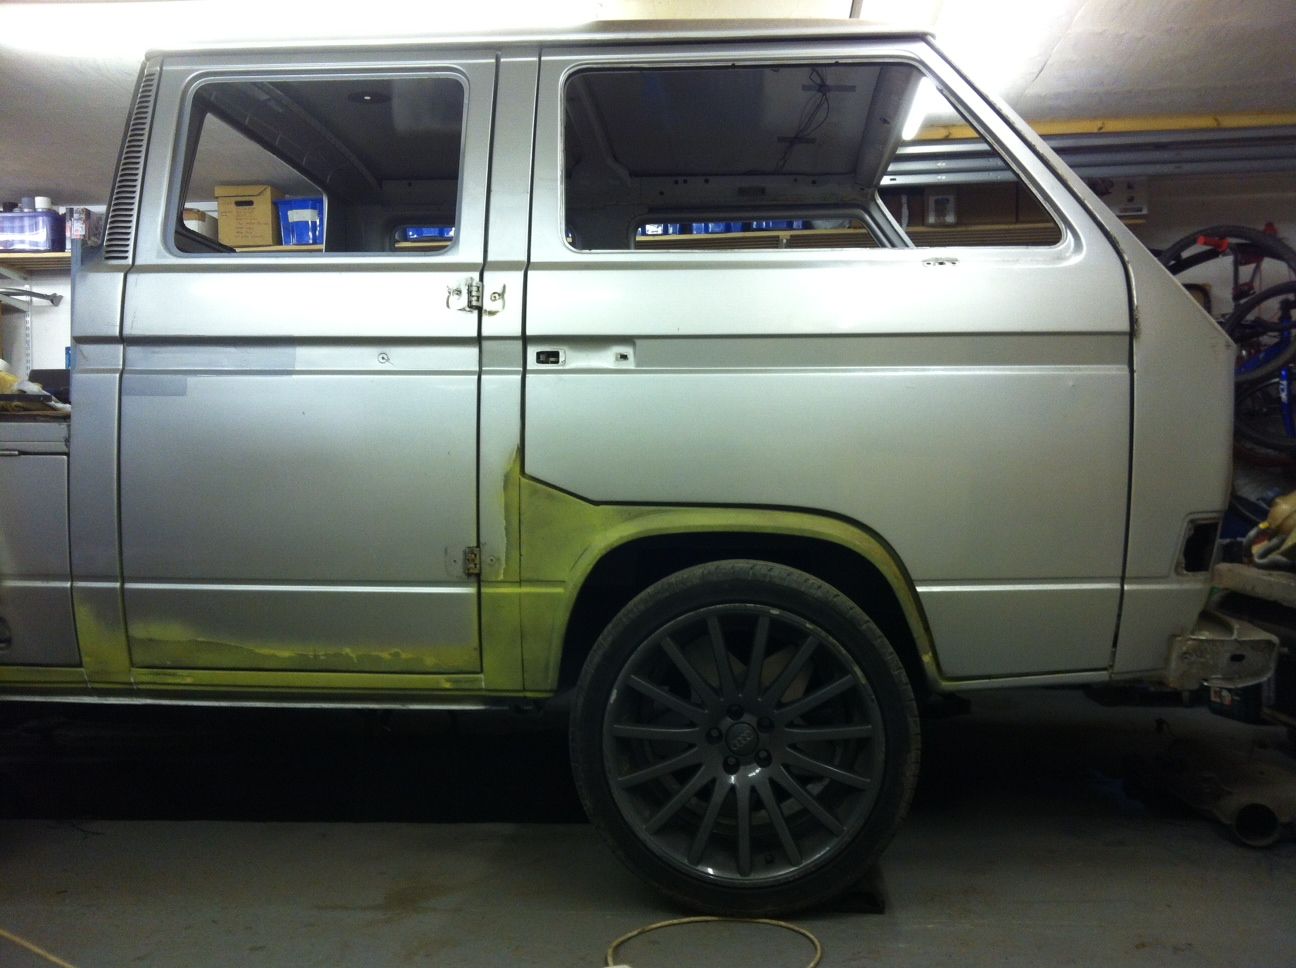 Back on it when I've figured out how to fit a grinder/saw/drill etc into a gap that a saw blade will only just fit into let alone anything else ::) Anyone??
------------- Too many projects..... Not enough time! |
Posted By: Gtavalanche
Date Posted: 28 Feb 13 at 20:22
|
I think Baxter doesn't even waste time messing with the bolts if they don't come straight out. He just opts for a 1mm cutting disc between the jacking point and trailing arm. ------------- I taste Hurty! |
Posted By: surf dude
Date Posted: 28 Feb 13 at 20:48
Yep, and that's exactly what I thought as well, but I've just had all the welding done and not sure that my welding is up to sticking them back on and it's obviously a bit tricky moving the van now!!------------- Too many projects..... Not enough time! |
Posted By: DavidPallister
Date Posted: 28 Feb 13 at 21:13
|
No no no, you don't need to cut the mounting point off. If you jack/prop the trailing arm up as high as it will go to get access, you can (very carefully) cut up through both sides of the exposed rubber bush, just inside of the mounting point. |
Posted By: Gtavalanche
Date Posted: 28 Feb 13 at 21:15
|
Nah. Just cut between the mount and the trailing arm. Then replace bushes and bolts. No welding required. Unless you have Parkinson's. :-) ------------- I taste Hurty! |
Posted By: surf dude
Date Posted: 28 Feb 13 at 21:21
|
Ah, right, I get you (what a tard ) I'll give that a bash next time I'm out in the garage! Thanks fellas. ------------- Too many projects..... Not enough time! |
Posted By: surf dude
Date Posted: 20 Mar 13 at 09:37
|
Well, I finally dragged my arse out to the garage and tackled the seized bolts. With much grinding and mucking about they finally were free! 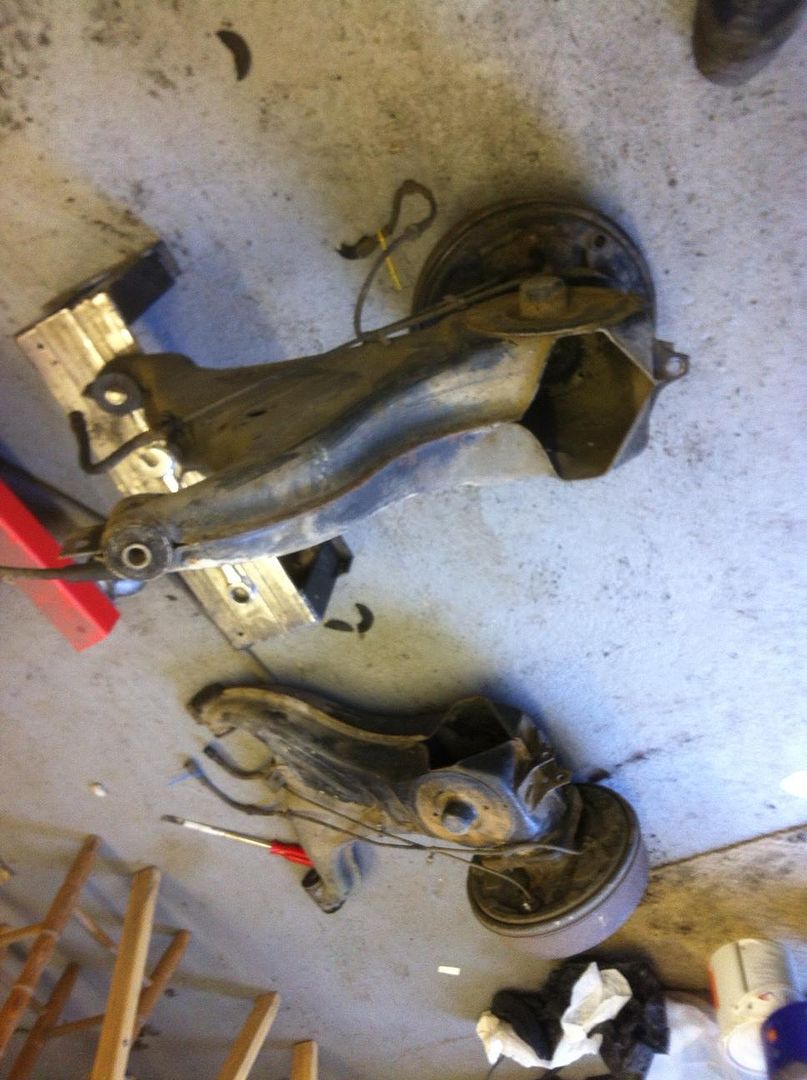 They were headed outside to the garden to get jetwashed, but my power washer is broken ::) so might scoot down to Morrisons tomorrow and use theirs ;) So, now we're looking at this; 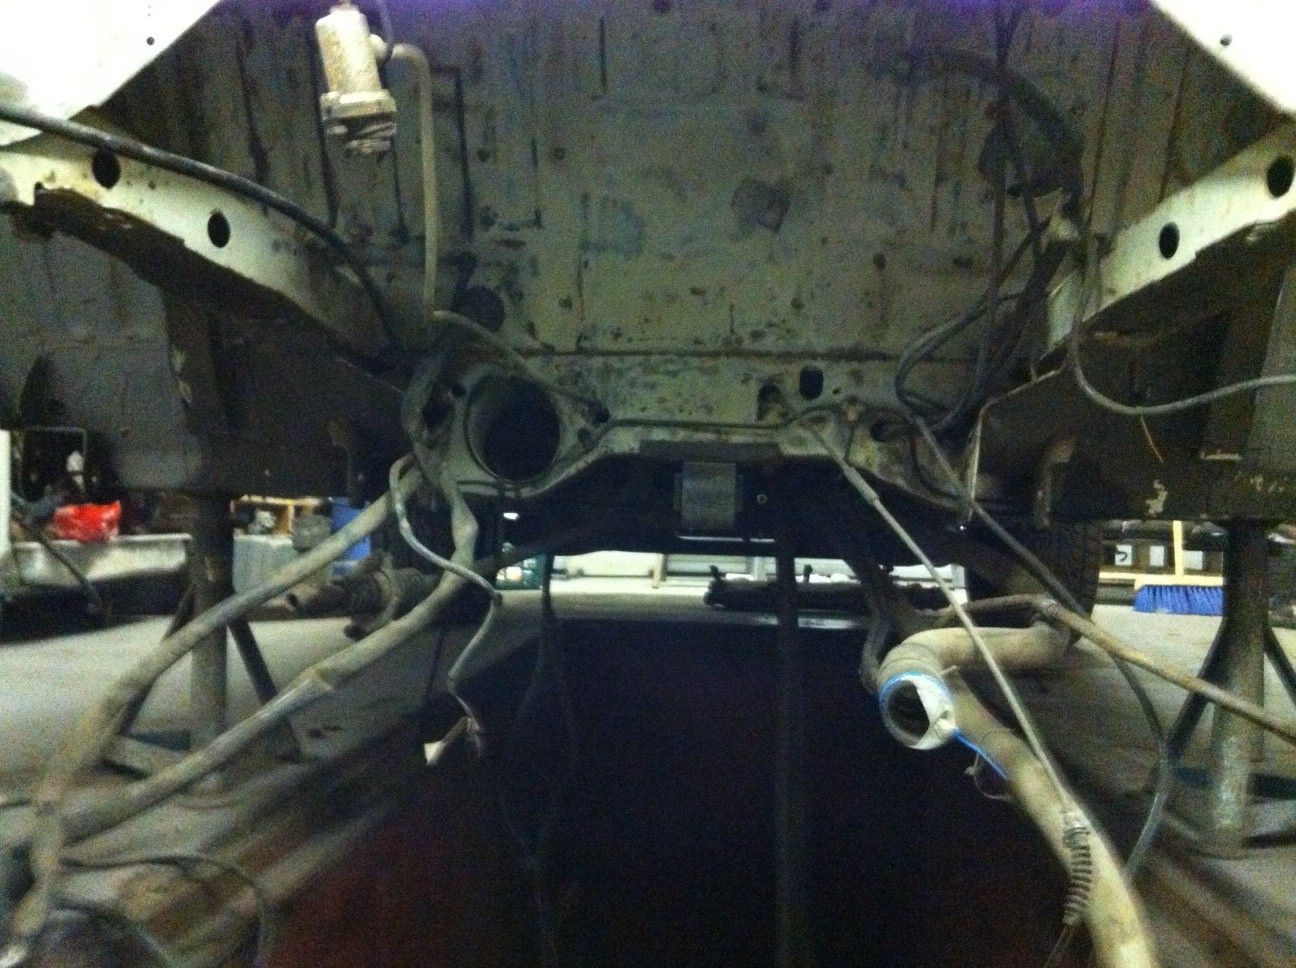 Tomorrow I'll get the grit blaster out again and finish off the stripping underneath, and then I'll throw some rust inhibitor and paint on. Probably gloss black, although I do have chassis stuff. Undecided, but I do want it to last (forever....... I'm not curse word doing this again!)
------------- Too many projects..... Not enough time! |
Posted By: surf dude
Date Posted: 20 Mar 13 at 09:38
|
Bit more done. (although I'm not exactly sure why it took me all day ::) ) SO, paintstripping? Why? Well, I don't really know to be honest, but I do want this to look good so I set too with wire brushes in the engine bay to get it looking clean. There are a lot of holes everywhere, mainly drilled for attaching things like the coil, electrical junction boxes etc, but most use self tappers and are hence a bit rusty. I want rid of all of these as most will no longer be needed and nor will the fixing for the air filter. Off that came 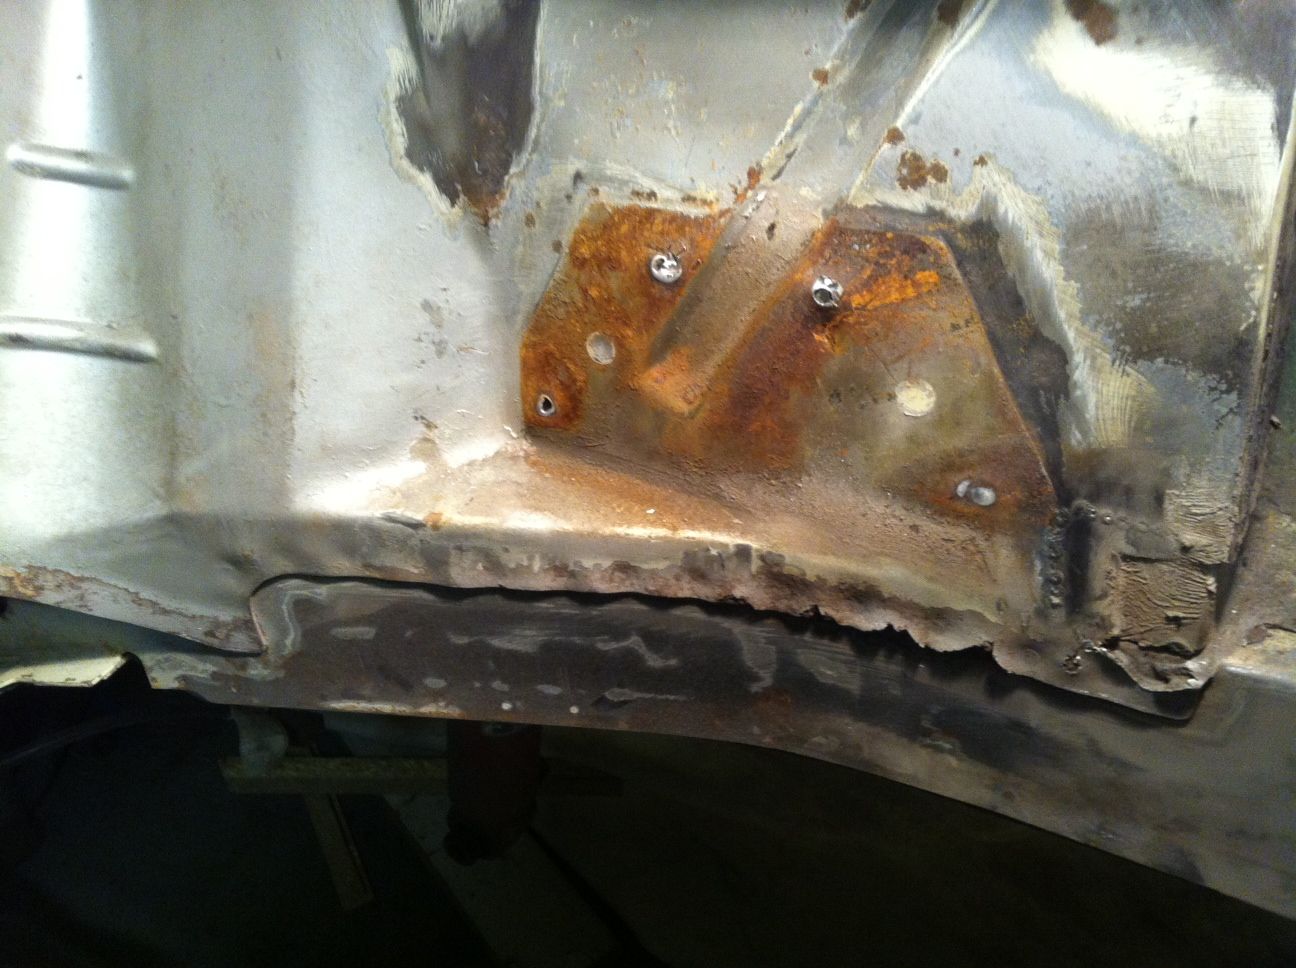 Oh, ffs, more crispiness. Choppy choppy.  Here's another area full of holes, and most of them surplus to requirements when the Scooby lump goes in, so after finding more rust around the seams that came out as well. 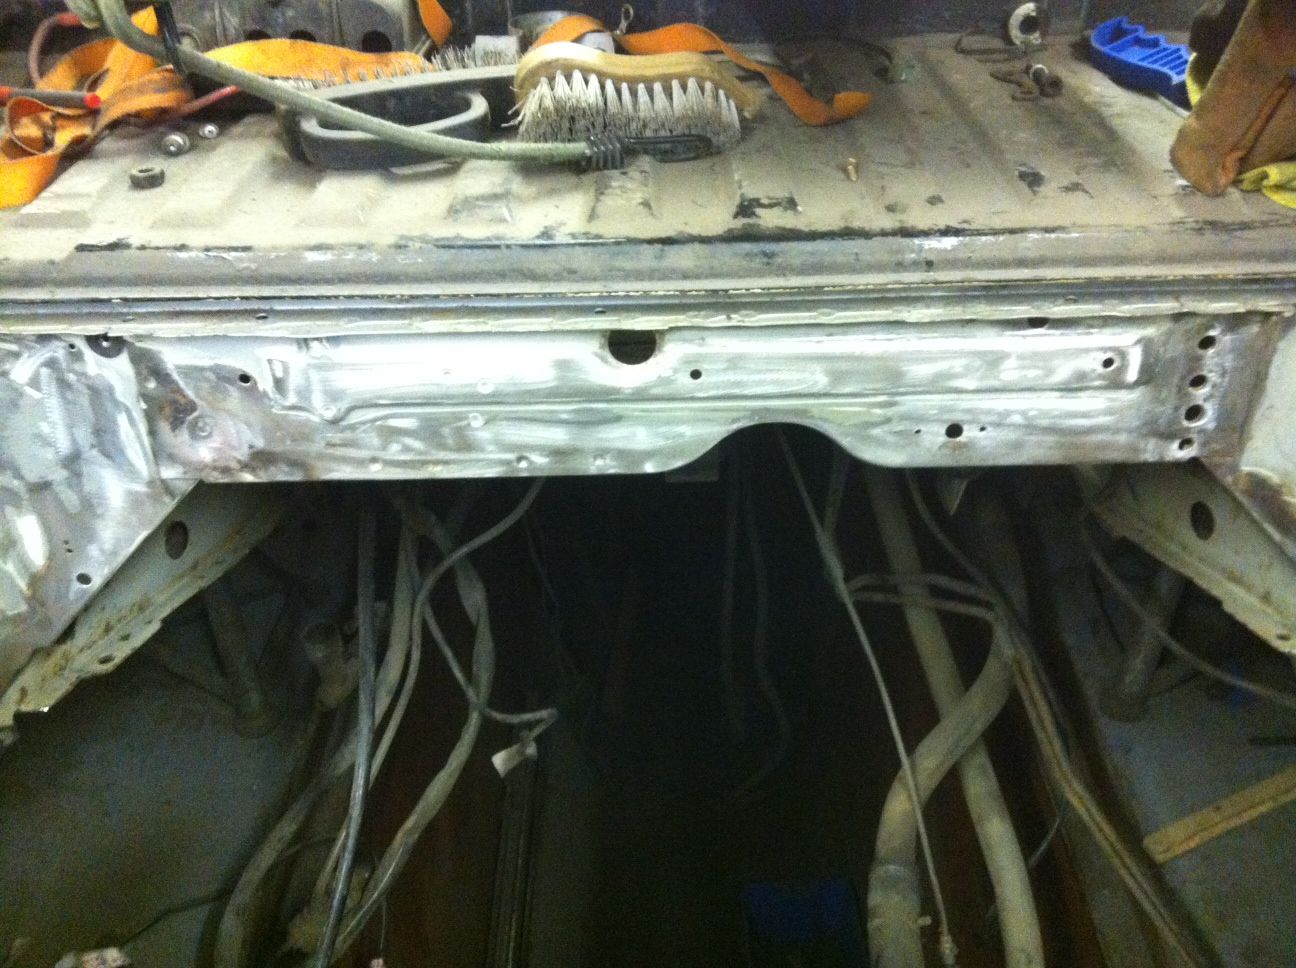 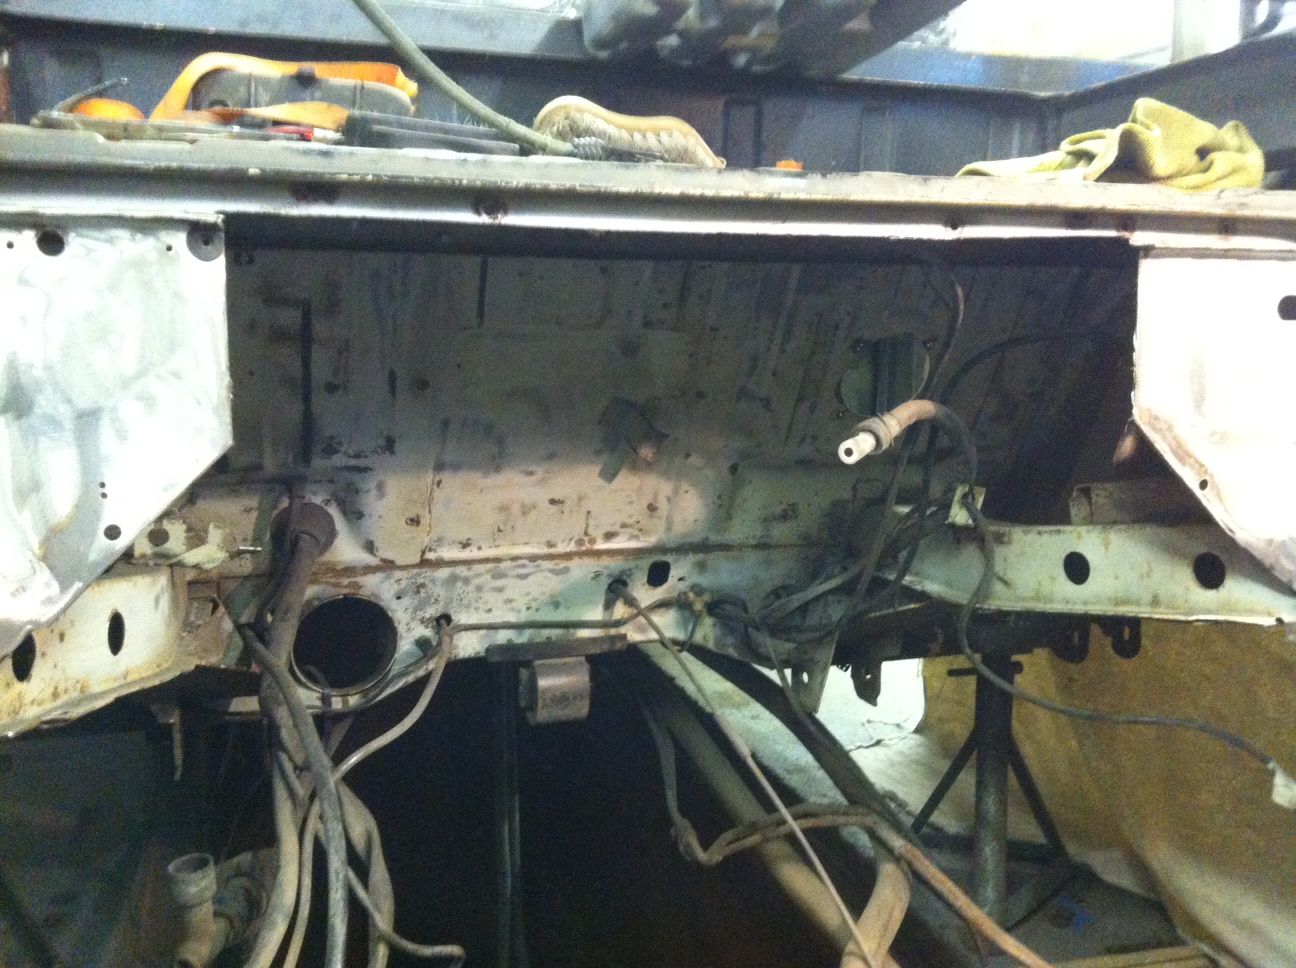 This will be remade so that the airfilter for the Scooby lump fits properly and can be routed around the engine and put somewhere cold (although up and above the axle may work as well) Then I spent some time sanding down the dash again ::) Just not happy with it and wanted all of the sanding marks gone! Knifing putty? Crap! So had to scrape that off and start again ::) 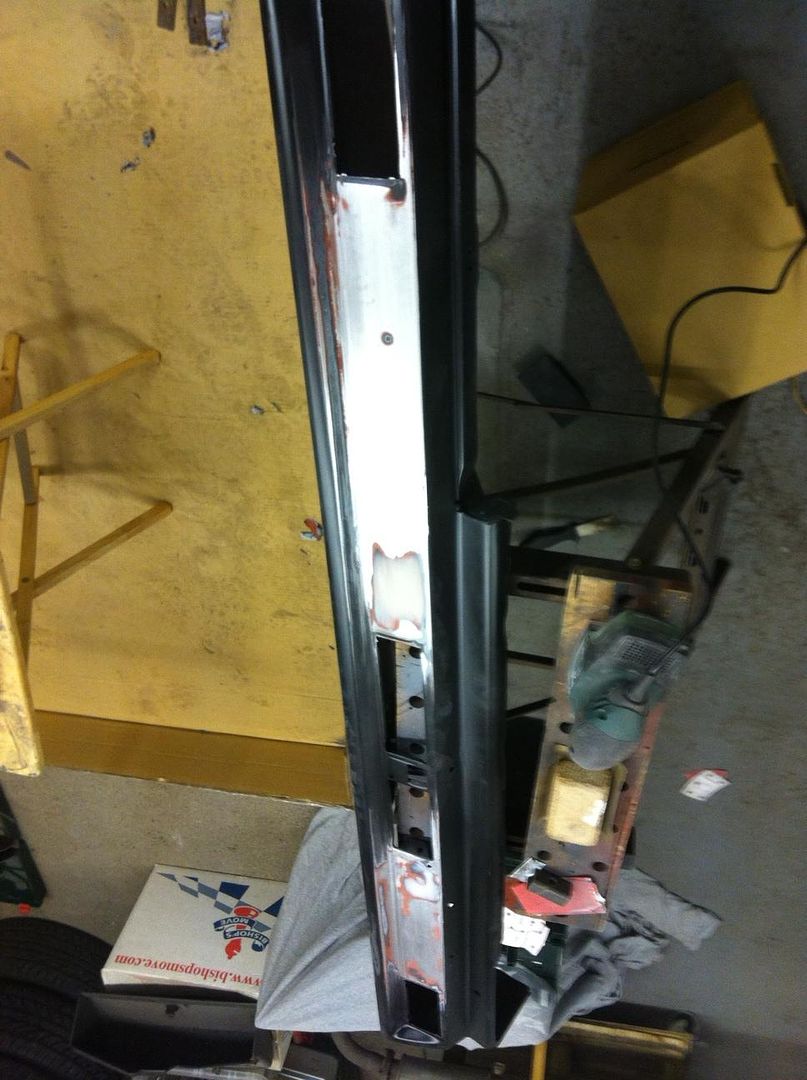 I also dug out the engine mounts for the Scooby lump to have a fiddle and see how they fit up. A couple needed derusting ready for paint and that will go on a bit later. All seems fairly straightforward, I need to get some new bolts and stuff, and drop the sump to fit one of the mounts, but looks OK. Then after choking on dust for an hour and basically getting nowhere on the paint stripping I went off and bought a proper grit blaster so will set to the van with that next week. Thanks for checking in ;) Pete
------------- Too many projects..... Not enough time! |
Posted By: Gtavalanche
Date Posted: 20 Mar 13 at 12:46
|
Looking better under there already. How much was the grit blaster? ------------- I taste Hurty! |
Posted By: surf dude
Date Posted: 20 Mar 13 at 13:06
|
£80. Plus grit (already got that but it's about £25 a tub) and the compressor which I already have but was £300+ It's a bit expensive this van restoration bollocks isn't it? ------------- Too many projects..... Not enough time! |
Posted By: Gtavalanche
Date Posted: 20 Mar 13 at 15:56
|
That's pretty cheap when you look at how much it would cost to pay some one to do it everytime. It does get expensive but a man needs his hobbies. ------------- I taste Hurty! |
Posted By: Syncost Alot.
Date Posted: 20 Mar 13 at 20:37
|
Good work Dude, Keep the faith & keep plugging away! Once all the dirty, shitty, cutting & scrapping stuff is out the way, putting clean/new stuff back together is all down-hill!! ------------- Founder member of the "WESTERN FRONT VOLKSWAGEN KLUB".......membership no 0001 |
Posted By: surf dude
Date Posted: 20 Mar 13 at 20:38
True enough  Just need to make use of it all (and I'm sure I will!!) At Chillwell tonight, FTRS medical! Back on the van on Monday! Just need to make use of it all (and I'm sure I will!!) At Chillwell tonight, FTRS medical! Back on the van on Monday! ------------- Too many projects..... Not enough time! |
Posted By: surf dude
Date Posted: 03 Apr 13 at 08:34
|
Evening! Well, I've managed to motivate myself a bit and after getting a proper grit blaster I set too on the engine bay. The stuff gets everywhere, but after masking up a bit and making a grit catcher out of a very large cardboard box we got to here :D 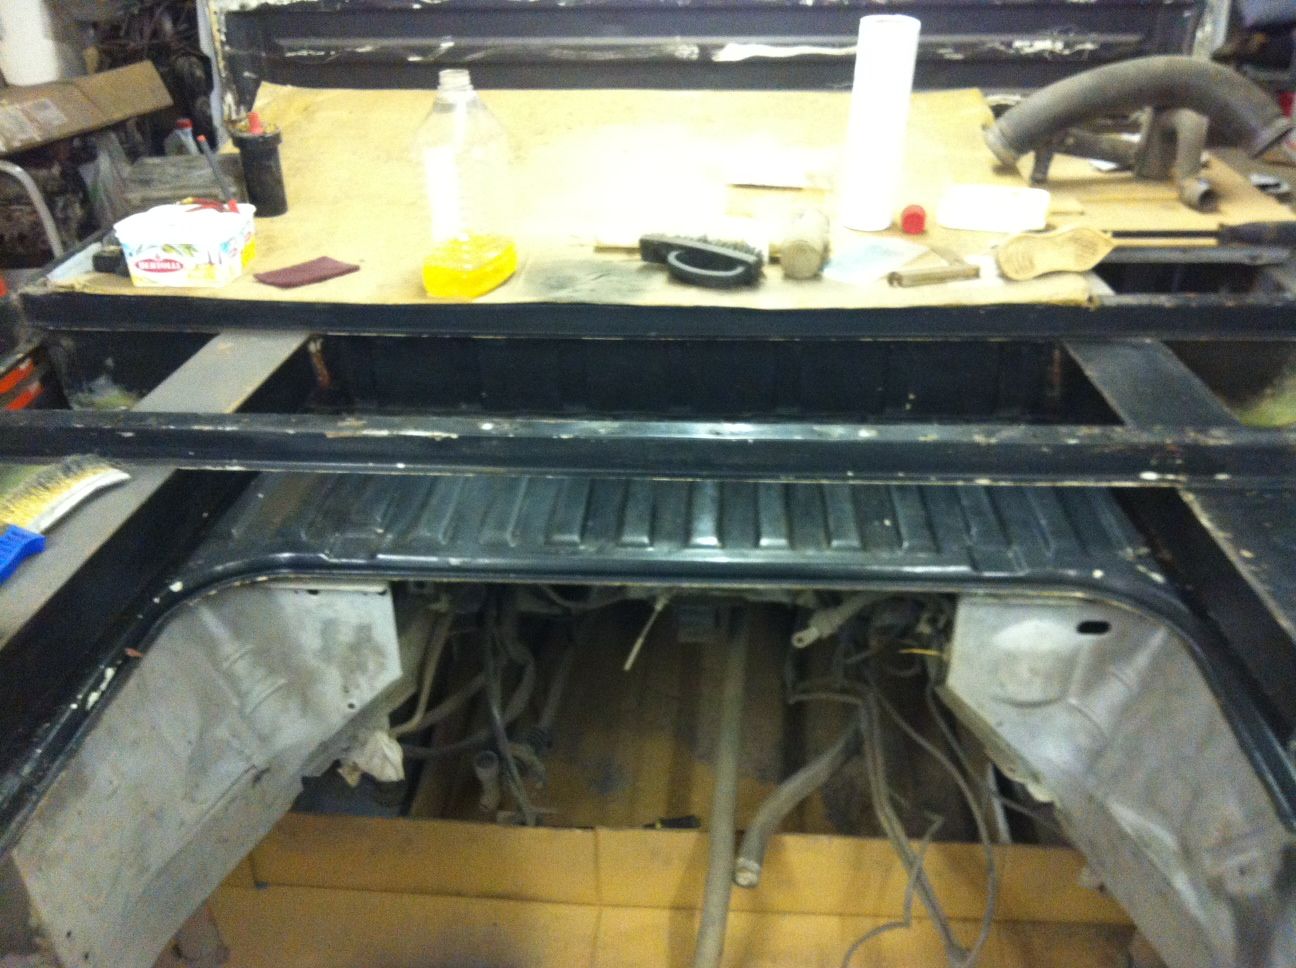 Why I didn't just bite the bullet and buy one months ago, I will never know ::) Suffice to say, it will be getting a lot more use! Today I had a clean up and hoovered up the used grit before tackling the dried waxoyl that had been spread liberally around the back end, and which wasn't doing a lot apart from collecting dirt. After an hour with a wire brush we got to what you see above ^^ I had noticed a couple of flaky areas though so had a tentative scrape with a small chisel 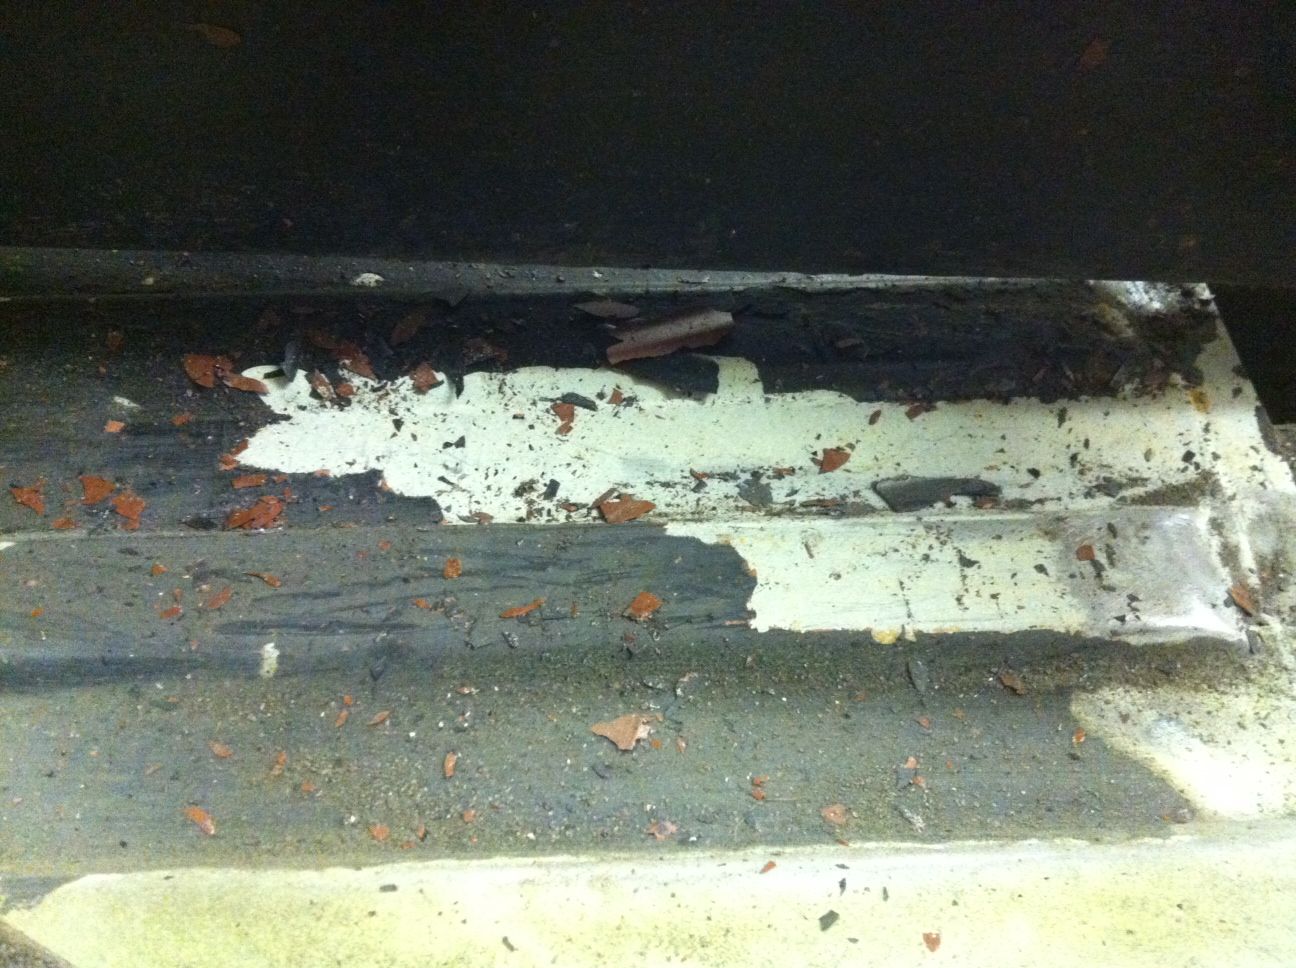 Erm, that doesn't seem to be right! It basically looks like someone has painted chassis black everywhere without any prep! More scraping.... 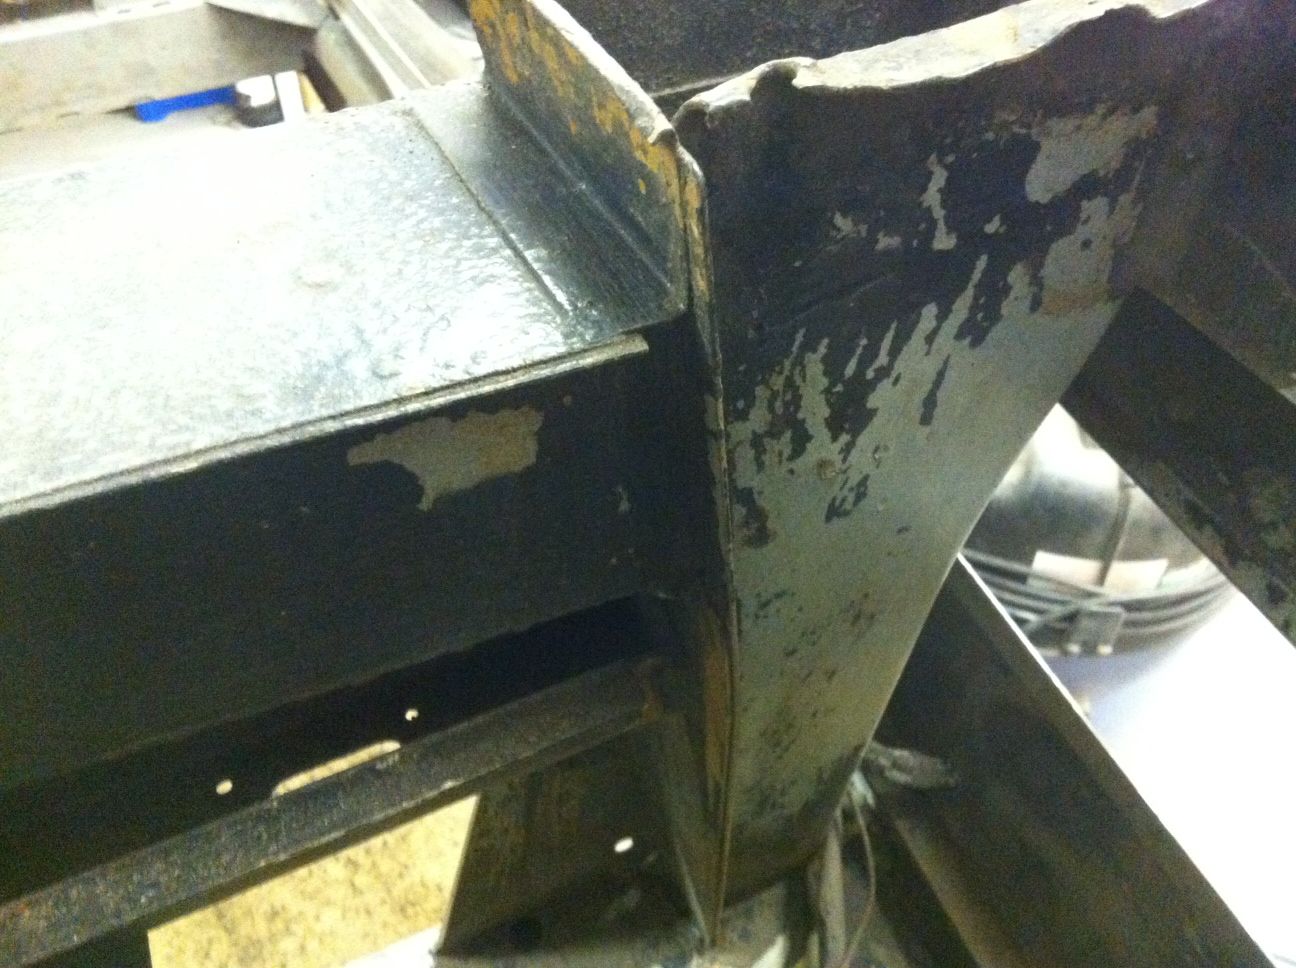 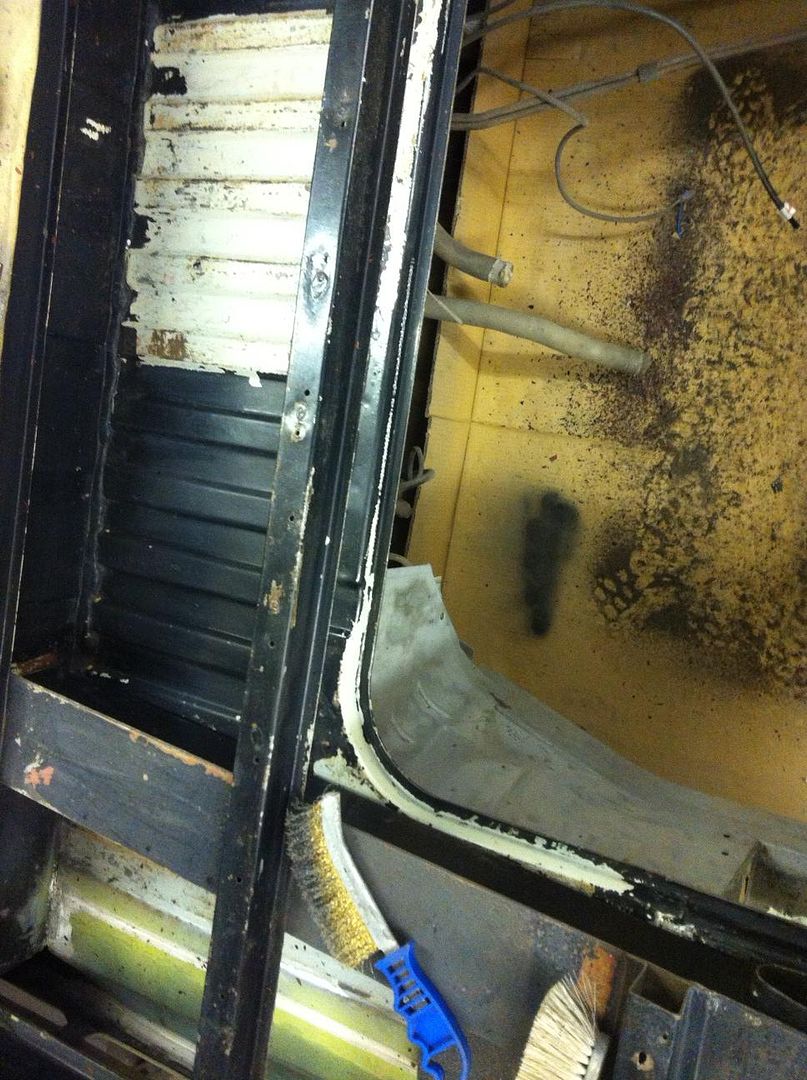 I'll be attacking it with the grinder tomorrow. More work, but there is surface rust under there and I don't want to have to go back and do any of this again so I'd rather give it the best chance possible! Thanks for looking in :D Pete
------------- Too many projects..... Not enough time! |
Posted By: surf dude
Date Posted: 04 Apr 13 at 23:33
|
Well, another day, another.........  (Load of rust with this bloody van!!!) (Load of rust with this bloody van!!!)So, I took to it with the grinder and a new wire cup brush courtesy of Aldi (or Lidl!) In fact I went a bit mad with grinder attachments!! Sure I'll get the use out of them though. After a bit of grinding we get to here, 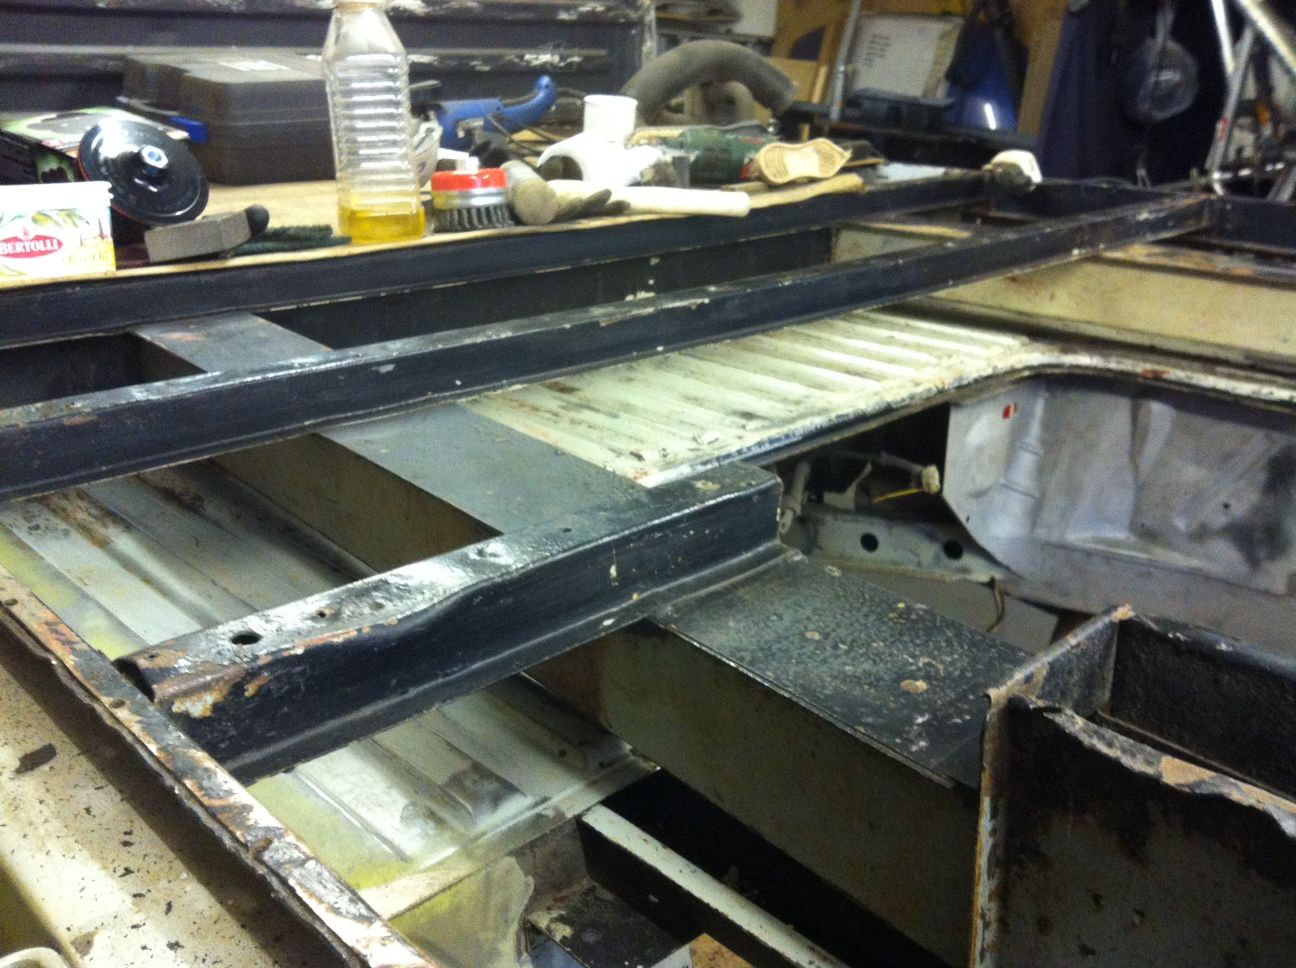 But I can't get to some areas so out comes the spot weld drill and..... 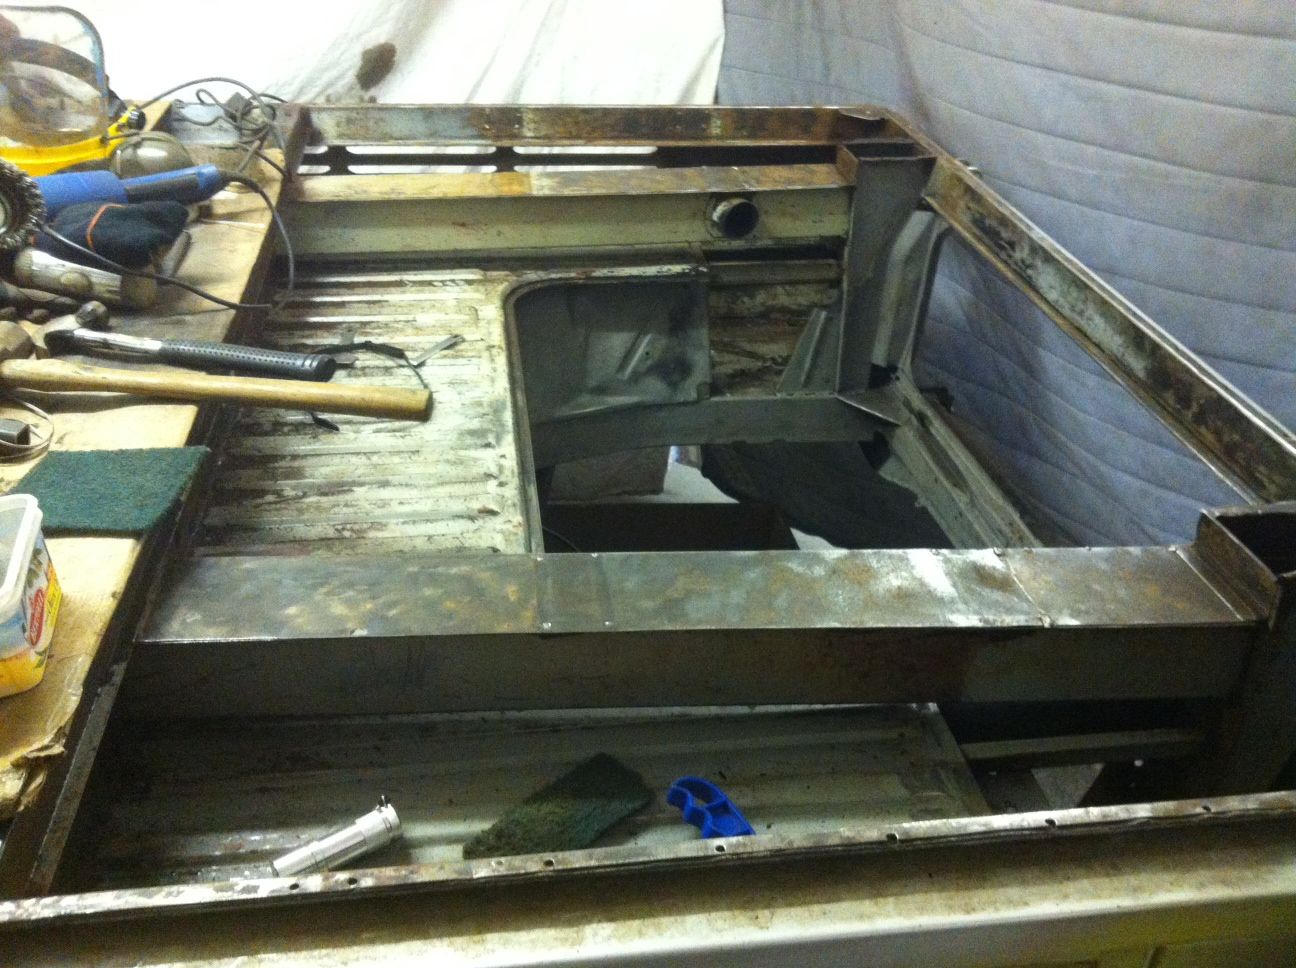 They were in a right old state to be honest. 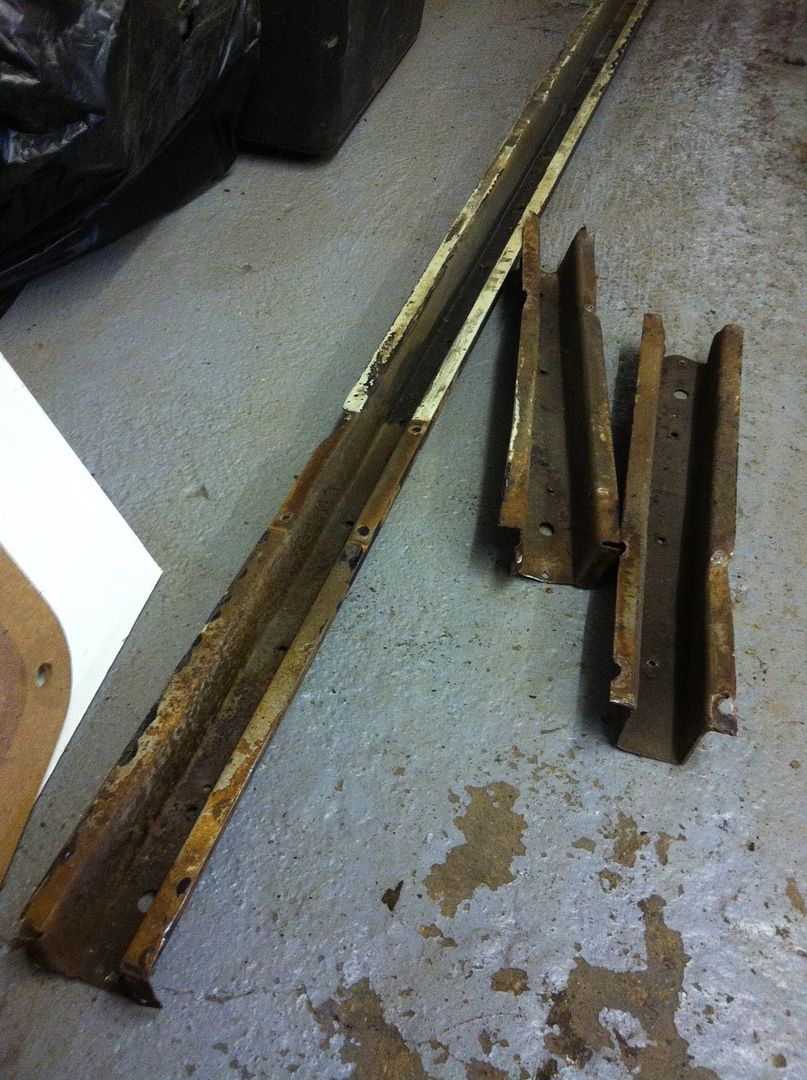 But as I had foreseen their demise I had (for once) thought ahead ;) 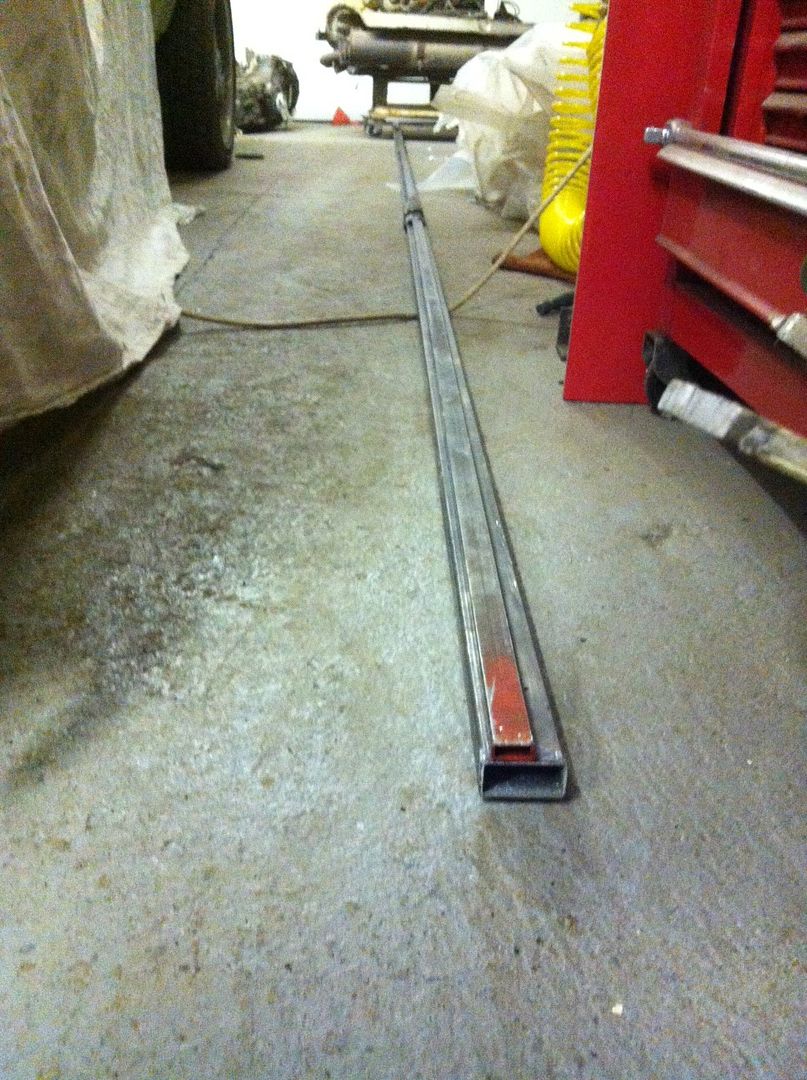 6 metres of 40mm x 20mm box section. Sadly the other stuff with it was an exercise in man measurements All too small  I spent another hour with the grit blaster, but it doesn't really look too different! Next job is to start treating some rust, otherwise I'll be getting a bit carried away! The box section will be reinstated to form a better base for the new bed as well as making up an area for an engine lid. On another note I caught sight of the side of the van  At this rate I'm going to need some more grit At this rate I'm going to need some more grit  ------------- Too many projects..... Not enough time! |
Posted By: Gtavalanche
Date Posted: 04 Apr 13 at 23:58
|
Where does it stop? You'll end up taking the whole thing apart and rebuilding it! ------------- I taste Hurty! |
Posted By: surf dude
Date Posted: 05 Apr 13 at 00:00
|
Don't go there......... ------------- Too many projects..... Not enough time! |
Posted By: Gtavalanche
Date Posted: 05 Apr 13 at 00:02
|
Lol. Keep plodding on buddy. It'll be sorted soon. ------------- I taste Hurty! |
Posted By: surf dude
Date Posted: 05 Apr 13 at 00:10
Soon! Need to make the most of the time off that's for sure, just bought some more blasting media....... Start underneath tomorrow. Oh, found more rust as well! More welding to add to the list  ------------- Too many projects..... Not enough time! |
Posted By: surf dude
Date Posted: 08 Apr 13 at 21:48
|
Quick update while I eat my lunch. So, I mentioned before the crusty rear quarter. I knew this would be a problem, It has had a prang on that rear corner and all of the seams are a bit mashed as well as having way way too much filler in! The plan at the moment is to see what's what and go from there, but an overriding factor is that the rear quarters are (a) ridiculously expensive, (b) only available for a van so twice as tall as needed and finally (c) I'm pretty sure that the offside one is not available anywhere. So, grinder, spot weld drill and chisel and here we go..... What we're looking at 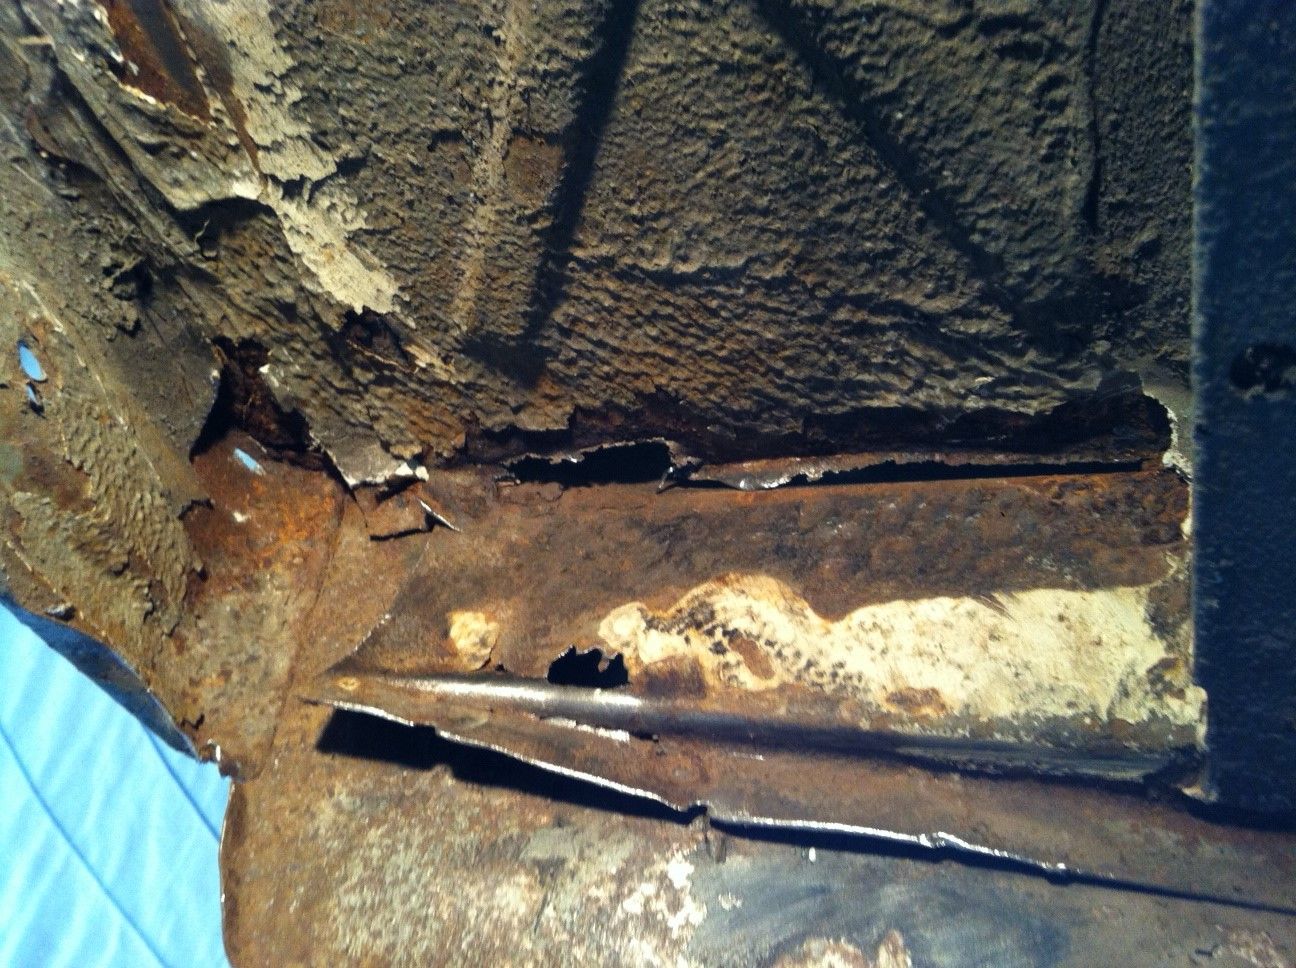 This area is rusted out and spotwelded to the rear valance. It also forms part of a piece that stretches across the whole van (apologies for the picture, had to have a quick play so you can see it ::) ) 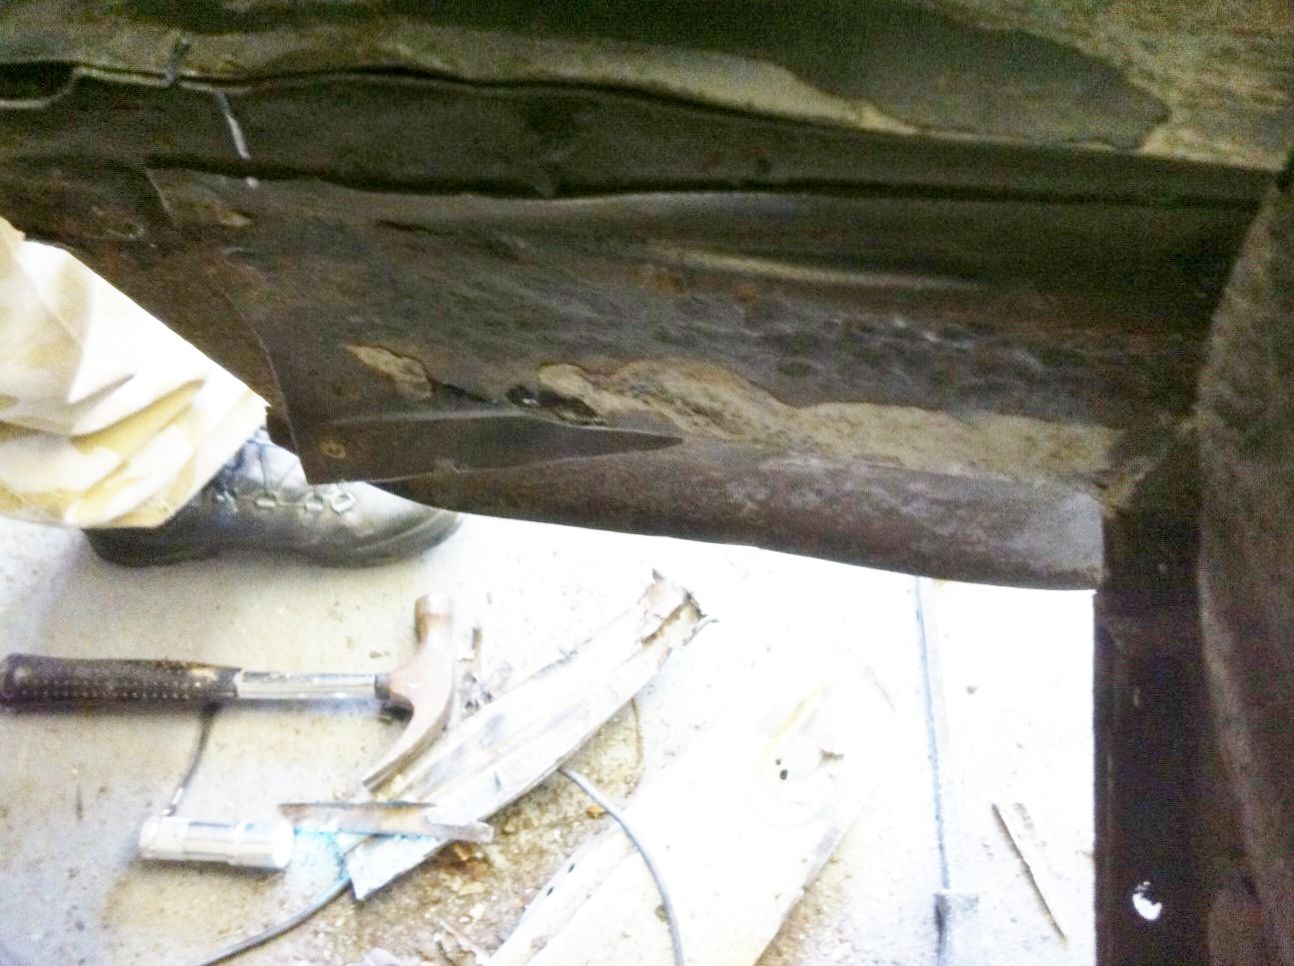 This is where we are now, I've sliced the battery tray area and folded it up out of the way so I can access the rear valance! 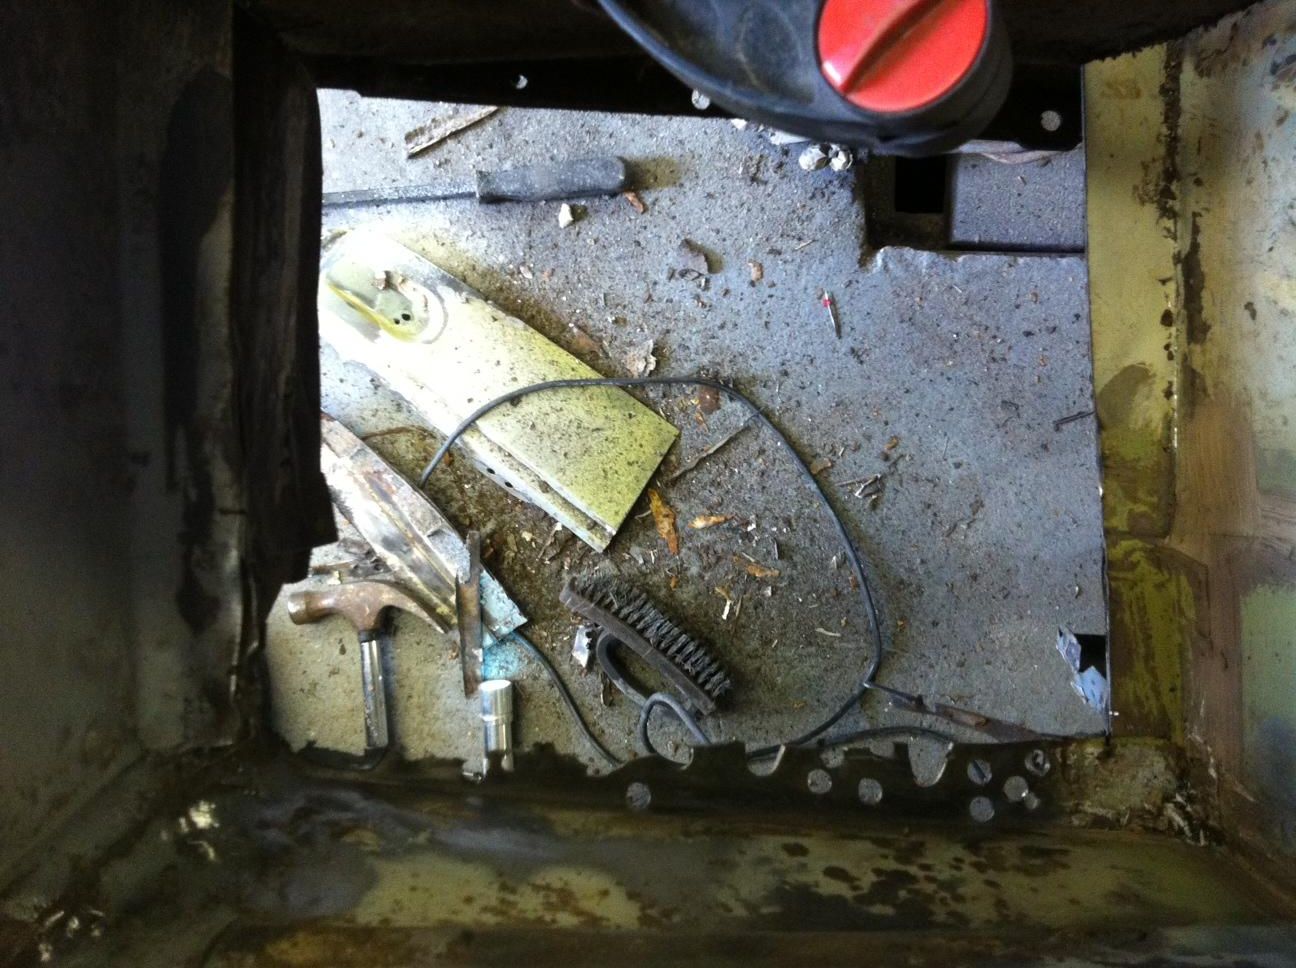 You can see the crash damage here as well. Just need to order a new lower corner now and then back into the garage! More to follow....... Pete ------------- Too many projects..... Not enough time! |
Posted By: surf dude
Date Posted: 08 Apr 13 at 22:02
So, more rust chopping. Out came that bar and this is what's left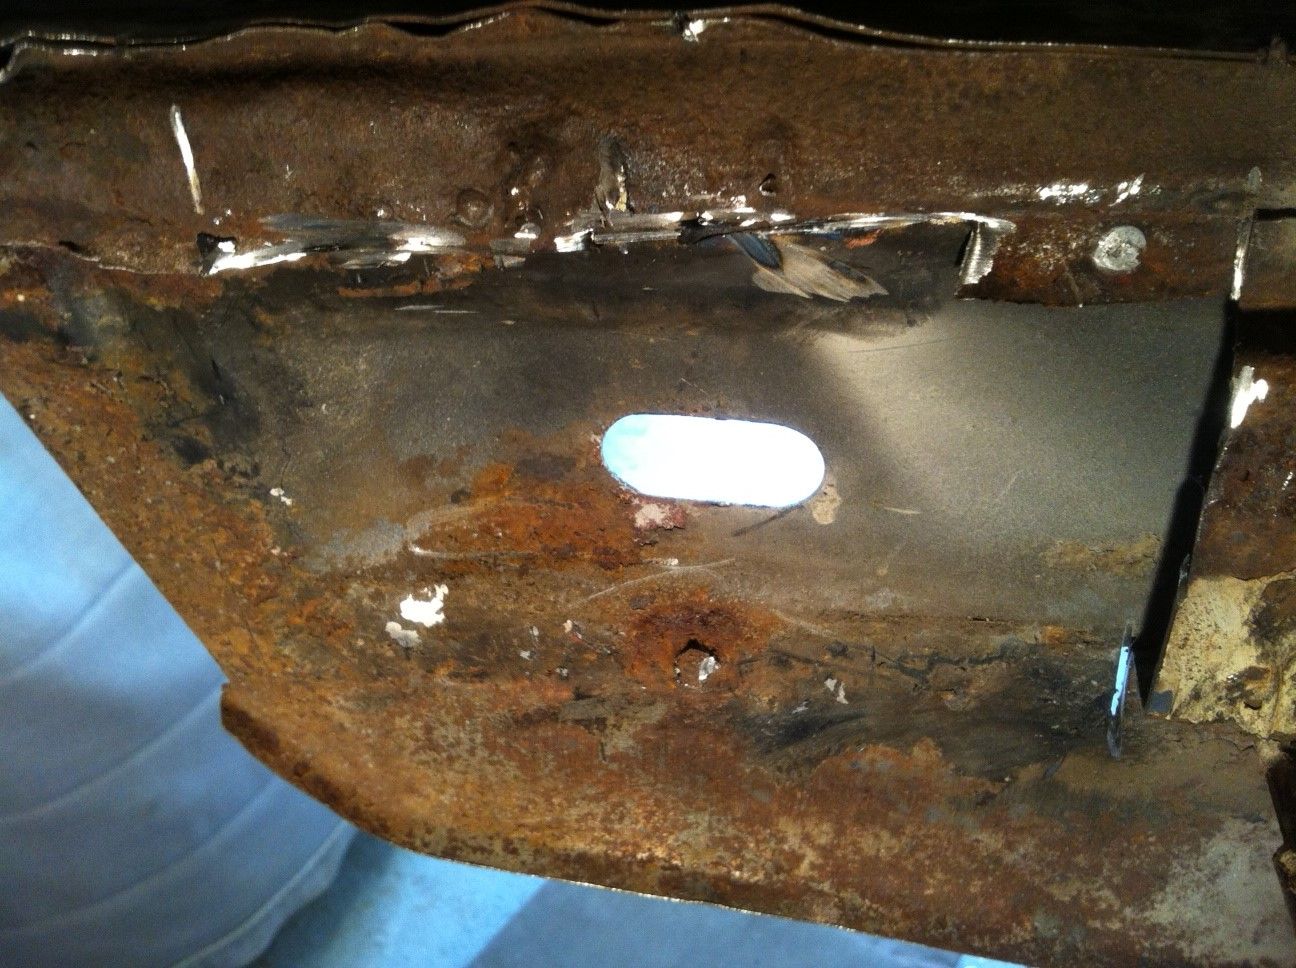 And the bar itself 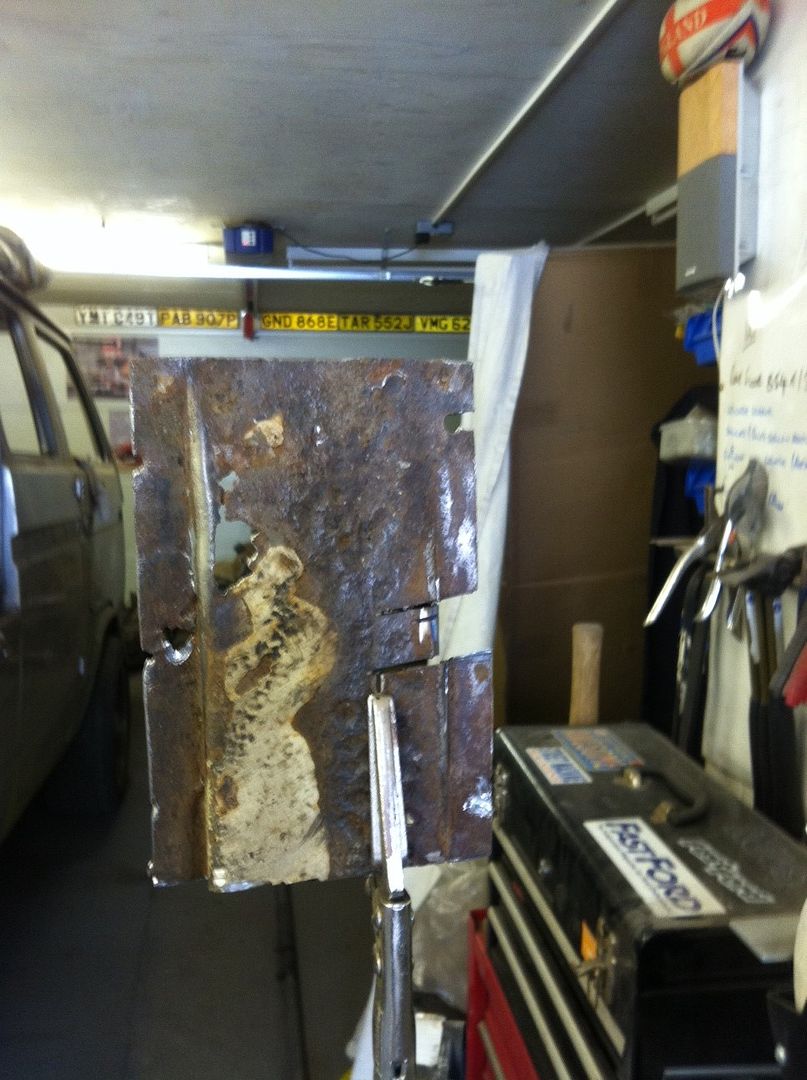 Then, sick of sucking in rust dust I decided to remake it in 16swg steel Template from masking tape and transferred onto the steel. I also made a cardboard version to make sure I had the folds right. Luckily this showed that I had it the wrong way round as one side is broader than the other. 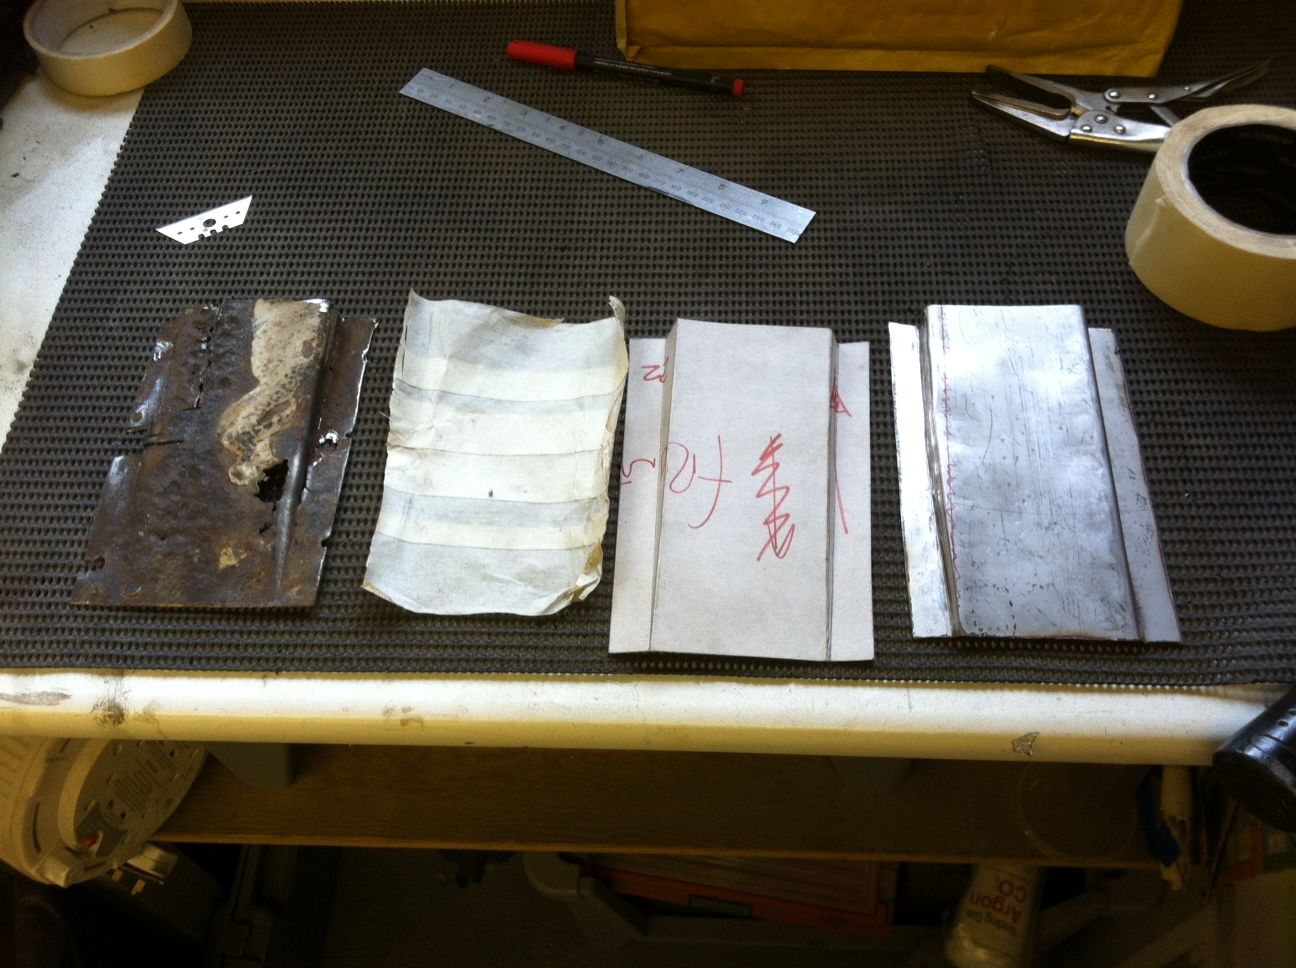  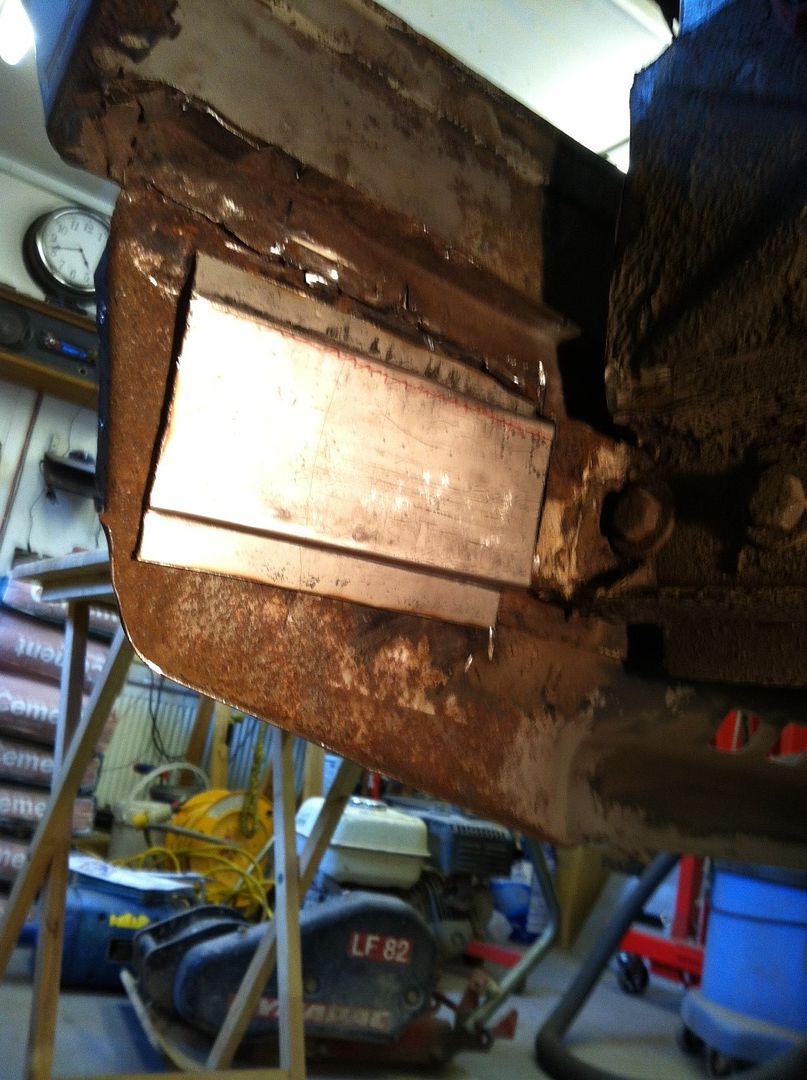 and in it's place for a bit of fettling! At this point it was clear that that the accident damage had an awful lot of filler in it so I took to it with the 1mm cutting disc. Always disconcerting when cutting a body panel from behind and getting a mouthful of filler dust :( I ended up with this slit, which will be replaced with fresh steel once it's all been cleaned up. 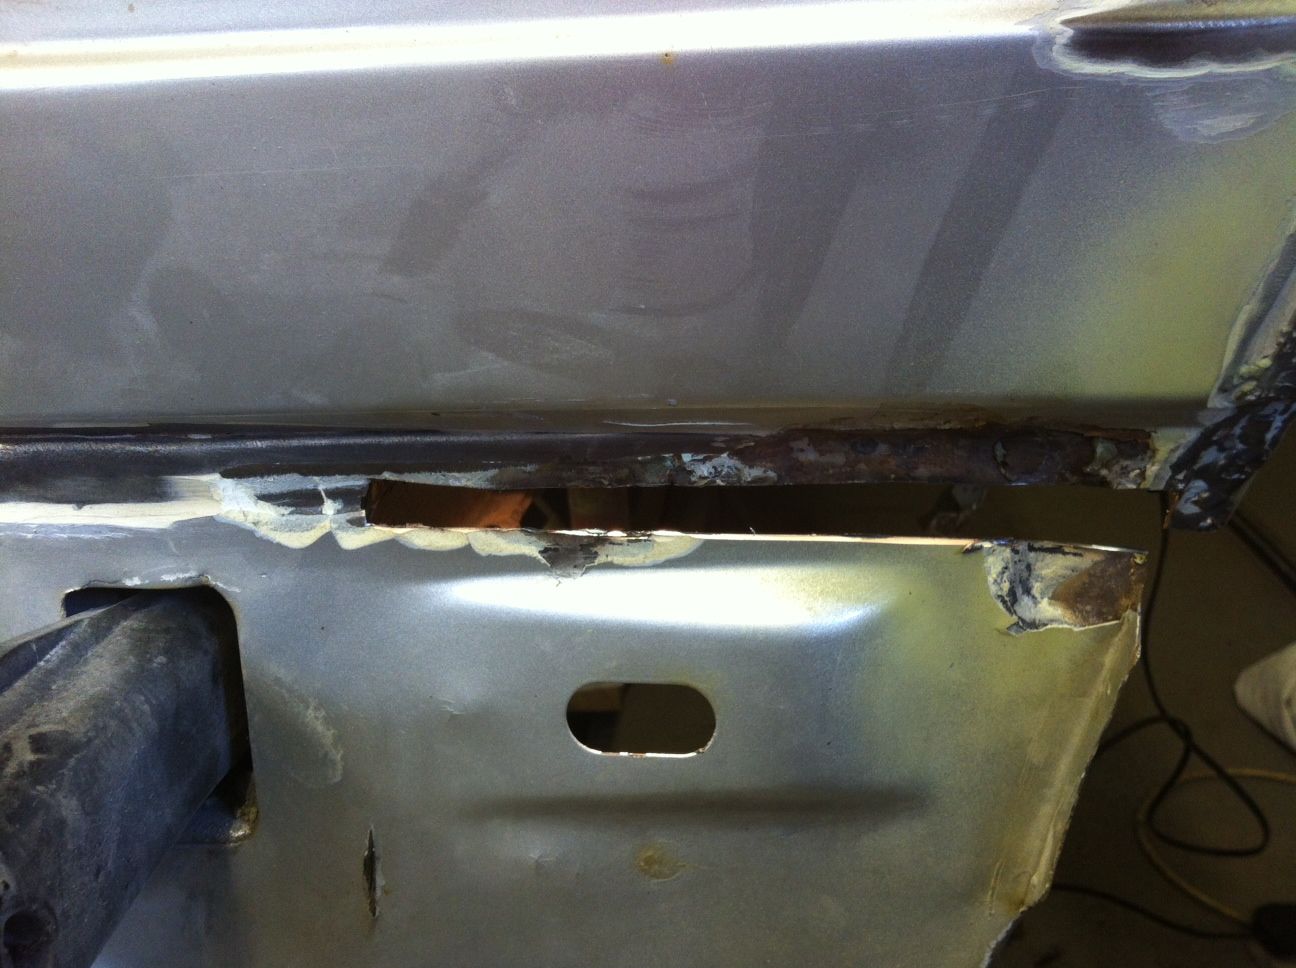 And the reason! 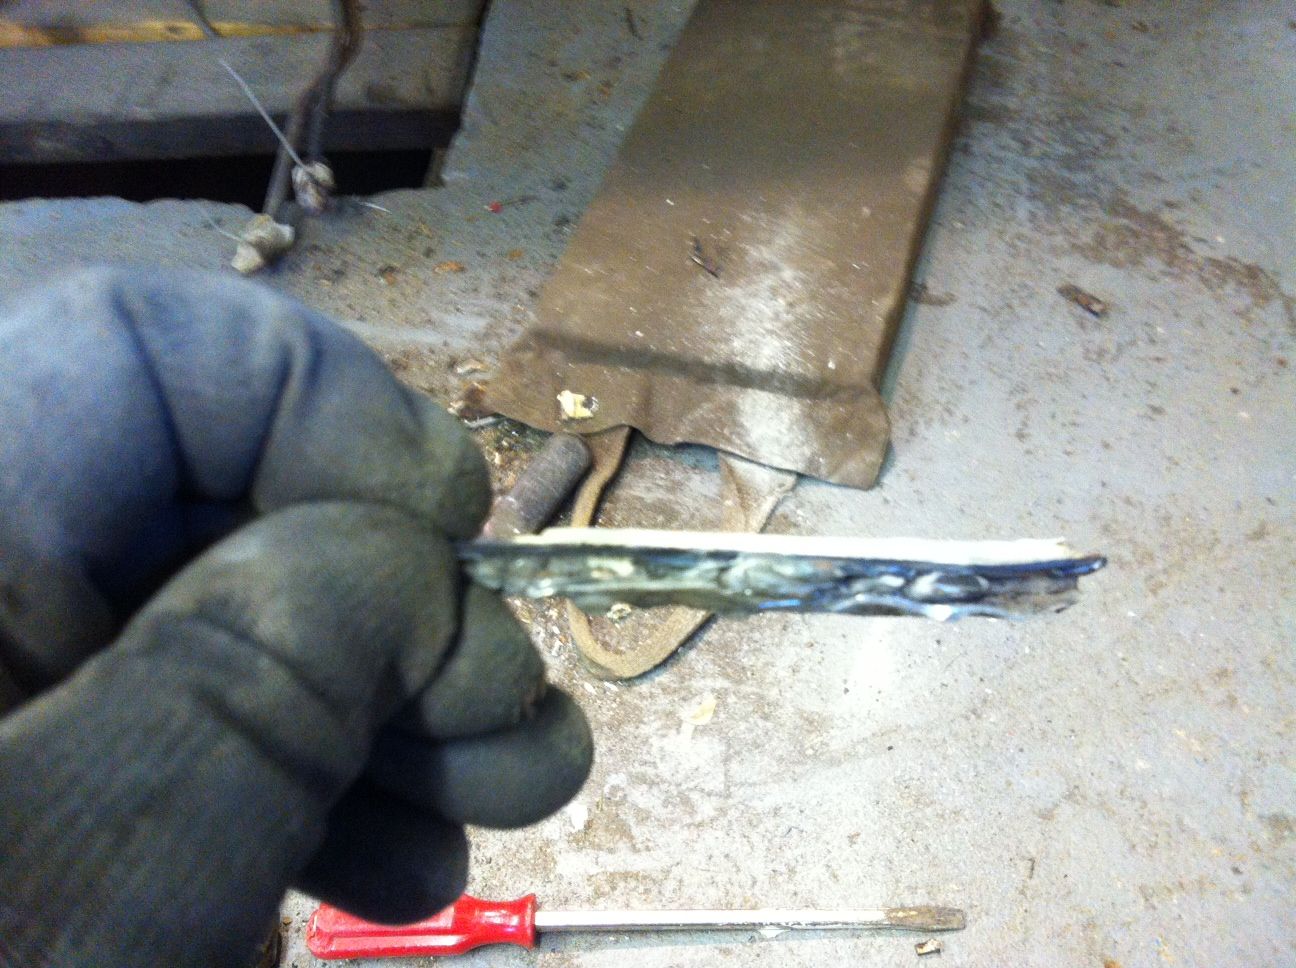  More of this then ::) 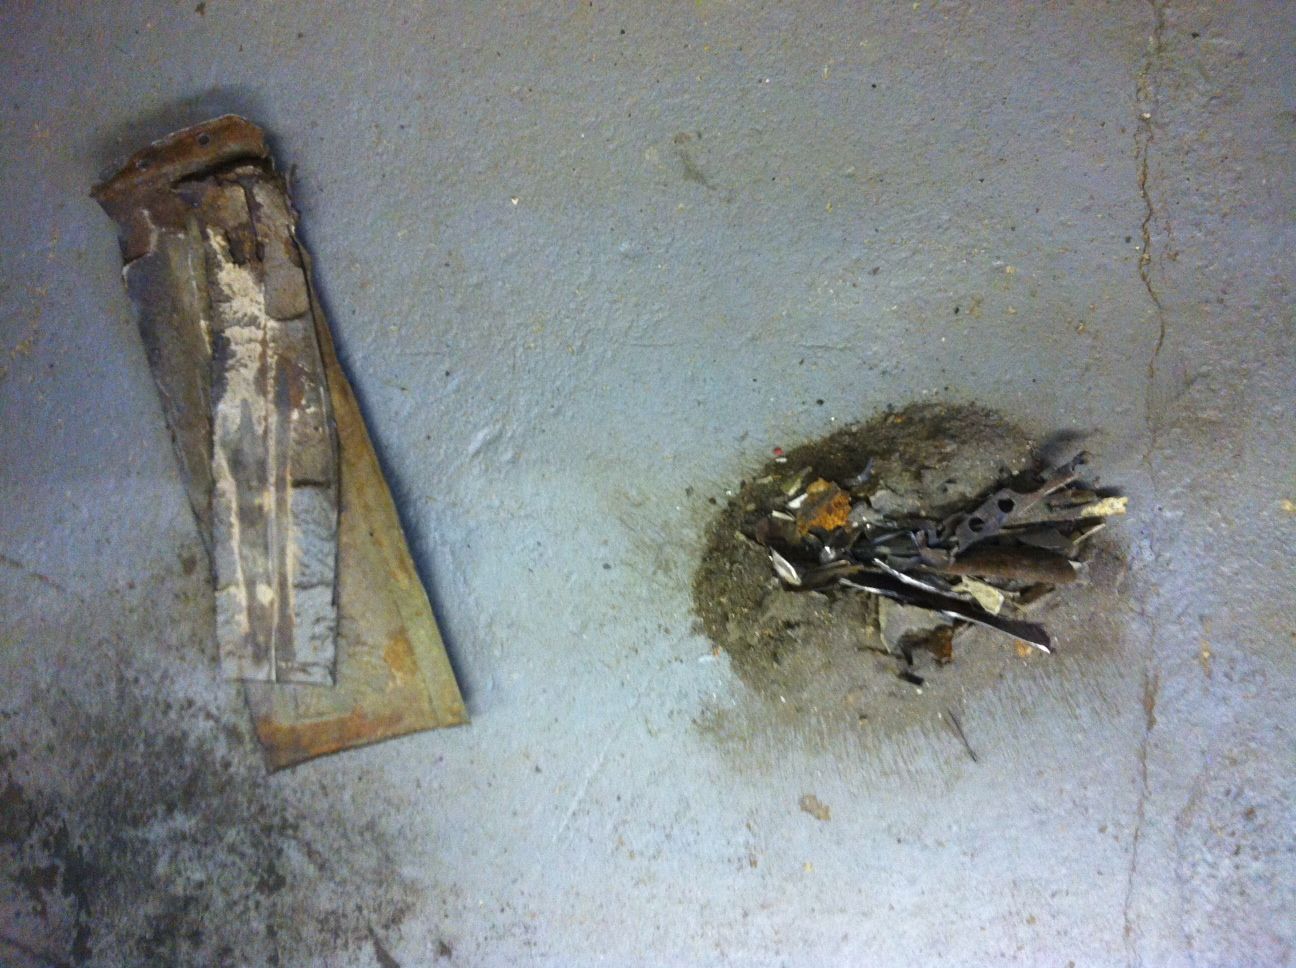 And how it is now. 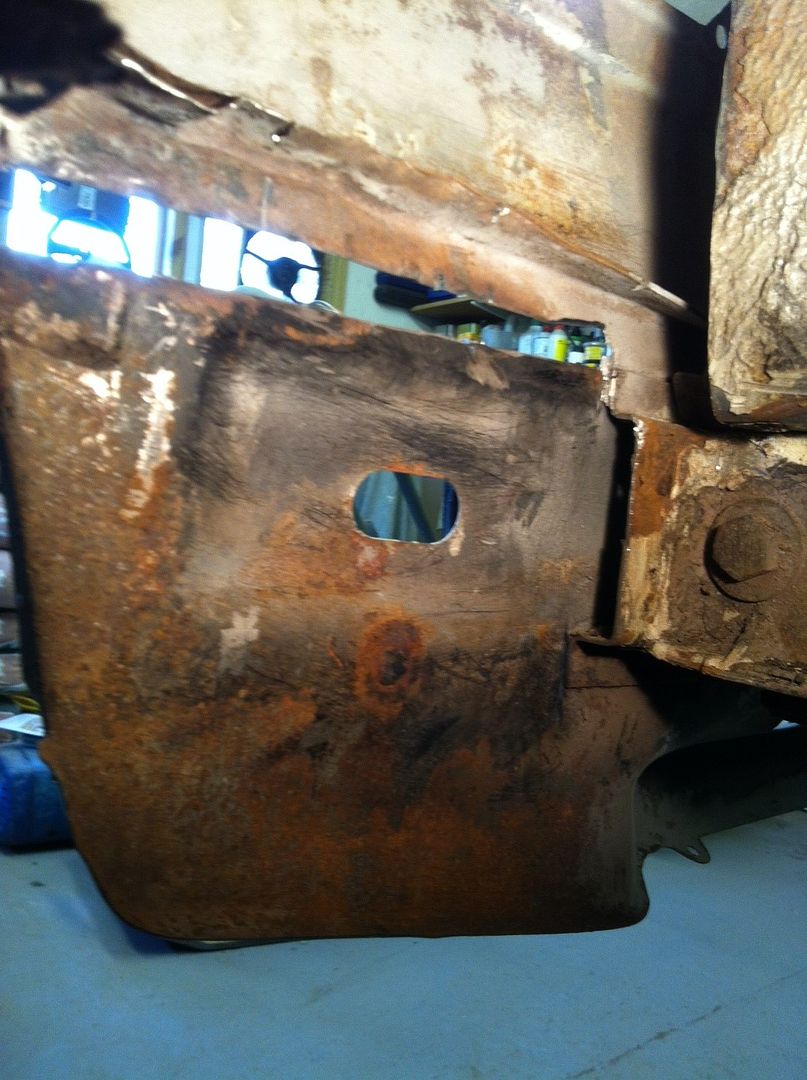 New part ordered, hopefully it'll be here tomorrow, I'll give it all a blast with the grit gun, then I can fit it in and line up the rest of the pieces! More tomorrow. Pete ------------- Too many projects..... Not enough time! |
Posted By: Gtavalanche
Date Posted: 08 Apr 13 at 22:04
|
Have you looked into a donor cut for this? There's a doka door on eBay at the moment based in sunny Suffolk apparently. It may be worth giving the bloke a ring. And seeing if it's got any bits worth cutting out. His number is 01728 833600 ------------- I taste Hurty! |
Posted By: surf dude
Date Posted: 08 Apr 13 at 22:29
I have indeed! But, I'm going to try and repair this myself first. If it goes Pete Tong, I can start looking at a body chop, but some of the ones I've had before have turned out to be just as bad! When I started on this, this corner was an area I wasn't concerned about  and I could end up with something just as bad! Hopefully I'll have the new corner tomorrow and I can start tackling it's repair! and I could end up with something just as bad! Hopefully I'll have the new corner tomorrow and I can start tackling it's repair!------------- Too many projects..... Not enough time! |
Posted By: Gtavalanche
Date Posted: 08 Apr 13 at 22:33
|
Hope it turns out alright for you buddy. ------------- I taste Hurty! |
Posted By: surf dude
Date Posted: 08 Apr 13 at 22:44
|
Thanks mate, hopefully we'll find out tomorrow!! ------------- Too many projects..... Not enough time! |
Posted By: surf dude
Date Posted: 09 Apr 13 at 22:14
Well, it arrived so out I went (eventually!) First off I had a look how it lined up with the 'tweaked' rear corner ::)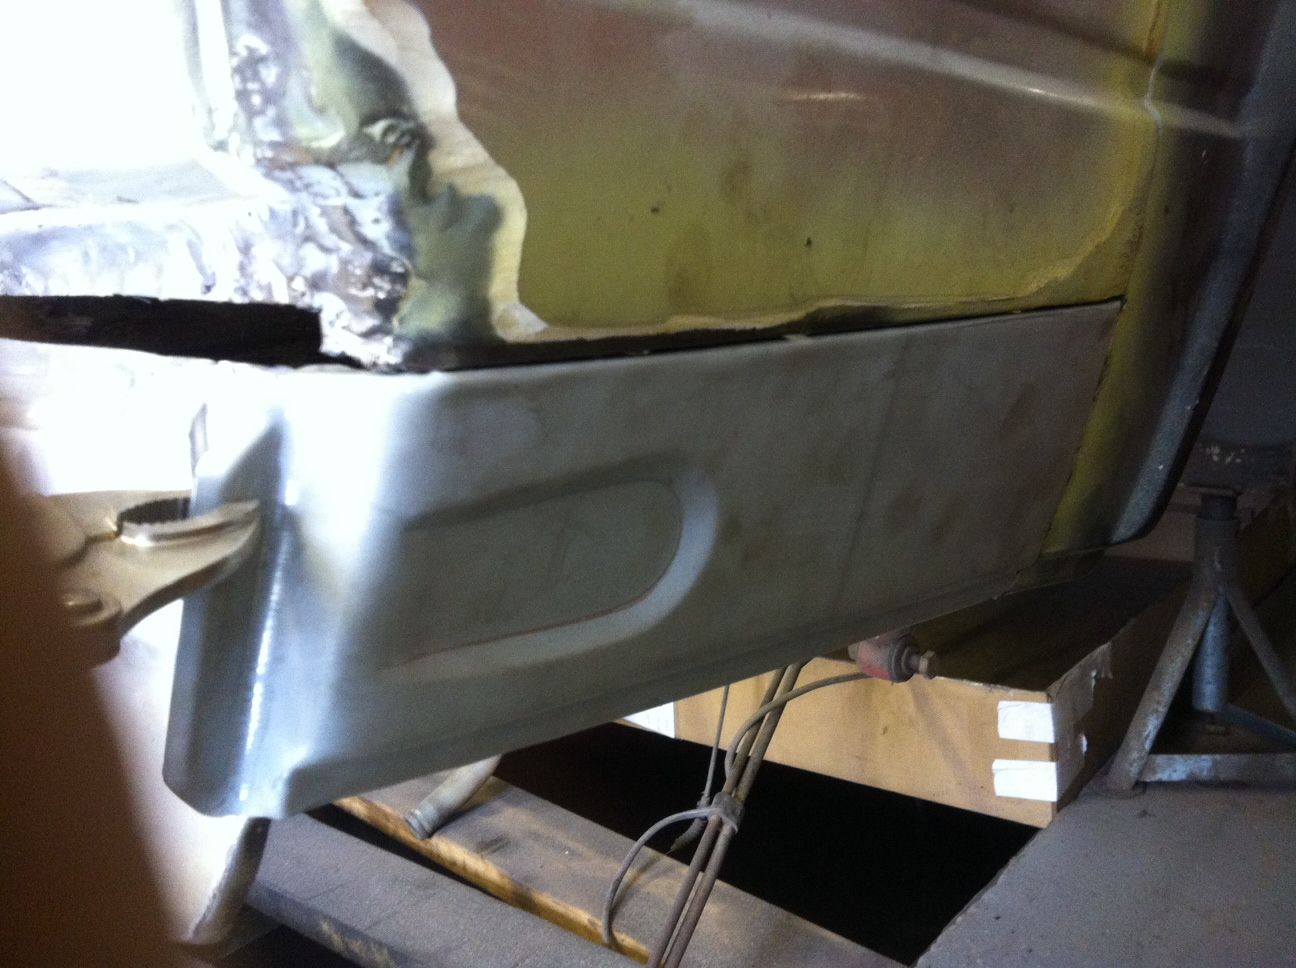 And then chopped out this bit as it was wrecked! 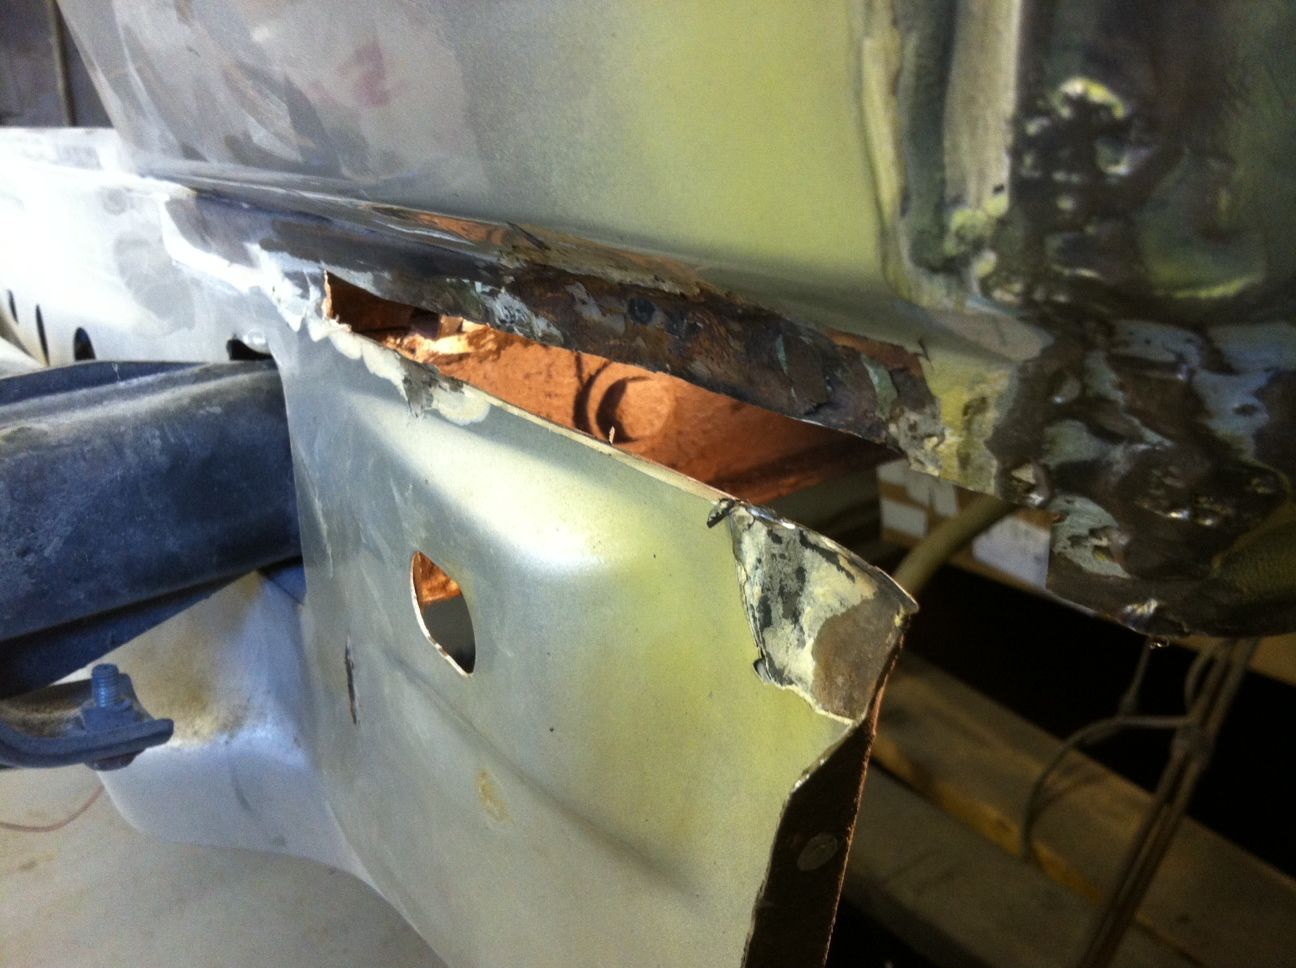  Then much tweaking, grinding, welding and bashing gets us to here 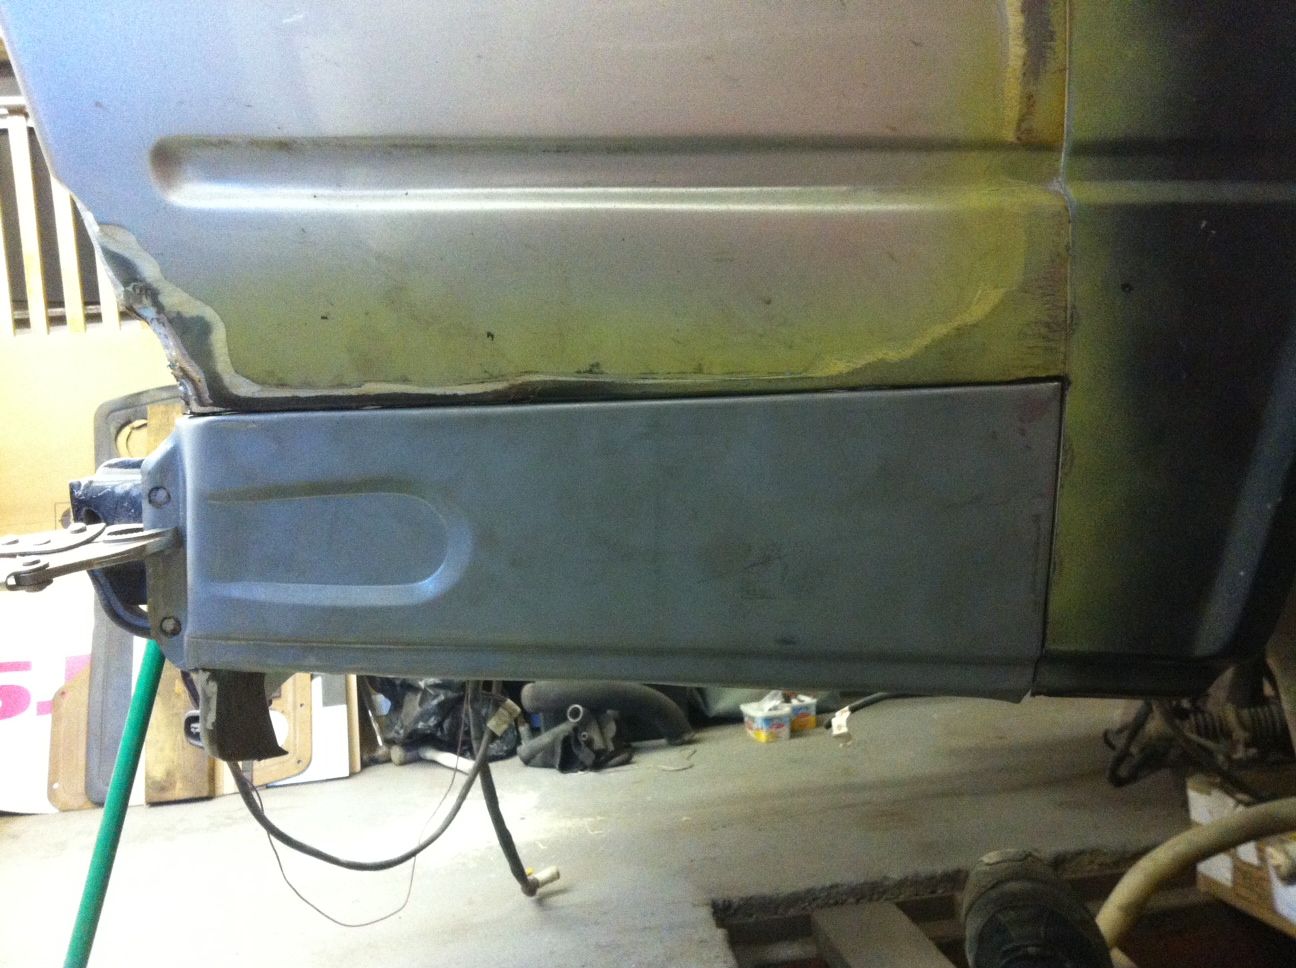 Off to weld it now the weld through primer is dry ;) And so I did! Drilled the holes for plug welding and got it in place. 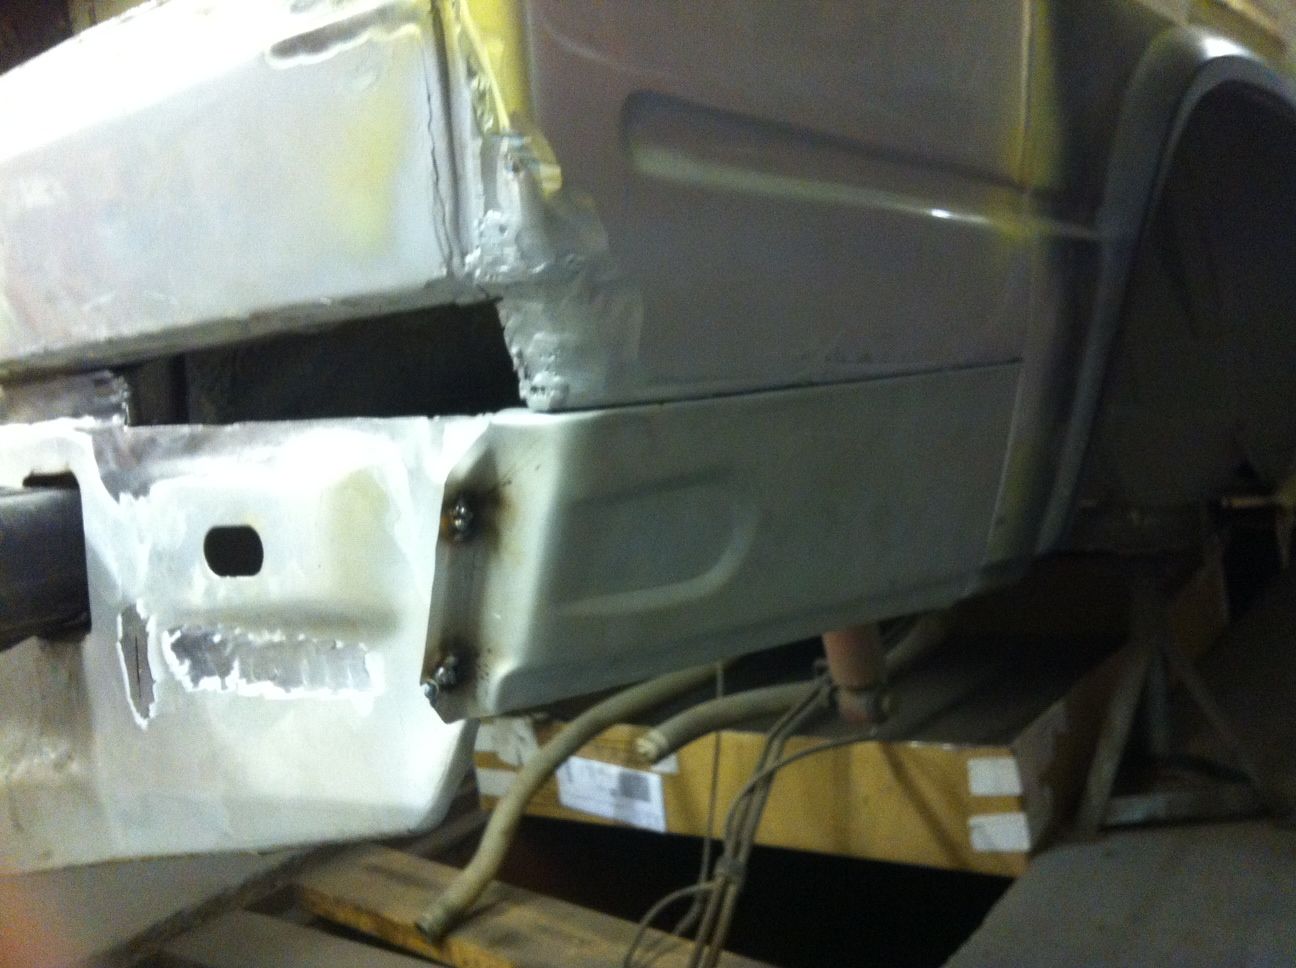 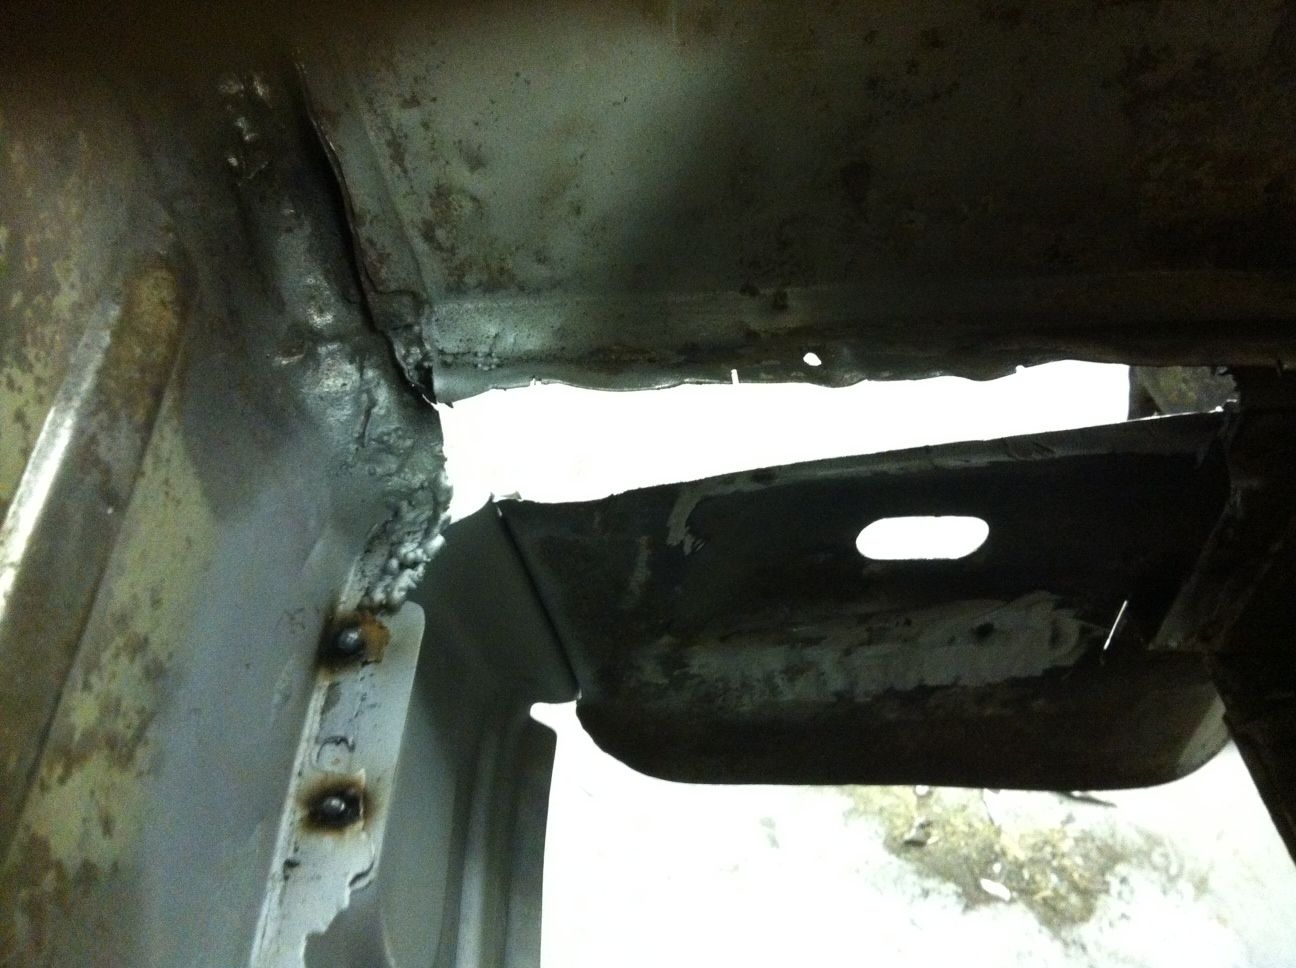 Not the prettiest but I've given it a good tug and it didn't come off in my hand....... Tomorrow I'll make a start on this! 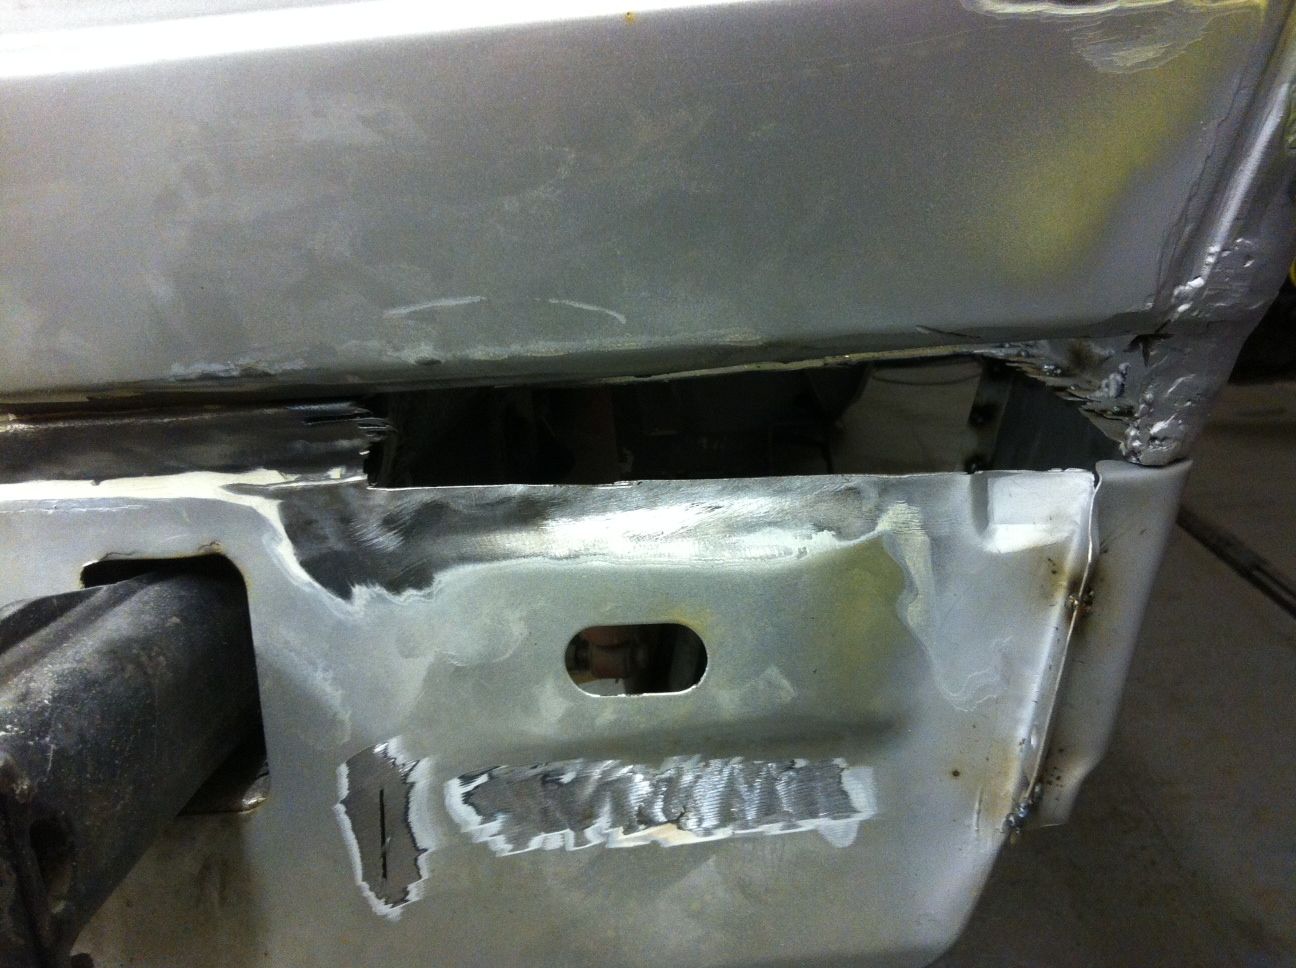 ------------- Too many projects..... Not enough time! |
Posted By: Zebedee
Date Posted: 11 Apr 13 at 11:33
Ooer. ------------- 
|
Posted By: Syncost Alot.
Date Posted: 13 Apr 13 at 23:06
|
------------- Founder member of the "WESTERN FRONT VOLKSWAGEN KLUB".......membership no 0001 |
Posted By: surf dude
Date Posted: 15 Apr 13 at 21:54
|
I never realised I was so funny Anyway, todays update..... Another day another update. Start back at work in 2 weeks so need to make the most of the 3 or so days I have in the garage before then (Don't ask what I've been doing for the last 8 months as I'm not entirely sure.....)Today I wanted to close up the hole in the rear valance, so out came the CAD (Cardboard Assisted Design) and then transfer over to some shiny steel. 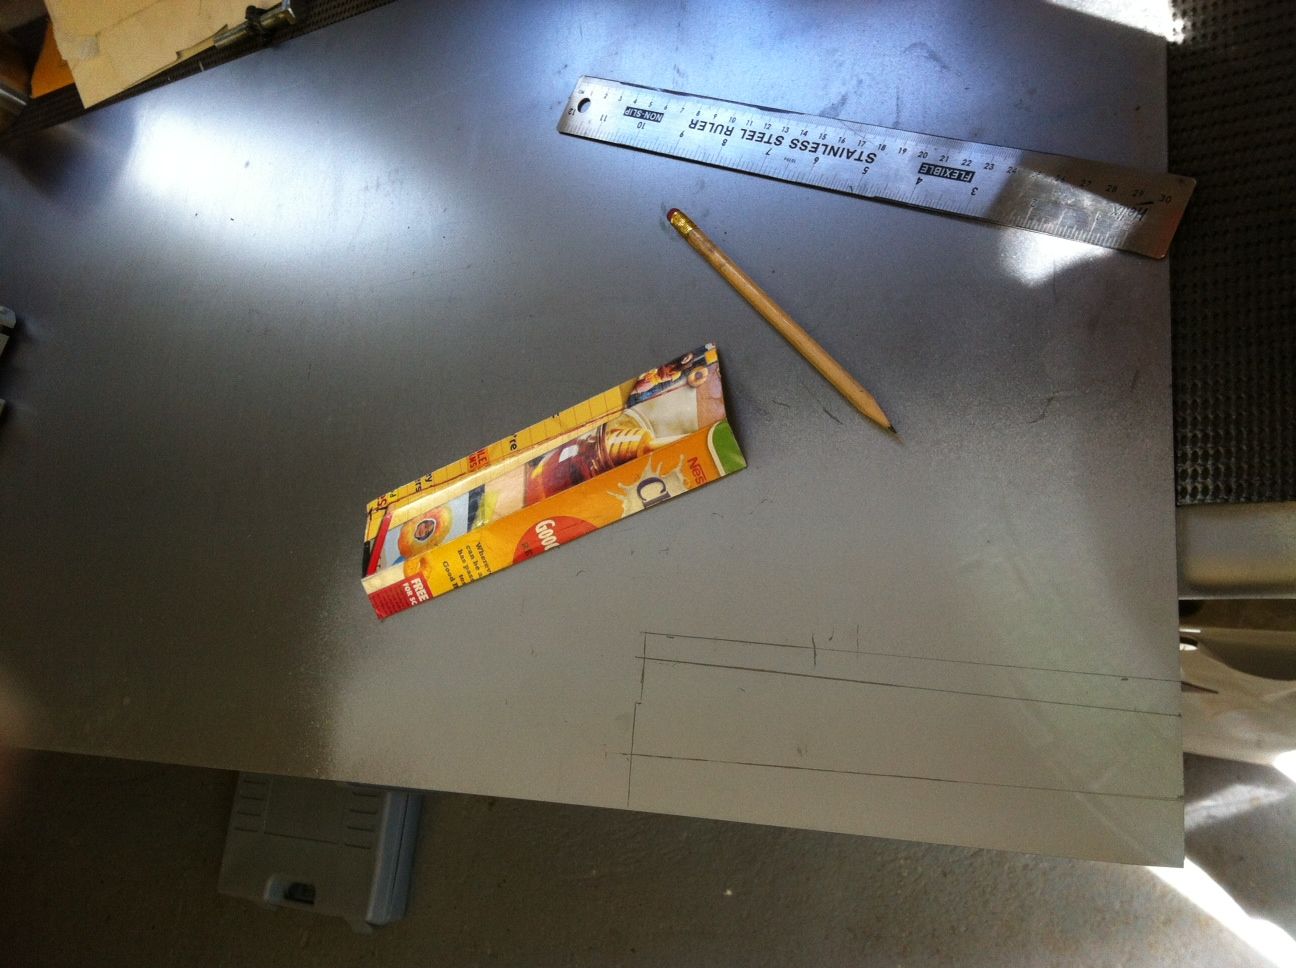 Choppy choppy (with a jigsaw, noisy but so much easier than my knackered snips!) and into the metal folder. 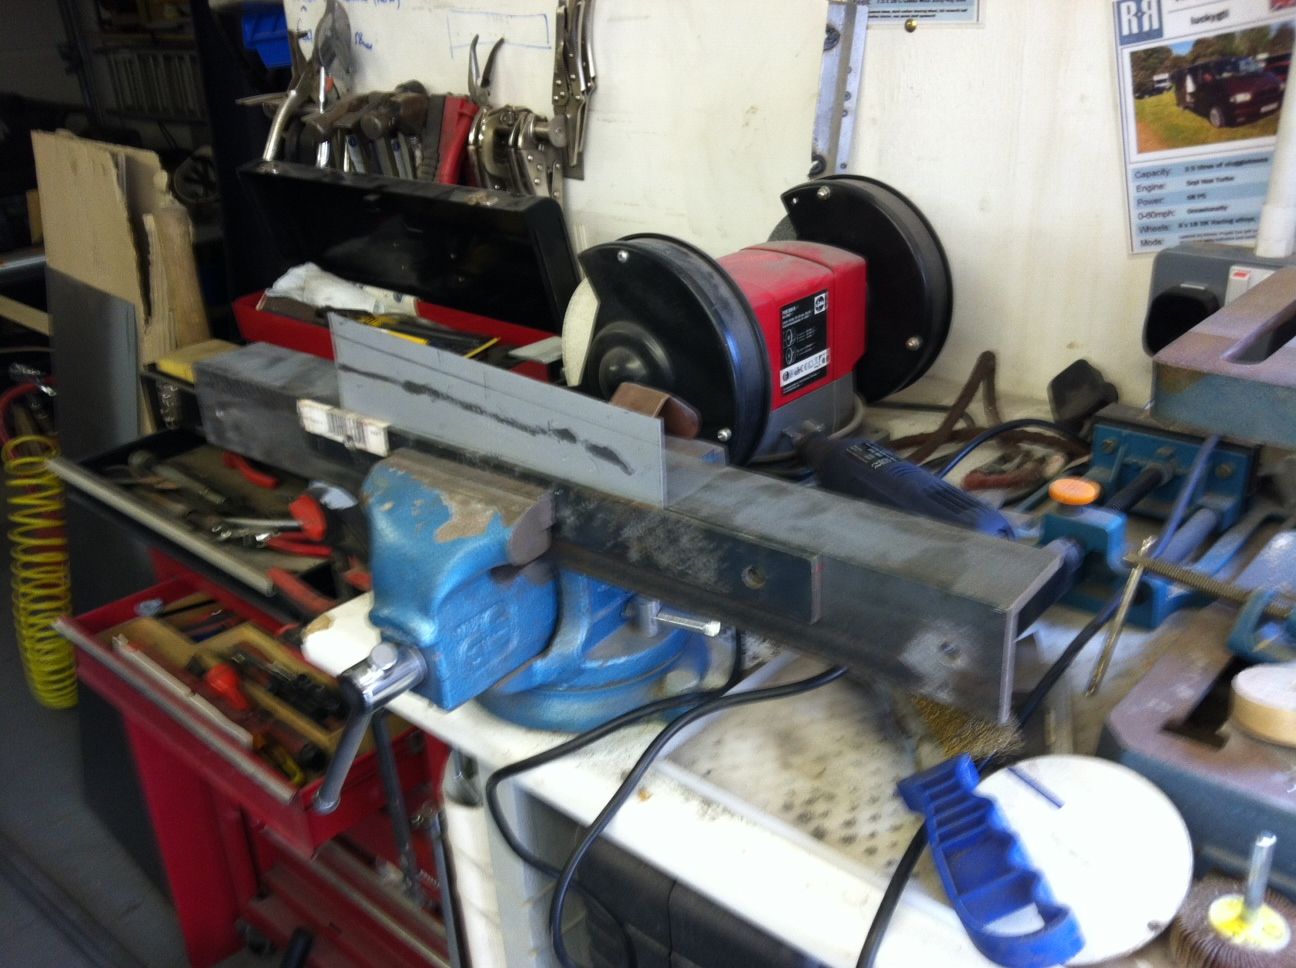 I do have a home made metal folder that I made but it needs a bit of "adjustment" I wanted to try and replicate this swage line so cut a small template to use to tweak the bend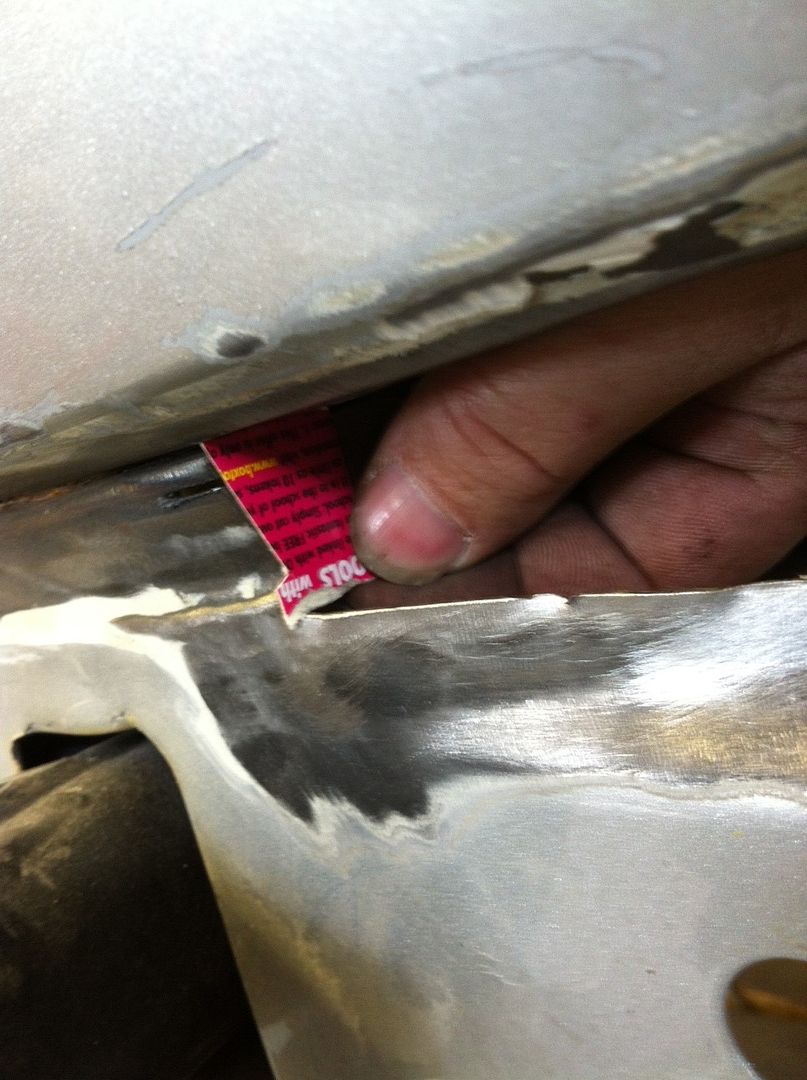 The angle is right, 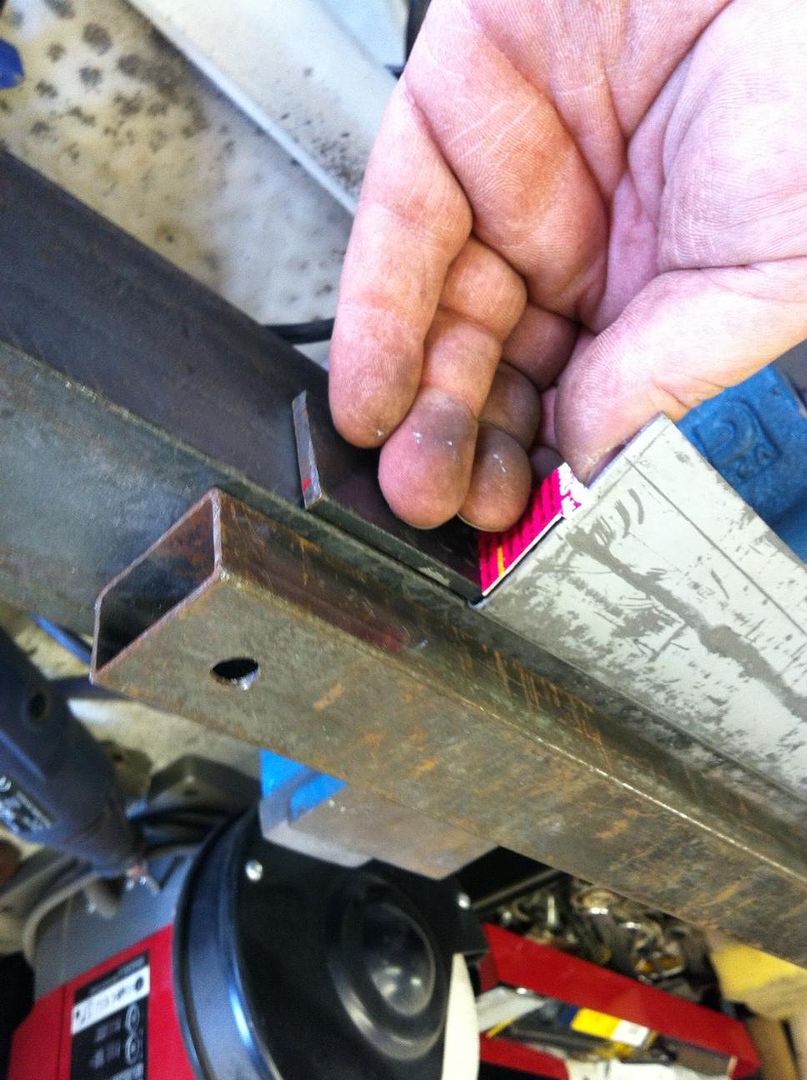 Just needs the swage putting in 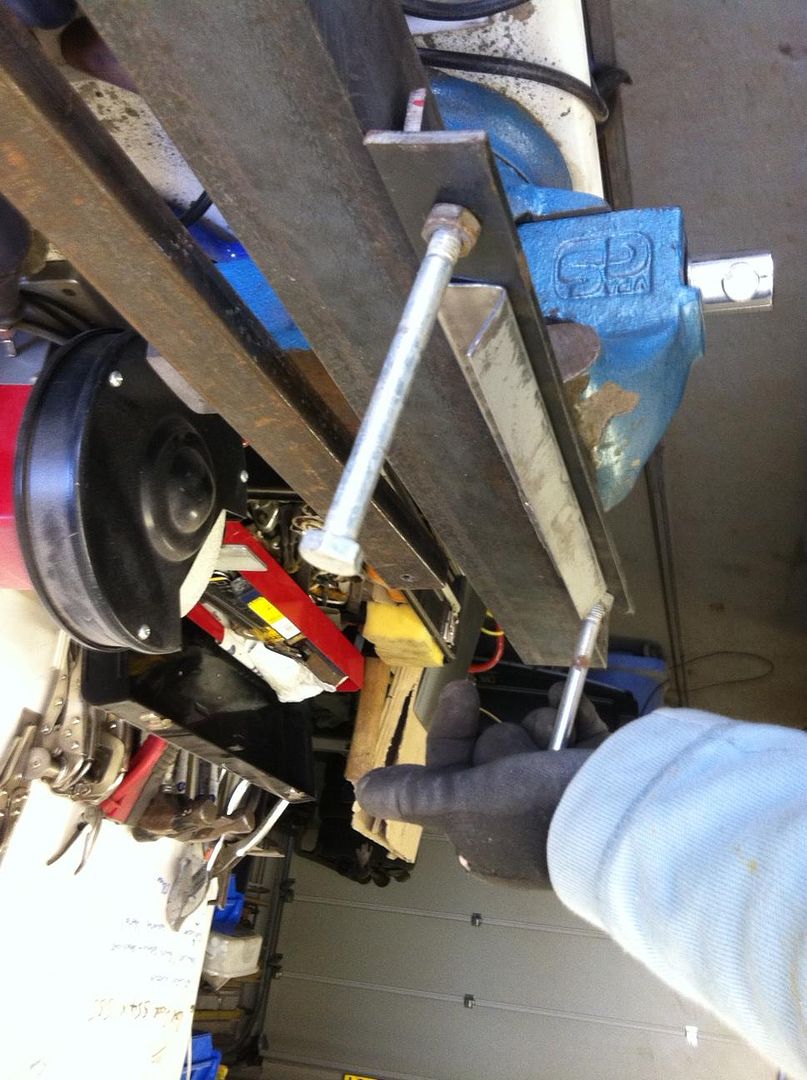 It kind of worked...... 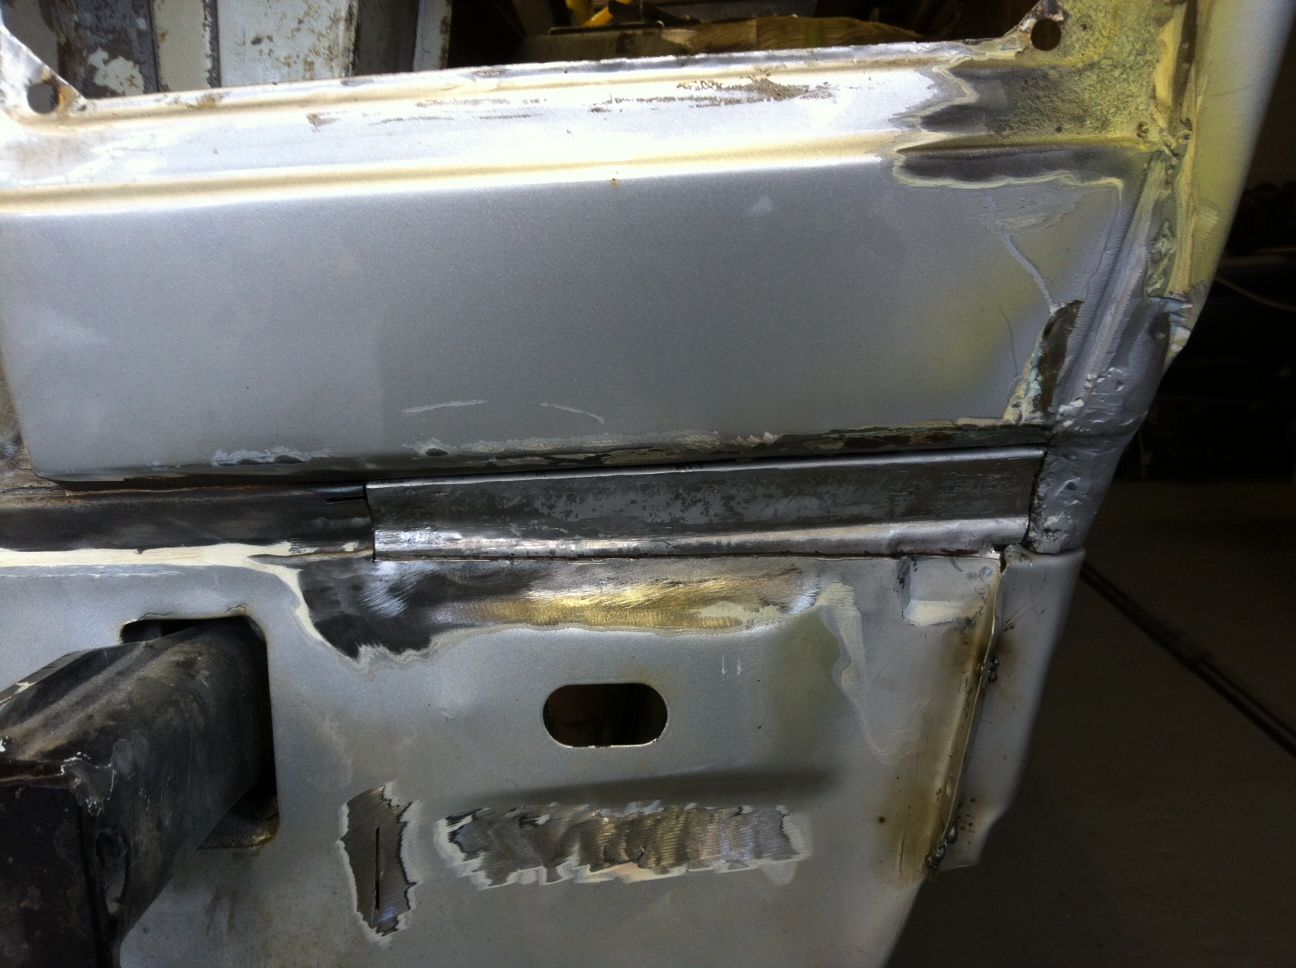 But seeing as how the other side has been filled in flat 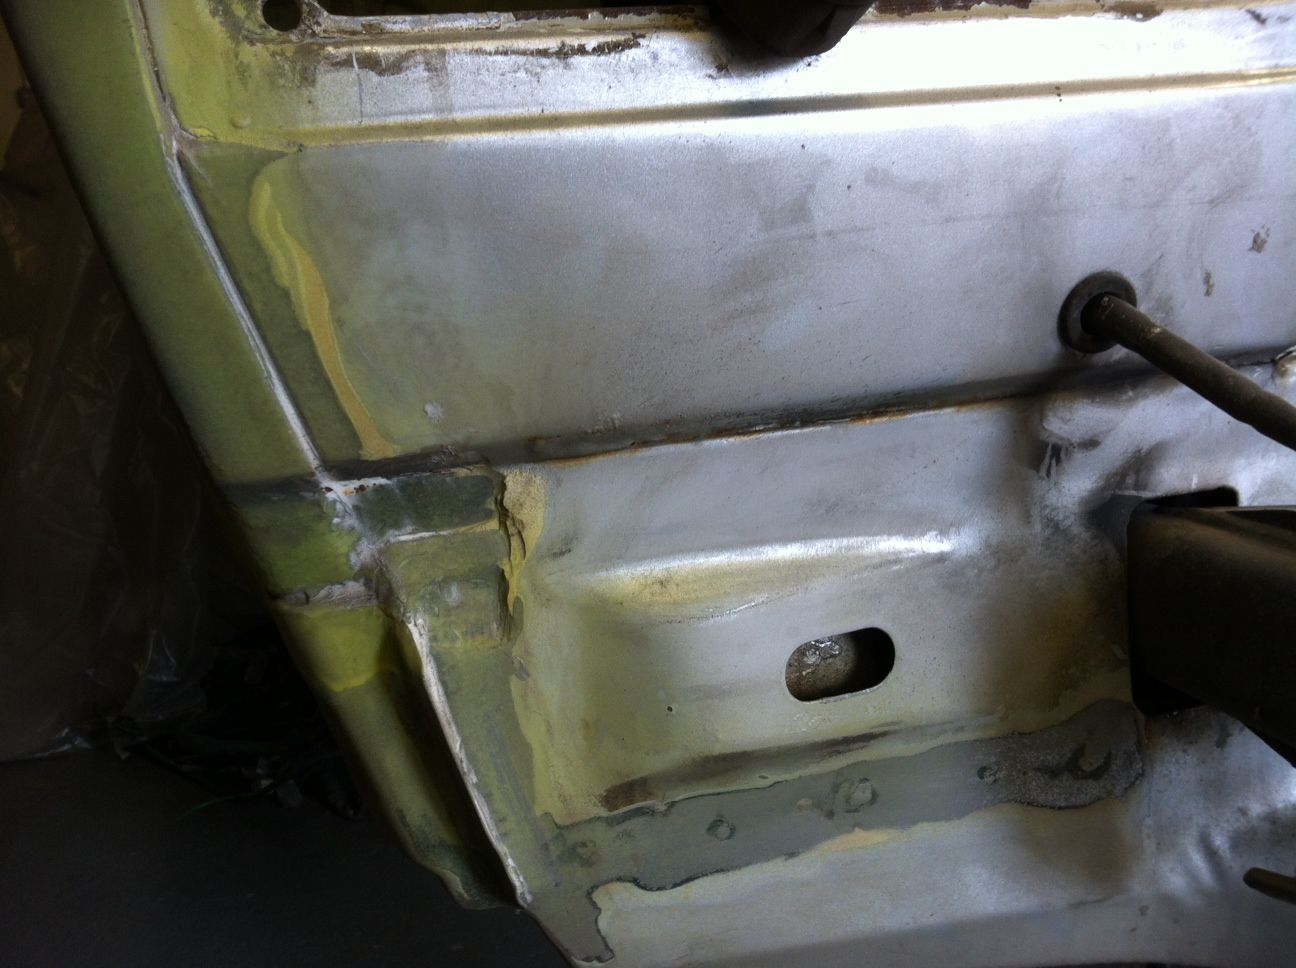 I'm not so worried about it after all. Then I waved the melty stick in it's general direction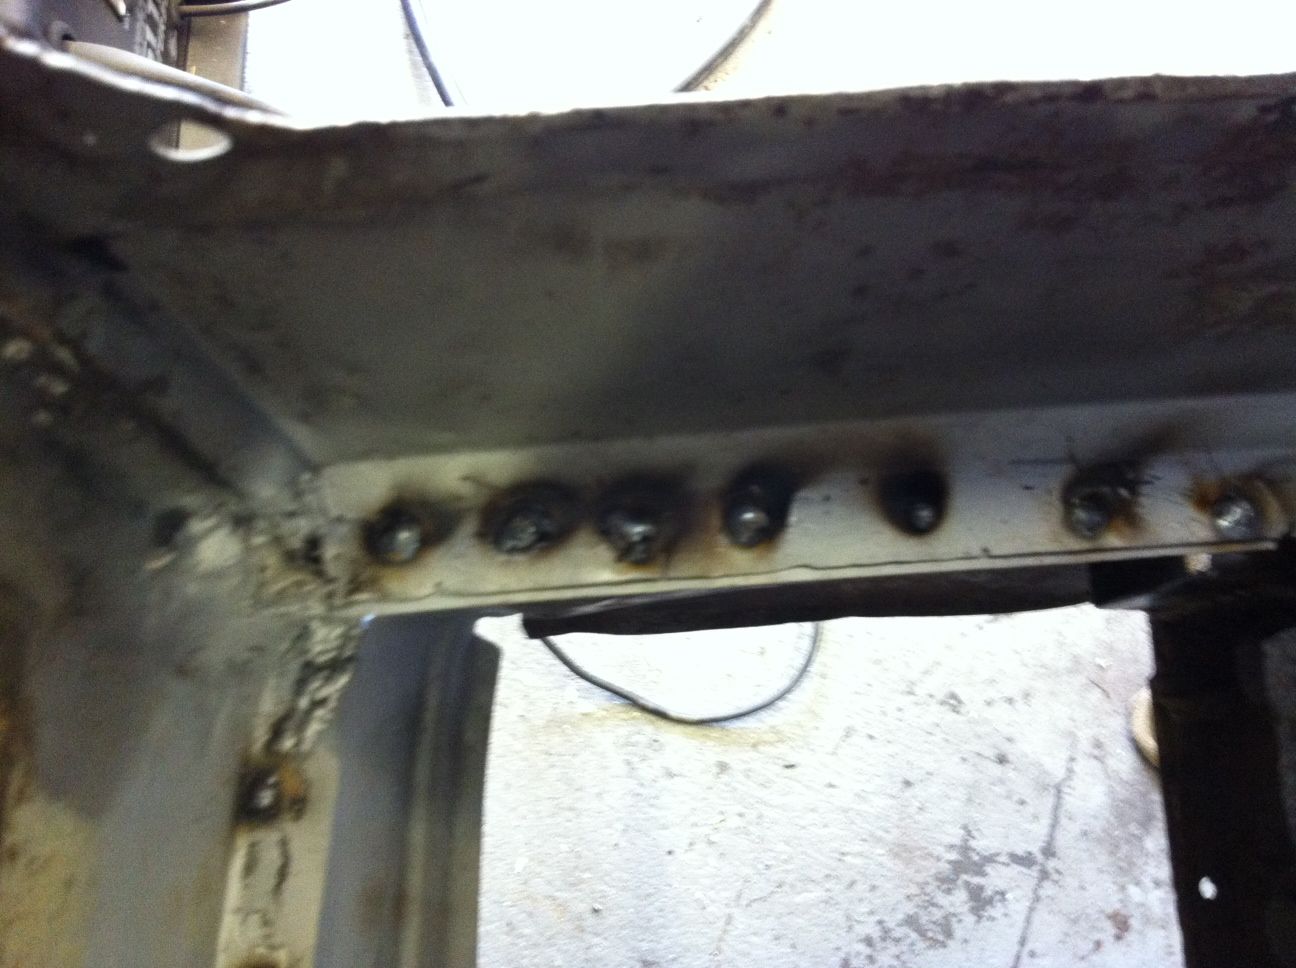 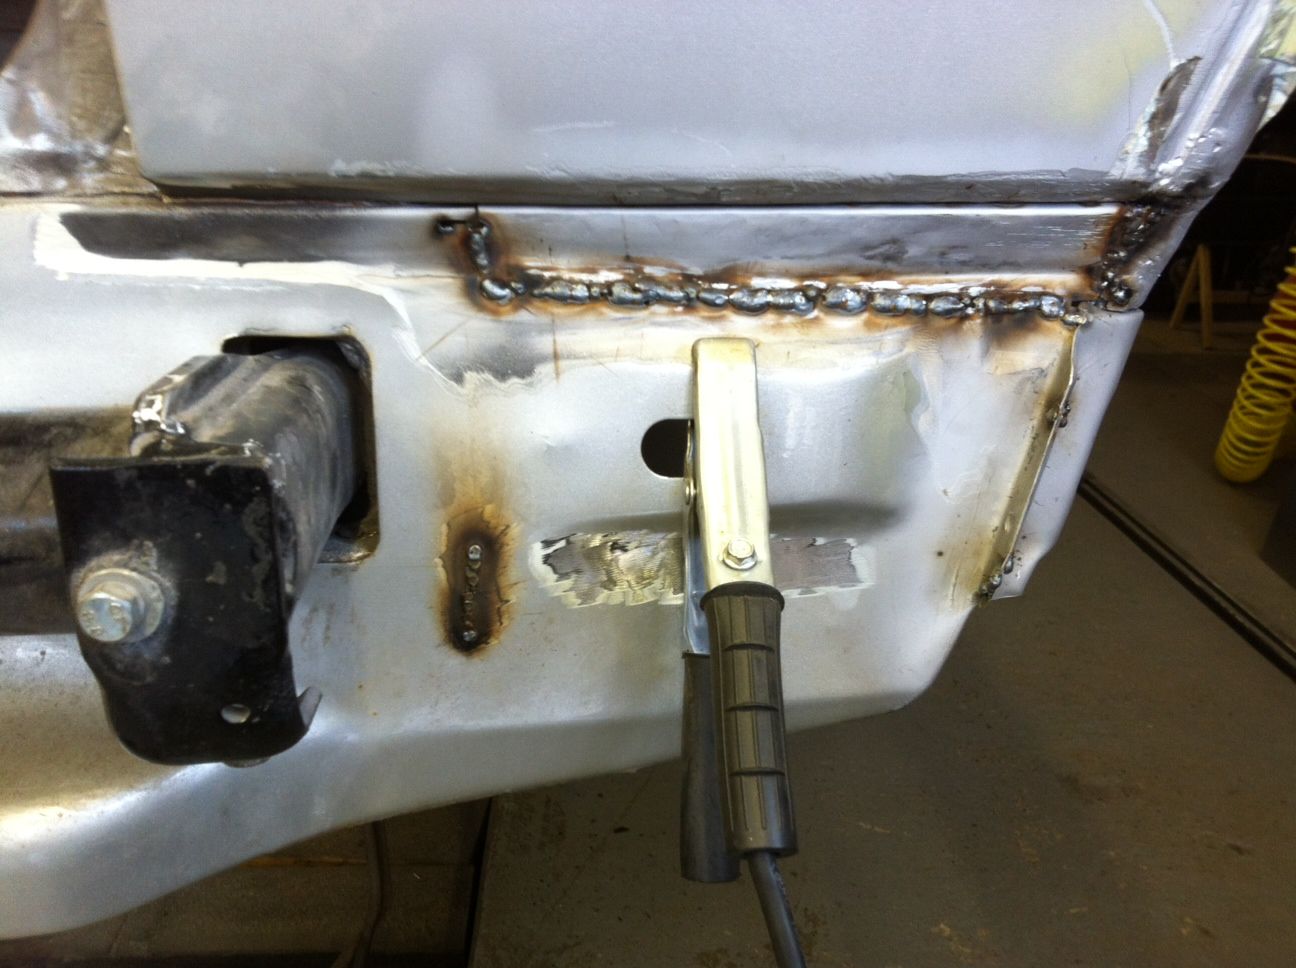 and gave it a whizz with the grinder 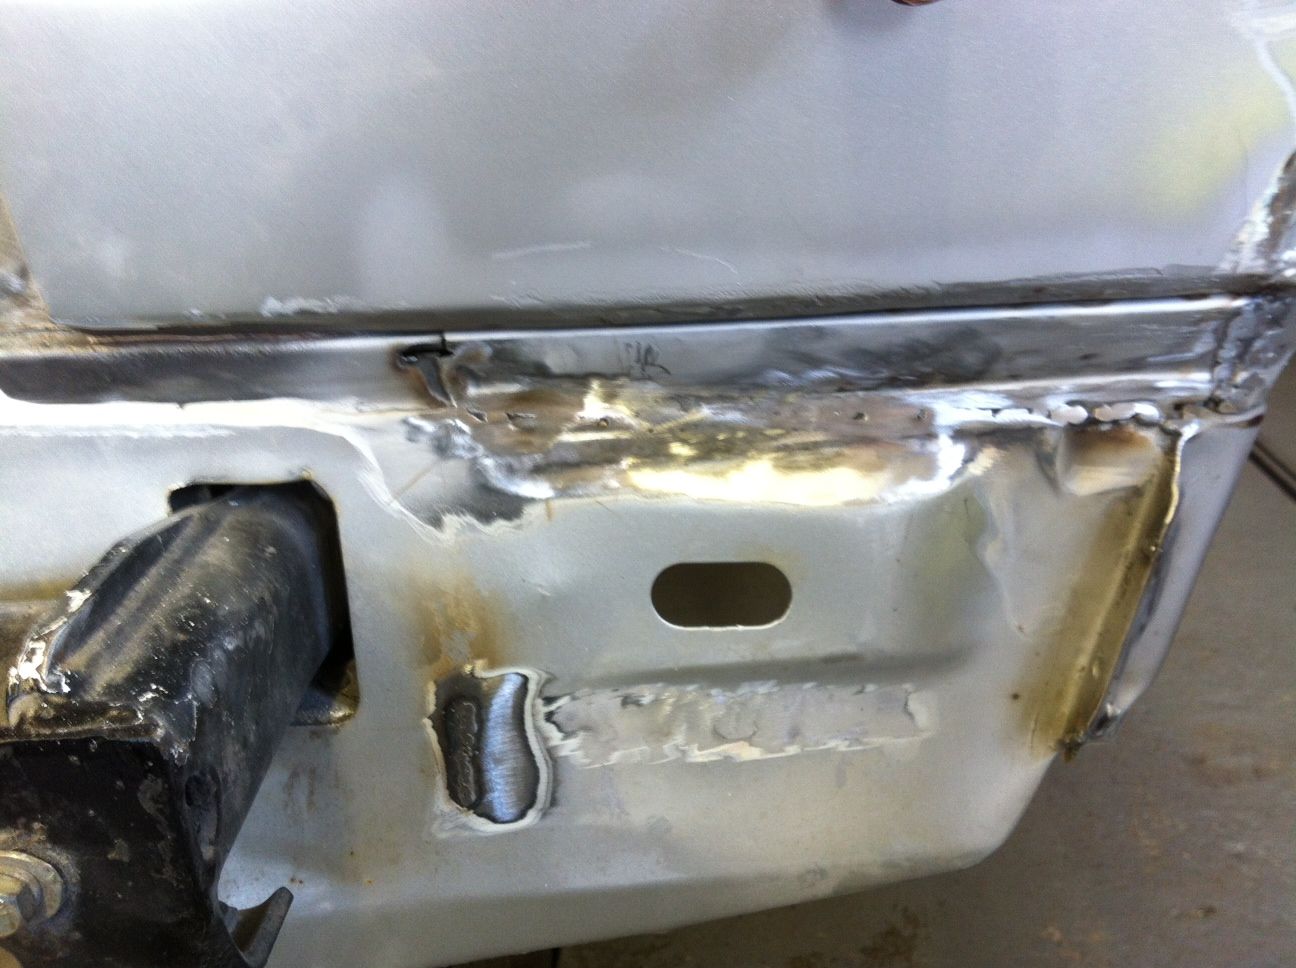 There's a bit more been done, but I just need to get the pics off of my phone. In other news I gave the rear trailing arm a good clean. If I'd thought this through properly I would have had the hub off and everything and got them dipped and stripped. But I didn't  ! They'll get a coat of chassis black for now and new poly bushes and when they're back on the van I'll strip the hubs off and give them a good degunge and freshen up as well. (They'll need it, they're full of grit blasting grit ! They'll get a coat of chassis black for now and new poly bushes and when they're back on the van I'll strip the hubs off and give them a good degunge and freshen up as well. (They'll need it, they're full of grit blasting grit 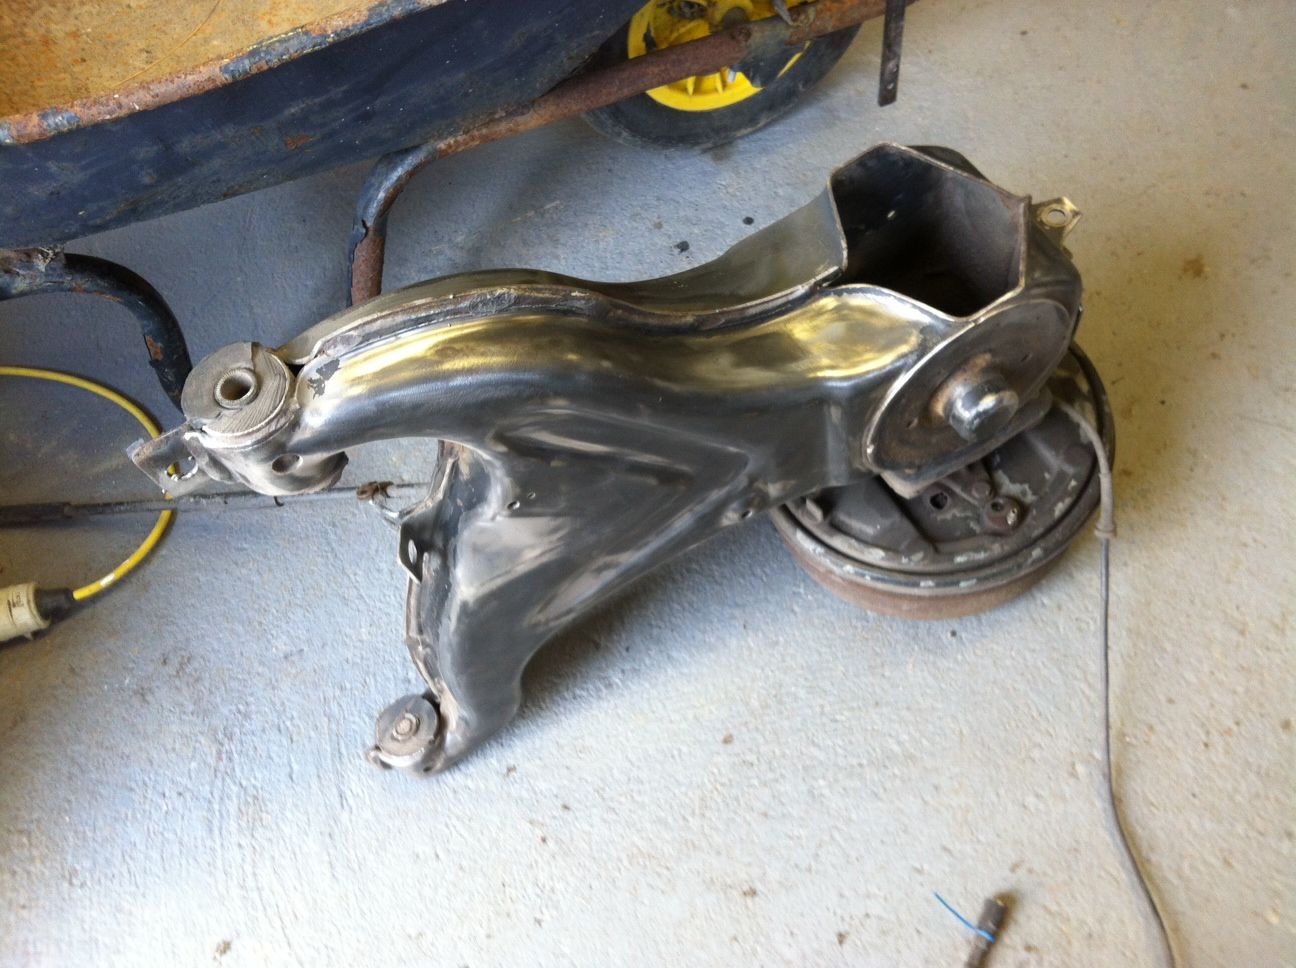 ------------- Too many projects..... Not enough time! |
Posted By: Gtavalanche
Date Posted: 15 Apr 13 at 22:16
|
Turned out alright didn't it. ------------- I taste Hurty! |
Posted By: surf dude
Date Posted: 15 Apr 13 at 22:22
Yep, not bad at all! Took all day though! Last bit, I had made this support bracket before so it just needed a bit of a tweak after filling the hole in the valance, so held on with some new clamps (very handy!) 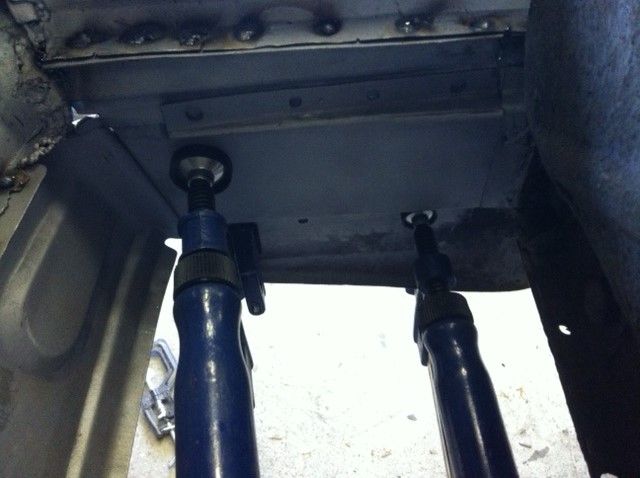 Some welding 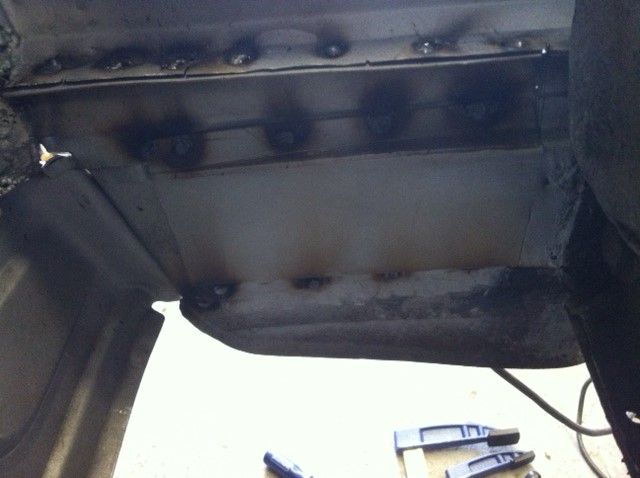 Job done. I've cut the piece as well to close up the bottom of the box, but that will have to wait until tomorrow! Thanks for looking in. Pete ------------- Too many projects..... Not enough time! |
Posted By: surf dude
Date Posted: 16 Apr 13 at 20:50
|
Today was all about closing up the battery box. We start here 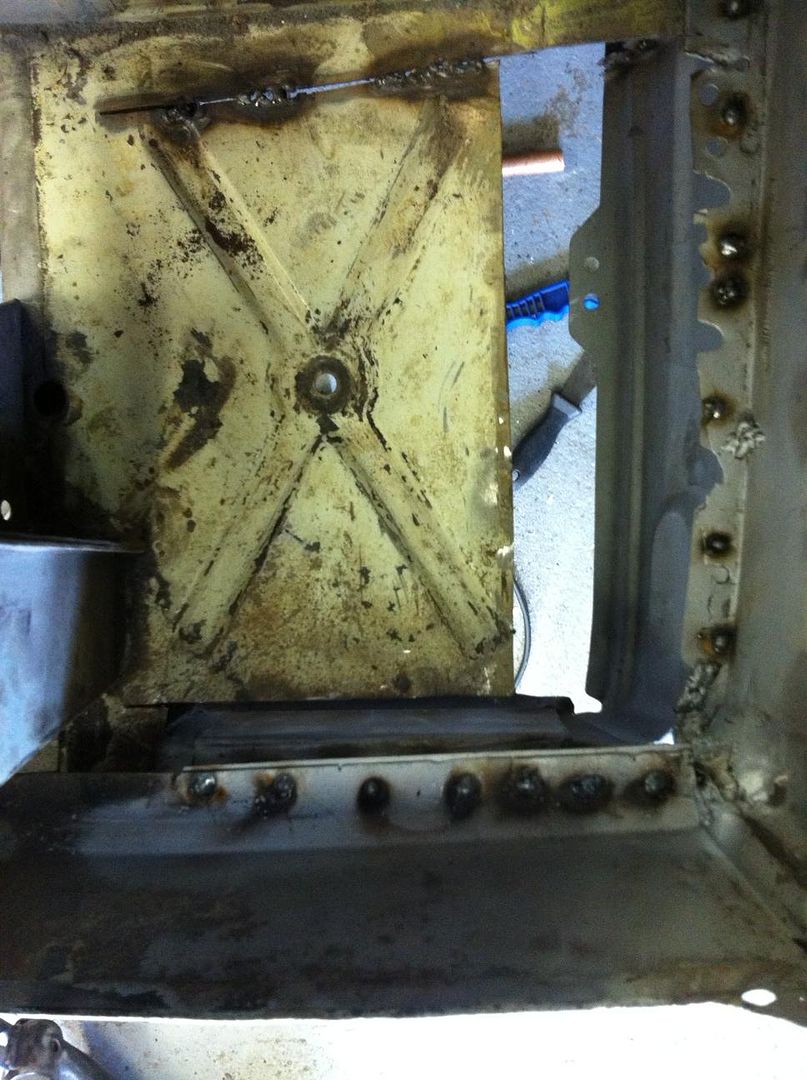 and I make a piece to fill the gap 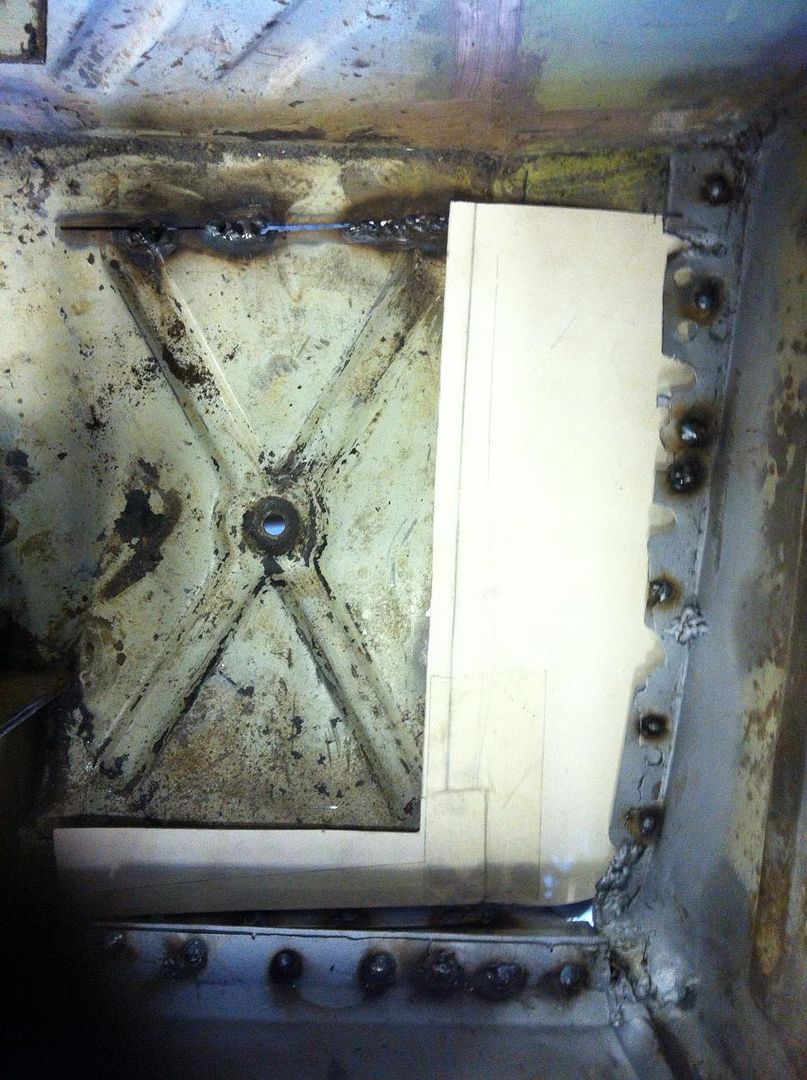 But, to be frank, it looks shite, so....... 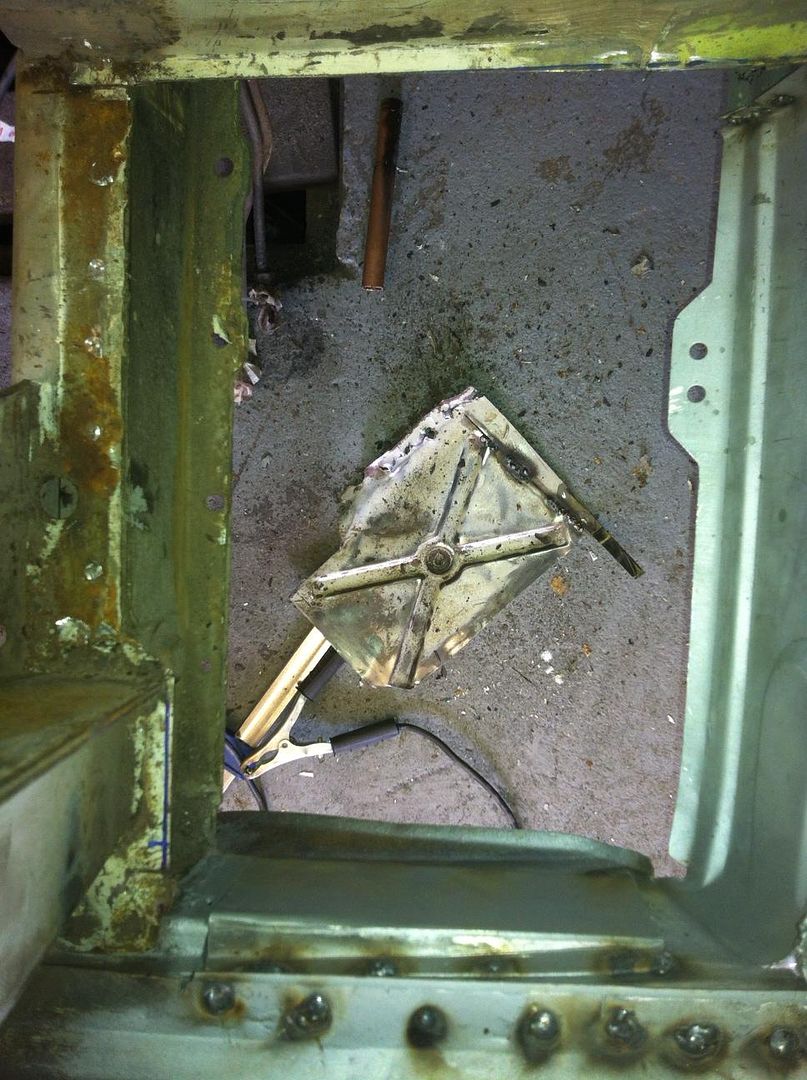 I also got rid of the fillet between here and the engine bay. Shock Horror!! More rust 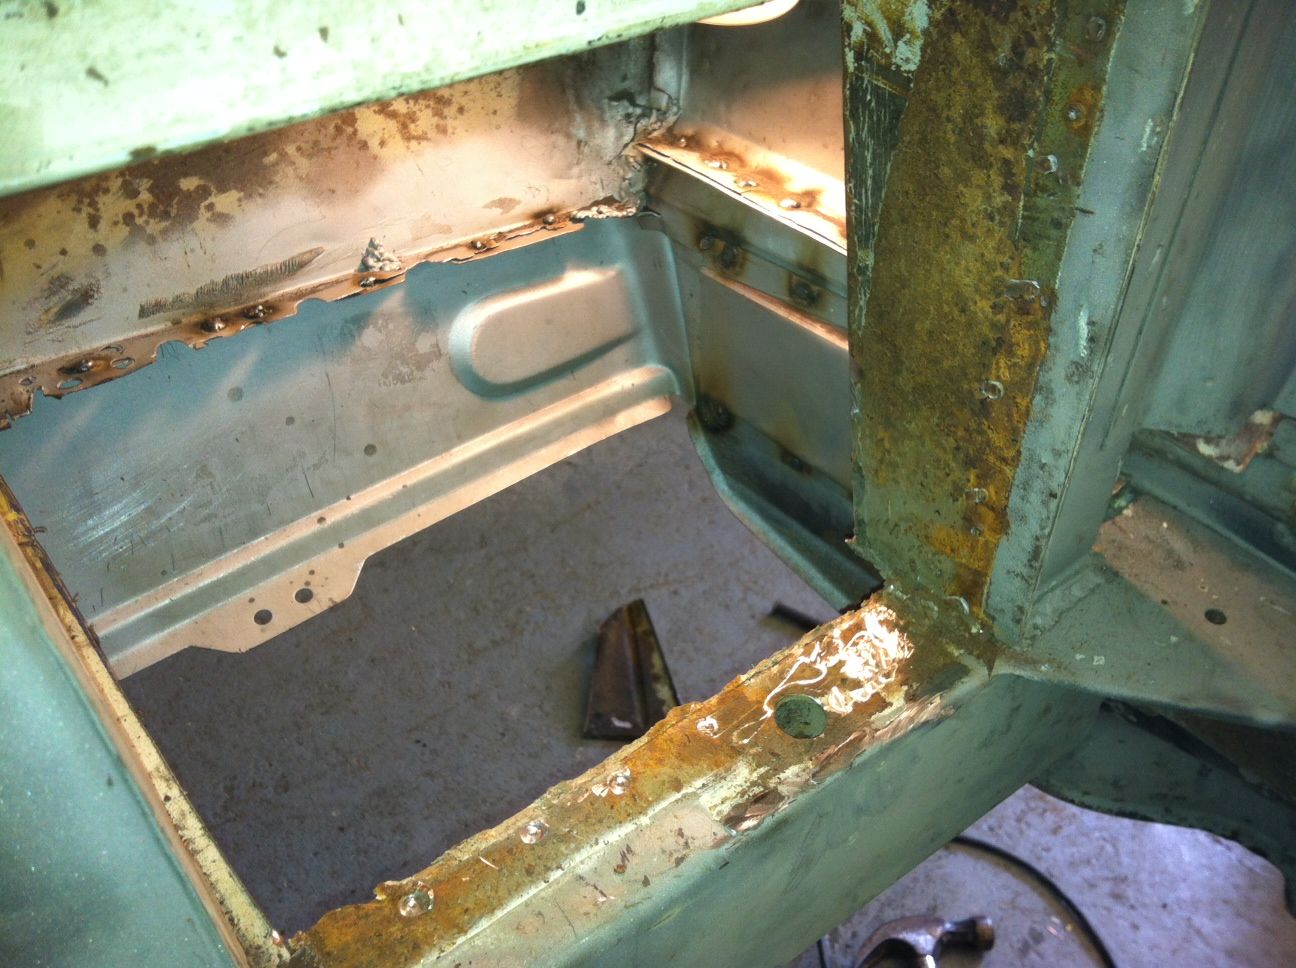 CAD and more cutting bending (starting again..... ) I'l let the pics do the talking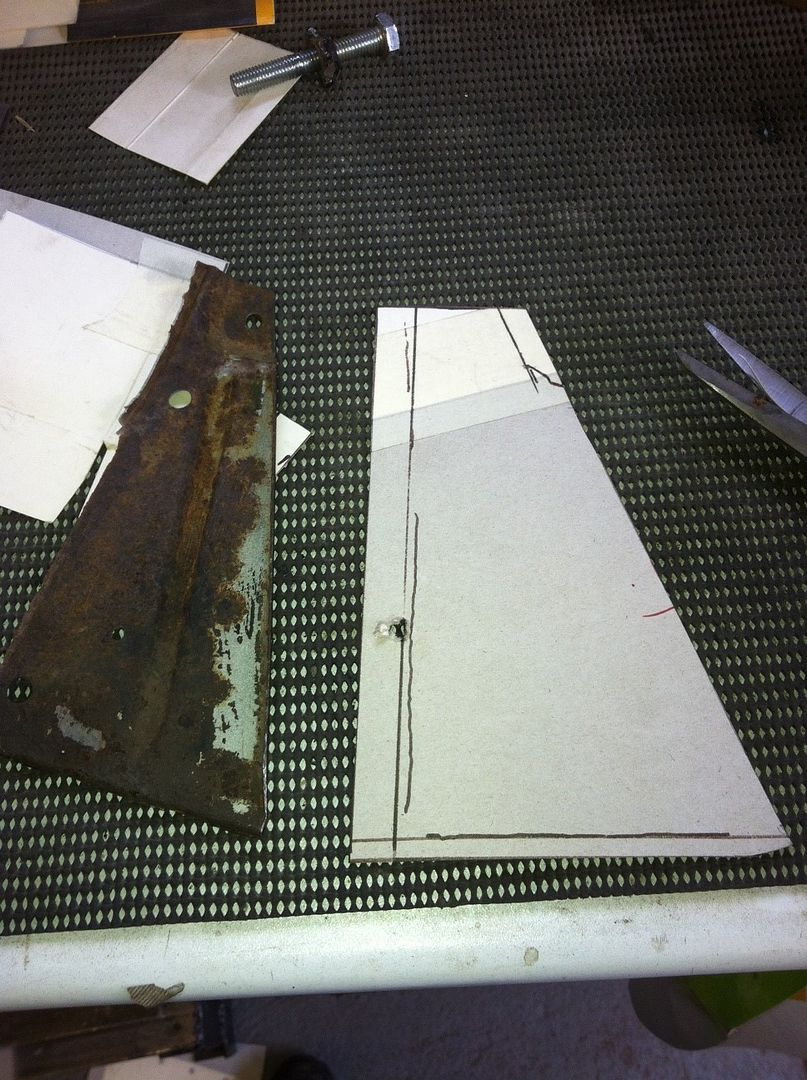  And the bottom 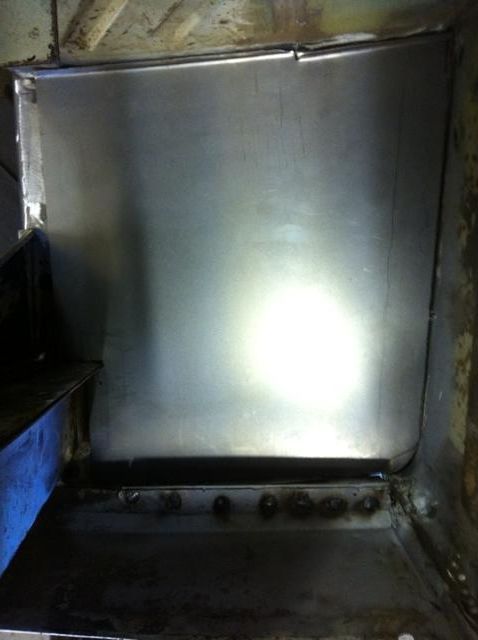 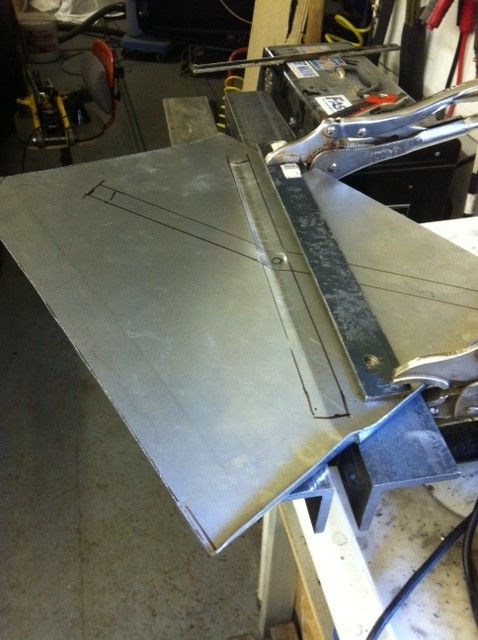 I've drilled the holes for plug welding and this is now sitting in place, just needs welding up which I'll do tomorrow Pete ------------- Too many projects..... Not enough time! |
Posted By: surf dude
Date Posted: 28 May 13 at 22:23
|
A couple of updates..... Not a great deal to tell, but did manage an hour in the garage the other day. Didn't really feel like getting dirty so thought I'd put the new clock set together as I'd finally got round to spraying it up in matt black. 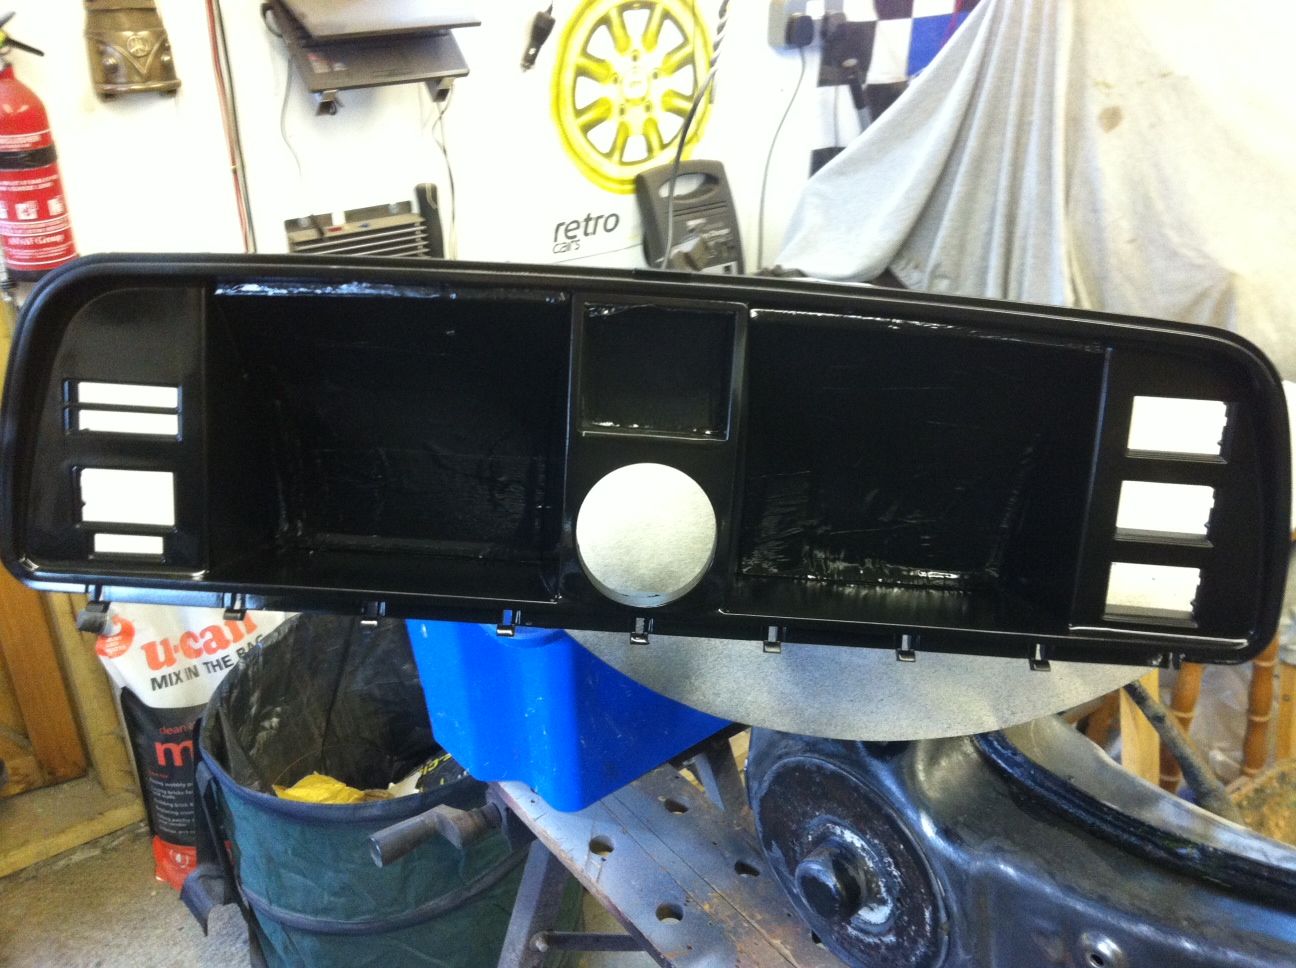 Stripped the old ones down. They have a plastic backing for all of the connections, these can be pretty knackered but mine actually looks to be in quite good nick. All off and cleaned up, and then onto the new one (The reason for changing was that most of the screw holes that hold on the clocks themselves were broken or missing. The new one had all but one I think in a fit state. What they didn't have was a hole for the trip ::) Quite how I missed that..... well, my attention to detail can be a bit lacking sometimes ::) Anyway, a bit of heat gun use had the old clear covers loosened. I haven't got them glued in yet, just a couple of the last bits of plastic to scrape out! 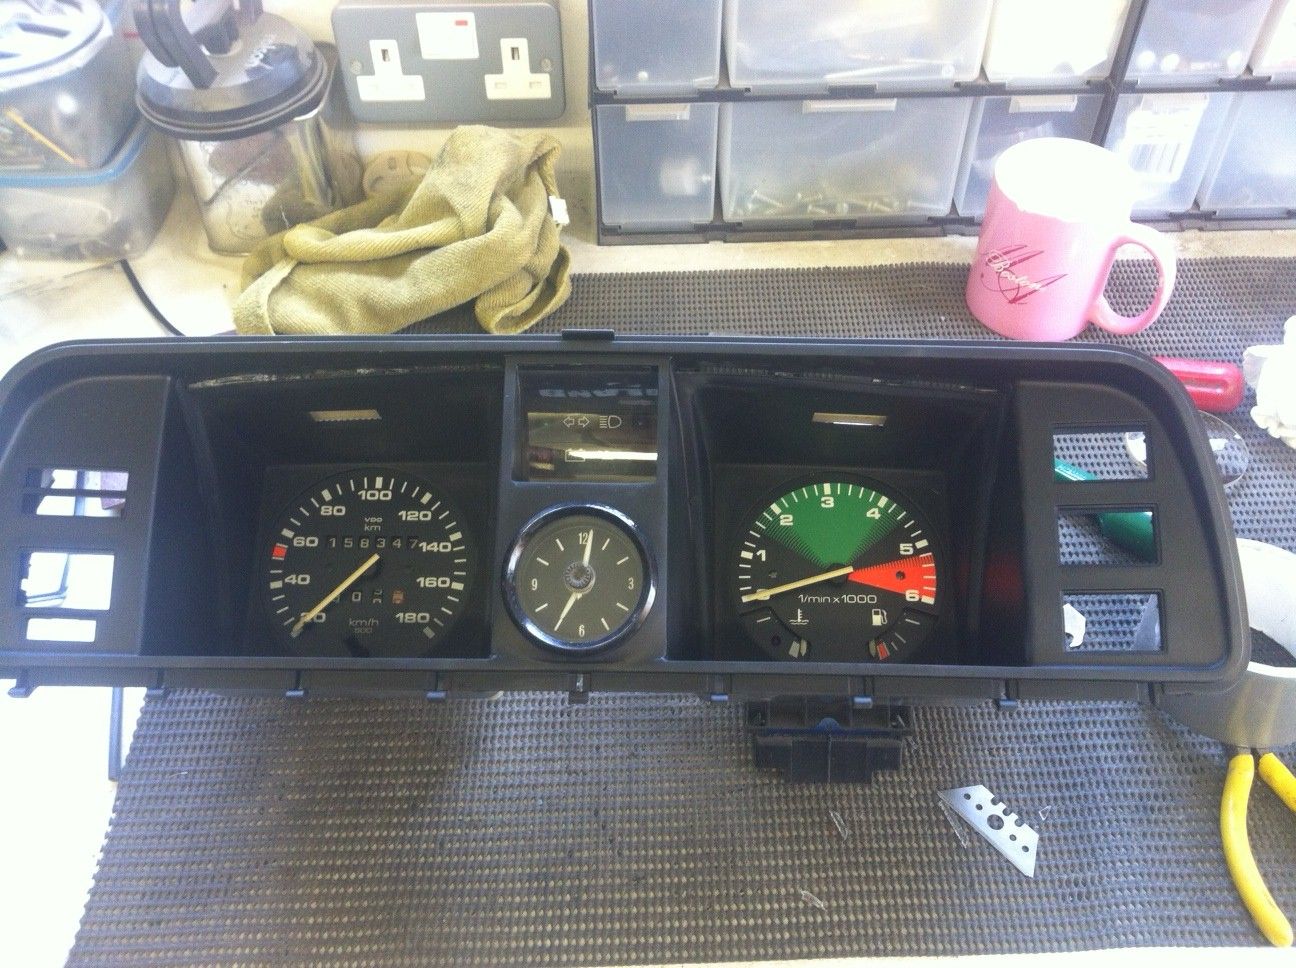 I'm pretty pleased with it, and the new clock in the middle. Just need to check it all works now........ And a few weeks later..... Well, it's been a while, and I've had a total mojo breakdown. Let ,me tell you why..... First off, I have dropped the rear suspension. This saga is detailed somewhere up there ^^ and after giving them a quick blast and grind, I gave them to a mate who runs the local garage to remove, and refit the bushes. Removal? Easy! Refitting? Not! I got some new bushes, Lemforder, which are (I think) the company who make the VW ones, but with a smaller price tag. Now apparently, there is a tool, cone shaped, that will ease the bushes into place, but they seem to be like the proverbial rocking horse poo, so the advice is lots and lots of lubrication and they'll go in. Or, they'll chew themselves up on the way in and become unusable. One down, I've called a halt to proceedings...... Now investigating whether I should go VW (£80 plus VAT) or Poly £84 plus post!) This investigation is ongoing!!!! The second mojo buster came when a mate was here, and with an extra pair of hands available, I thought this would be a good time to try and mate the Scooby lump with my 5 speed gearbox. Now, the engine was sat on a couple of wooden trestles, which in hindsight, weren't really up to the job when we starting doing a bit of engine - gearbox mating action (the gearbox was on the engine crane) The first issue was that on pushing them together, we ended up with a 1 inch gap between the two, that no amount of shoving would reduce. Then, we removed the clutch, placed it over the gearbox shaft and then tried fitting them together. Lo and behold, it slotted together straight away ::) Clutch reattached to flywheel? Yep, still the 1 inch gap. Now I'm starting to get a bit frustrated..... Keen not to have a tantrum in front of one of my oldest mates, I decide that now would be a good time to stop, take stock over a beer, and do some internet knowledge searching. "That trestle doesn't look too clever" says said mate. "Nah, it'll be fine says I........" The inevitable outcome is that the engine fell off the trestle, smashed the plastic pulley covers, one of the pulleys, and bent the bolts that connect engine and gearbox. Needless to say, it is now sitting under a cover, so that I don't have to look at the fu*****g thing. I have emailed smallcar.com to ask their advice though as the adaptor plate is theirs. 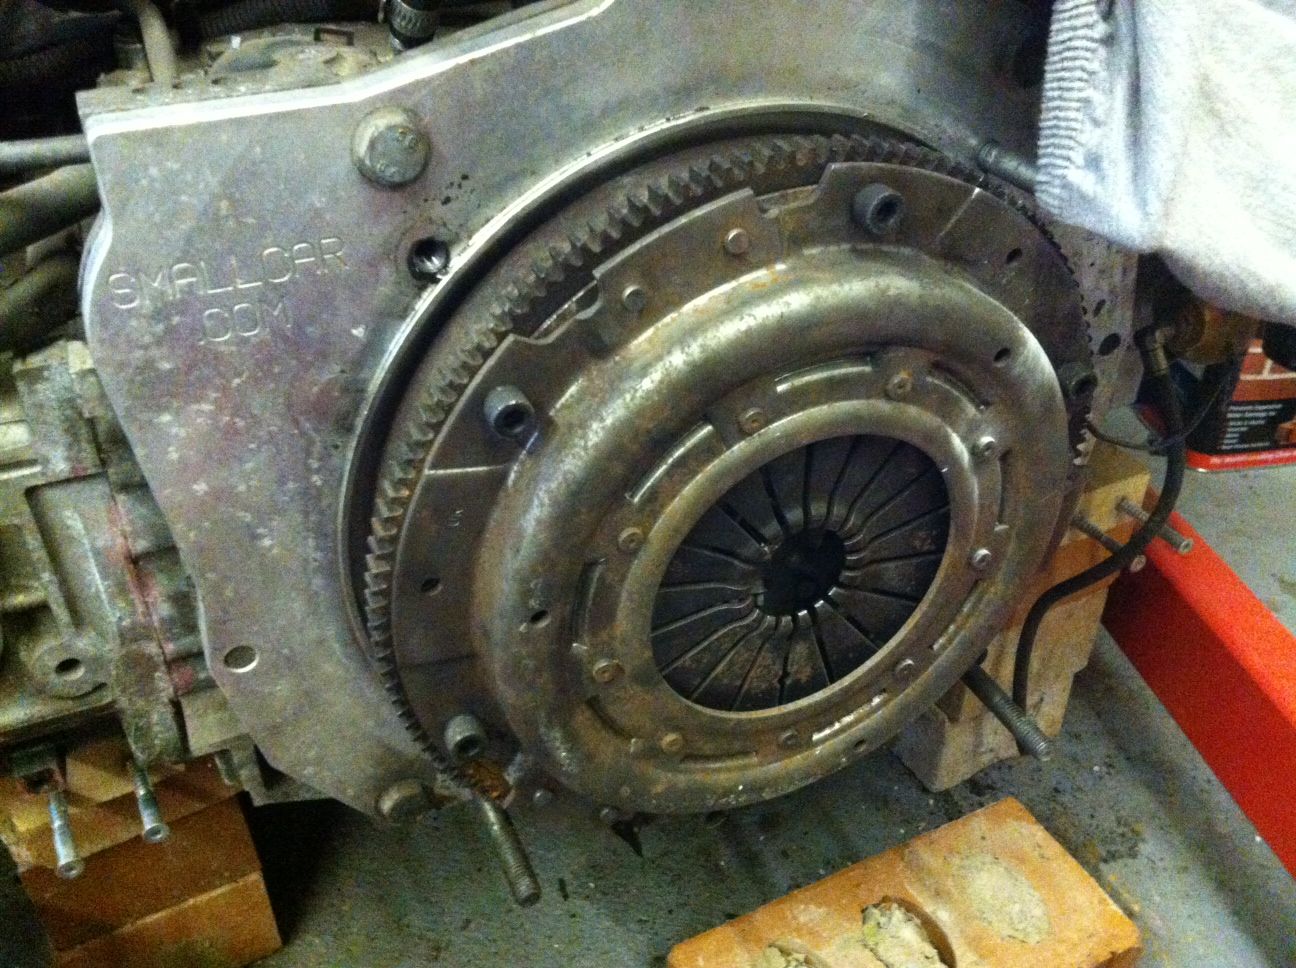 Sick of mechanical shenanigans, I started to sand down the back end in preparation of filler, filler, filler,filler, sanding, sanding,sanding,sanding,sanding, and eventual paint. Primer to start, and that's where we're at. 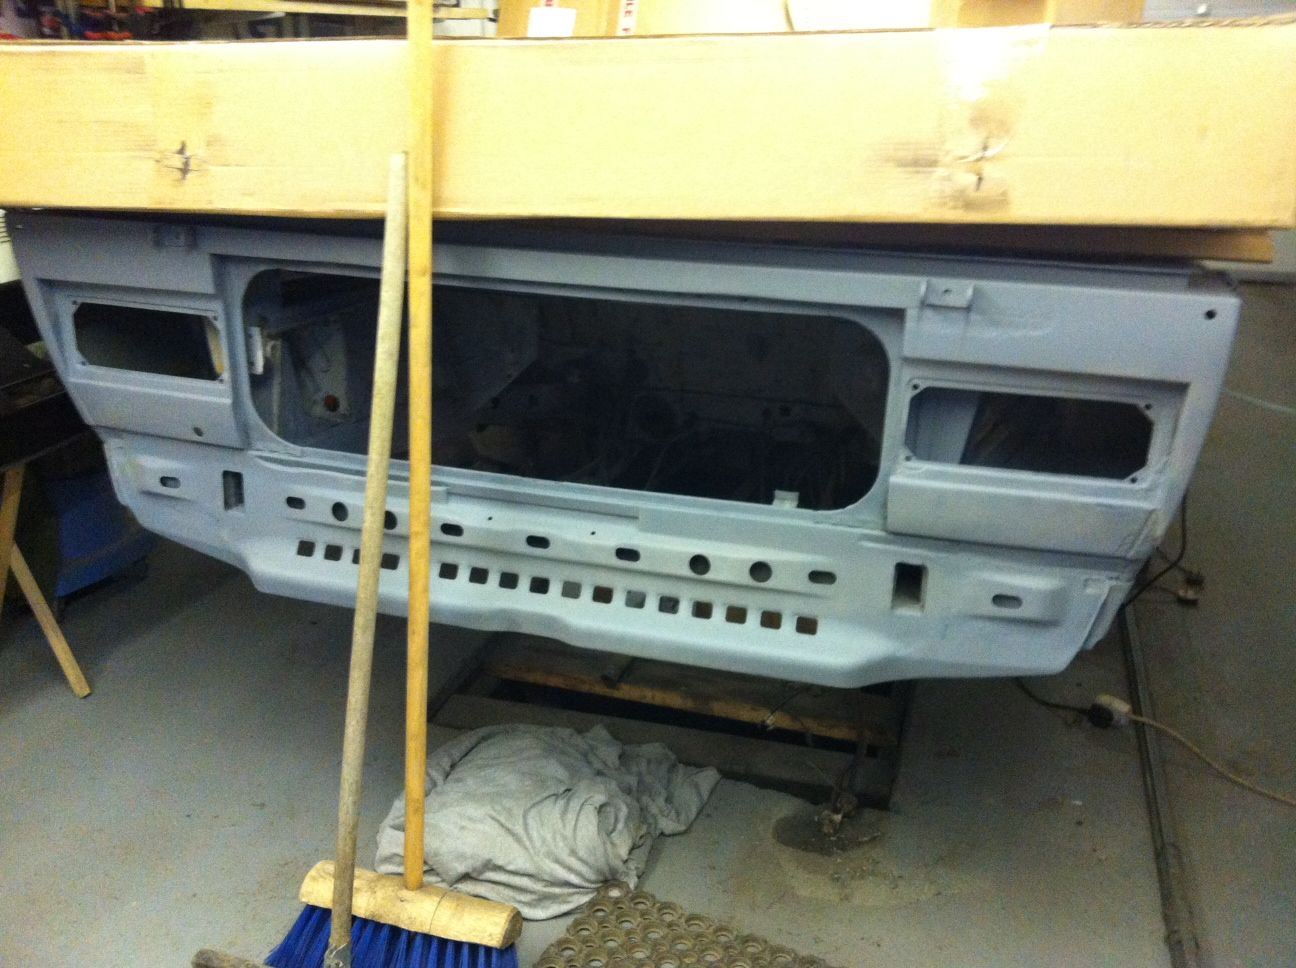 At least I have the Escort for Retro duties. This may take a while :( ------------- Too many projects..... Not enough time! |
Posted By: surf dude
Date Posted: 28 May 13 at 22:28
Just realised that I hadn't put up the finished pics of the rear battery tray! So, first fix,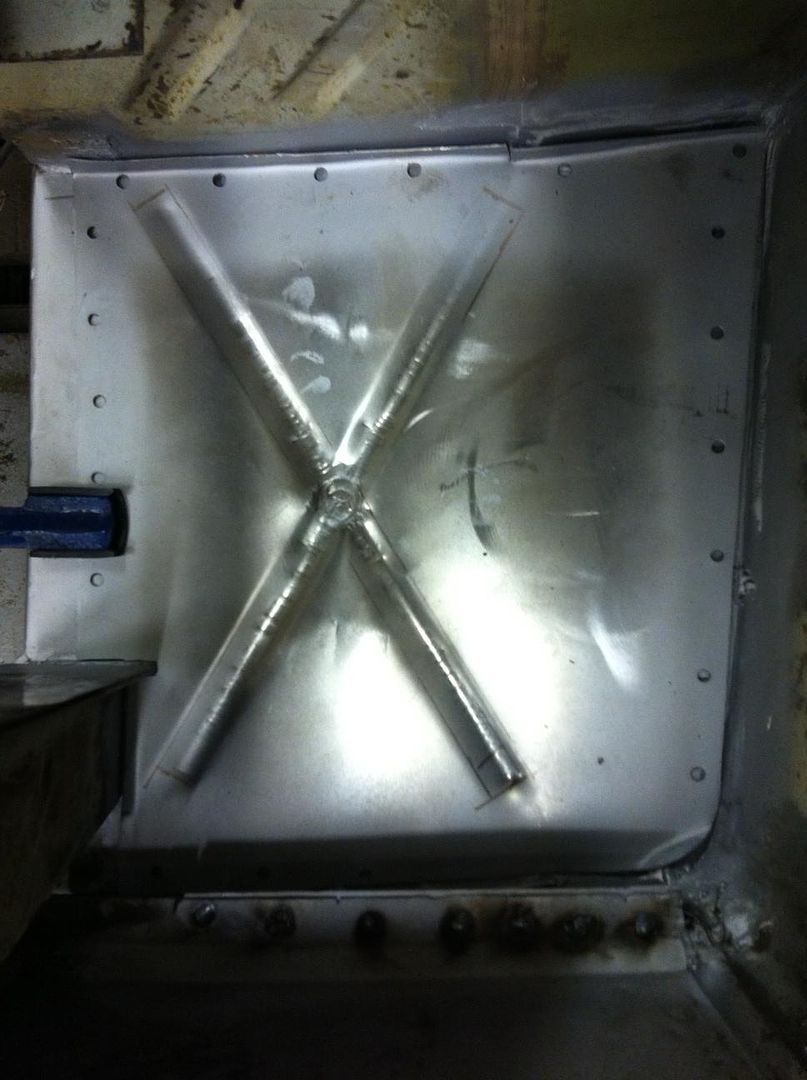 Then plug welded in. 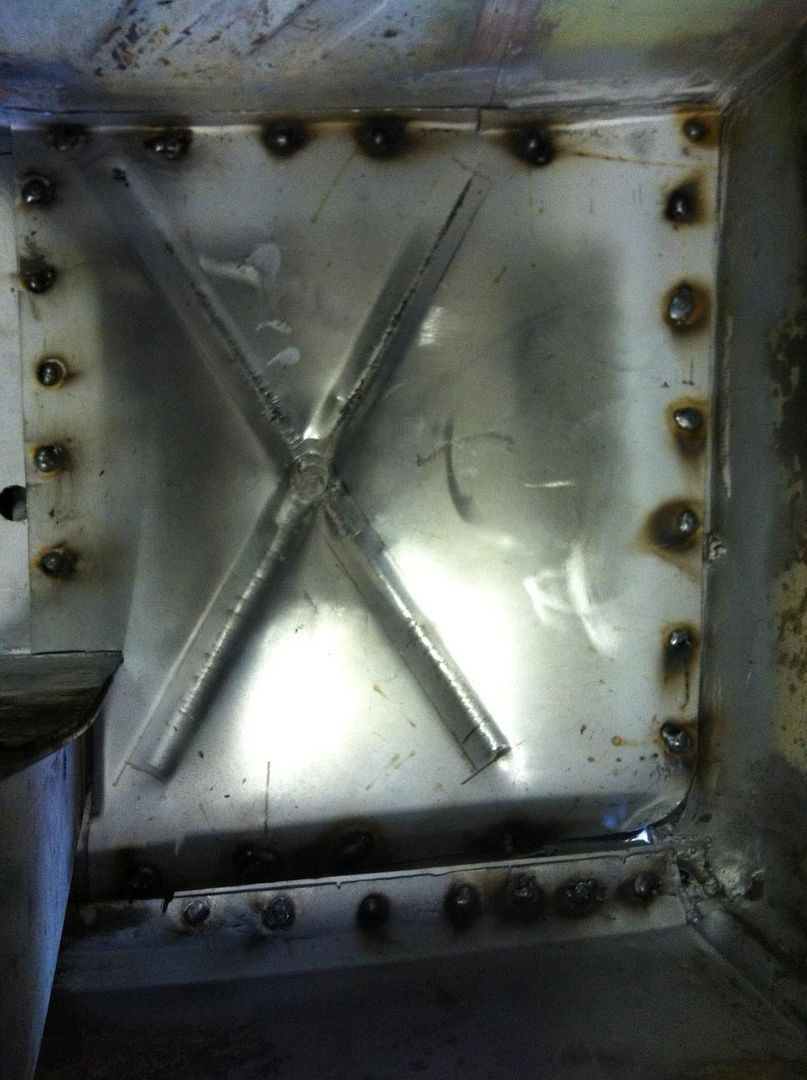 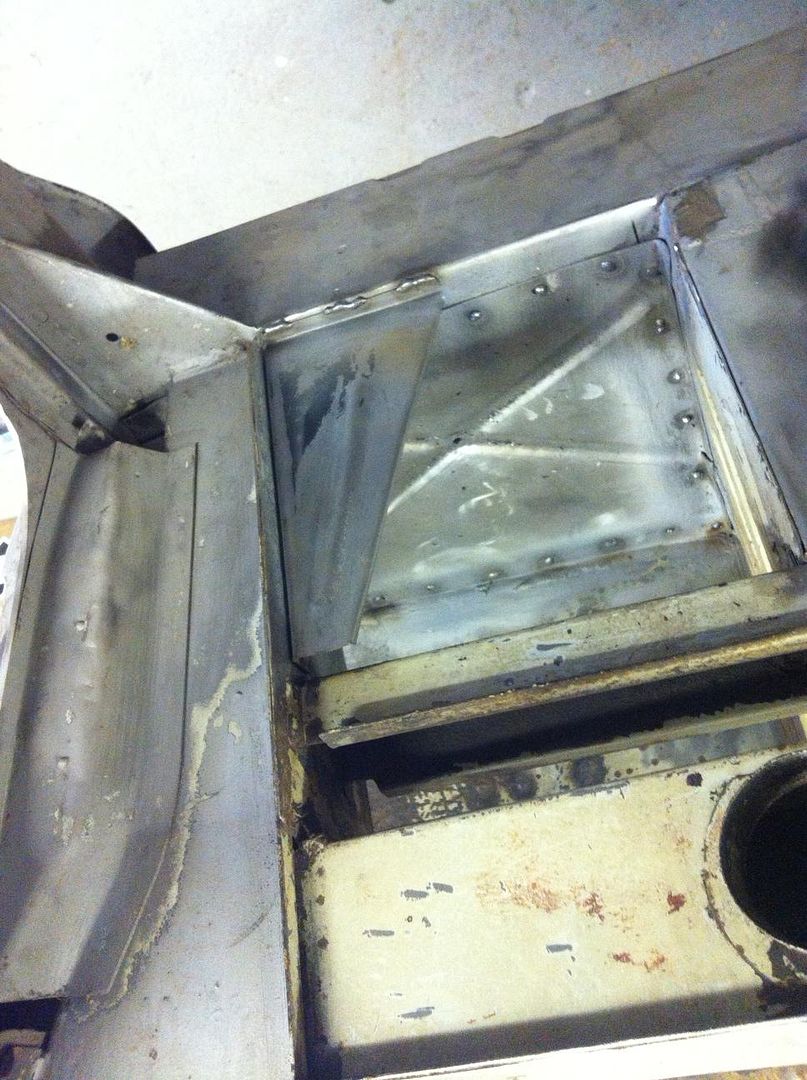 Pretty pleased with it all really, goes to prove that chopping everything out before starting repairs is 'NOT' the way to tackle a job like this ------------- Too many projects..... Not enough time! |
Posted By: rowlesy
Date Posted: 29 May 13 at 17:20
|
getting there though mate! after all - the mishaps are soon forgotten when its up and running ------------- UberFukz broke another! sucky sucky five dollah! always out numbered never out gunned! RWS welding 07846 380 467 (worcs) |
Posted By: surf dude
Date Posted: 29 May 13 at 18:09
|
Ha, yep, that's what I'm hoping!! Good news from smallcar.com, the setup I have should fit the 5 speed box so I'm guessing the clutch just needs to be better lined up!! Gonna be a while though ------------- Too many projects..... Not enough time! |
Posted By: max and caddy
Date Posted: 30 May 13 at 00:14
|
If I may offer a tip? Make your plug weld holes a bit bigger...it's easier and neater as the weld bobble will flow out and be flatter..and stronger. I use a puncher on the joddler and then enlarge with a step drill to about 7mm..more if its dirty or thicker metal. Nice bit of tin bashing on the battery box thingy... |
Posted By: surf dude
Date Posted: 30 May 13 at 07:03
Of course you may have been meaning to get a step drill and now I have a reason to! Is that a hand joddler? Mine has a punch but I've never used it (weak hands!!) thanks for the tip. Always open to advice.------------- Too many projects..... Not enough time! |
Posted By: surf dude
Date Posted: 23 Jun 13 at 22:11
|
Thought I should crack on so got the paint out and started making it look pretty (Well, tidier anyway!) I've also been sanding and doing some rust treatment with some furtan. Seems to work pretty well, and the rust has turned a nice black. So, it was roller painting on the top, and chassis black underneath! Not very interesting, but it's a job that has to be done. 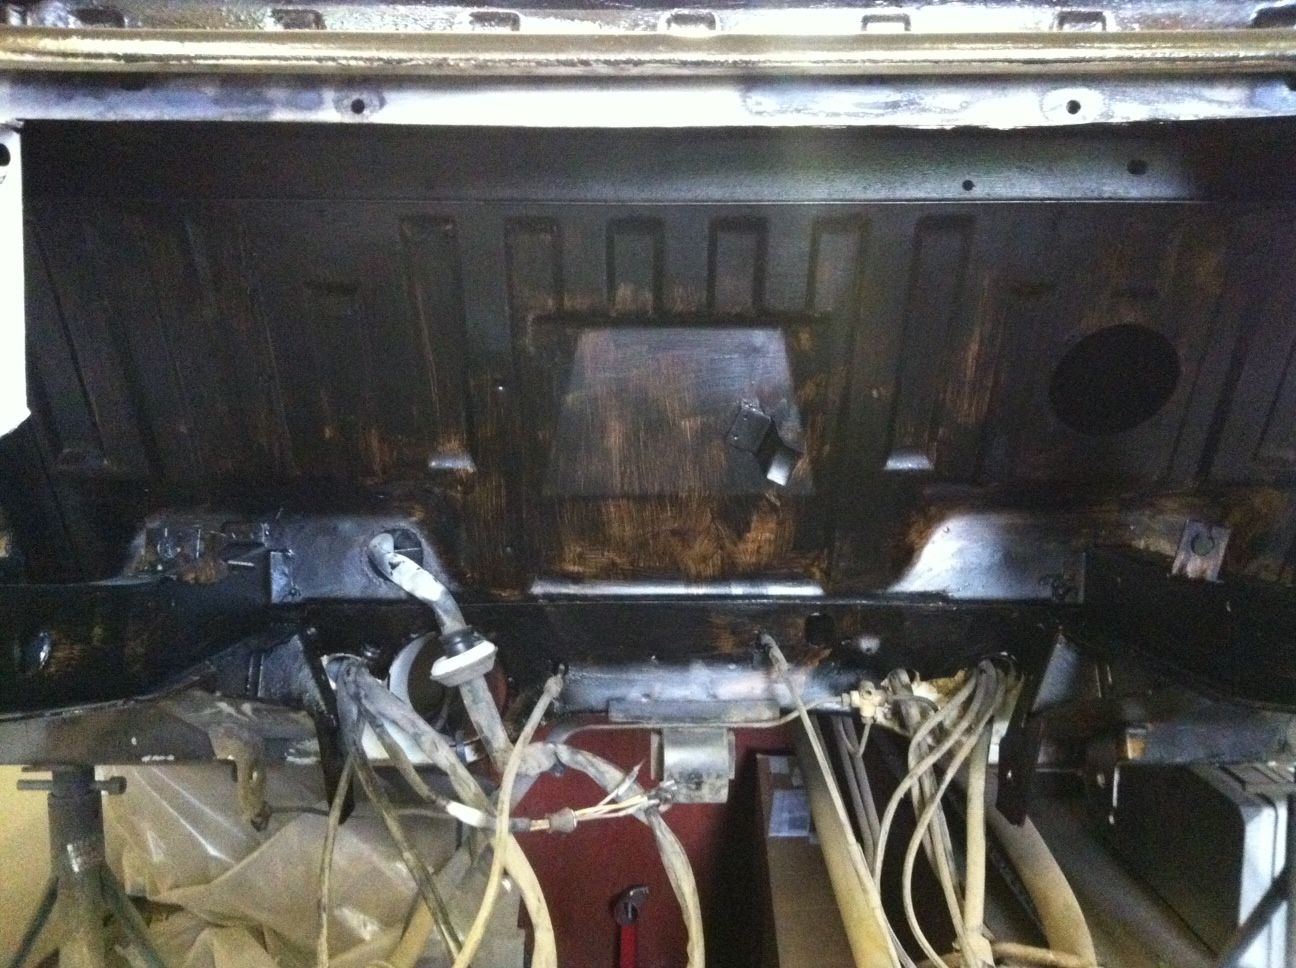 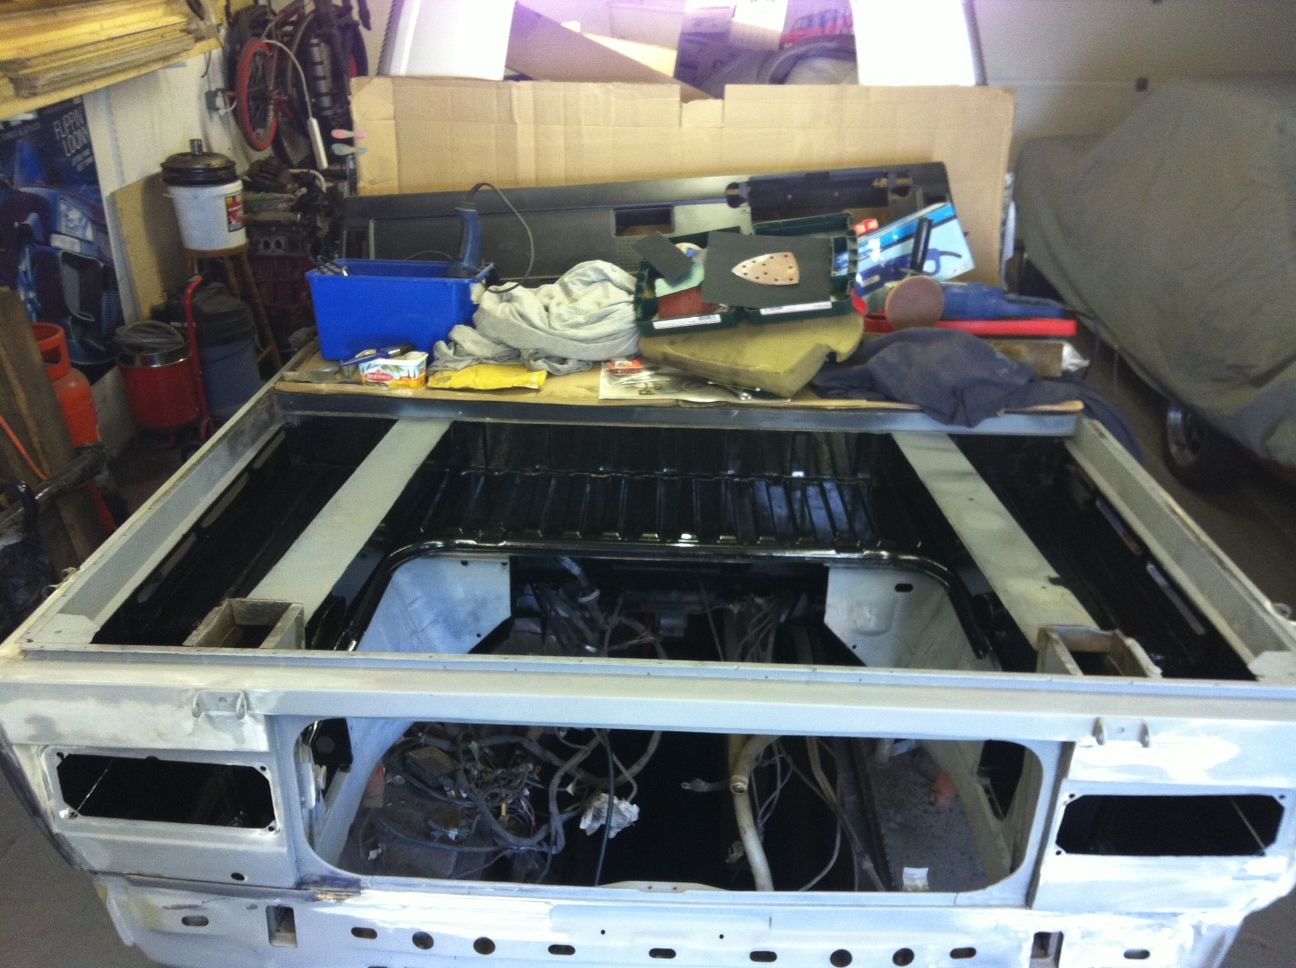 Then, as it needed some time to dry, I thought I'd drag the other Scooby lump out and see how complicated it might be to get that attached to the gearbox with the adaptor plate on. First I need to get rid of this lump of pig iron! 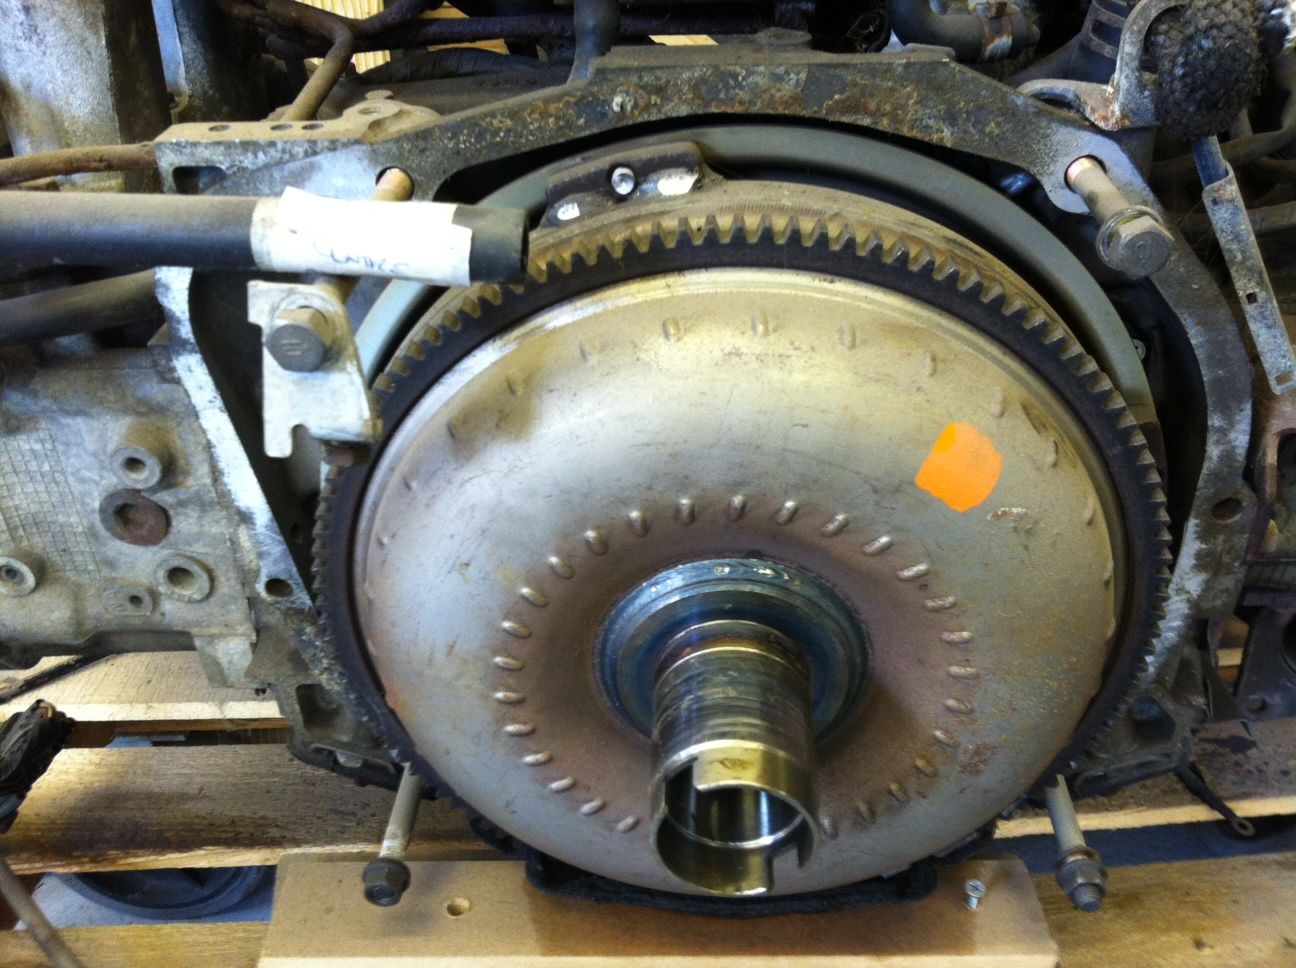 It took a while, the bolt heads are a bit tricky to get to when it's sitting on a pallet ::) Still, I managed 3 of the 4, and then after rounding only 2 of the 8 flywheel bolts, the thing was on the floor.  Well, another week/weekend has gone by, and, because everything seems to take forever, it doesn't really look like I've done a lot! But I have ;) So, last week the engines were sat next to each other, with a view to changing everything over to the 2.5 lump from my old Legacy. There's been plenty of fiddling around, and thanks to Dez and a gearbox input shaft (LEGEND) eventually........ Ta da :D  SO, they're together. And that has pretty much made up my mind that this engine is going in. (I wnated to really, and should have just stuck with this one in the first place! Next up is the engine mounts. These bolt to the original Scooby mounts and have adaptors to fit them to the original VW engine mounts. I need some longer bolts, which I'll get in the week, but two of the four bolt straight up. Oh, no, hang on a minute, that's not right ::) The dipstick is in the way! So, after about 15 minutes of wiggling the dipstick came out, but still no good, so I had to drop the sump and have at it with the Dremel. 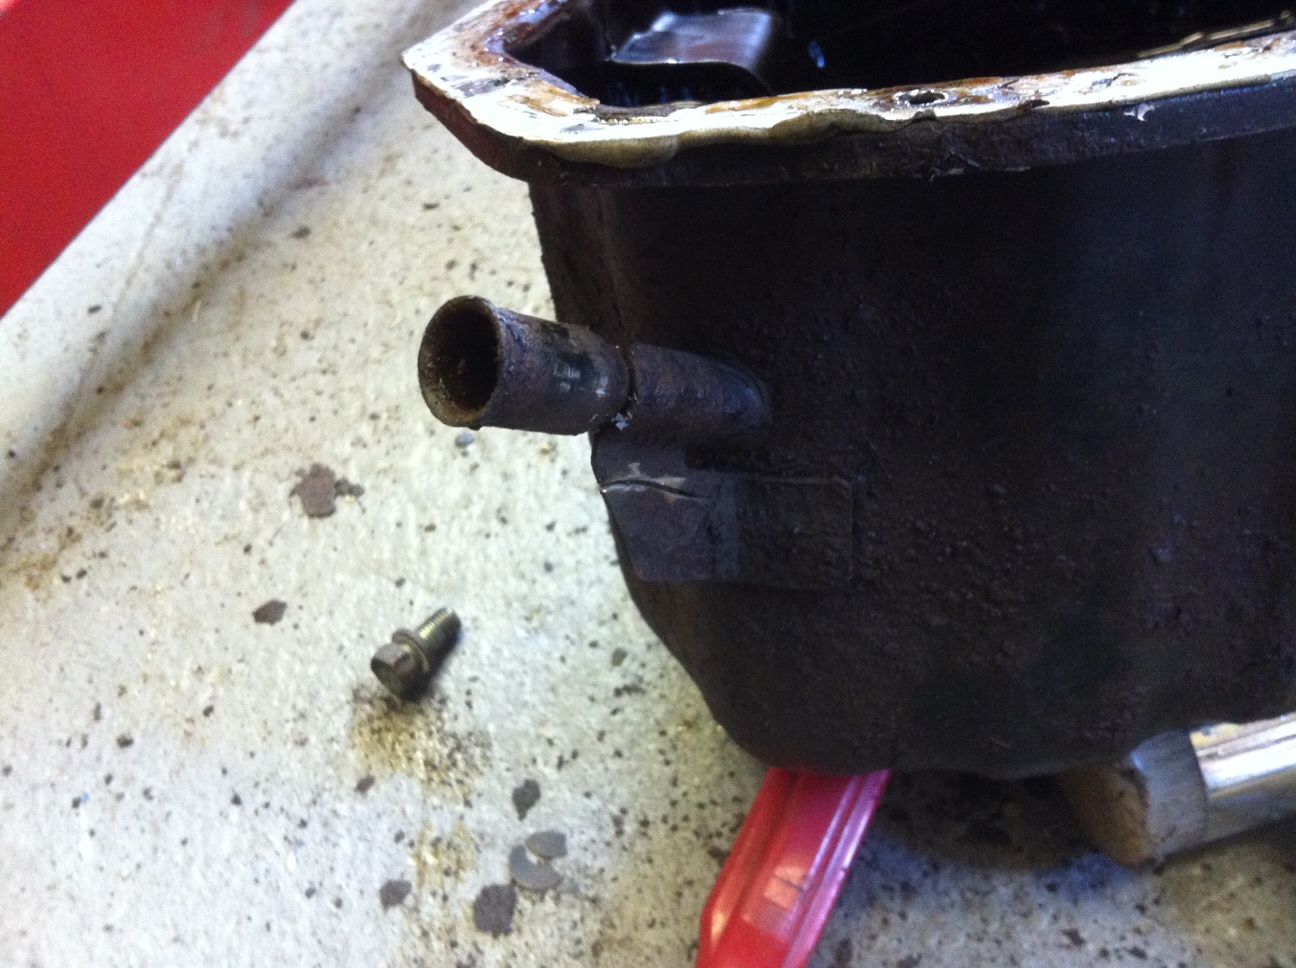 This is the first cut, but it's now all cut and cleaned up and the bracket is loosely on. I need a new sump gasket and the longer bolts, but I wanted it off the crane so it's loosely bolted up for now, so that it can sit on my wheeley pallet. 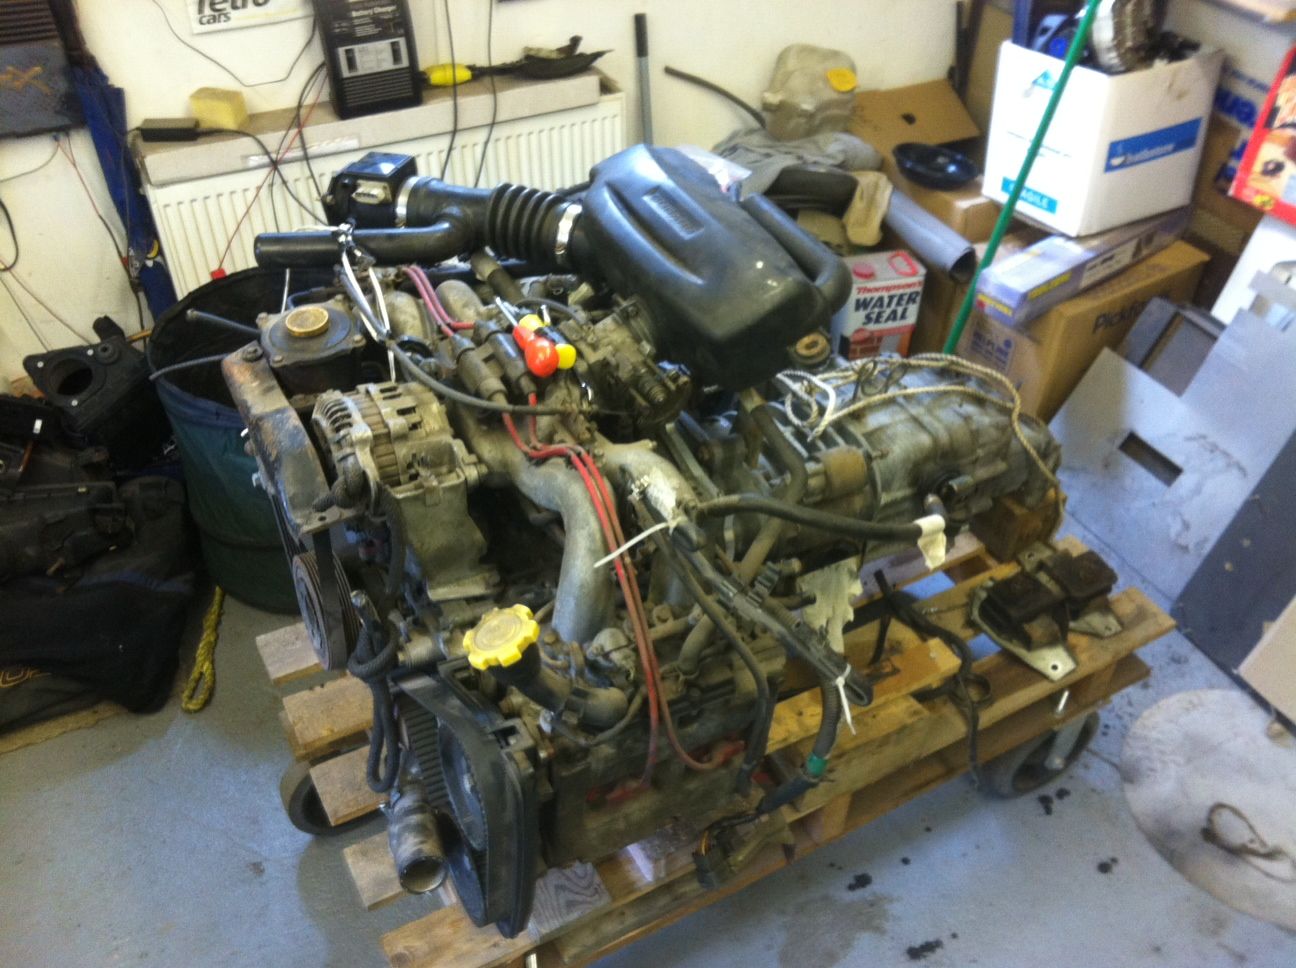 I started connecting up the loom and stripping all of the black tape off so that I cpuld start seeing what needs to stay and what needs to go! I've already spotted one issue, as I labelled one connector AFM 1. And I have no idea where it goes ::) I didn't think it would be straightforward, but blimey, there's a lot of wires!! 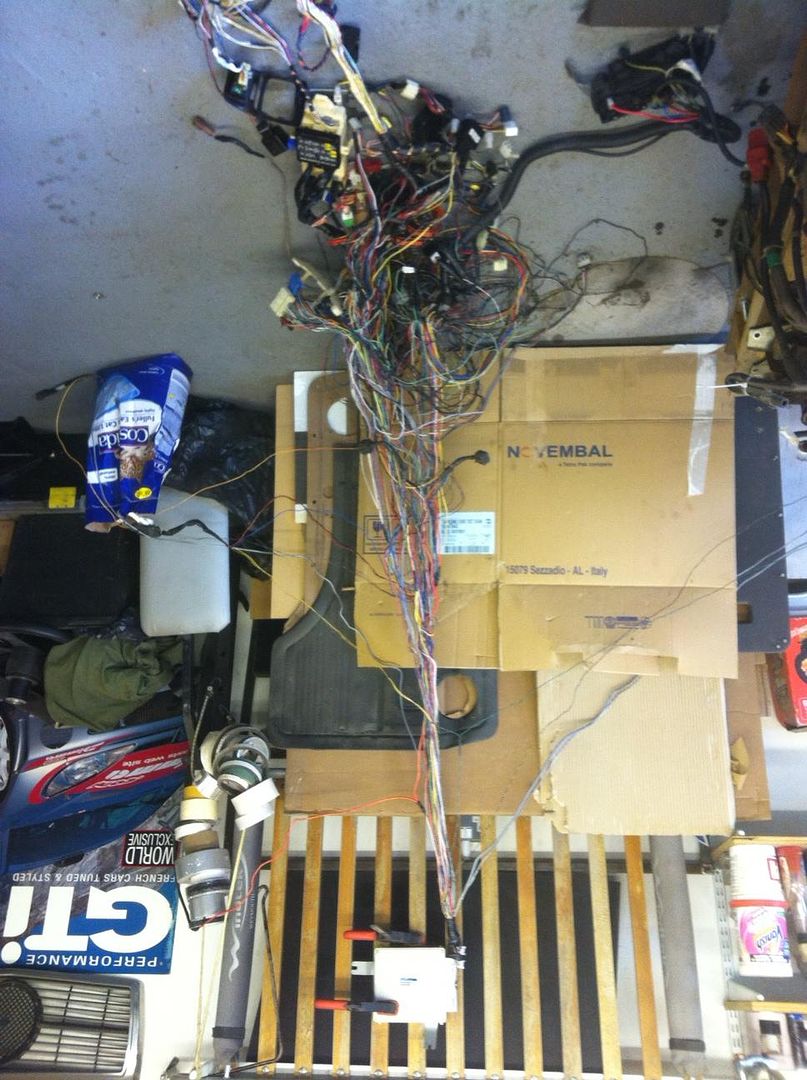 I'll keep cracking on with this, but there's always the Megasquirt on the other engine if this gets too complicated! (Truth of it is though, wiring is not one of my strongest points....... (some would say that I don't have any ;) )) Back on it tomorrow night, and I'll be having a search now to see if I can find some wiring diagrams! Thanks for looking. Pete ------------- Too many projects..... Not enough time! |
Posted By: youthy giblets
Date Posted: 23 Jun 13 at 22:59
| Nice pick up there, your making a good job, your a man after my own heart there a 205, a t3 and a mk2 escort!!! I haven't got a start on my belle yet been busy carrying out a full resto on my mk2 1600 sport. What's model and spec of your mk2? |
Posted By: surf dude
Date Posted: 24 Jun 13 at 07:17
Thanks mate, 205's gone sadly, it was a great car but I didn't use it enough! Escort is a reshelled RS2000, built by the previous owner about 15 years ago (I guess we've had it 3) from a 1.3 pop. All the period mods, 2.1 stage 2 burton engine, Capri struts and princess calipers, 9" drums, full RS interior. Running a twin choke carb at the moment, but I'm planning on a set of bike carbs when I have the time!! And fit some decent tyres, the current ones are shite!! ------------- Too many projects..... Not enough time! |
Posted By: youthy giblets
Date Posted: 24 Jun 13 at 09:47
|
Sounds like a decent car, if u have time have a read through my build thread here http://bbs.rallyesportescorts.co.uk/showthread.php?t=60668 Cars nearly ready for paint now |
Posted By: surf dude
Date Posted: 24 Jun 13 at 19:19
Looking good, kind of glad I didn't have to go through that with ours! And so far the van has cost me more than the Escort did Here you go,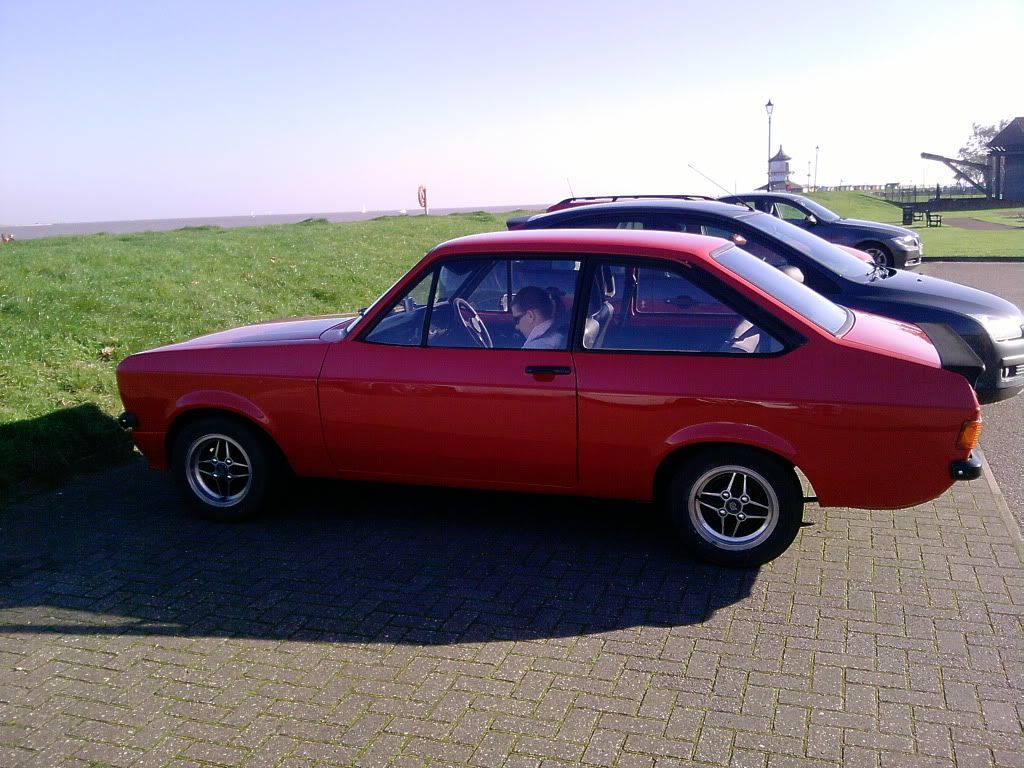 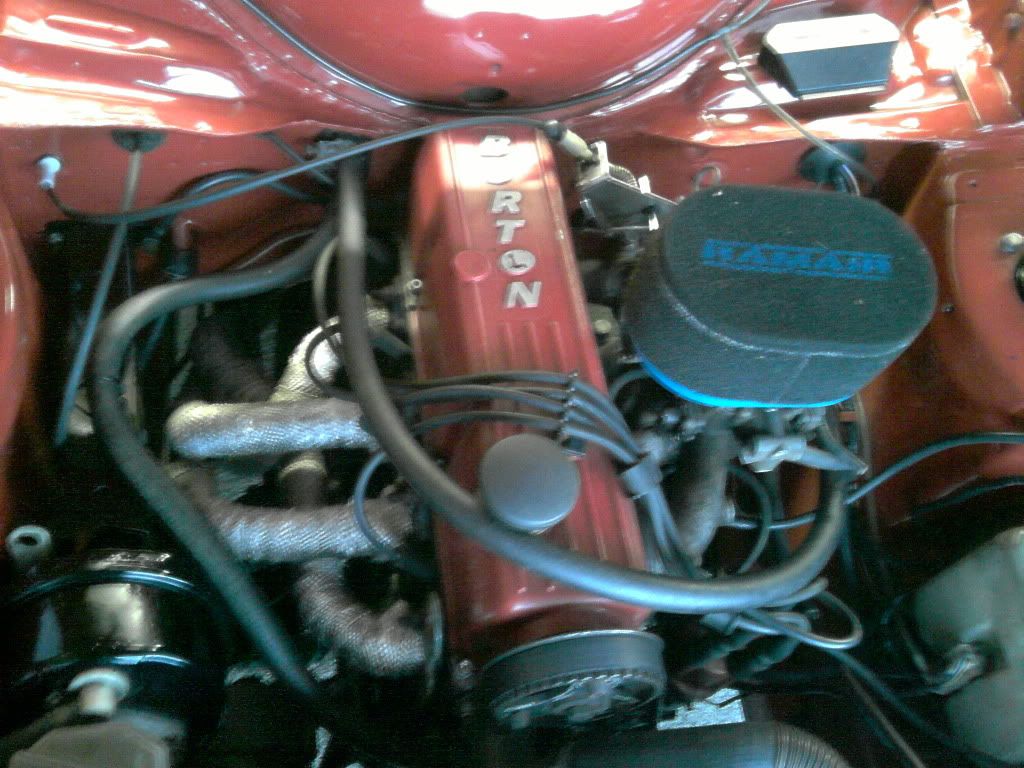 Might just have to take it for a spin tomorrow! ------------- Too many projects..... Not enough time! |
Posted By: surf dude
Date Posted: 23 Jul 13 at 21:14
|
Been a while again ::) But not completely idle! First I had a chat with Richard Jones at RJES about the loom which is now booked in for September and will include the necessary bits to basically make it plug and play, which is very very good! So I've removed all of the loom tape, put "most " of it in tie wraps so that it's not like a bowl of spaghetti, and boxed it up for when he needs it. Next up, more bodywork :( So, I'm kind of planning on doing the backend first, and working my towards the front, so with that in mind, I started cracking in on the back left quarter. There's quite a lot of new metal here, and mostly hand beaten as the panels are either stupidly expensive, or more likely, because it's a DoKa, simply not available. Cue more filler then! After Furtan and primer though!  Then, as we're heading in that direction, I whipped the locker door off as there was a bit of rust near the hinge. I'd planned on a quick sand and rust treatment and then filler, but then gave myself a kick up the arse and went about repairing it properly! 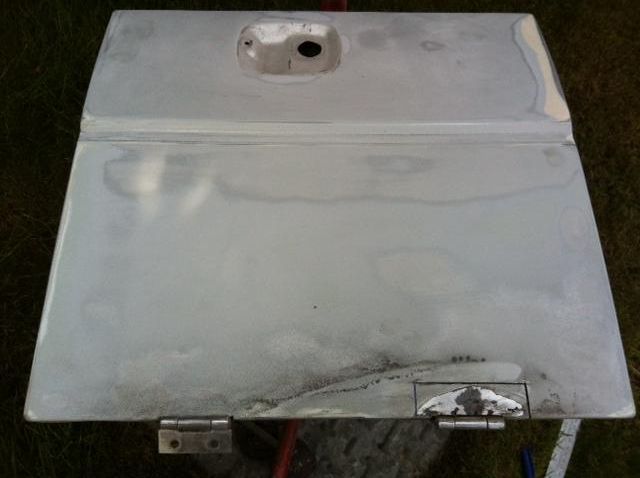 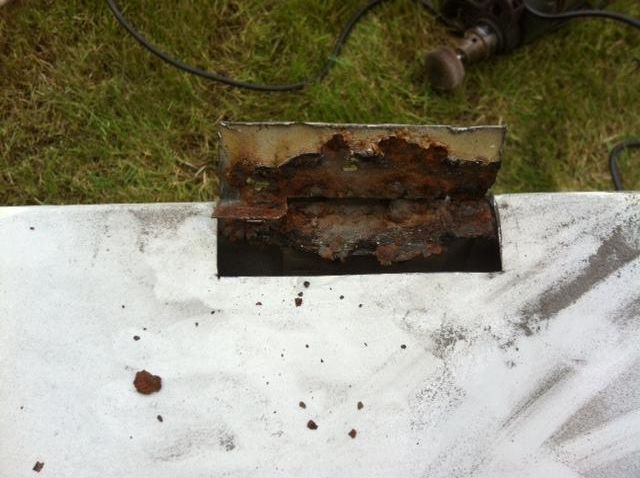 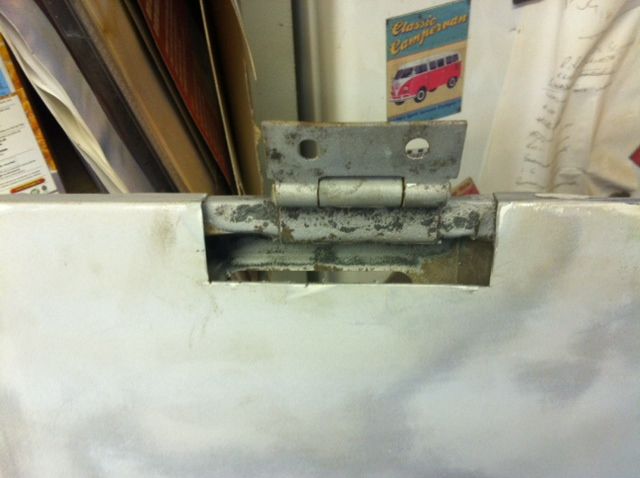 Next up, filler piece and welding! Oh, and I ordered some paint ;D ------------- Too many projects..... Not enough time! |
Posted By: Paul Van Denton
Date Posted: 24 Jul 13 at 21:37
| This is a pretty epic restoration. What colour you gonna go for? |
Posted By: surf dude
Date Posted: 24 Jul 13 at 22:41
Well, I love primer grey, but I've just got some anthracite/dark grey. I'm rollering it so if I don't like it, I'll change it! ------------- Too many projects..... Not enough time! |
Posted By: surf dude
Date Posted: 29 Jul 13 at 21:17
Managed to get a bit more done, though wanted to do more Having treated the door and hinges to some Furtan, I cut a piece out to fill the hole, and much grinding and filing later I managed to get it to fit 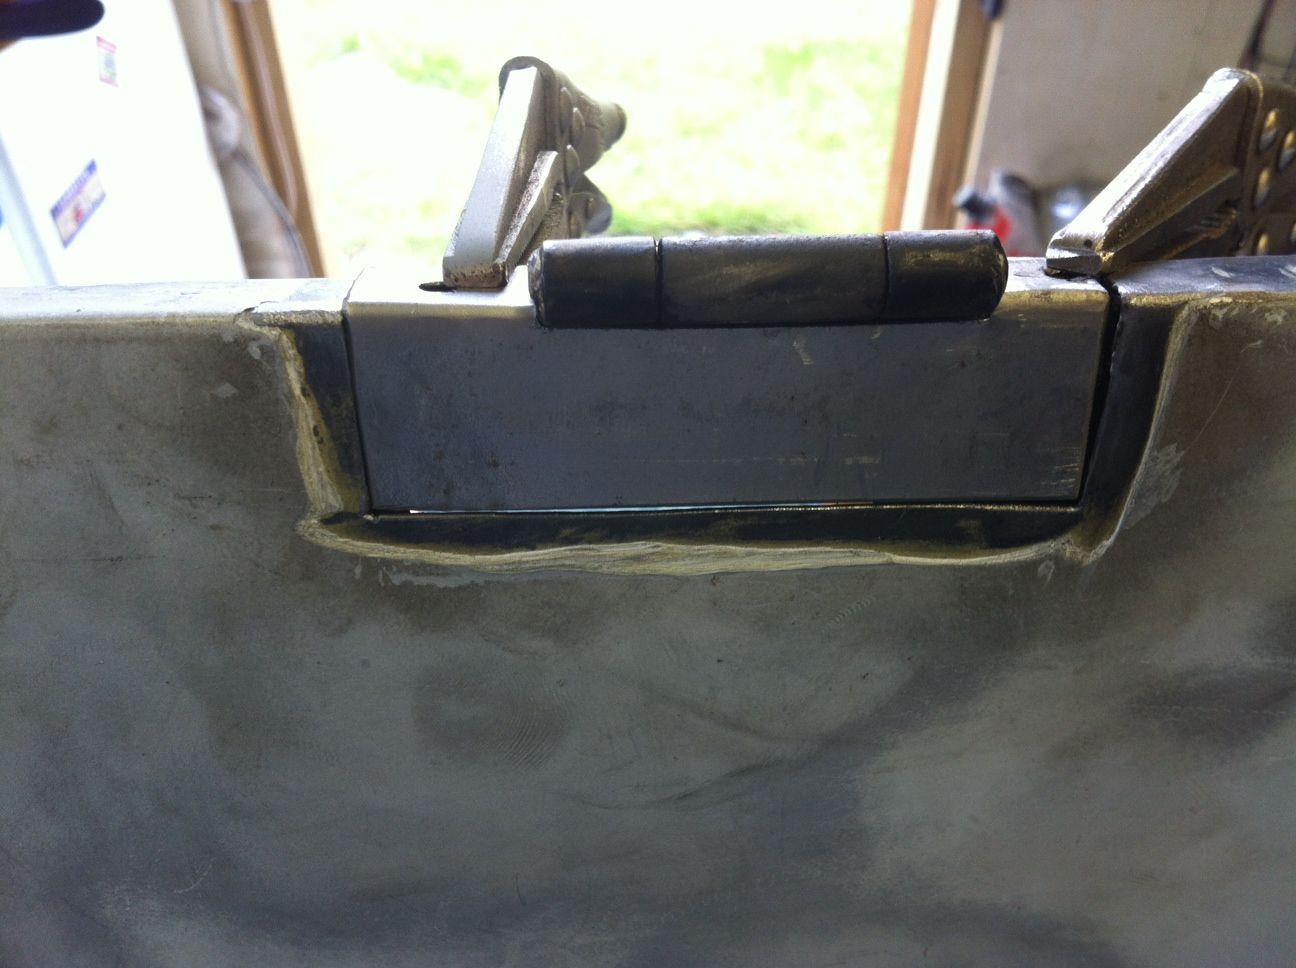 Then out came the zappy stick and I welded it in! 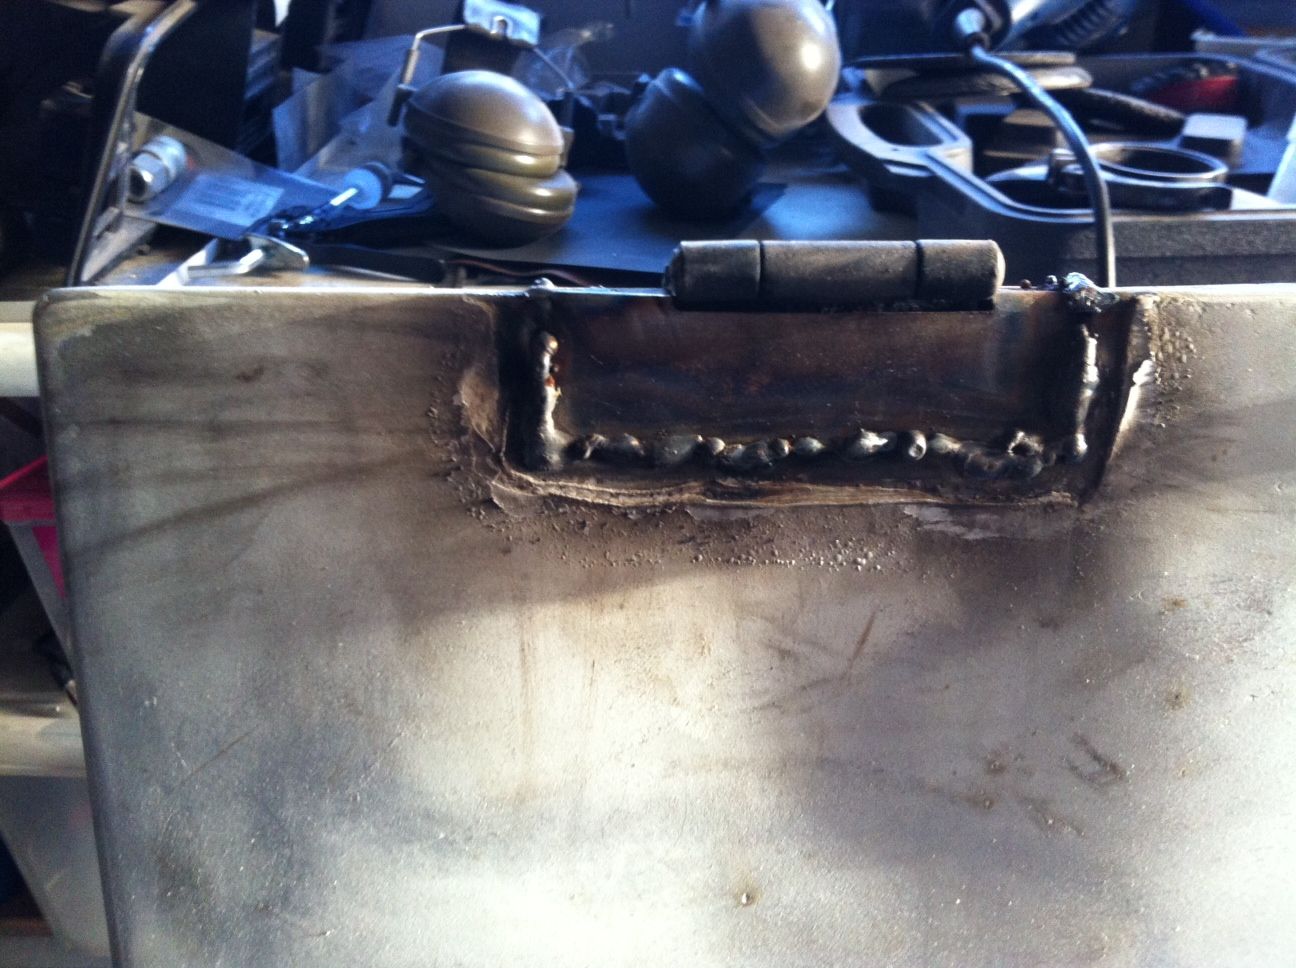 Just need to grind it down now, but my grinder lost the locking part to remove discs and stuff ages ago and it's finally got to the stage where I can't remove the wire wheel, so that'll have to wait til I get a new one! Which is a tad frustrating Away for a week and a bit now so no more work for a bit, but plan to get stuck in again in a couple of weeks! (Maybe )------------- Too many projects..... Not enough time! |
Posted By: Gtavalanche
Date Posted: 29 Jul 13 at 22:02
|
Keep plugging away mate. Have you got much left to do? ------------- I taste Hurty! |
Posted By: surf dude
Date Posted: 29 Jul 13 at 22:05
Erm, yes!!! Frickin lots! I'll get there eventually ------------- Too many projects..... Not enough time! |
Posted By: Gtavalanche
Date Posted: 29 Jul 13 at 22:06
|
I'm getting excited about mine, I can't fricken wait to have it back! ------------- I taste Hurty! |
Posted By: surf dude
Date Posted: 29 Jul 13 at 22:12
|
When you back? ------------- Too many projects..... Not enough time! |
Posted By: Gtavalanche
Date Posted: 29 Jul 13 at 22:38
|
End of September ish. This place has got worse! ------------- I taste Hurty! |
Posted By: surf dude
Date Posted: 29 Jul 13 at 22:54
|
So I hear! Not much better here by all accounts! Apart from being able to come home to the garage! Really should make better use of my time ------------- Too many projects..... Not enough time! |
Posted By: Gtavalanche
Date Posted: 30 Jul 13 at 07:07
|
Its quiet, which is a good thing, but there's too many people with nothing else to do apart from coming up with bullshit! ------------- I taste Hurty! |
Posted By: surf dude
Date Posted: 02 Jan 14 at 22:31
|
Erm, can't believe how slack I've been on this, but I have had a stab of guilt as well as a need to get the van done fairly quickly; bit difficult to sell a house, when there's a rusty bus on axle stands in the garage apparently So, another cut and paste session from RR. 23 Sept 13 Well, another 2 months have flown by and I don't seem to be getting far with the van! I have managed to tinker a little bit and after a call from Richard to send my loom I thought I better get on with separating the old loom out to just the front end connections so from this! 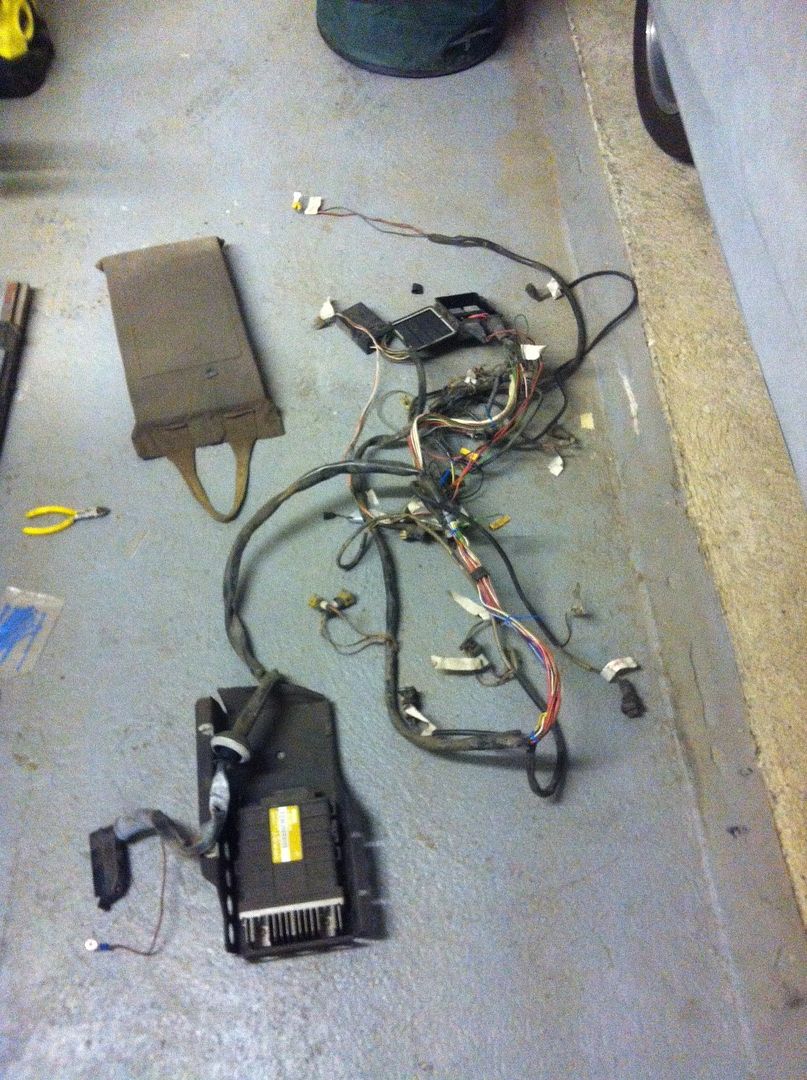 To this 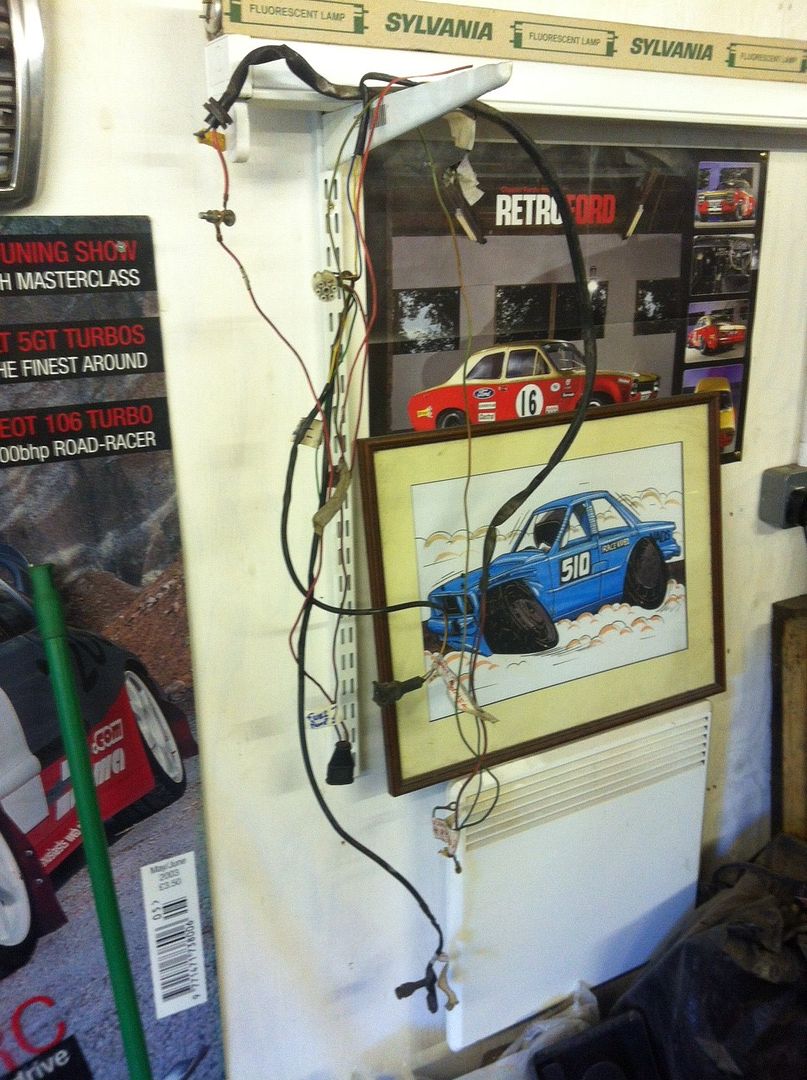 Much smaller :) Next up I gave the old 2.1 a clean and connected all of the engine wiring back up! There are literally 2 wires (That might not be true, I often have screws left over........) It'll be up for sale at some stage, probably when the Scooby lump is in and running! 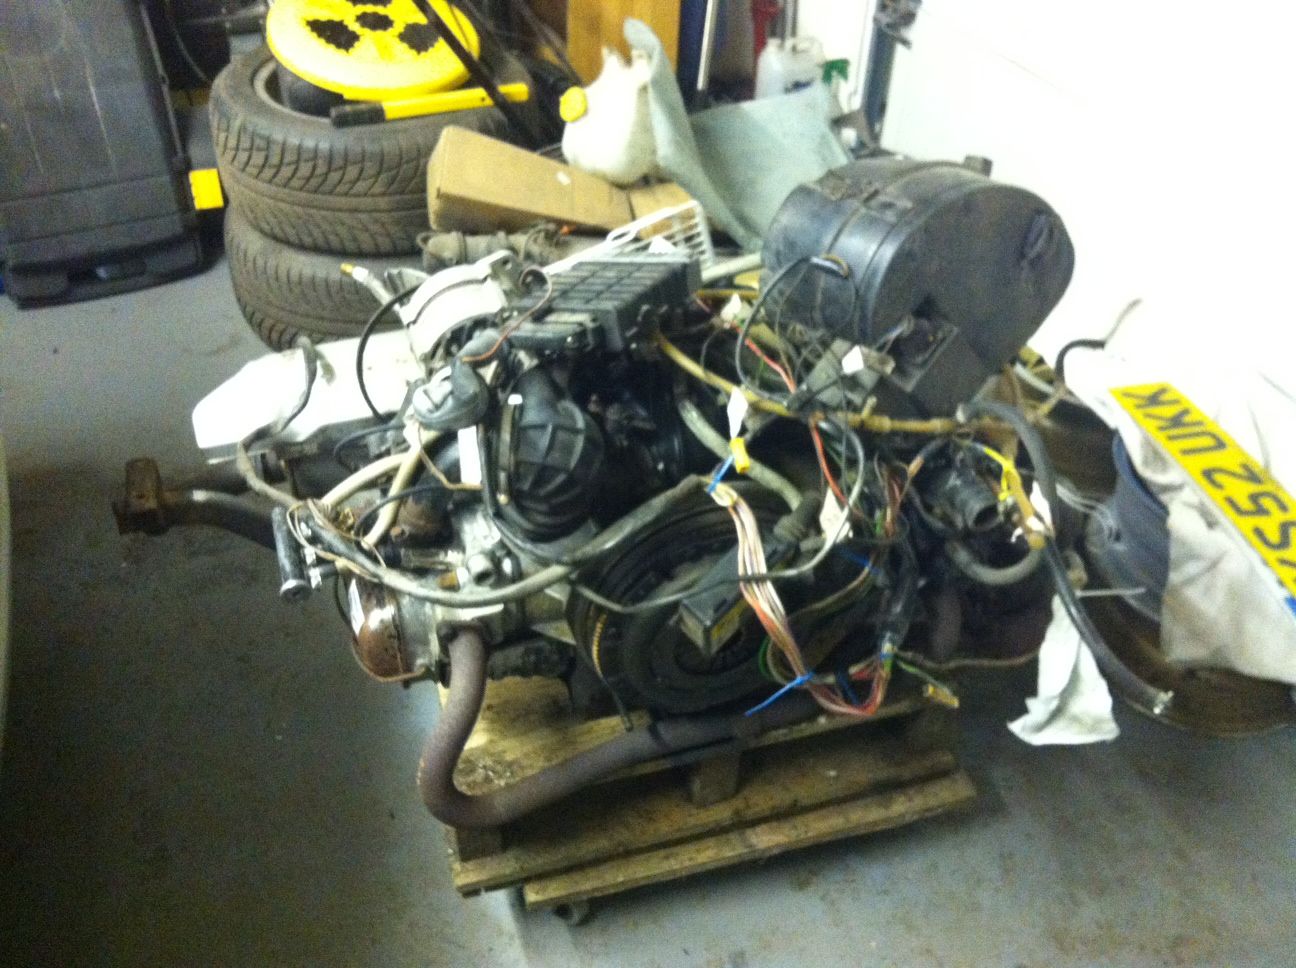 And then it was back underneath with the scraper >:D Yep, the dreaded underseal, but after spending so much on the welding underneath, I just can't face the thought of it rusting through again. Of course it'll get another coat, but it'll get a dose of Furtan first, and then a couple of coats of Rustoleum! Then underseal again. Still, one bit done, same on the other side and I've started underneath. Turns out the PO was a bit tight with the black stuff so it only goes up to the chassis rails. The rest is oil and crap! It really needs a good jetwashing, just need to figure out how to do that without suspension and wheels on the back. 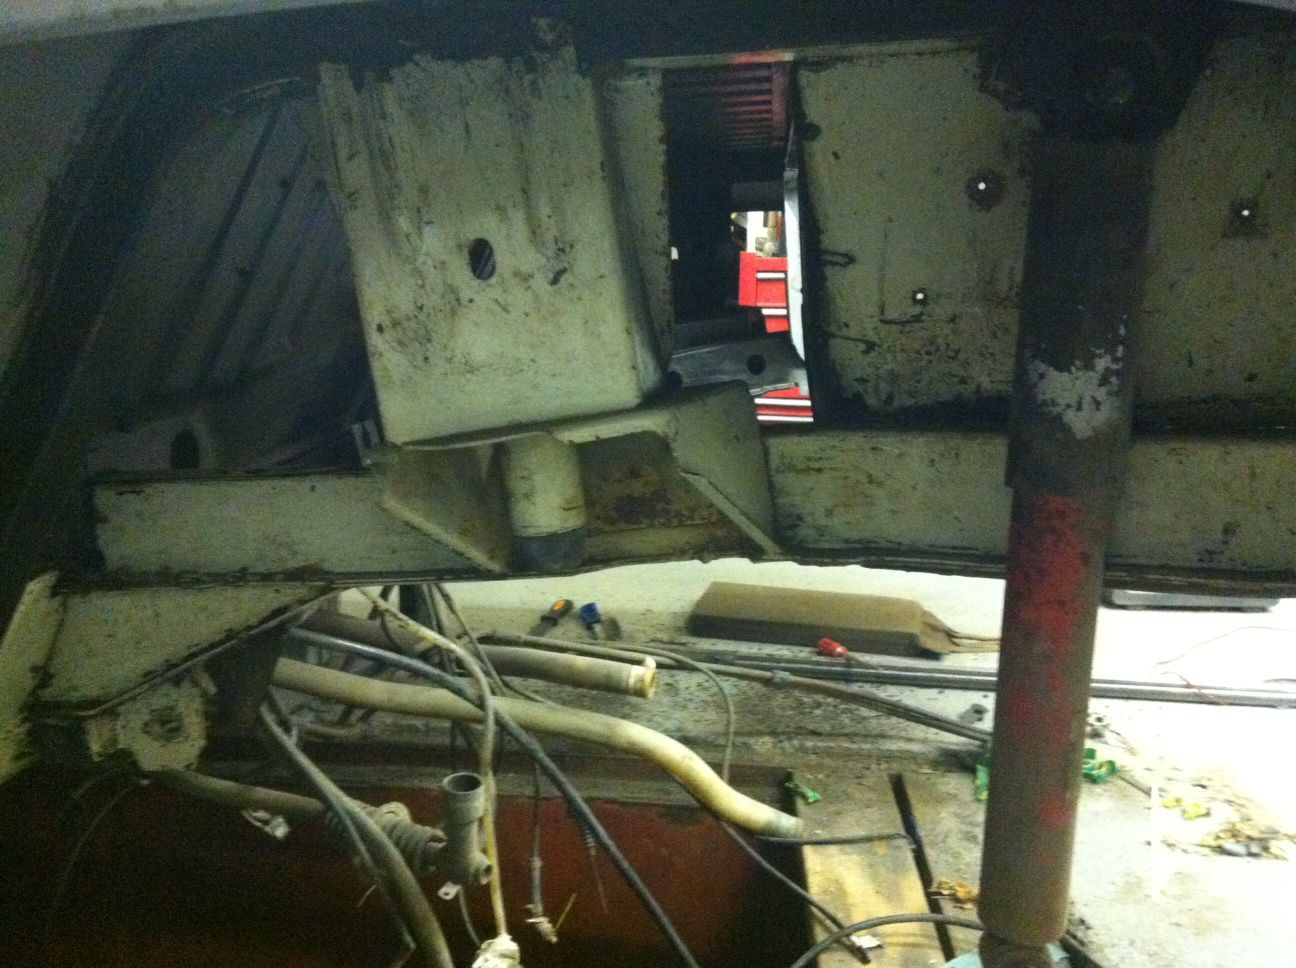 22 Sept 13 Bit more done. First off, I saw a bargain in Lidl. Now I know I'm spoilt having a pit, but it's a bit of a cave!! 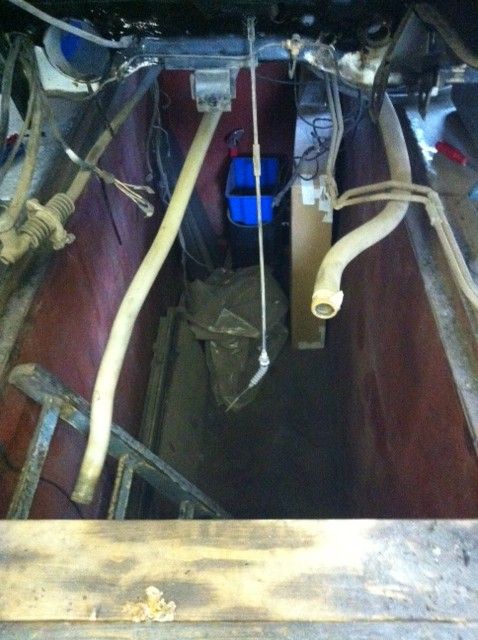 And pointing a torch is a PITA, and normal lightbulbs are forever breaking on me!! 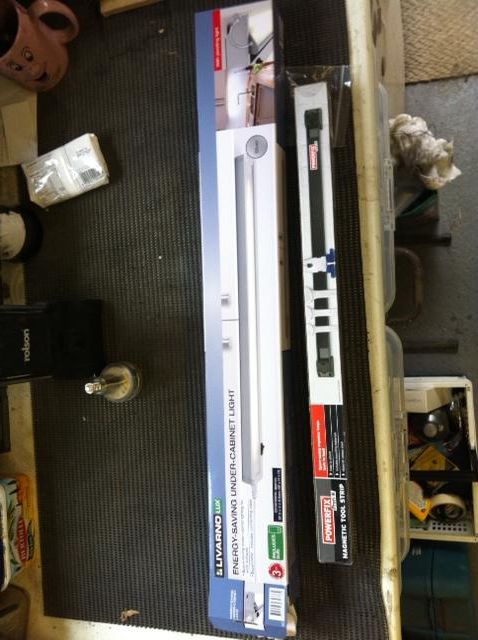 So, one light and a magnetic tool holder later, et voila :D 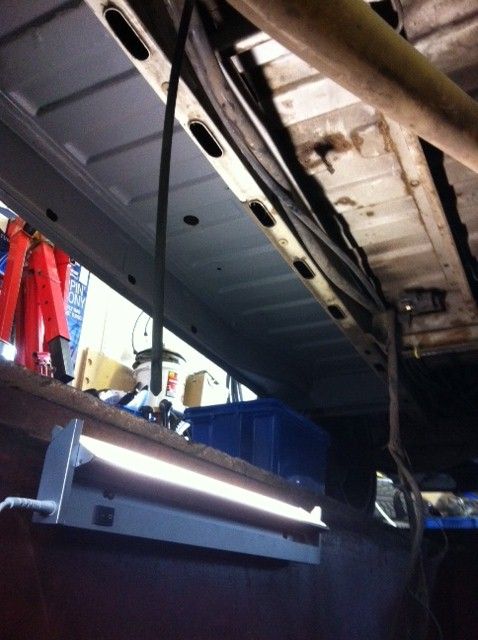 Anyway, tinkering done, I set to the floor with a paintbrush and engine degreaser, turns out it's not underseal, just good old fashioned grease and dirt and oil ::) Easier to get off, but still monotonous! I've shifted cables, the fuel pump and pipe, gear shifter and the power steering pipes out of the way as well. Time to clear the decks and get on with it properly! Start  half way down 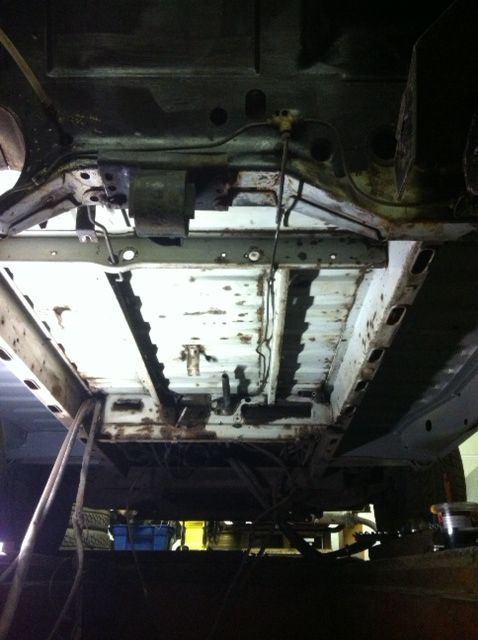 Still plenty more to do, but this feels like I'm finally getting somewhere!!!! Next update coming soon! Pete ------------- Too many projects..... Not enough time! |