

|
|
Long Wheelbase (Shorter Job) LT35 |
Post Reply 
|
Page <1 678910 11> |
| Author | |
BigAl68 
Yardie 

Joined: 13 May 09 Location: Shildon Status: Offline Points: 255 |
 Post Options Post Options
") Thanks(1) Thanks(1)
 Quote Reply Quote Reply
 Posted: 23 Oct 12 at 14:50 Posted: 23 Oct 12 at 14:50 |
|
Cheers Jay.
Bought the cameras and monitor from ebay after a recommendation from someone on one of the other forums. The reversing camera is this one. The rear view camera is very similar to this one and the monitor looks exactly the same as this one. The reversing camera comes from China but I didn't have any problems with the delivery. The other 2 items came from Hong Kong but I couldn't at the time find any in this country for the same money. As you will see they now do them. Just drilled the hole on the doors for the cameras, then fastened them in. 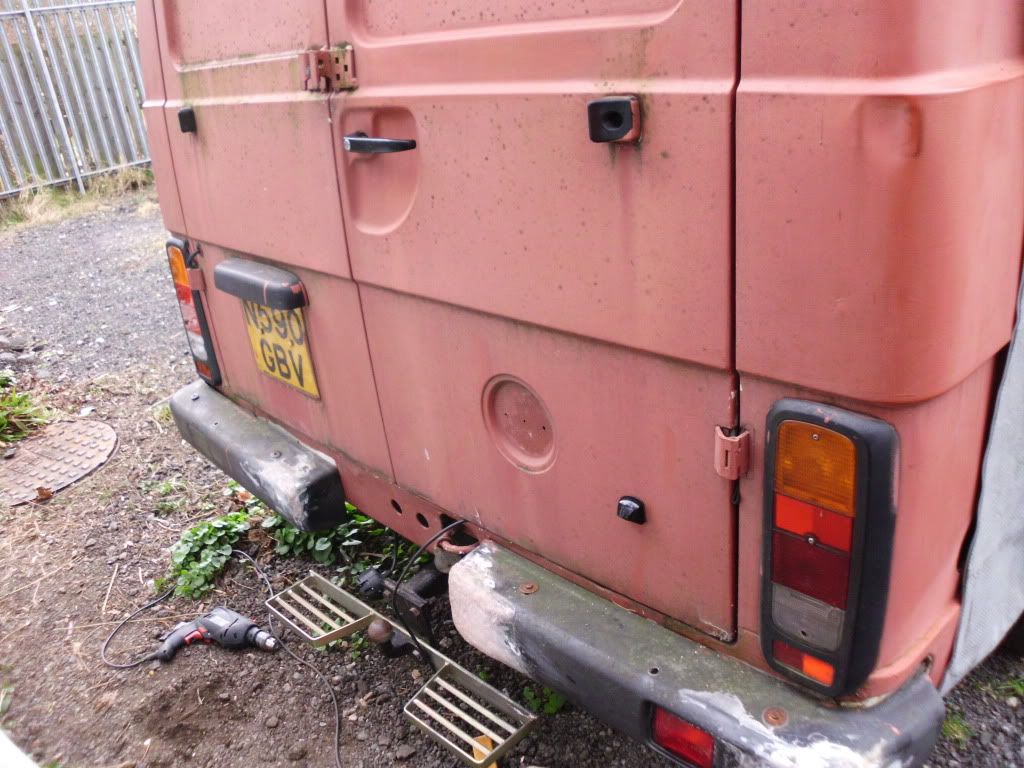 For the reversing camera I gently  had to tap the door out slightly to move the camera to get a better picture. had to tap the door out slightly to move the camera to get a better picture.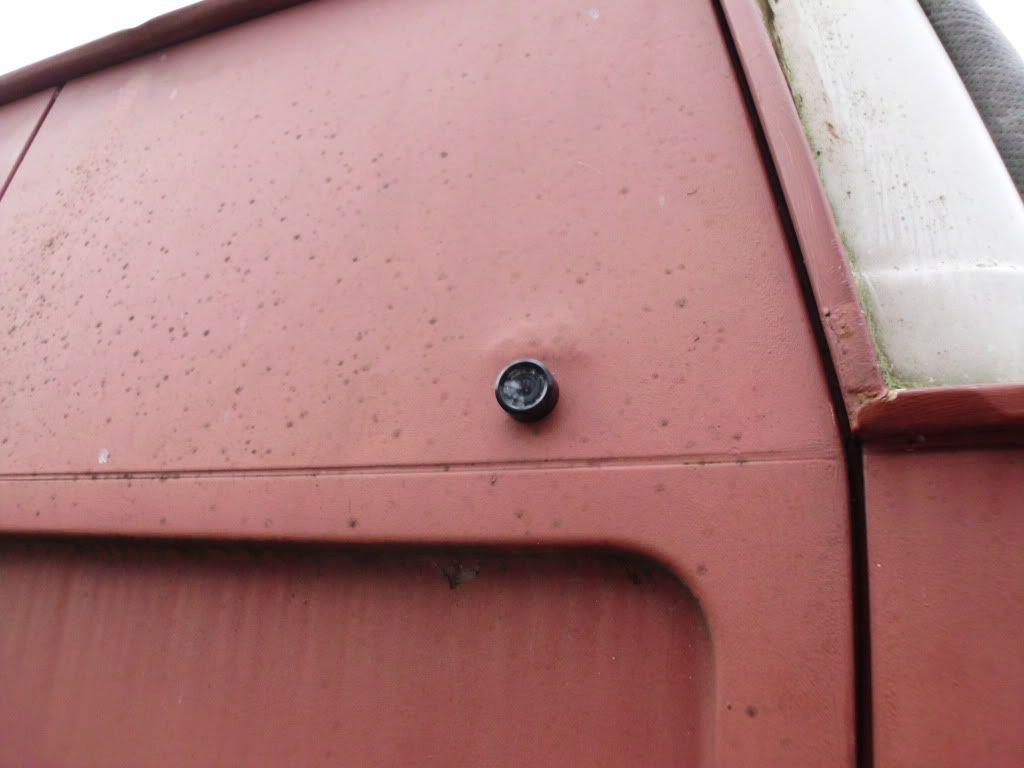 I wired the reversing camera into the reversing lights and the rear view camera into a fused live feed. The camera clips onto the rear view mirror. 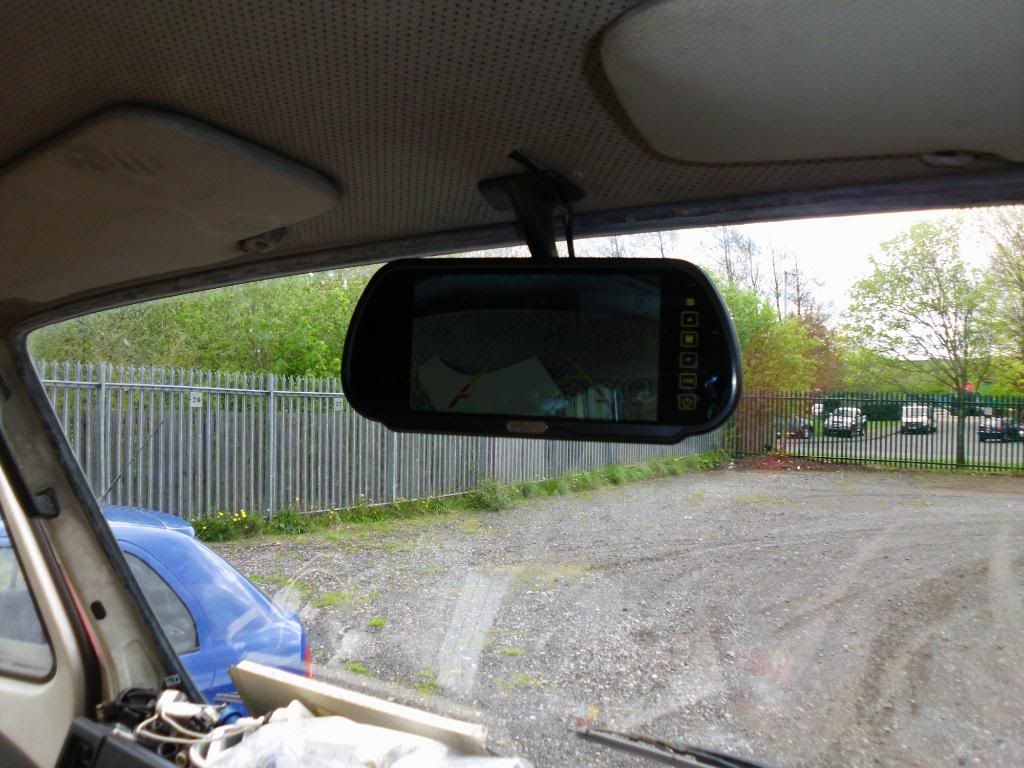 For forward driving I use the AV1 button on the monitor 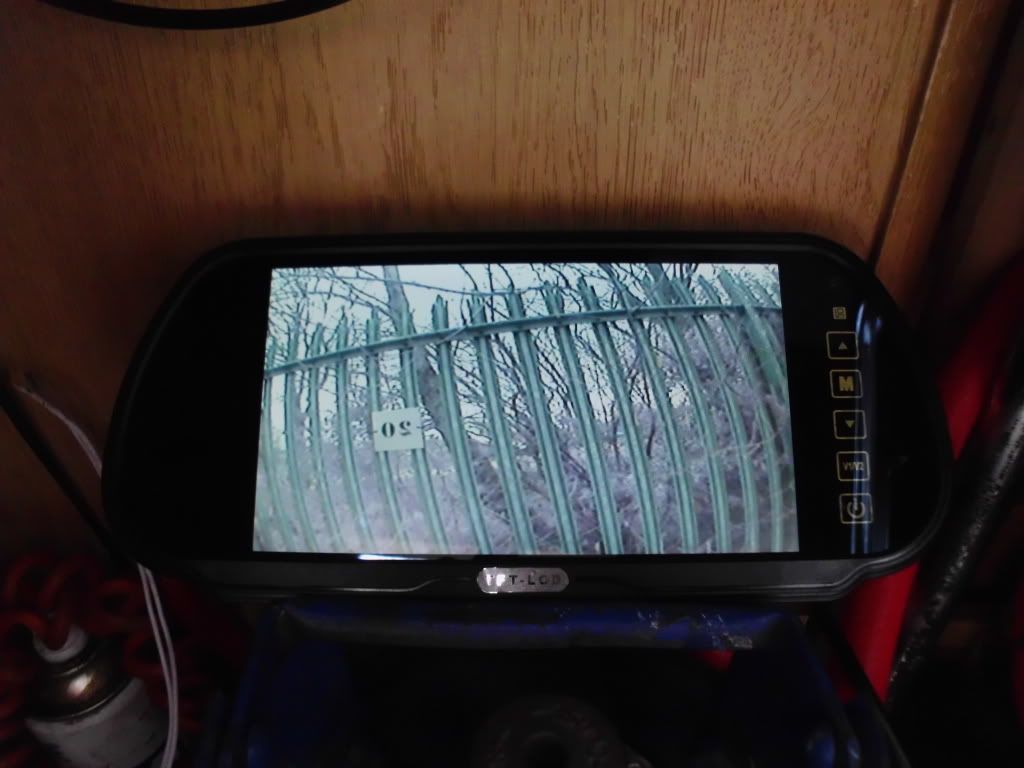 and when I select reverse gear, I push the AV2 button to give the reversing image. 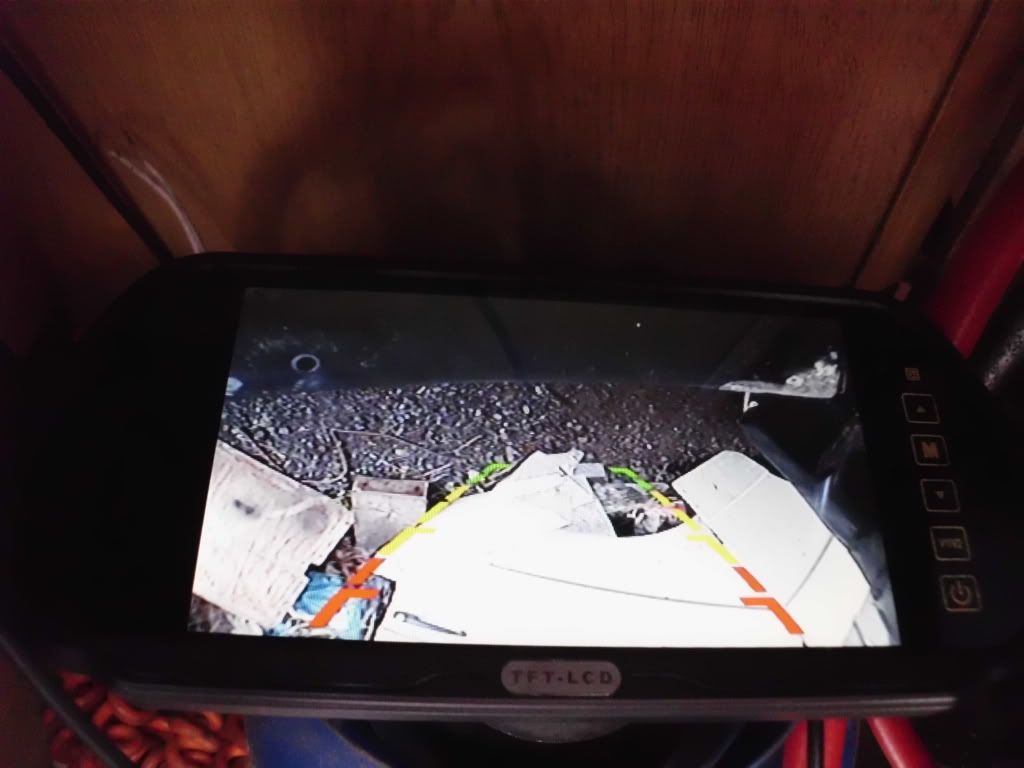 After checking everything worked and was happy with where everything was I siliconed round the cameras to keep the rain out. The cables are just long enough in my camper but I took them up over the cab and down the back to the floor. I purchased some extension leads but found I didn't need them. Hope that helps. If you need to know anything else just shout Cheers Allan  Edited by BigAl68 - 23 Oct 12 at 14:51 |
|
|
1995 LT 35 Self Built Camper 2.4 TDI
|
|
 |
|
|
JimmyCee
Not Quite Newbie 

Joined: 20 Oct 12 Location: Llanelli, Wales Status: Offline Points: 20 |
Post Options
Thanks(0)
Quote Reply
Posted: 23 Oct 12 at 16:09 |
|
Nice one Allan, when you reply with advice you do it with pictures - I couldn't have asked for more!
Huge thanks, I'll let you know how I get on!
 |
|
|
1986 VW LT35 2.4D
I wish that just once someone would call me 'Sir' without adding 'you're making a scene....' |
|
|
|
|
BigAl68
Yardie
Joined: 13 May 09 Location: Shildon Status: Offline Points: 255 |
Post Options
Thanks(0)
Quote Reply
Posted: 30 Oct 12 at 17:40 |
|
Well, after nearly 2 months off, I thought it's about time I did some more. Stripped out the old dash again and refitted a one from a 1995 LT35.
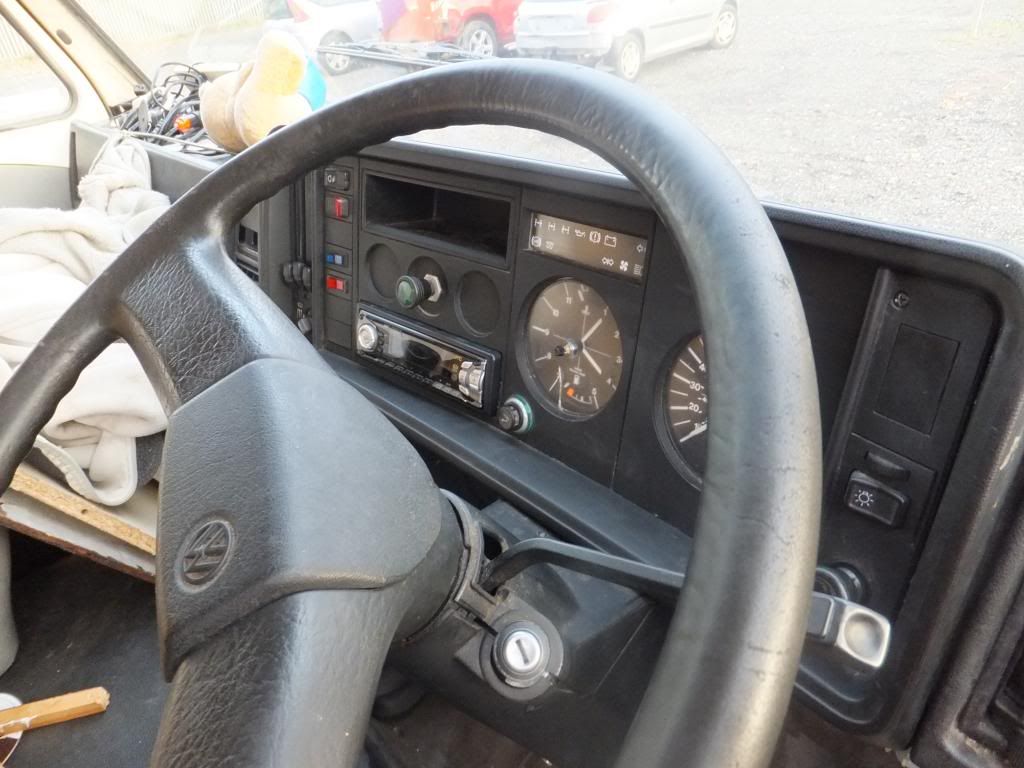 This time the fuel guage works  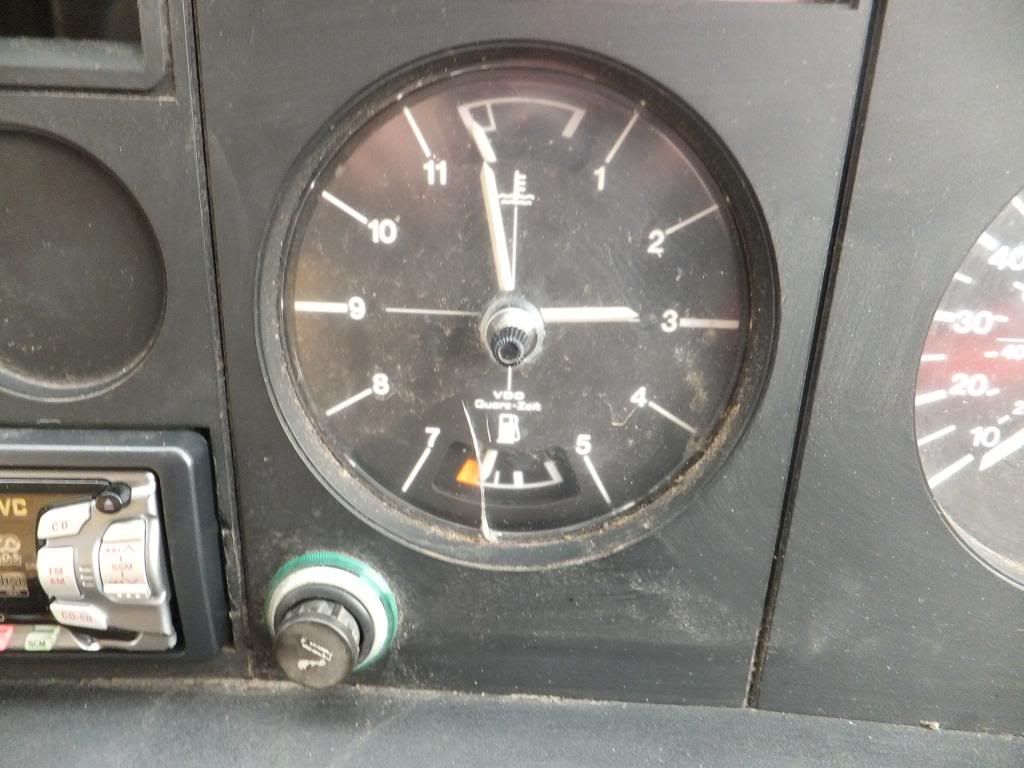 Got the speedo to work, had to slide the drive gear along the shaft in the gearbox to enable it to mesh with the speedo drive. It had slid along and wasn't meshing with the pinion I had replaced earlier. Tried removing the drain plug in the water heater and it shattered. New one on order  Altered the door mirrors after having a drive round the yard 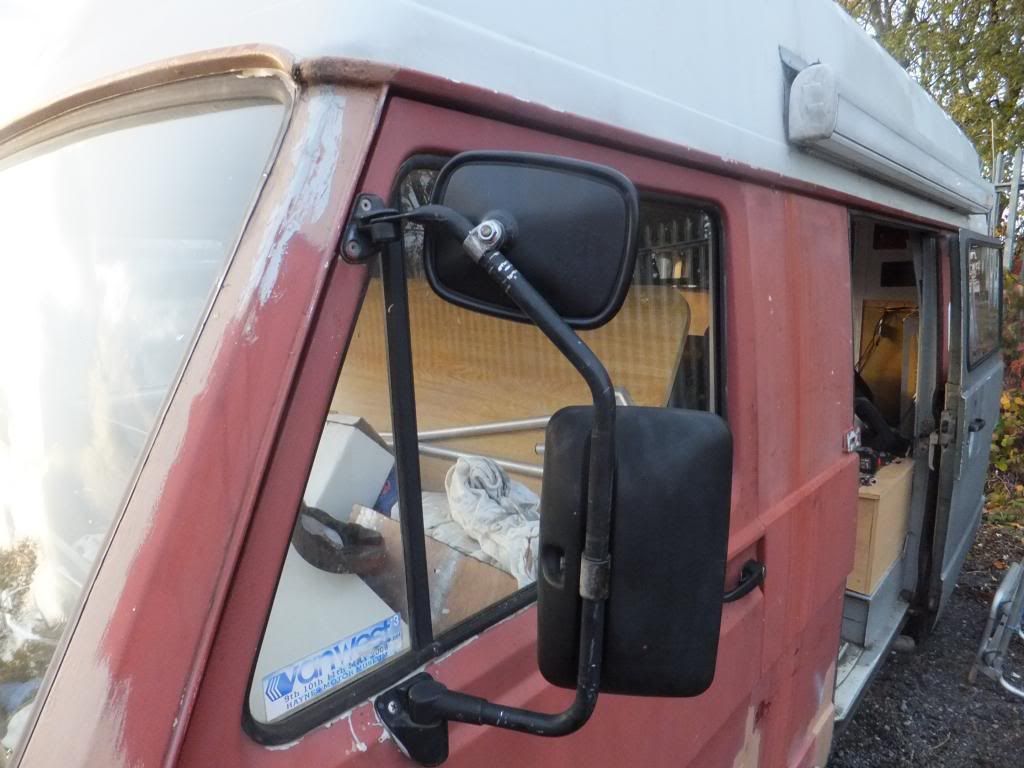 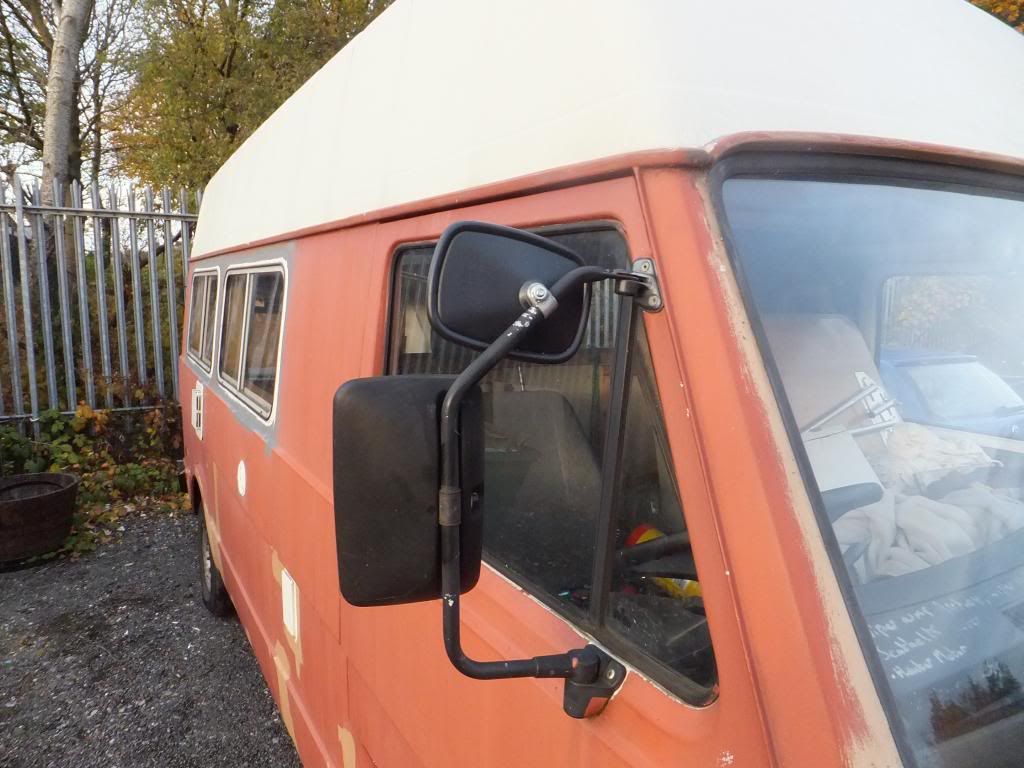 Also moved the van further along in the yard, was told it was to keep the skips together  . .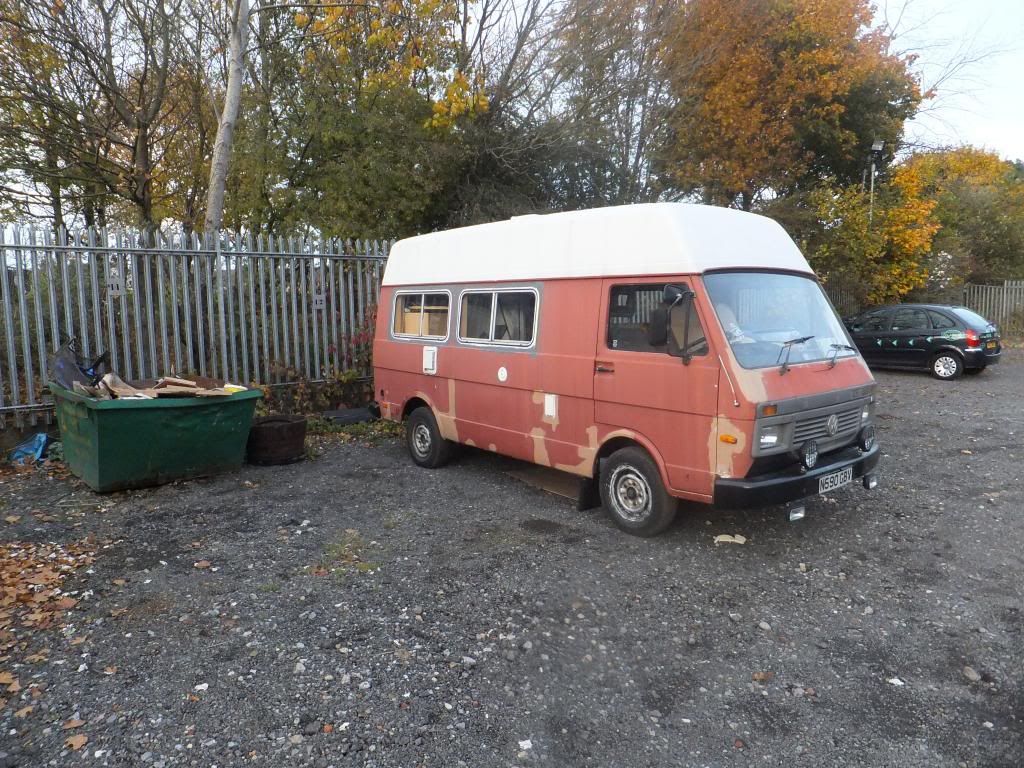 More soon Cheers Allan |
|
|
1995 LT 35 Self Built Camper 2.4 TDI
|
|
|
|
|
skyblueads
Groupie 
Joined: 23 Mar 13 Location: Honiton, Devon Status: Offline Points: 64 |
Post Options
Thanks(0)
Quote Reply
Posted: 26 Mar 13 at 00:32 |
|
Wow. Just finished reading through the eight page on this. What an epic thread! Some seriously good work there. The more I read around here the more I know it's gotta be an LT35 for our camper!
|
|
|
Looking for a 4 berth LT31/35
|
|
|
|
|
BigAl68
Yardie
Joined: 13 May 09 Location: Shildon Status: Offline Points: 255 |
Post Options
Thanks(0)
Quote Reply
Posted: 02 May 13 at 20:44 |
|
Cheers for that Skyblueads. Well it's been 6 months so I thought it was time to do a bit more
 . Turned the engine over for about 30 seconds to get the diesel through, turned on the ignition a couple of times to heat the glow plugs and woohoo it fired up 1st time . Also fitted a new drain plug to the front of the carver water heater, connected the gas and batteries and it also fired up first time. Put the fridge back in after changing a couple of parts and testing it at home. . Turned the engine over for about 30 seconds to get the diesel through, turned on the ignition a couple of times to heat the glow plugs and woohoo it fired up 1st time . Also fitted a new drain plug to the front of the carver water heater, connected the gas and batteries and it also fired up first time. Put the fridge back in after changing a couple of parts and testing it at home.  Also put all the woodwork back around the cooker area  More soon Cheers Allan Edited by BigAl68 - 02 May 13 at 20:45 |
|
|
1995 LT 35 Self Built Camper 2.4 TDI
|
|
|
|
|
BigAl68
Yardie
Joined: 13 May 09 Location: Shildon Status: Offline Points: 255 |
Post Options
Thanks(0)
Quote Reply
Posted: 09 May 13 at 17:34 |
|
Spent a few hours this afternoon doing some more. Fitted some more connecters to the in line filter
 and to the surge damper.  Fitted an in line drain tap  and fastened the now bigger gas bottle into place.  Got most of the carpet tiles cut to size  That's it for a couple of weeks Cheers Allan |
|
|
1995 LT 35 Self Built Camper 2.4 TDI
|
|
|
|
|
VWlewis
Yardie

Joined: 03 Oct 06 Location: East Midlands Status: Offline Points: 740 |
Post Options
Thanks(0)
Quote Reply
Posted: 10 May 13 at 10:30 |
|
very interesting and thanks for taking time to add all the photos ... keep up the good work .. looks like you are close to finishing her - Did you get an MOT yet?
Cheers (VW) Lewis
|
|
|
- Took test in a T2, drove a T1, T4, T5 and now run a T3 - and I am not Tee'd off
|
|
|
|
|
BigAl68
Yardie
Joined: 13 May 09 Location: Shildon Status: Offline Points: 255 |
Post Options
Thanks(0)
Quote Reply
Posted: 10 May 13 at 16:41 |
|
Cheers Lewis. Not tested as yet. Going to get the bumph sent off soon to the DVLA to get it changed from a van to a motor caravan. Then insure her and then the MOT. Hopefully on the road in June / July
 Cheers Allan |
|
|
1995 LT 35 Self Built Camper 2.4 TDI
|
|
|
|
|
BigAl68
Yardie
Joined: 13 May 09 Location: Shildon Status: Offline Points: 255 |
Post Options
Thanks(0)
Quote Reply
Posted: 24 Jul 13 at 21:00 |
|
Yipeeeeeeeeeeee
 Took 3 1/2 weeks from sending the photos & V5C off to receiving the above. Will take a couple of weeks when I can get to the Motor Caravan ( sounds nice) to finish it for the MOT but unfortunately have started a new job which will be day shift for a couple of months. Cheers ( A very happy ) Allan |
|
|
1995 LT 35 Self Built Camper 2.4 TDI
|
|
|
|
|
VWlewis
Yardie
Joined: 03 Oct 06 Location: East Midlands Status: Offline Points: 740 |
Post Options
Thanks(0)
Quote Reply
Posted: 24 Jul 13 at 21:43 |
|
Well done Allan - The smile says it all!

|
|
|
- Took test in a T2, drove a T1, T4, T5 and now run a T3 - and I am not Tee'd off
|
|
|
|
|
LTCamper89
Vanorak 
Joined: 18 Apr 12 Location: The Toon Status: Offline Points: 4285 |
Post Options
Thanks(0)
Quote Reply
Posted: 24 Jul 13 at 22:07 |
|
I was beginning to wonder where you had gone.
|
|
|
1989 LT28 2.4D Saviour of 6Music, well one of them. Now playing http://www.bbc.co.uk/radio/player/bbc_6music
VW LT Camper not Cramper ....at least the roof is not rusting away.... |
|
|
|
|
mat_the_cat
Vanorak
Joined: 06 May 09 Location: North Wales Status: Offline Points: 1862 |
Post Options
Thanks(0)
Quote Reply
Posted: 25 Jul 13 at 00:08 |
|
Nice one! Cheaper insurance AND you get to legally do a heady 60 mph on A roads...
|
|
|
Mid engined, 6 cylinder, turbocharged 2 seater - it can only be a VW LT!
|
|
|
|
|
volition82
Yardie

Joined: 06 Jan 10 Location: somerset Status: Offline Points: 972 |
Post Options
Thanks(0)
Quote Reply
Posted: 27 Jul 13 at 14:19 |
In our dreams Congratulations. Good to hear your up and running. |
|
|
1989 LT35 - 2.4 Lpg/Petrol - Converted To Camper
|
|
|
|
|
peter100
Groupie
Joined: 07 Jul 12 Location: Gateshead Status: Offline Points: 66 |
Post Options
Thanks(0)
Quote Reply
Posted: 27 Jul 13 at 21:10 |
|
Good to see your still here Allan, my MOT has just ran out and before I put it in for a new one what what did you have to supply the DVLA for them to change to a motor caravan.
I have just about finished mine off now the inside is complete and the body work is in primer. got a load of pictures so I will post them all at once. Cheers Pete
|
|
|
|
|
BigAl68
Yardie
Joined: 13 May 09 Location: Shildon Status: Offline Points: 255 |
Post Options
Thanks(0)
Quote Reply
Posted: 05 Sep 13 at 13:19 |
|
Hi Peter.
Sorry I've taken so long to get back to you. On your V5C form for your van, look in Section 7, 'Changes to current vehicle' and fill in the 'Wheelplan / Body type' section with Motor Caravan then take your photos (I sent 15 but that might have been overkill on my part) and write out a covering letter, that's about it. This is the letter I sent: Address
Date DVLA Swansea SA99 1BA
Dear Sirs, I am writing to request that my vehicle registration number **** *** is reclassified as a “Motor Caravan”. I have completed the conversion myself and am aware of your requirements for the vehicle to fit into the classification of “Motor Caravan”. Please find a series of photographs enclosed showing details of the vehicle.
I enclose my V5C document with section 7 “Changes to Current Vehicle” completed. I trust that the enclosed photographs provide you with sufficient evidence to make the amendment to Body Type classification. If you require any further information please do not hesitate to contact me. My home telephone number is ***** ******. Yours
faithfully,
enc. V5C, 15 Photographs of the vehicle The photos I sent (which were all returned) with the comments I wrote on the back were: 1A) Front of vehicle showing Registration Plate
1B) Front and side of vehicle
2A) Rear of vehicle showing Registration Plate
2B) Rear of vehicle, both doors open (showing small amount of storage space). No rear windows in doors
3) Interior detail. Table bracket permanently fixed to side wall. Sliding door to access area
4) Bed in sleeping area. Seat cushions used for mattress. Bed 6' 2'' long  5A) Rear of vehicle showing cooker, sink & fridge
5B) Cooker & sink
6A) Main storage cupboard closed
6B) Main storage cupboard open
6C) Storage cupboard above driver / passenger seats
6D) Storage cupboard fixed to side wall
7A) Side windows fitted to drivers side
7B) Side window in sliding door
8) Water container
Once that's done then post it off. I got a reply within 3 weeks. Sorry it's a bit long winded but hope it helps. Yours looks fab. Hurry up and get some photos put on here. Cheers Allan Edited by BigAl68 - 05 Sep 13 at 13:22 |
|
|
1995 LT 35 Self Built Camper 2.4 TDI
|
|
|
|
|
BigAl68
Yardie
Joined: 13 May 09 Location: Shildon Status: Offline Points: 255 |
Post Options
Thanks(0)
Quote Reply
Posted: 08 Sep 14 at 18:35 |
|
A few months ago, before putting the camper in for it's MOT, i thought I would check around and under the van to make sure everything looked OK. Found a couple of 5p size holes next to the chassis legs near the wheel arches
 . Had a quick read on here and found Chris's (LTCamper89) trials and tribulations about his floor. Thought I'd better investigate it properly so took back out the bench, water container and pump from the drivers side and the bench, fridge and heater from the passenger side. I then cut the bottom of the storage cupboard off and removed both wheel arch wooden covers. I then proceeded to cut bit by bit the floor panels till I'd exposed the rot . Had a quick read on here and found Chris's (LTCamper89) trials and tribulations about his floor. Thought I'd better investigate it properly so took back out the bench, water container and pump from the drivers side and the bench, fridge and heater from the passenger side. I then cut the bottom of the storage cupboard off and removed both wheel arch wooden covers. I then proceeded to cut bit by bit the floor panels till I'd exposed the rot  . Then using a compressed air powered nibbler cut around the area as much as I could up to the supports under the floor . Then using a compressed air powered nibbler cut around the area as much as I could up to the supports under the floor  . .Drivers side  Passenger side   I then got, as Chris suggested, some 2mm plate and drilled it to use as a spacer on top of the chassis rails  I finished cutting the rot then ground the rest out Drivers Side  Passenger side  The plates in position to be welded tomorrow Drivers side  Passenger side  More tomorrow Cheers Allan |
|
|
1995 LT 35 Self Built Camper 2.4 TDI
|
|
|
|
|
LTCamper89
Vanorak
Joined: 18 Apr 12 Location: The Toon Status: Offline Points: 4285 |
Post Options
Thanks(0)
Quote Reply
Posted: 08 Sep 14 at 20:51 |
|
Thank you for the foil Al, saved me all manner of faffing around.
I have found a thread somewhere, probably the Germans, where that 2mm plate is left out since it is a water trap, that is imossible to seal with certainty. The floor is welded directly to chassis rail. Now I know that the structural engineers amongst you lot will be quivering with fear and calculators but thoughts please.  ?Could it be that the chassis being standardised but base model being the chassis-cab, and the various bodies are fitted around that? One thing I think I would change from mine, IF I had to do it again, God forbid, would be to make the puddle holes bigger, from 5dia to 8dia. Dearly Beloved has been wanting to get on with the interior of ours, thinking I am taking too long doing the floor to the extent I have and soon the skirts too and associated ribs and whatever else falls apart. It is a great shame all your previous hard work needs to be redone Al.  |
|
|
1989 LT28 2.4D Saviour of 6Music, well one of them. Now playing http://www.bbc.co.uk/radio/player/bbc_6music
VW LT Camper not Cramper ....at least the roof is not rusting away.... |
|
|
|
|
BigAl68
Yardie
Joined: 13 May 09 Location: Shildon Status: Offline Points: 255 |
Post Options
Thanks(0)
Quote Reply
Posted: 09 Sep 14 at 18:53 |
|
Don't mind the rework Chris, it's just one of those things. Wifey has been waiting 4 1/2 years for me to finish this one, yours is just a blink of an eye lol. Glad to be of help with the foil.
I drilled the holes @ 6mm first then thought they looked a bit small so redid them to 8mm. Welded the plate to the chassis rails today Drivers side  Passenger side  More next week Cheers Allan |
|
|
1995 LT 35 Self Built Camper 2.4 TDI
|
|
|
|
|
BigAl68
Yardie
Joined: 13 May 09 Location: Shildon Status: Offline Points: 255 |
Post Options
Thanks(0)
Quote Reply
Posted: 10 Sep 14 at 19:01 |
|
Managed to sneak another day in
. Cut out some cardboard templates   Got a sheet of steel plate  Then cut them out   Still need to grind the spacer plate puddle welds flush and remove all the necessary paint, etc to be able to weld it up and drill some puddle holes to attach the top plate to the spacer plate. More next week Cheers Allan |
|
|
1995 LT 35 Self Built Camper 2.4 TDI
|
|
|
|
|
LTCamper89
Vanorak
Joined: 18 Apr 12 Location: The Toon Status: Offline Points: 4285 |
Post Options
Thanks(0)
Quote Reply
Posted: 10 Sep 14 at 19:57 |
|
Flying along Al
I got some brushable seam sealer for inside the wheelarches, God it is claggy.
|
|
|
1989 LT28 2.4D Saviour of 6Music, well one of them. Now playing http://www.bbc.co.uk/radio/player/bbc_6music
VW LT Camper not Cramper ....at least the roof is not rusting away.... |
|
|
|
|
Post Reply
|
Page <1 678910 11> |
| Tweet |
| Forum Jump | Forum Permissions You cannot post new topics in this forum You cannot reply to topics in this forum You cannot delete your posts in this forum You cannot edit your posts in this forum You cannot create polls in this forum You cannot vote in polls in this forum |


 LT35")


 Topic Options
 mat_the_cat wrote:


