|
|
1984 1.9DG to AGG Conversion |
Post Reply 
|
Page 123 4> |
| Author | |
Mark-Hans 
Yardie 

turkey drummer Joined: 22 Jul 12 Location: Netherlands Status: Offline Points: 332 |
 Post Options Post Options
") Thanks(0) Thanks(0)
 Quote Reply Quote Reply
 Topic: 1984 1.9DG to AGG Conversion Topic: 1984 1.9DG to AGG ConversionPosted: 30 Aug 19 at 07:19 |
|
THANK YOU. You are the first person to give me such useful information. So, the engine will spark for a few rotations and then shut down. This is triggered by the one wire you ran from front to back!.....
OK, as you know this much, then I'll throw a couple more...... :-) If the main coil feed looses it's earth, i.e., from the Coil HT outlet, then what will it blow up!.......... no spark at all still!. The Computer seems my only choice?....... If you have any other diagnosis tips, I'd love to hear them. Greetings and thanks from Sunny Amsterdam.
|
|
|
Mark..Amsterdam
|
|
 |
|
|
club joker 84
Groupie 
Joined: 21 Jul 09 Location: Cornwall Status: Offline Points: 138 |
Post Options
Thanks(0)
Quote Reply
Posted: 29 Aug 19 at 23:32 |
|
Should have said, the factory immobiliser lets the engine fire up 'fully' (i.e. with spark etc) for a few seconds before it cuts it off. This is to help you differentiate between immobiliser issues and general running issues.
Assuming yours is a factory immobiliser, then it will fire up ok but then die. If it is not doing this then your problems probably lie elsewhere.
|
|
|
|
|
club joker 84
Groupie
Joined: 21 Jul 09 Location: Cornwall Status: Offline Points: 138 |
Post Options
Thanks(0)
Quote Reply
Posted: 29 Aug 19 at 23:22 |
|
My ECU is a Simos unit, but I think that the immob wiring is probably similar. There are only 6 wires to the immobiliser. 3 of these are from the immobiliser aerial ring and plug straight in. The others are a 12v, earth and a grey and white wire that needs to be connected to pin 43 on the ecu (may be different on your ECU). I ran a new wire from front to back for this. The 12v can be taken straight from a spare terminal on the fuse box. Note that the immobiliser seems to be a bit picky about earths, so make sure that you get a really good connection to the body. Hope this helps! Ben
|
|
|
|
|
Mark-Hans
Yardie
turkey drummer Joined: 22 Jul 12 Location: Netherlands Status: Offline Points: 332 |
Post Options
Thanks(0)
Quote Reply
Posted: 29 Aug 19 at 19:14 |
|
Before you go any further, do you have a wiring diagram of where the impobiliser goes ( I understand the arieal is clipped around the Ignition Switch), where it plugs into the original T3 System and where it ends up?. I am still not clear 'what' the imobiliser, imobolises?..... I think this system I am trying to sort has taken a nasty high current shock, but no one actually has a wiring diagram of the T3 original wiring to the Golf GTi set up. Mabye you have one?, would be very very helpful to know. My computer is a Digifant 11, 037 9906 022 N. Any electrical information would be a great help!.
Thanks in advance. Mark
|
|
|
Mark..Amsterdam
|
|
|
|
|
club joker 84
Groupie
Joined: 21 Jul 09 Location: Cornwall Status: Offline Points: 138 |
Post Options
Thanks(0)
Quote Reply
Posted: 07 Jul 18 at 23:49 |
|
Hi,
No snorkel on mine, just the airbox sitting in the engine bay. Intake faces toward the vent area, but not had any problems with water intake. Pretty sure you could join up to a snorkel if you were offloading a lot. Mine stays on the road, and I have not had any water ingress issues. |
|
|
|
|
bmouthboyo
Not Quite Newbie 
Joined: 24 Feb 11 Status: Offline Points: 33 |
Post Options
Thanks(0)
Quote Reply
Posted: 07 Jul 18 at 08:50 |
|
That is great thank you, I will have a little look about and check it's not the timing on my older Gti engine and then check regulator.
Regarding the air intake, I like your idea of using the intake hoses running to the OS snorkle. What do you use after the airbox up into the snorkle box? I have a diesel snorkle header part but I don't think it will fit in the OS box. How does yours prevent water ingress? Cheers
|
|
|
|
|
club joker 84
Groupie
Joined: 21 Jul 09 Location: Cornwall Status: Offline Points: 138 |
Post Options
Thanks(0)
Quote Reply
Posted: 05 Jul 18 at 20:50 |
|
Voltage regulator I think you just measure between the two connected pins and you should get about 10v. https://www.thesamba.com/vw/forum/viewtopic.php?t=609208&start=0 I only found it because I had tried everything else. New sensor, checking fan function, checking thermostat, etc. Wasted hours! For the cost of the part, it would probably be one of the first things I looked at if it ever happened again. If I did it again, I would probably use the AGG dipstick and just shorten in to get under the hatch. You would probably need to move the collar up it a bit so that it came to the right level with the JX sump on, but much less likely to leak. What did you want to know on the air intake? There is quite a lot of information out there about the different ways people have done it. I was trying to keep it looking factory, so re-used the DG air box. There are two types of DG air box though. I don't think that my method would work with one of the round ones. I aimed to keep the original tubing between the MAF and throttle body, as I thought that these would be the most important bits. Other than that it is just a matter of getting clean, cool air to the MAF. My intake might be a bit restrictive maybe, but the DG filter was quite a bit bigger than the AGG original, so seemed ok to me. Feels fine to drive, but not tried any others to compare. It is nice and quiet if that is important to you. In one of my posts above, there is a link to a guy on retro rides (I think) who managed to re-use the original AGG air box. You will probably need an adaptor to join the MAF to any aftermarket intake hose / filter etc. I used this one http://www.autosiliconehoses.com/air-inlet-adaptor-vw-golf-mk2-mk3-mk4-jetta.html. It was a bit off when it came, as it was square inside, so I cut this out with a hacksaw and Dremel.
Edited by club joker 84 - 05 Jul 18 at 20:59 |
|
|
|
|
Forden341
Not Quite Newbie
Joined: 27 Aug 14 Location: Dorset Status: Offline Points: 21 |
Post Options
Thanks(0)
Quote Reply
Posted: 05 Jul 18 at 08:17 |
|
Hi, I am currently running an AGG in a Gipsy and an ABF in a Doka, both using the JX dipstick as it’s a lot more convenient to keep an eye on things through the flap rather than lift the engine hatch, especially with the paranoia that comes with a new conversion!
You could as you say extend the AGG dipstick and mark your new level on it no problem tho. Where abouts in the country are you? By your name I wondered if you were Bournemouth as I’m in Weymouth? Cheers, Bert. Edited by Forden341 - 05 Jul 18 at 09:56 |
|
|
|
|
bmouthboyo
Not Quite Newbie
Joined: 24 Feb 11 Status: Offline Points: 33 |
Post Options
Thanks(0)
Quote Reply
Posted: 05 Jul 18 at 07:55 |
|
Ah that is interesting regarding the voltage regulator. How did you trace the fault down to that? Is there a way of testing the voltage from the sensor with a multimeter?
I am looking to install my AGG during August, have not even started the wiring loom yet! Can I ask what you did regarding the oil dipstick? I am not fussed about small hatch access and struggling to source a JX dipstick and tube so looking at possibly keeping the AGG tube and modding the stick? Also do you have any advice / images regarding the air intake? Thanks again for the great writeup.
|
|
|
|
|
club joker 84
Groupie
Joined: 21 Jul 09 Location: Cornwall Status: Offline Points: 138 |
Post Options
Thanks(0)
Quote Reply
Posted: 04 Jul 18 at 22:52 |
|
Hi there,
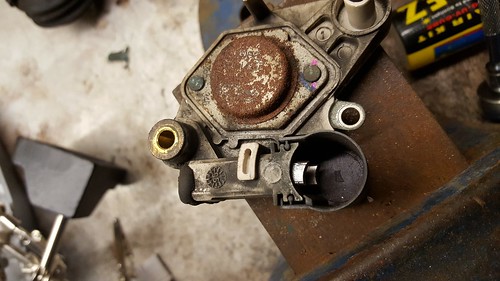
Yes, fixed the overheating. It was easy, as it didn't really exist! Took quite a bit of pissing about to find this out though. The voltage regulator in the dash had gone, so too much voltage was going to the gauge and moving it too far. Bought a new one (https://www.brickwerks.co.uk/voltage-regulator-t3-lt-caddy-instrument-panel.html) and all was well once fitted. Also found out just how little petrol I have been driving around with! Just post on here if you have any questions about the conversion. I will do what I can! It is definitely worth doing the conversion. One thing that I don't think I have mentioned on here is to make sure that your exhaust is good and airtight, at least as far as the lambda. If it leaks then the ecu thinks it is running lean and dumps extra fuel in. Feels ok to drive, but not very economical! Ben
|
|
|
|
|
bmouthboyo
Not Quite Newbie
Joined: 24 Feb 11 Status: Offline Points: 33 |
Post Options
Thanks(0)
Quote Reply
Posted: 28 Jun 18 at 10:52 |
|
Wow what an amazingly detailed writeup! I am upgrading an existing MK1 Gti conversion in my bus to an AGG soon and this is like gold, thank you.
What came of the over heating issue? Did you manage to fix it?
|
|
|
|
|
club joker 84
Groupie
Joined: 21 Jul 09 Location: Cornwall Status: Offline Points: 138 |
Post Options
Thanks(0)
Quote Reply
Posted: 23 May 17 at 00:01 |
|
A bit of an update on this, and a bit of head scratching.
Firstly, after few days I had my first problem when the van
wouldn’t restart. Battery was flat. As there was no alternator warning light, I
put this down to a dead battery due to the van standing for so long. Put another battery in and all was well for
another couple of days and the same thing happened. Started to have a think about the alternator (still no warning
light though) and stuck a multimeter across it to find that I was only getting
just over 12V, so not charging properly.
The AGG engine came with a 70A Valeo alternator. Had a read up online and found this useful video https://www.youtube.com/watch?v=f56-26I6idc
and thought that I would have a go refurbishing it. Bought a new regulator, flip rings and
bearing from here, came to about £15 http://www.saverepair.com/ Also an excuse to buy another soldering iron (you need quite
a big one for this). Got this one http://cpc.farnell.com/antex/sr8w270/soldering-iron-100w/dp/SD00837?CMP=TREML007-005
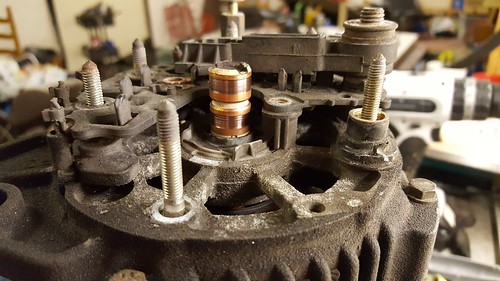
£14. A bit fiddly, but certainly doable. The bushes and slip rings were definitely
knackered, so I was happy that I had found the problem.
Knackered bushes.
Knackered slip rings. It was whilst reassembling it all that I suddenly
twigged that I had been a dopey twat.
Alternators earth through their mounting bolts and body to the engine,
and I had carefully painted over all of this in an effort to make it look
nice! Doh! Anyway, duly reassembled and paint removed around mounts,
put it back on van and added an earth strap for good measure. Tested continuity between alternator body and
van body and had almost no resistance, so all good. Started van up (freshly charged battery), and
found that my alternator warning light was now working (yes!) but that the
alternator was not (noooo!). A bit more reading up on alternators, and found that they need to be ‘excited’ to start charging. The smaller terminal on the alternator needs some voltage sent to it to start things off. This comes via the warning light circuit on the dash. When you turn the ignition on, voltage is sent from the dash to the alternator, triggering the alternator. Once the alternator is working, the voltage 'out' of the alternator is greater than than the voltage in, reversing the current flow and turning off the warning led. I tested this
voltage and found I was only getting about 9v, so started to think this might
not be enough. As a quick check, I very
briefly ran a jumper wire from the large D+ terminal on the alternator to the exciter
terminal, and the engine note instantly changed as the alternator kicked in. Now getting a full 14.5v from the
alternator. Following this initial 'excitement' at a full 12v, the 9v exciter seems to be enough to start it all off. Maybe something to try if anyone else rebuilds there alternator and has trouble? Seems to need a bit more 'kick' first time around. Anyway, problem solved! The moral is don't paint over vital earthing points! Head gasket thing was still nagging at me, so bought one of
the head gasket chemical tester from ebay and found that I did actually have a leak. Bugger.
Undid exhaust, drained fluids, etc. and took the head off. Good news is that there is room to do this with
the engine still in the van. This is a
westie, so the cupboard slightly overhangs, but it is still doable. No obvious signs of any leaks, but gave it a
really thorough clean up (head and block).
New gasket set and head bolts (decent quality) were less than £60, so not too drastic. That
is for a full gasket and seal set, so pretty good value. Seeing as the head was now off, I thought
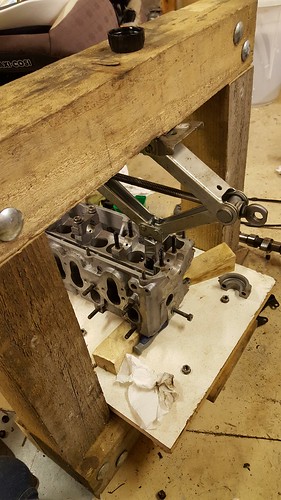
that I might as well replace the stem seals and clean up the valves. The more agriculturally minded of you will appreciate my ‘ghetto’
valve spring compressor…
It’s a cider press that I made last year out of a fencepost
to deal with some excess apples. A
combination of fence post frame, car jack and a bit of tube. I just put a few shims under the each valve
(i.e. at the bottom of the valves – the cylinder end) and could then compress the
springs and lift out the collets. Bloody
fiddly! More cleaning (dunked the block
in some hot water with Swarfega degreaser and left it an hour or so – came out
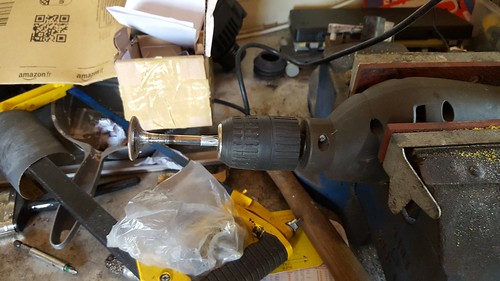
sparkling!). Cleaned up the valves (which weren’t too bad) using emery
paper and a drill. Tried more gentle approaches, but this one seems to be the way
forward. Stayed well away from the sealing faces. Was also very careful to keep
everything in the same order!
Also lapped the valves seeing as it was all apart. Replaced the stem seals. Followed this guy’s videos to put it all back together https://www.youtube.com/watch?v=ILngxEMRw2g&t=4s. Getting the head back on was a bit of twat to be
honest. It is bloody heavy and difficult
to hold over the engine bay. Best done
with a mate I would say. All torqued up
to spec and rest of engine put back together.
Oil and coolant back in (only water so far just in case). Was all super clean, flat faces etc. (measured with a straight edge) so 95% confident the gasket replacement went ok. A lot less bubbling in the coolant tank now, just water being moved by the pump. Took it for a spin and the temperature crept
up to the top of the temperature gauge after about 4 miles. Heaters full on (plenty of hot air coming
out) and temperature hardly moved down at all.
No flashing light, but I was babying it! I noticed that there was a broken fuse to the radiator fan, replaced that and jumped radiator fan switch to turn it permanently on for drive home (was definitely on!). Strange thing was that this made no difference to temp reading, which climbed straight back up. Made it home and had a poke around at the engine. Bottom hose to water pump was staying cool, so I thought thermostat had died. Took it out to see if it made any difference. Pipe now gets warm, but temperature climbed and again, jumping the fan made no real difference. Definitely did not have to put in the full 16lt of coolant, more like 8lt? But it really didn’t seem to be able to take any more, despite doing all the revving it etc. as recommended by Baxter. Rad is bled and hot right to top. Measured blocks using Vagcom whilst it was running and it says that the coolant temperature gets up to about 90degrees when the gauge is up at the top. Jumping the fan brings it down on vagcom pretty quick. Putting on the heater also brings it down. Tested the thermostat that I took out on the stove and it
opened up fine! So, any ideas???? Is this just a temperature gauge
malfunction?? Was ok before all the d1cking
about, but things have been plugged and unplugged a few times since! Or is it
something more serious?? |
|
|
|
|
fufflenarnia
Vanorak 

#1 Cable Shift Bitch Joined: 04 Sep 10 Location: Redhill, Surrey Status: Offline Points: 1362 |
Post Options
Thanks(0)
Quote Reply
Posted: 21 Apr 17 at 07:31 |
|
Good news, and thanks for the component list.
You've got more room in the engine bay to mount the cruise control gubbins. It would be difficult to get the connections you need at the front as the cable is under the van by the pedal. |
|
|
|
|
Bromy
Vanorak
Joined: 26 Feb 12 Location: Cambridge Status: Offline Points: 1303 |
Post Options
Thanks(0)
Quote Reply
Posted: 20 Apr 17 at 23:25 |

|
|
|
"follow the masses, do the opposite"
|
|
|
|
|
club joker 84
Groupie
Joined: 21 Jul 09 Location: Cornwall Status: Offline Points: 138 |
Post Options
Thanks(0)
Quote Reply
Posted: 20 Apr 17 at 23:05 |
|
Good news, van MOT'd yesterday with no advisories. Taxed it and drove to work today, and van ran great. No issues with temperature etc. so confident no head gasket problems.
What a transformation! Engine really suits the van. Plenty of torque. It makes the van much easier to drive, as it's much less fussy about what gear its in. You can even accelerate up hill! Very happy, and a big thank you to everyone who offered help and advice. Much appreciated  Ben
|
|
|
|
|
club joker 84
Groupie
Joined: 21 Jul 09 Location: Cornwall Status: Offline Points: 138 |
Post Options
Thanks(0)
Quote Reply
Posted: 16 Apr 17 at 23:23 |
|
Hi there,
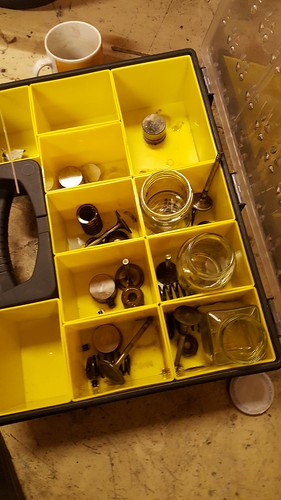
Yes, I did track it down. List as follows, with links: Hall sensor - I bought 2 types, and to be honest I am not sure which I used! They are cheap though, so suggest you get both and see which one works. I will see if I can dig out what I have left and let you know which one I used. First one is http://cpc.farnell.com/allegro-microsystems/a1120eua-t/hall-effect-switch-unipolar-3sip/dp/SC10233?CMP=TREML007-005 (£1.12 each) Second one is http://cpc.farnell.com/allegro-microsystems/a1101eua-t/ic-hall-effect-switch-sip-3-1101/dp/SC10230?CMP=TREML007-005 (£2.60 each) Zener diode - I went for an 11v one in case of any voltage drops etc. in the wiring. http://cpc.farnell.com/nxp/bzx79-c11/diode-zener-500mw-11v/dp/SC05704?CMP=TREML007-005 (£0.40/10) Resistors - you need 1k and 100k. I bought a bulk pack of 480 different types, but obviously you could buy individual ones for pennies. http://cpc.farnell.com/velleman-sa/k-res-e3/resistor-set-cf-1-4w-5-e3-480pc/dp/RE07594?CMP=TREML007-005 (£6.64 / pack) Breadboard - http://cpc.farnell.com/multicomp/mc01010/circuit-board-95x72-780-ic-board/dp/PC01289?CMP=TREML007-005 (£0.95 each - probably enough board to make about 10 of them!) LED I already had, but something like this should be ok: http://cpc.farnell.com/kingbright/l-934gd-12v/led-resistor-3mm-green-12v/dp/SC14319 (£0.18 each) Let me know how you get on. Side of the van is fixed, so MOT next week! Will let you know what happens... One I have the MOT (fingers crossed), next plan is to see if I can get cruise control up and running. I have a set of T3 cruise control stalks with the control box and relay. Need new pedal switches (same part number as a T4 and several other VAG models), switch brackets, vacuum hose and an actuator. I have been thinking about using a Land Rover pump and actuator which all looks quite self contained. 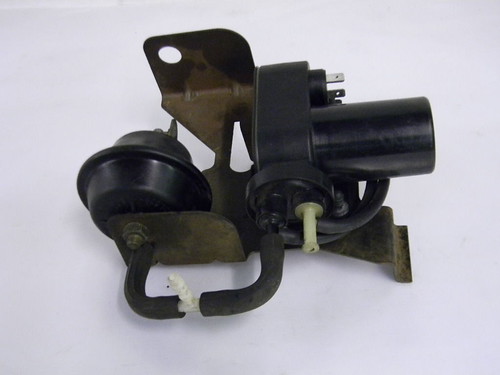 Anyone done anything similar? Any reason that the actuator can't be mounted at the pedal end rather than in the engine bay? |
|
|
|
|
fufflenarnia
Vanorak
#1 Cable Shift Bitch Joined: 04 Sep 10 Location: Redhill, Surrey Status: Offline Points: 1362 |
Post Options
Thanks(0)
Quote Reply
Posted: 16 Apr 17 at 09:05 |
|
Did you find you parts list for the vss? I'm getting my shit together do do my conversion shortly.
|
|
|
|
|
club joker 84
Groupie
Joined: 21 Jul 09 Location: Cornwall Status: Offline Points: 138 |
Post Options
Thanks(0)
Quote Reply
Posted: 27 Mar 17 at 23:44 |
|
Thanks for asking. I have hit a bit of a hold up! Giving the van a pre MOT go over and wash, when I noticed the dreaded behind-the-dildo panel was quite a lot worse than when I last looked. It's been on the 'to do' list since I got the van about 9 years ago, but it has just leapt to No. 1 by rusting right through
 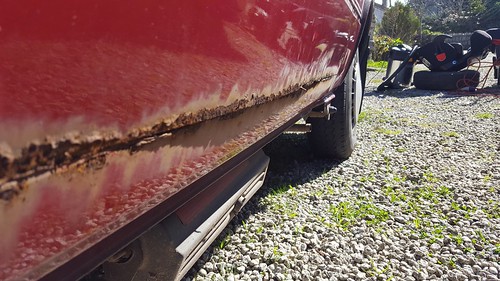 So it needs fixing before MOT time! Back in the workshop and out with the nibbler (brilliant tool btw!) 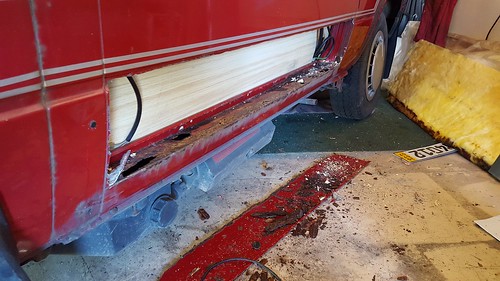 Low panel ordered from Schofields. Very impressed by the quality of the panel. Good shape and nice and thick. Going to do a 'quick fix' for Summer using panel adhesive. Need to actually use the van again! Hoping to get this done in the evenings this week. Bodywork will hopefully get a proper going over in winter, so a quick fix is fine with me. On the cost of the conversion, I don't think it's too bad. It is a full service, new exhaust, cambelt, etc. so like you say nothing should need doing for a while (hopefully ages!). If you added up doing these sort of bits to the DG, you would probably be into the best part of £1k. Like I say, you could definitely do it cheaper.
|
|
|
|
|
rowlesy
Vanorak
murdered the murderwagen Joined: 09 Oct 05 Location: up unit! Status: Offline Points: 6466 |
Post Options
Thanks(0)
Quote Reply
Posted: 27 Mar 17 at 20:36 |
|
doubt any of that will need replacing in the next few years so not bad all in....
|
|
|
UberFukz broke another! sucky sucky five dollah!
always out numbered never out gunned! RWS welding 07846 380 467 (worcs) |
|
|
|
|
fufflenarnia
Vanorak
#1 Cable Shift Bitch Joined: 04 Sep 10 Location: Redhill, Surrey Status: Offline Points: 1362 |
Post Options
Thanks(0)
Quote Reply
Posted: 27 Mar 17 at 20:27 |
|
How's things going? Running well? Exhaust noise ok? Impressed???
|
|
|
|
|
Post Reply
|
Page 123 4> |
| Tweet |
| Forum Jump | Forum Permissions You cannot post new topics in this forum You cannot reply to topics in this forum You cannot delete your posts in this forum You cannot edit your posts in this forum You cannot create polls in this forum You cannot vote in polls in this forum |


 Topic Options