

|
|
1980 VW T3 DoKa |
Post Reply 
|
Page <12345 11> |
| Author | |
surf dude 
Yardie 
Joined: 11 Apr 05 Location: United Kingdom Status: Offline Points: 470 |
 Post Options Post Options
") Thanks(0) Thanks(0)
 Quote Reply Quote Reply
 Posted: 19 Dec 12 at 22:03 Posted: 19 Dec 12 at 22:03 |
|
Thanks fellas, long way from sorted at the moment but a massive step in the right direction

|
|
|
Too many projects..... Not enough time!
|
|
 |
|
|
surf dude
Yardie
Joined: 11 Apr 05 Location: United Kingdom Status: Offline Points: 470 |
Post Options
Thanks(0)
Quote Reply
Posted: 13 Feb 13 at 22:21 |
|
So, been mucking about in the garage. The van still needs some welding done so I wanted to have a little practice on something first. I turned an old Cobra bucket seat into a gaming chair. Practice welding, making some metal panels, filling and spraying.
From this,  via this 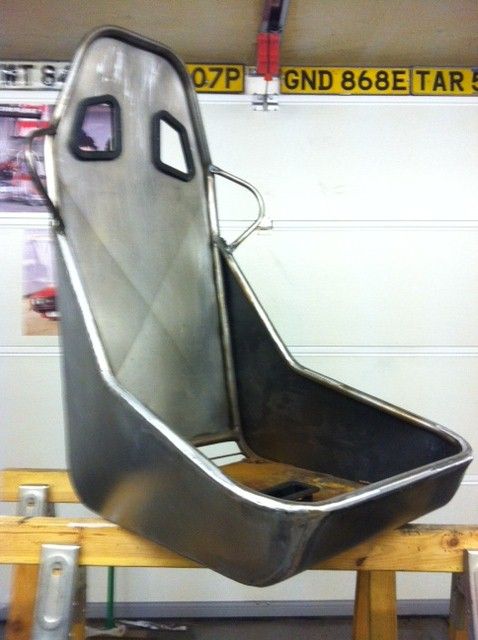 to this 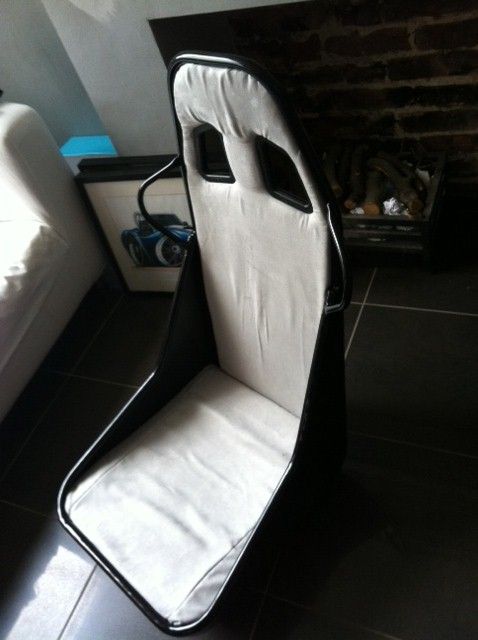 Pretty happy with it, but need to get cracking with the van, so this evening I decided to stop mucking about and get on with it. I'd already been underneath and removed all of the petrol heater gubbins. It still worked, but the ducting was all wrecked and I'm not sure I trust it anymore. Anyway, it's out now, but in the midst of doing that I noticed that the heater pipes were all mashed, everything was zip tied in place (pipes, fuel pump and filter etc) and it was generally looking a bit untidy! So I thought, bugger it, lets get the engine out!! 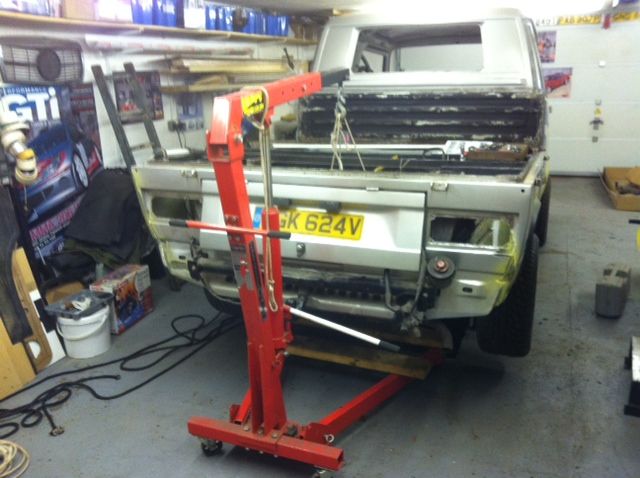 Forgotten how easy it was, even on your own, and after a bit of adjustment to get the van higher 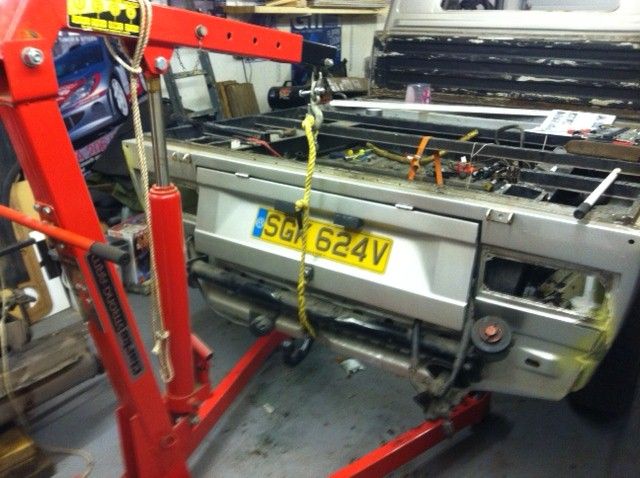 It was out. 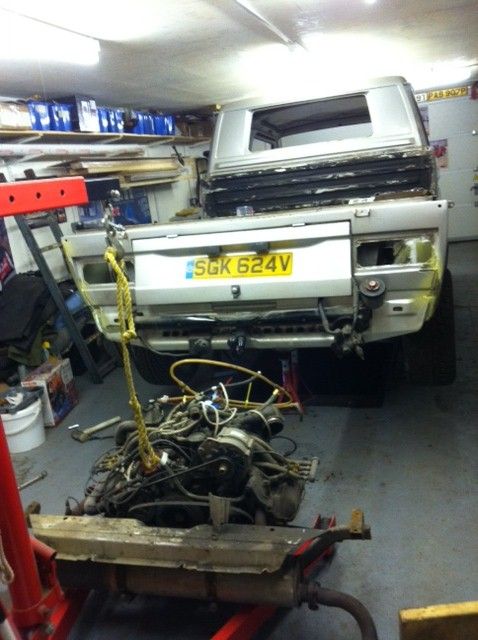 There's a bit of rust here too, so that will get sorted. and of course another engine to go in!! 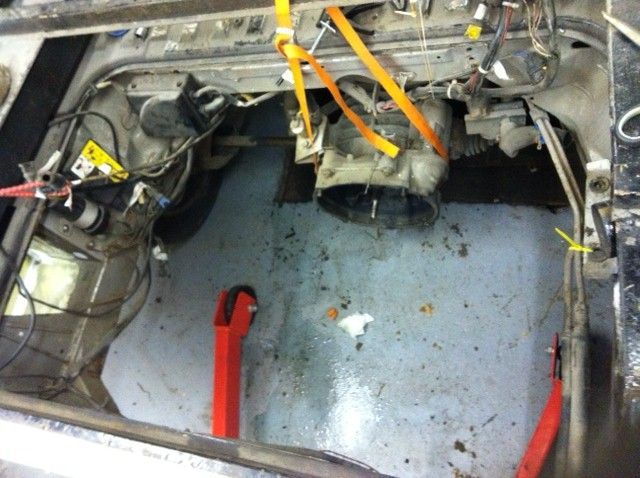 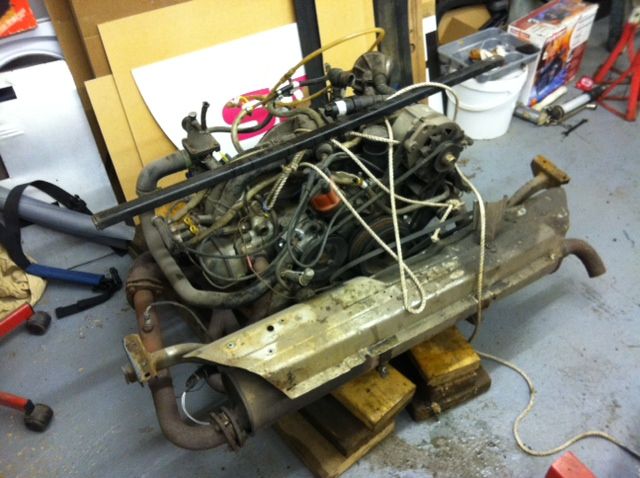 The 2.1 will be for sale soon, once it's had a bit of a clean up and I've stripped out all of the wiring for it (new Scooby lump is on MS) More tomorrow hopefully. Pete
|
|
|
Too many projects..... Not enough time!
|
|
|
|
|
rhysdubber
Groupie 

Joined: 10 Jan 13 Location: South Wales Status: Offline Points: 41 |
Post Options
Thanks(0)
Quote Reply
Posted: 15 Feb 13 at 00:54 |
|
Im loving the amount of detailed work thats gone into this!
 You'll have a tidy looking Doka by the end which will be awesome! You'll have a tidy looking Doka by the end which will be awesome!
|
|
|
If my calculations are correct, when this baby hits eighty-eight miles per hour... you're gonna see some serious shit.
"Better To Be Pissed Off Than To Be Pissed On" 1989 1.7D DK Box "Dylan" |
|
|
|
|
surf dude
Yardie
Joined: 11 Apr 05 Location: United Kingdom Status: Offline Points: 470 |
Post Options
Thanks(0)
Quote Reply
Posted: 15 Feb 13 at 09:00 |
|
Thanks mate, I certainly hope so. Just need to get my arse into gear and get on with it
|
|
|
Too many projects..... Not enough time!
|
|
|
|
|
surf dude
Yardie
Joined: 11 Apr 05 Location: United Kingdom Status: Offline Points: 470 |
Post Options
Thanks(0)
Quote Reply
Posted: 19 Feb 13 at 22:32 |
|
Well, another day in the garage (there are perks to unemployment ::) ) and after getting distracted cleaning up (all this grinding makes an awful lot of dust :( ) I started looking at the rust in the engine bay. I needed to remove various bolts that had been used to hold on the coil and electrics boxes. 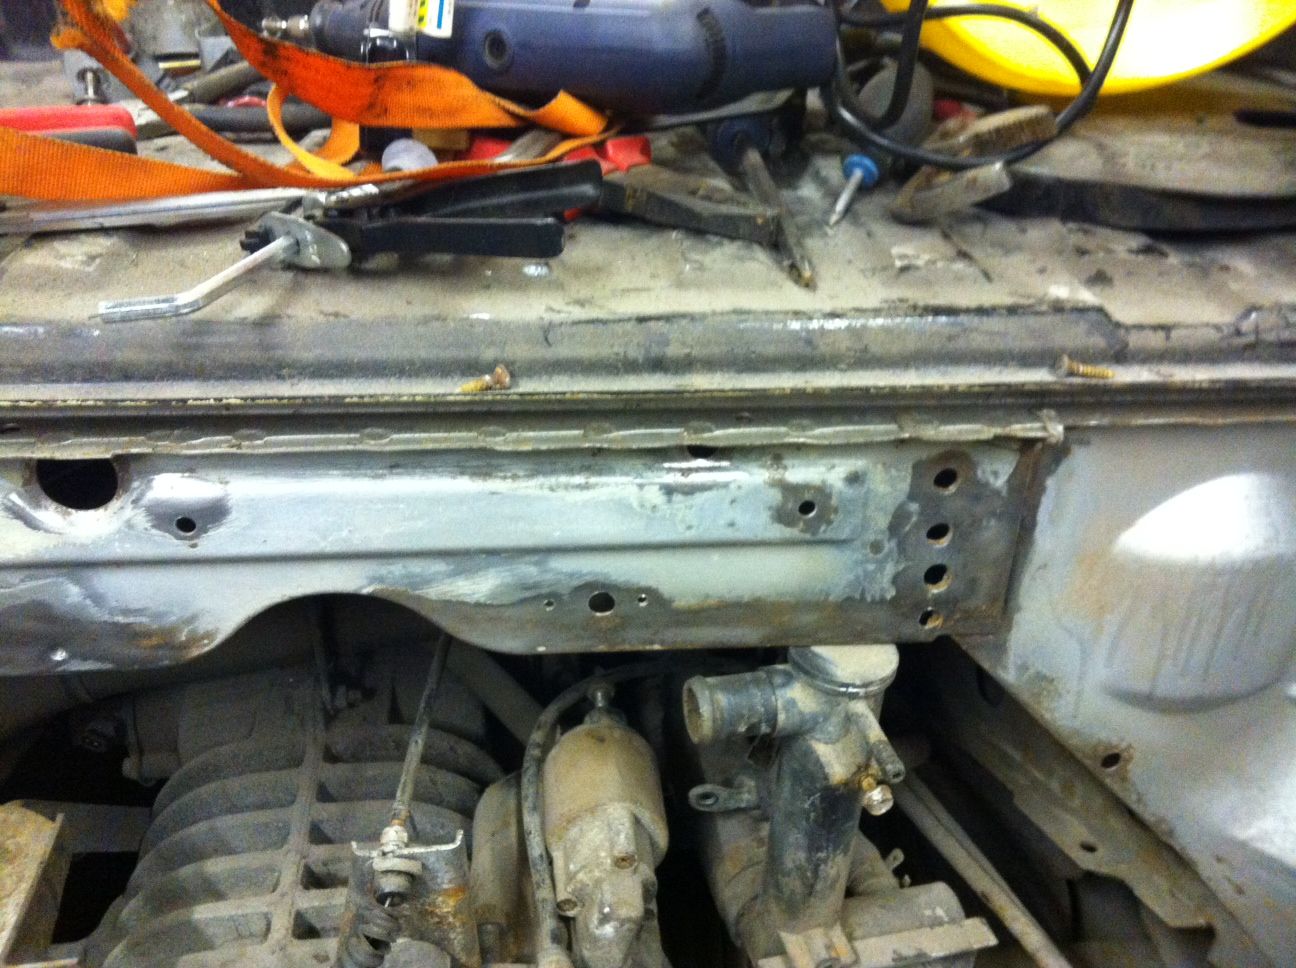 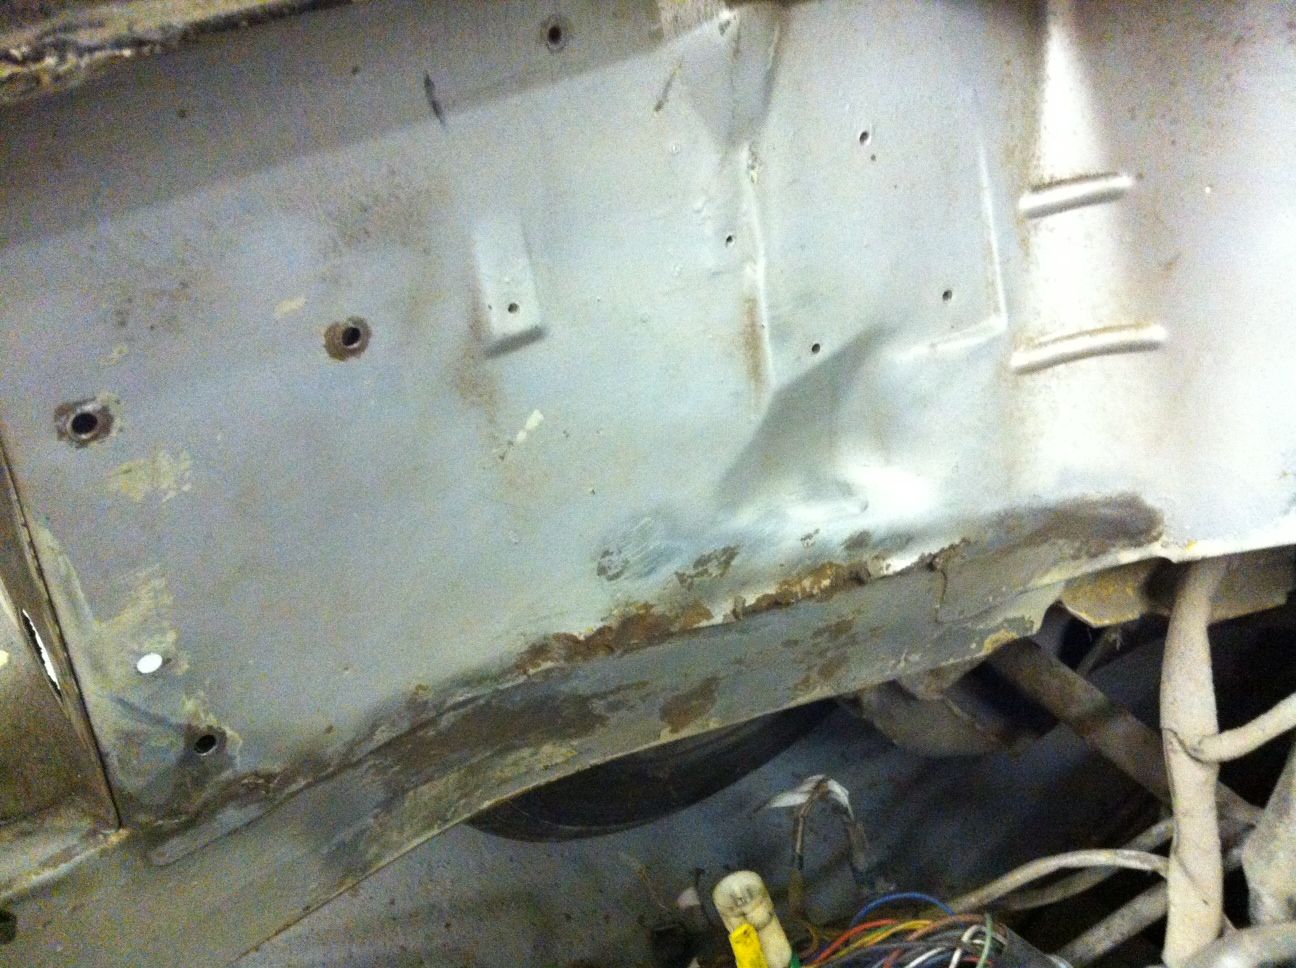 Inevitably, I found more rust ::) So, choppy choppy! 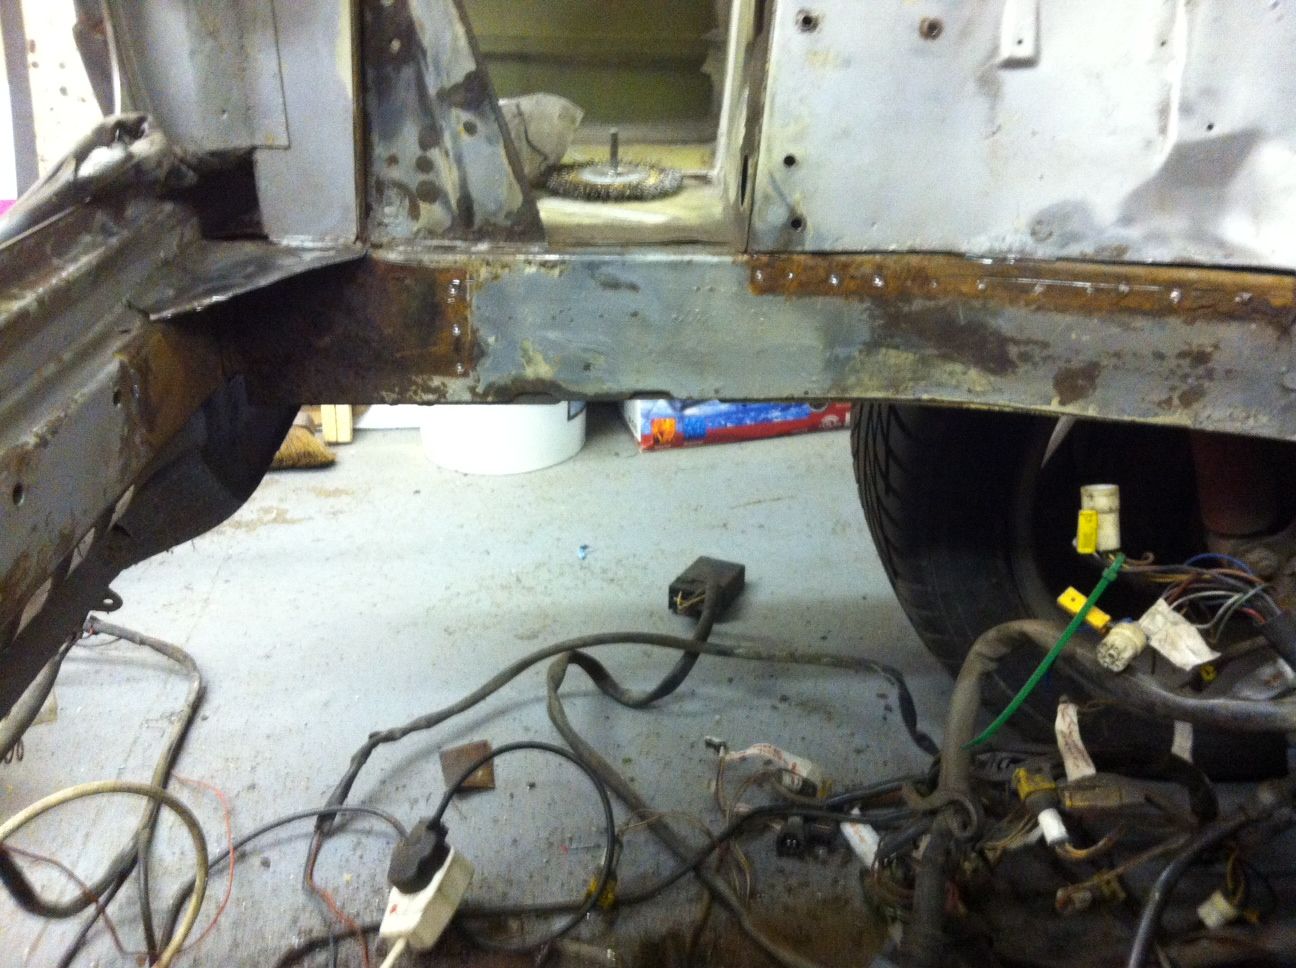 Ballcocks!! More welding then. That's all been ground down now but no pics. Then I dropped the gearbox. 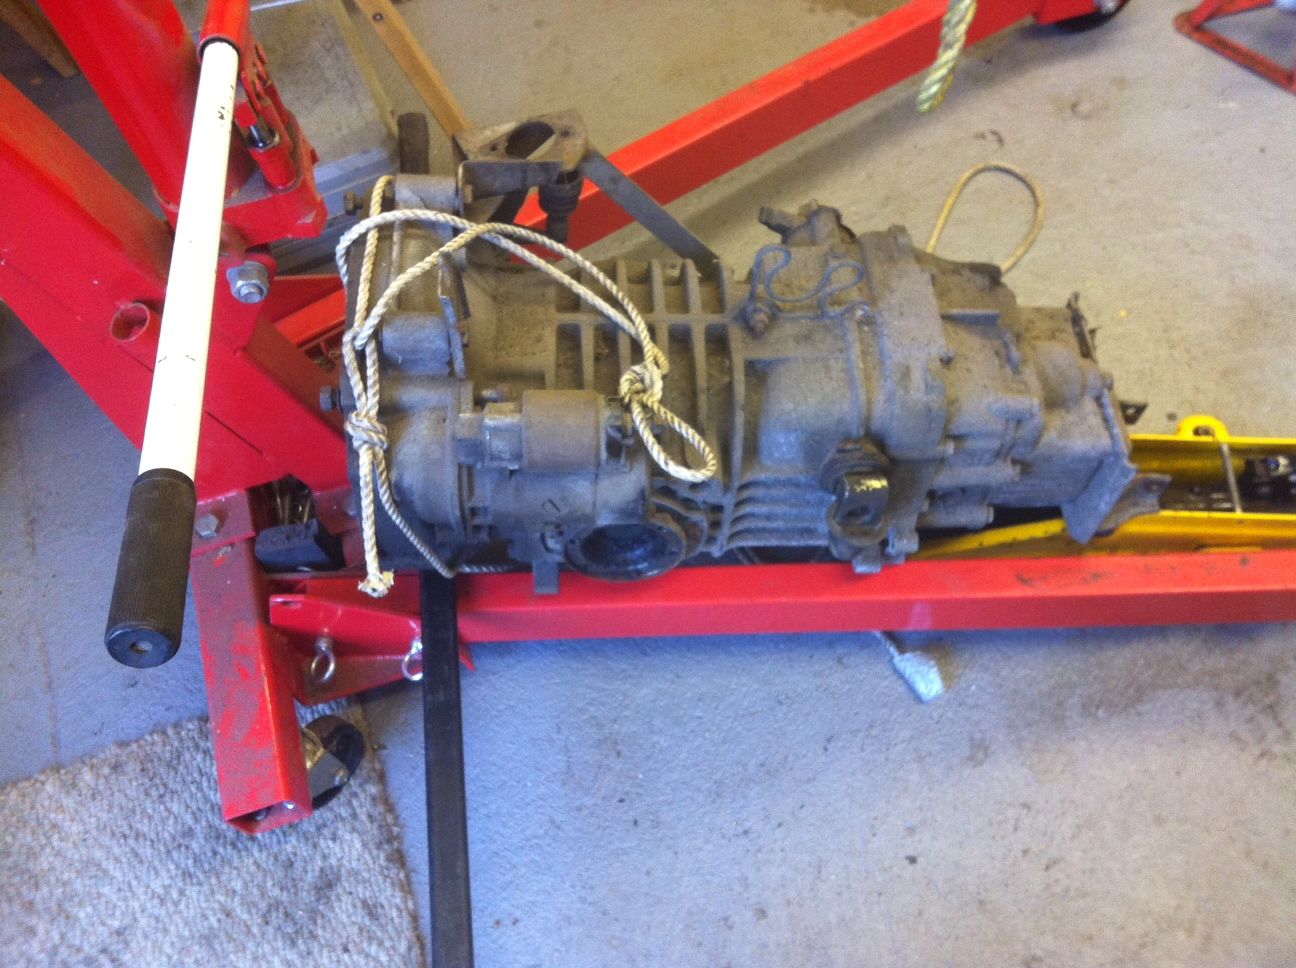 Makes it sound easy doesn't it. It wasn't, it was a ballache, but it's done now and on the floor. I've spent a bit of time underneath cutting cable ties, dodging coolant (trying to move the pipes underneath, a, because the heater pipes were crushed and b, because I am a bit OCD and want it to be tidy under there after I've thrown some chassis paint on) I really wish I'd been able to jet wash it underneath before I'd started, it is minging ::)
|
|
|
Too many projects..... Not enough time!
|
|
|
|
|
surf dude
Yardie
Joined: 11 Apr 05 Location: United Kingdom Status: Offline Points: 470 |
Post Options
Thanks(0)
Quote Reply
Posted: 28 Feb 13 at 20:13 |
|
So, a bit more time spent on the van this week. First off though I had to have a tidy up ::) There was dust everywhere (Denise pointed out that garages are supposed to be like that!) but it was doing my head in. After that, I wanted to make a bit of effort to keep the dust off the shelves so up went some cloths.  Then it was time to get cracking. Out came the grit blaster to start tackling this; 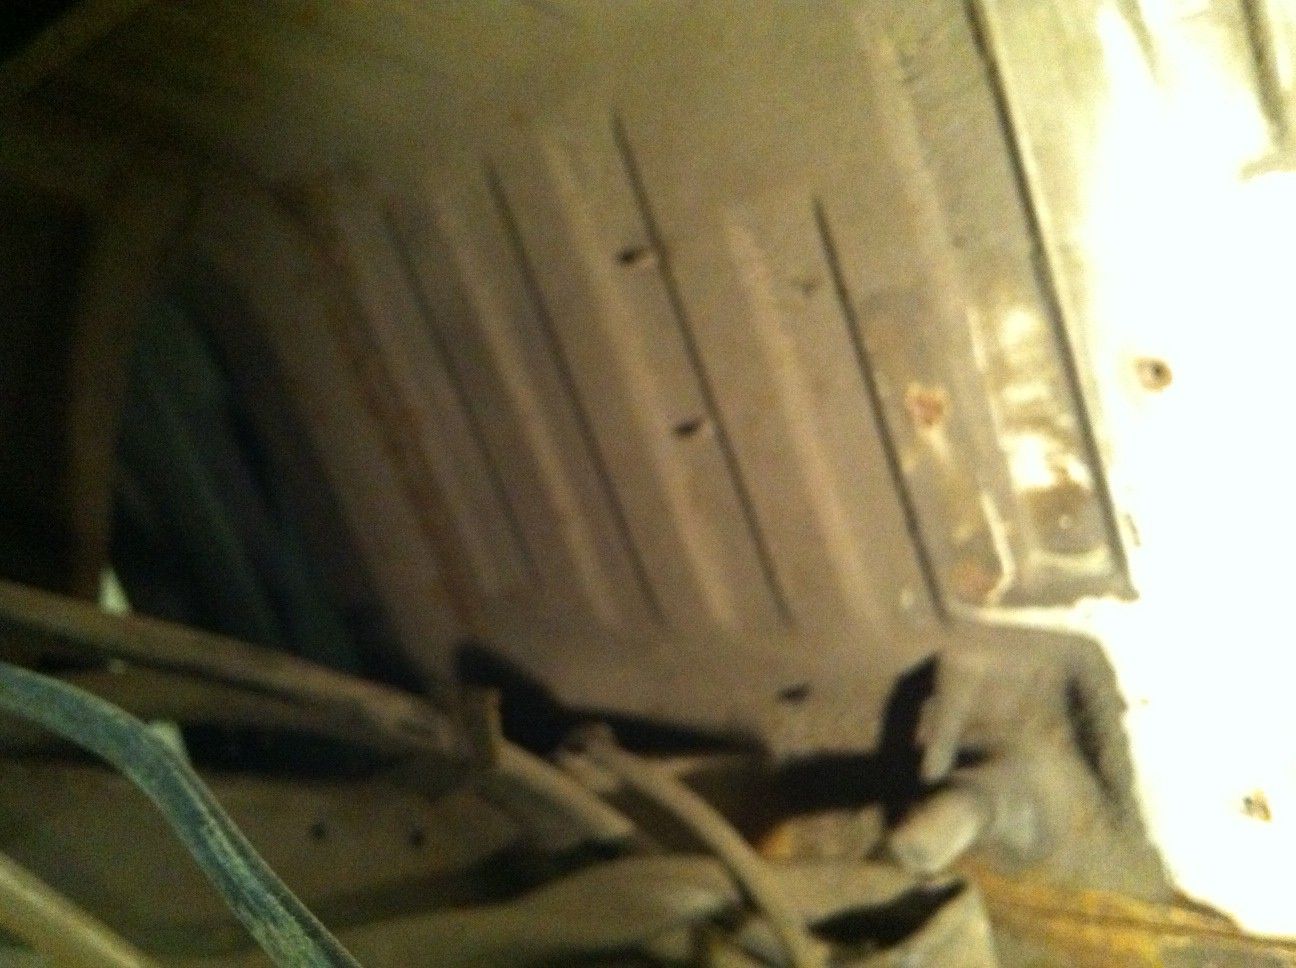 And after a few passes 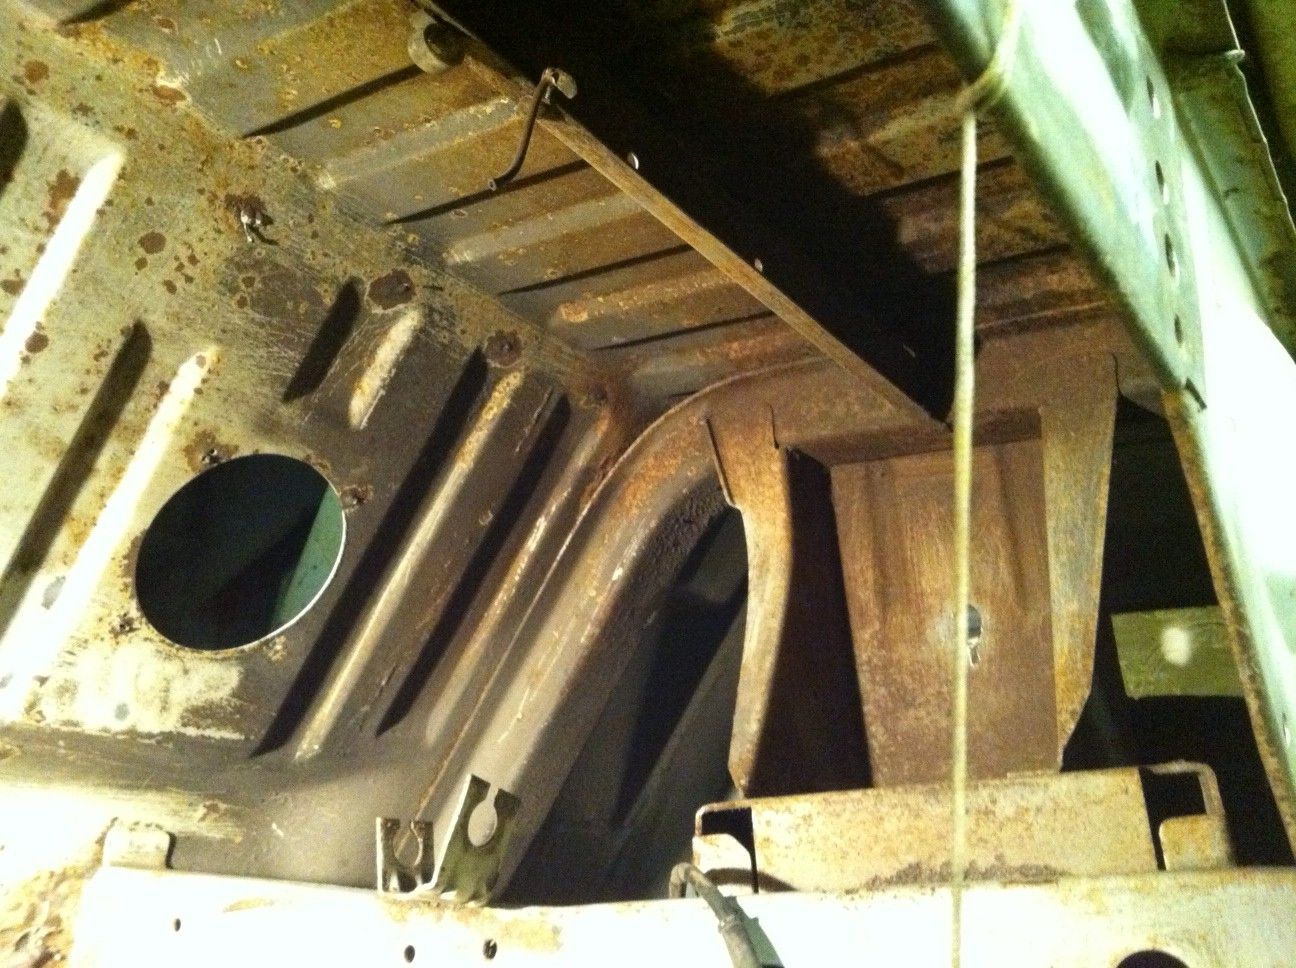 Different sides obviously ;) I didn't want to strip off all of the paint back to bare metal, just the horrible black stuff, which has clearly done nothing to stop the rust taking hold ::) It's all pretty much surface rust though so I'll treat it before I put some paint on (I've got chassis stuff, or I'll use some gloss black rustoleum that I used on the bumpers. Next up, I decided that to do the job properly I'd drop the driveshafts (easy) and the rear suspension (You all know where this is going don't you......?) So, bolt for the shock came out a treat, then the one form the inner side was the same. Brilliants thinks I, whoever did this before coated it with copperslip so no rusted in bolts for me. Nope! Typically, it was seized solid! On both sides ::) 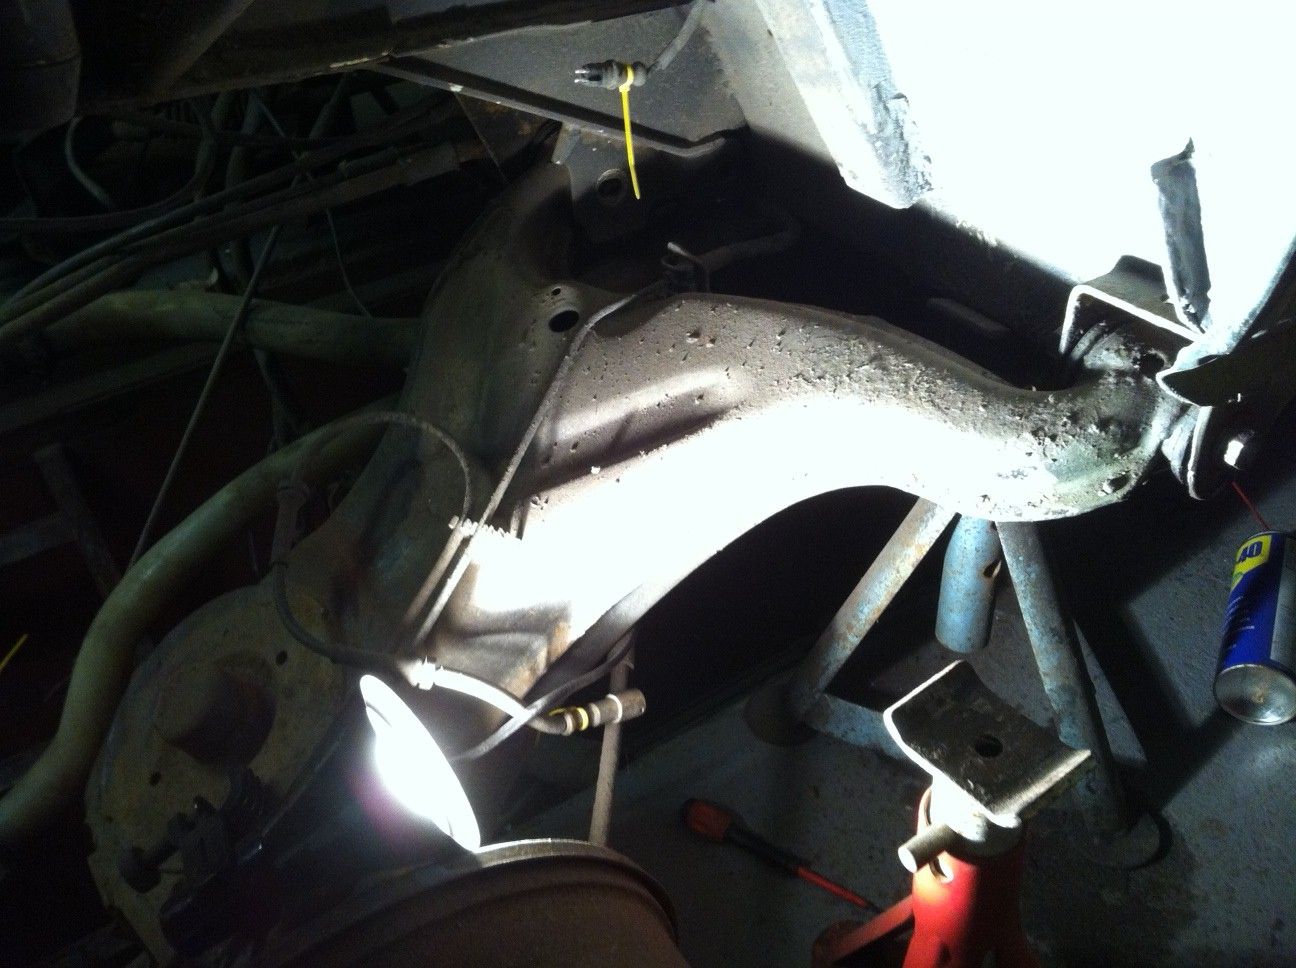 I've drilled out the bolt head on this side, thinking that I may be able to give it a good whack to get it moving. Erm, that'll be no then :( So, I've packed up for the night and am having some tea. Mainly because I have no idea how to chop off the other end of the bolt ::) Bloody van! Oh, I put the alloys back on the Golf (Insurance came up for renewal and I mentioned that it had larger alloys on and they wouldn't cover me ::) ) Thought it prudent to take them off until my renewal came through ;) One just happened to fall against the van ;D 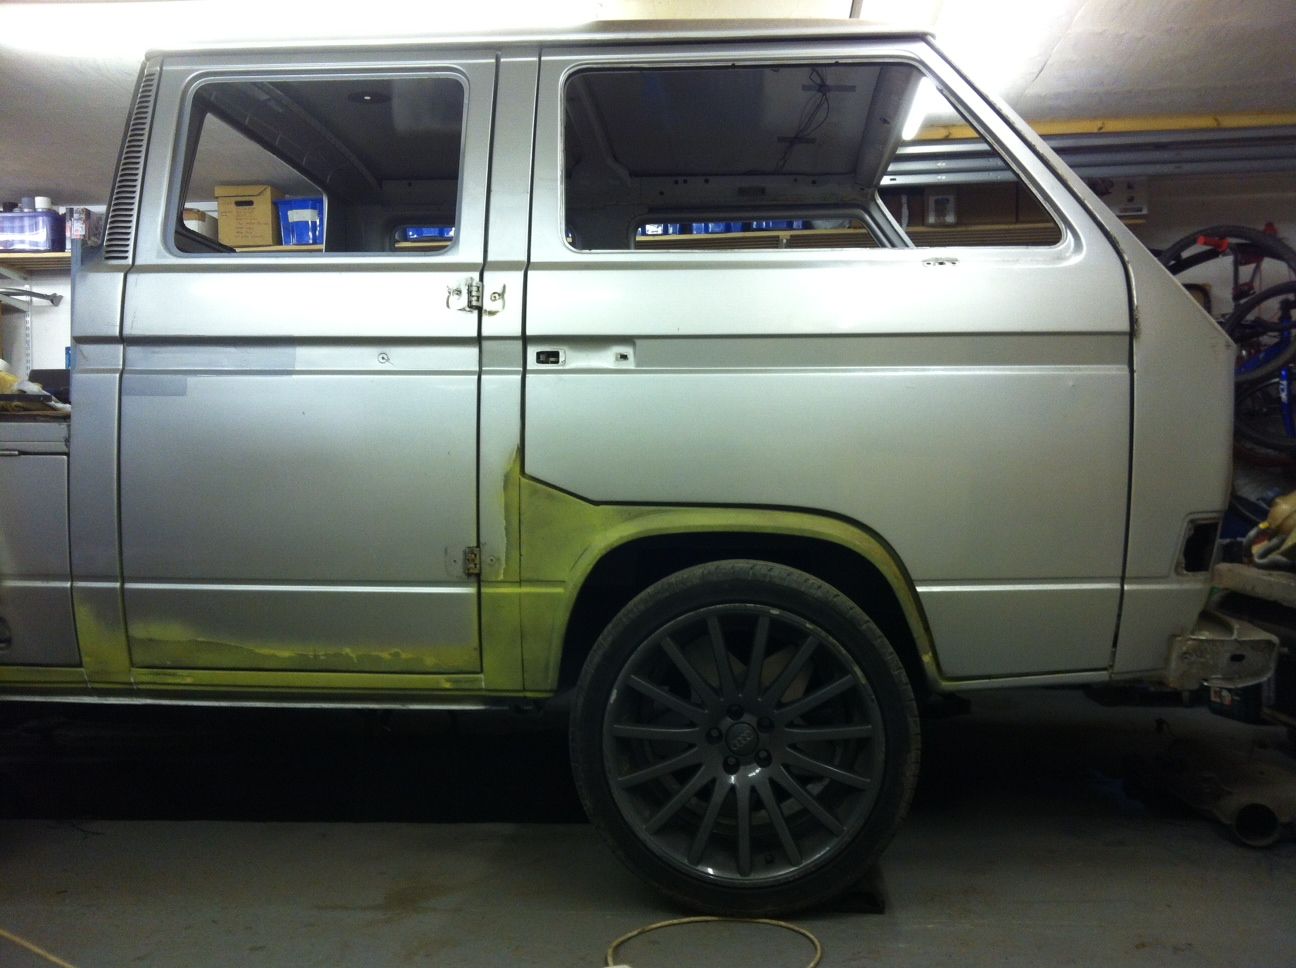 Back on it when I've figured out how to fit a grinder/saw/drill etc into a gap that a saw blade will only just fit into let alone anything else ::) Anyone??
|
|
|
Too many projects..... Not enough time!
|
|
|
|
|
Gtavalanche
Vanorak 

"I'm learnding" Joined: 22 Feb 11 Location: Ipswich Suffolk Status: Offline Points: 1305 |
Post Options
Thanks(0)
Quote Reply
Posted: 28 Feb 13 at 20:22 |
|
I think Baxter doesn't even waste time messing with the bolts if they don't come straight out. He just opts for a 1mm cutting disc between the jacking point and trailing arm.
|
|
|
I taste Hurty!
|
|
|
|
|
surf dude
Yardie
Joined: 11 Apr 05 Location: United Kingdom Status: Offline Points: 470 |
Post Options
Thanks(0)
Quote Reply
Posted: 28 Feb 13 at 20:48 |
 Yep, and that's exactly what I thought as well, but I've just had all the welding done and not sure that my welding is up to sticking them back on Yep, and that's exactly what I thought as well, but I've just had all the welding done and not sure that my welding is up to sticking them back on  and it's obviously a bit tricky moving the van now!! and it's obviously a bit tricky moving the van now!! |
|
|
Too many projects..... Not enough time!
|
|
|
|
|
DavidPallister
Yardie

Joined: 03 May 08 Location: Bridgend Status: Offline Points: 446 |
Post Options
Thanks(0)
Quote Reply
Posted: 28 Feb 13 at 21:13 |
|
No no no, you don't need to cut the mounting point off.
If you jack/prop the trailing arm up as high as it will go to get access, you can (very carefully) cut up through both sides of the exposed rubber bush, just inside of the mounting point. |
|
|
|
|
Gtavalanche
Vanorak
"I'm learnding" Joined: 22 Feb 11 Location: Ipswich Suffolk Status: Offline Points: 1305 |
Post Options
Thanks(0)
Quote Reply
Posted: 28 Feb 13 at 21:15 |
|
Nah. Just cut between the mount and the trailing arm. Then replace bushes and bolts. No welding required. Unless you have Parkinson's. :-)
|
|
|
I taste Hurty!
|
|
|
|
|
surf dude
Yardie
Joined: 11 Apr 05 Location: United Kingdom Status: Offline Points: 470 |
Post Options
Thanks(0)
Quote Reply
Posted: 28 Feb 13 at 21:21 |
|
Ah, right, I get you (what a tard
) I'll give that a bash next time I'm out in the garage! Thanks fellas.
|
|
|
Too many projects..... Not enough time!
|
|
|
|
|
surf dude
Yardie
Joined: 11 Apr 05 Location: United Kingdom Status: Offline Points: 470 |
Post Options
Thanks(0)
Quote Reply
Posted: 20 Mar 13 at 09:37 |
|
Well, I finally dragged my arse out to the garage and tackled the seized bolts. With much grinding and mucking about they finally were free! 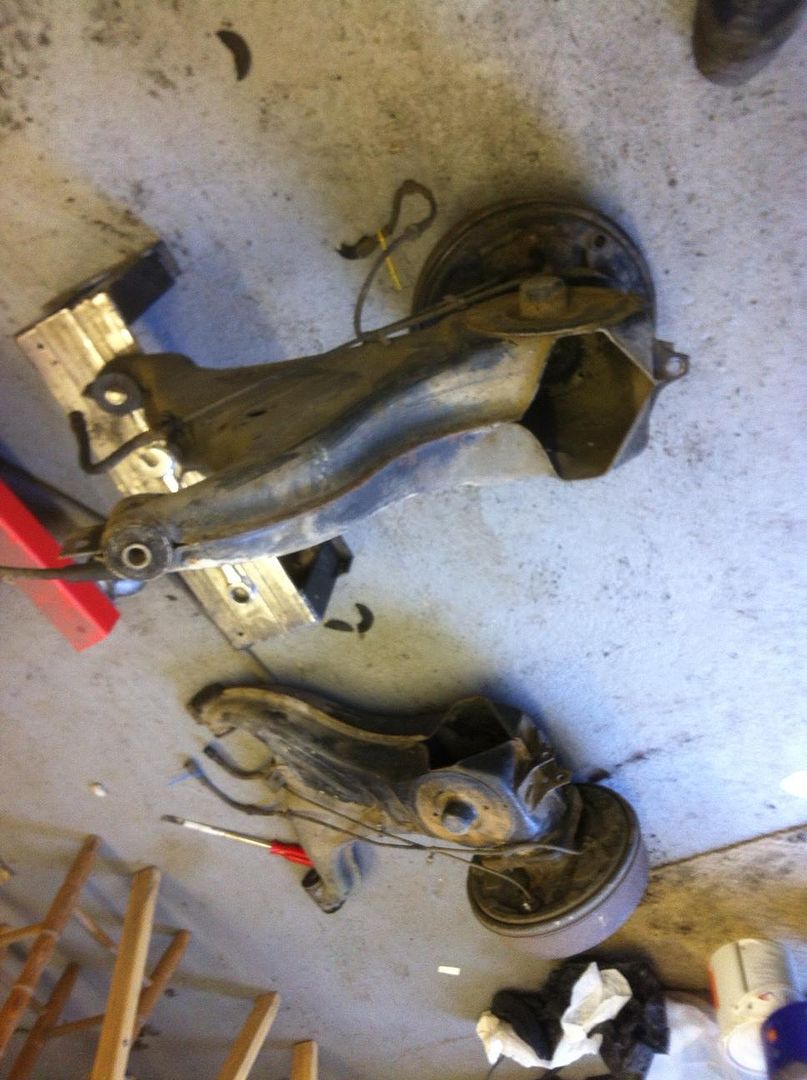 They were headed outside to the garden to get jetwashed, but my power washer is broken ::) so might scoot down to Morrisons tomorrow and use theirs ;) So, now we're looking at this; 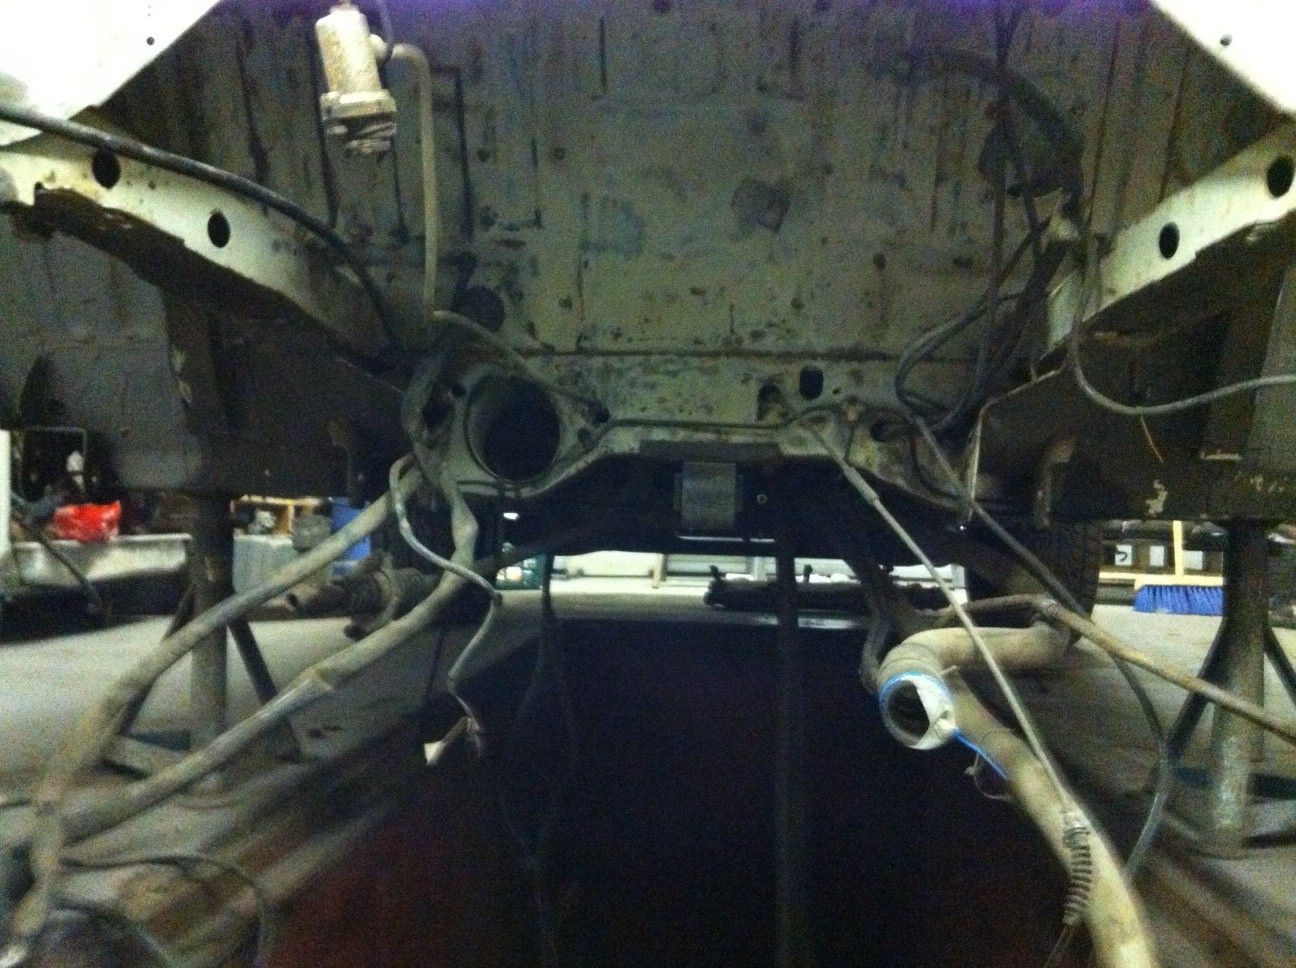 Tomorrow I'll get the grit blaster out again and finish off the stripping underneath, and then I'll throw some rust inhibitor and paint on. Probably gloss black, although I do have chassis stuff. Undecided, but I do want it to last (forever....... I'm not curse word doing this again!)
|
|
|
Too many projects..... Not enough time!
|
|
|
|
|
surf dude
Yardie
Joined: 11 Apr 05 Location: United Kingdom Status: Offline Points: 470 |
Post Options
Thanks(0)
Quote Reply
Posted: 20 Mar 13 at 09:38 |
|
Bit more done. (although I'm not exactly sure why it took me all day ::) ) SO, paintstripping? Why? Well, I don't really know to be honest, but I do want this to look good so I set too with wire brushes in the engine bay to get it looking clean. There are a lot of holes everywhere, mainly drilled for attaching things like the coil, electrical junction boxes etc, but most use self tappers and are hence a bit rusty. I want rid of all of these as most will no longer be needed and nor will the fixing for the air filter. Off that came 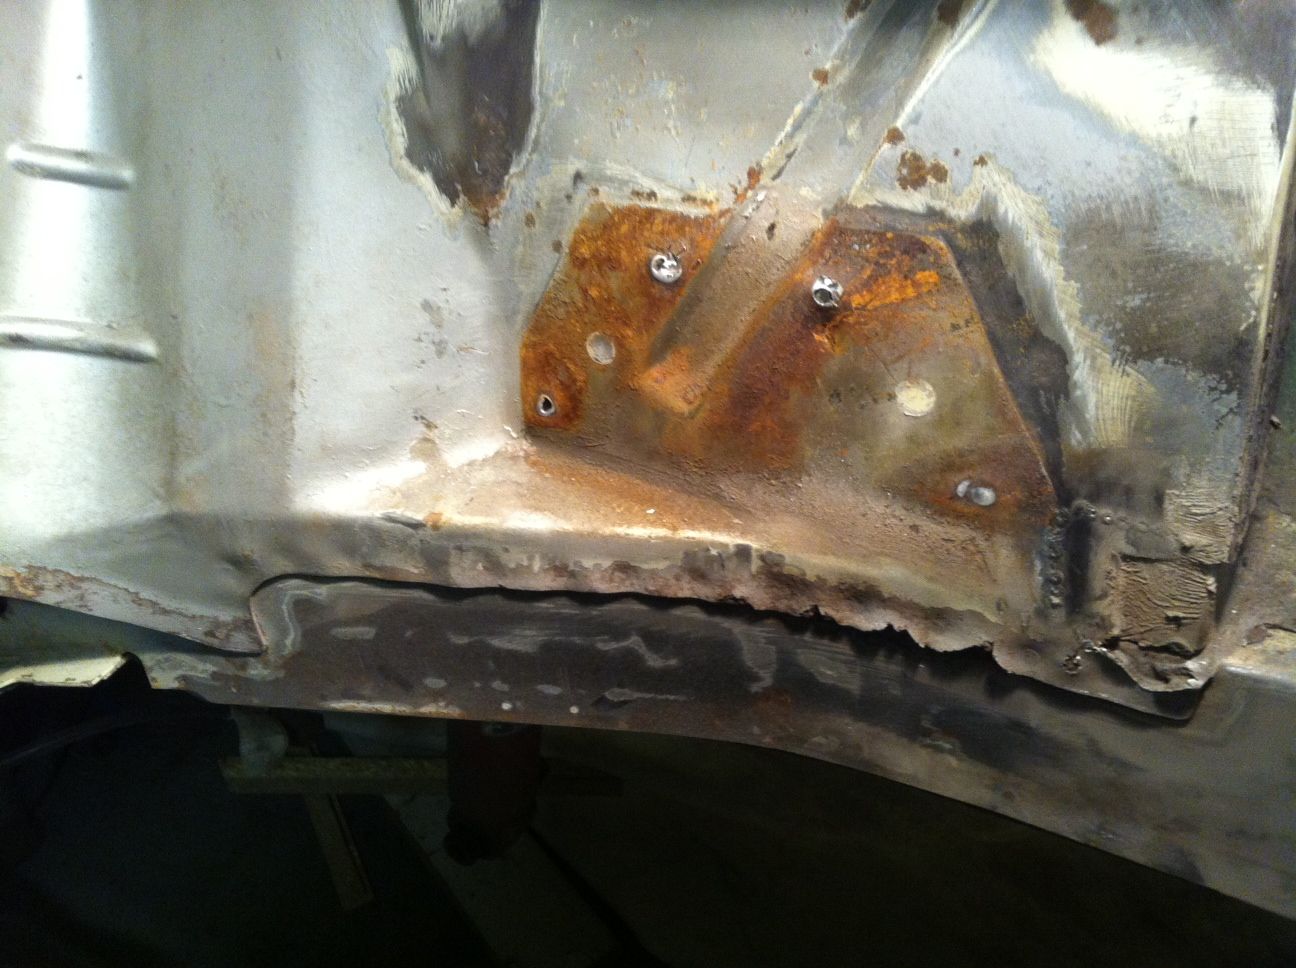 Oh, ffs, more crispiness. Choppy choppy.  Here's another area full of holes, and most of them surplus to requirements when the Scooby lump goes in, so after finding more rust around the seams that came out as well. 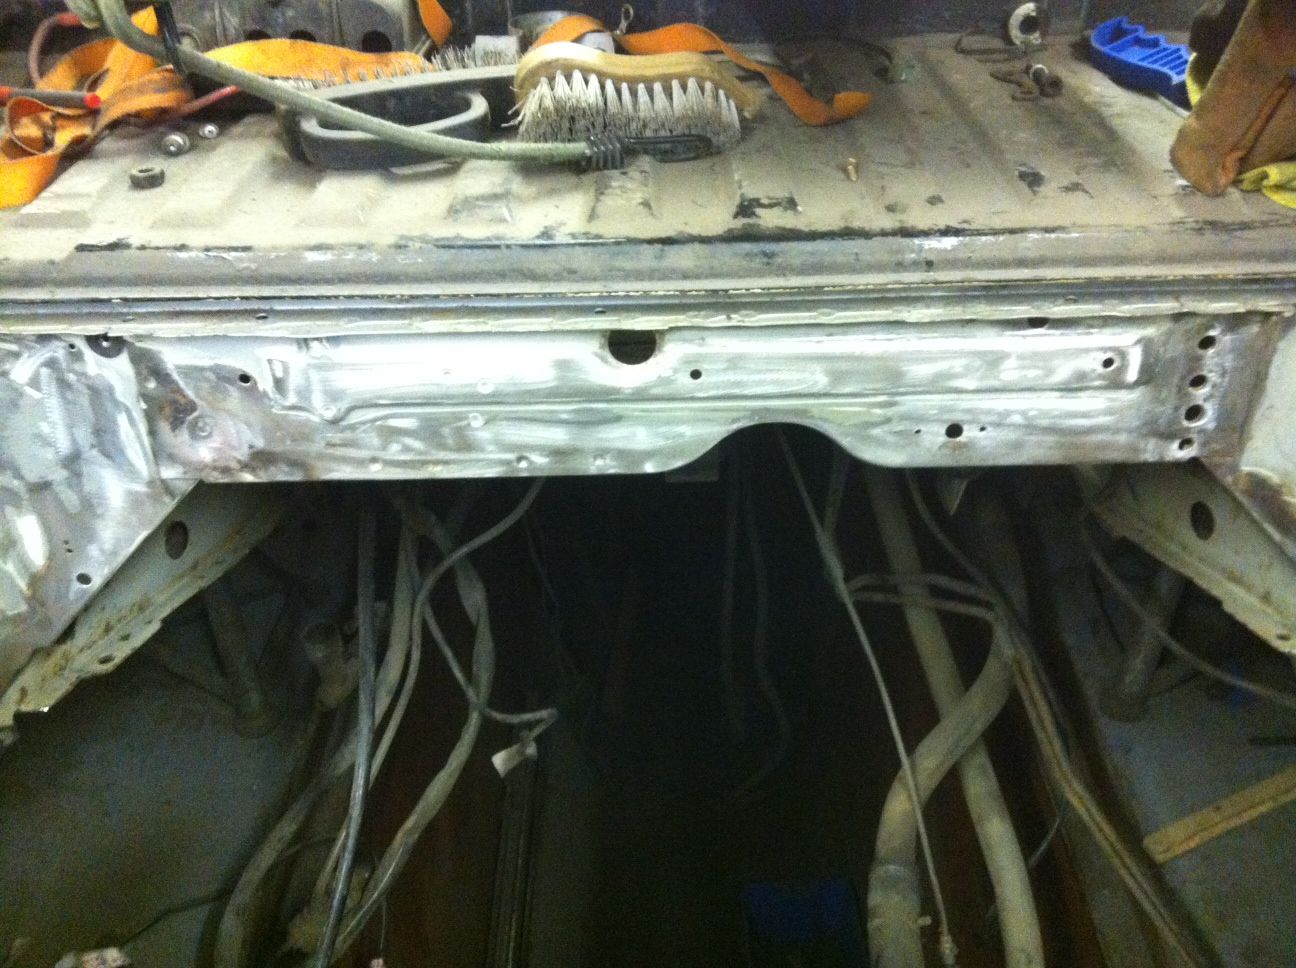 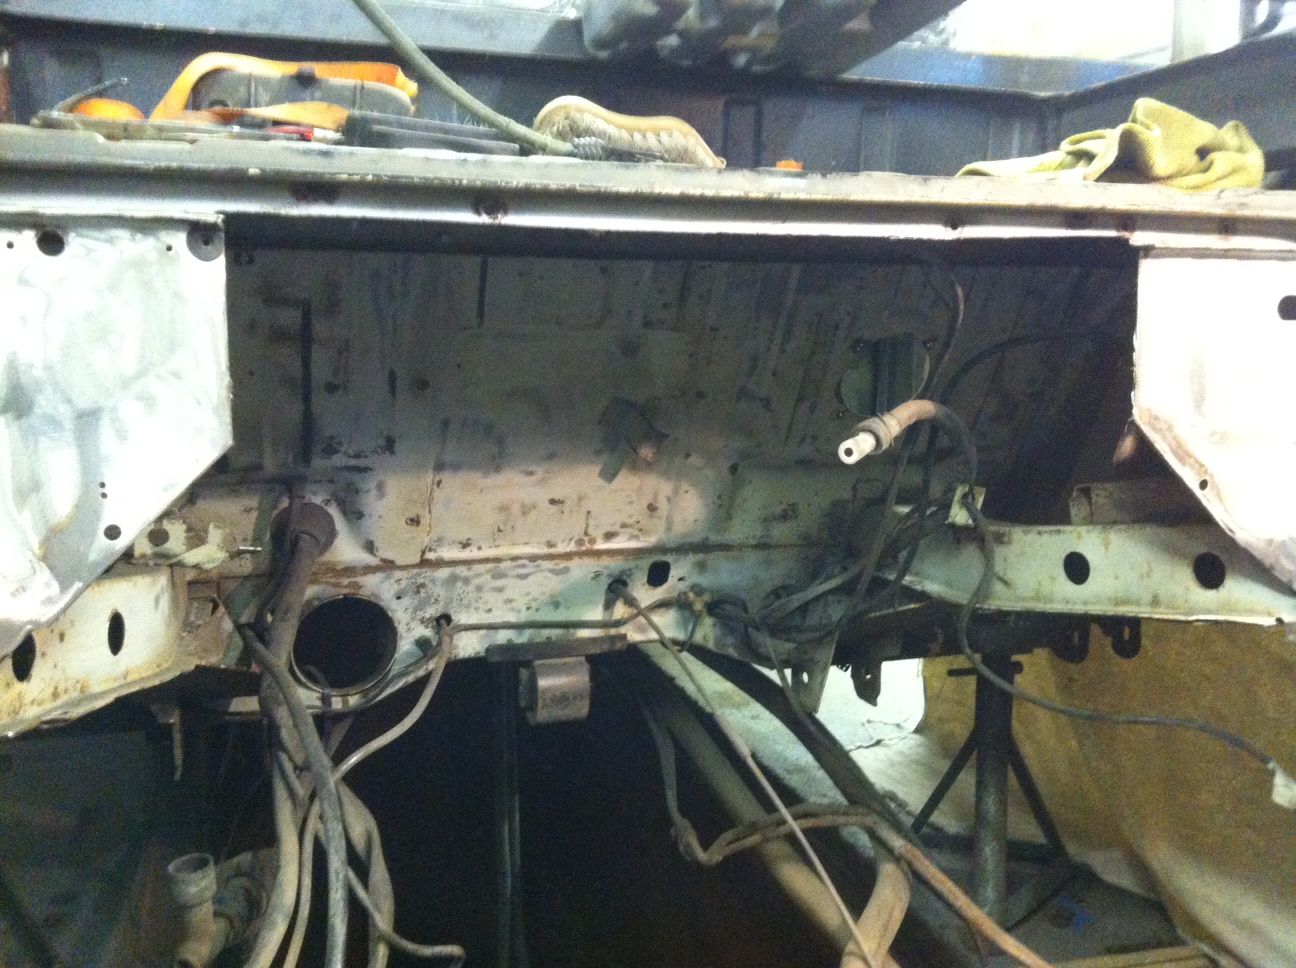 This will be remade so that the airfilter for the Scooby lump fits properly and can be routed around the engine and put somewhere cold (although up and above the axle may work as well) Then I spent some time sanding down the dash again ::) Just not happy with it and wanted all of the sanding marks gone! Knifing putty? Crap! So had to scrape that off and start again ::) 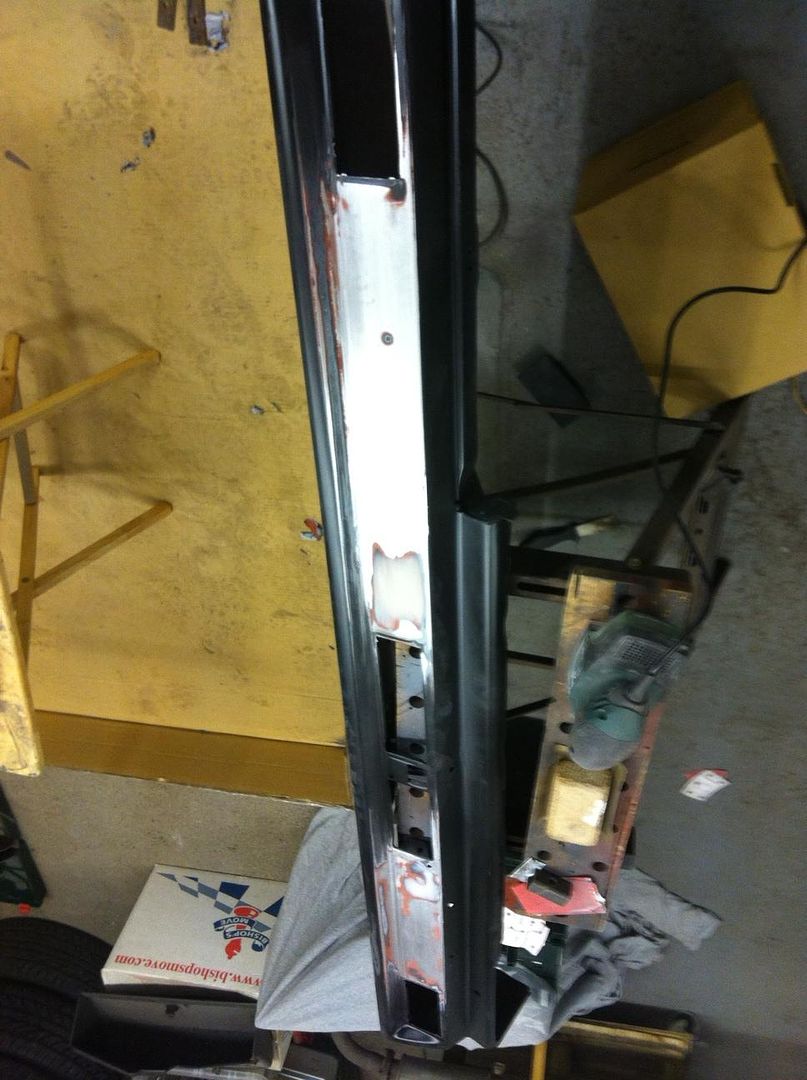 I also dug out the engine mounts for the Scooby lump to have a fiddle and see how they fit up. A couple needed derusting ready for paint and that will go on a bit later. All seems fairly straightforward, I need to get some new bolts and stuff, and drop the sump to fit one of the mounts, but looks OK. Then after choking on dust for an hour and basically getting nowhere on the paint stripping I went off and bought a proper grit blaster so will set to the van with that next week. Thanks for checking in ;) Pete
|
|
|
Too many projects..... Not enough time!
|
|
|
|
|
Gtavalanche
Vanorak
"I'm learnding" Joined: 22 Feb 11 Location: Ipswich Suffolk Status: Offline Points: 1305 |
Post Options
Thanks(0)
Quote Reply
Posted: 20 Mar 13 at 12:46 |
|
Looking better under there already. How much was the grit blaster?
|
|
|
I taste Hurty!
|
|
|
|
|
surf dude
Yardie
Joined: 11 Apr 05 Location: United Kingdom Status: Offline Points: 470 |
Post Options
Thanks(0)
Quote Reply
Posted: 20 Mar 13 at 13:06 |
|
£80. Plus grit (already got that but it's about £25 a tub) and the compressor which I already have but was £300+ It's a bit expensive this van restoration bollocks isn't it?
|
|
|
Too many projects..... Not enough time!
|
|
|
|
|
Gtavalanche
Vanorak
"I'm learnding" Joined: 22 Feb 11 Location: Ipswich Suffolk Status: Offline Points: 1305 |
Post Options
Thanks(0)
Quote Reply
Posted: 20 Mar 13 at 15:56 |
|
That's pretty cheap when you look at how much it would cost to pay some one to do it everytime. It does get expensive but a man needs his hobbies.
|
|
|
I taste Hurty!
|
|
|
|
|
Syncost Alot.
Vanorak

horns apprentice Joined: 25 Oct 07 Location: Devon Status: Offline Points: 1859 |
Post Options
Thanks(0)
Quote Reply
Posted: 20 Mar 13 at 20:37 |
|
Good work Dude, Keep the faith & keep plugging away! Once all the dirty, shitty, cutting & scrapping stuff is out the way, putting clean/new stuff back together is all down-hill!!
 |
|
|
Founder member of the "WESTERN FRONT VOLKSWAGEN KLUB".......membership no 0001
|
|
|
|
|
surf dude
Yardie
Joined: 11 Apr 05 Location: United Kingdom Status: Offline Points: 470 |
Post Options
Thanks(0)
Quote Reply
Posted: 20 Mar 13 at 20:38 |
|
True enough
 Just need to make use of it all (and I'm sure I will!!) At Chillwell tonight, FTRS medical! Back on the van on Monday! Just need to make use of it all (and I'm sure I will!!) At Chillwell tonight, FTRS medical! Back on the van on Monday!
|
|
|
Too many projects..... Not enough time!
|
|
|
|
|
surf dude
Yardie
Joined: 11 Apr 05 Location: United Kingdom Status: Offline Points: 470 |
Post Options
Thanks(0)
Quote Reply
Posted: 03 Apr 13 at 08:34 |
|
Evening! Well, I've managed to motivate myself a bit and after getting a proper grit blaster I set too on the engine bay. The stuff gets everywhere, but after masking up a bit and making a grit catcher out of a very large cardboard box we got to here :D 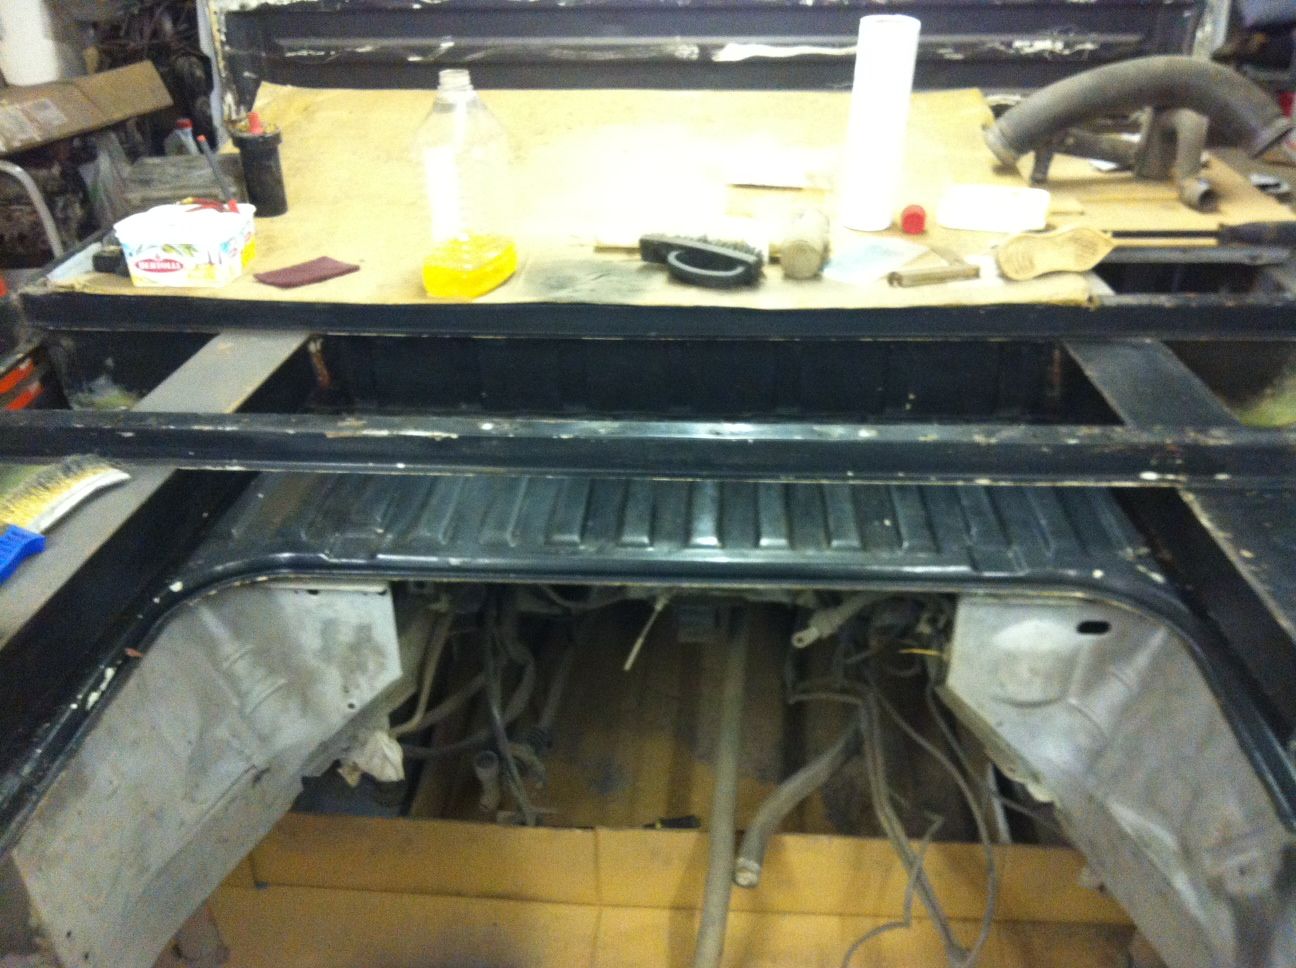 Why I didn't just bite the bullet and buy one months ago, I will never know ::) Suffice to say, it will be getting a lot more use! Today I had a clean up and hoovered up the used grit before tackling the dried waxoyl that had been spread liberally around the back end, and which wasn't doing a lot apart from collecting dirt. After an hour with a wire brush we got to what you see above ^^ I had noticed a couple of flaky areas though so had a tentative scrape with a small chisel 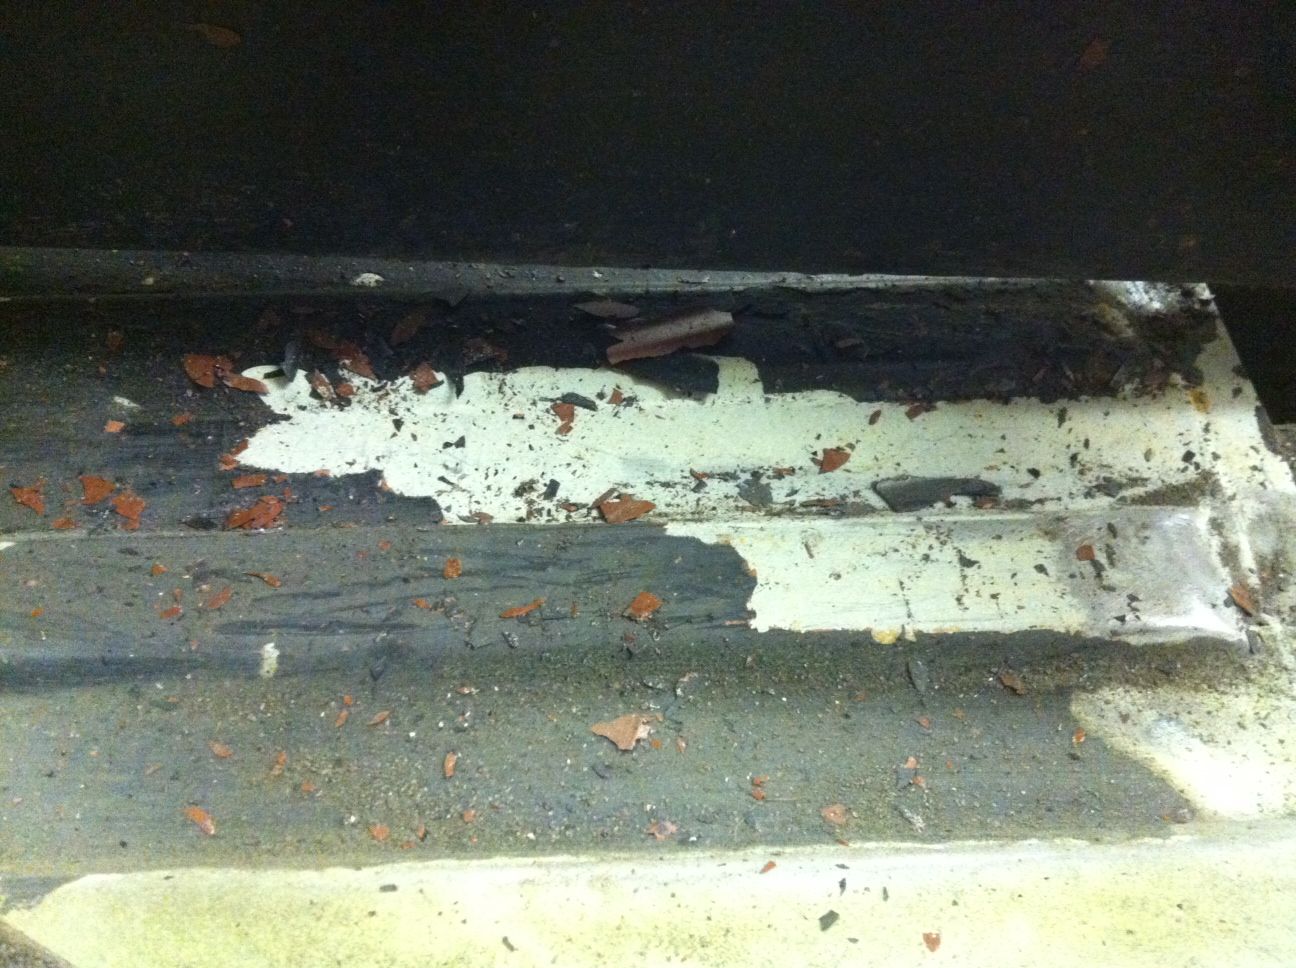 Erm, that doesn't seem to be right! It basically looks like someone has painted chassis black everywhere without any prep! More scraping.... 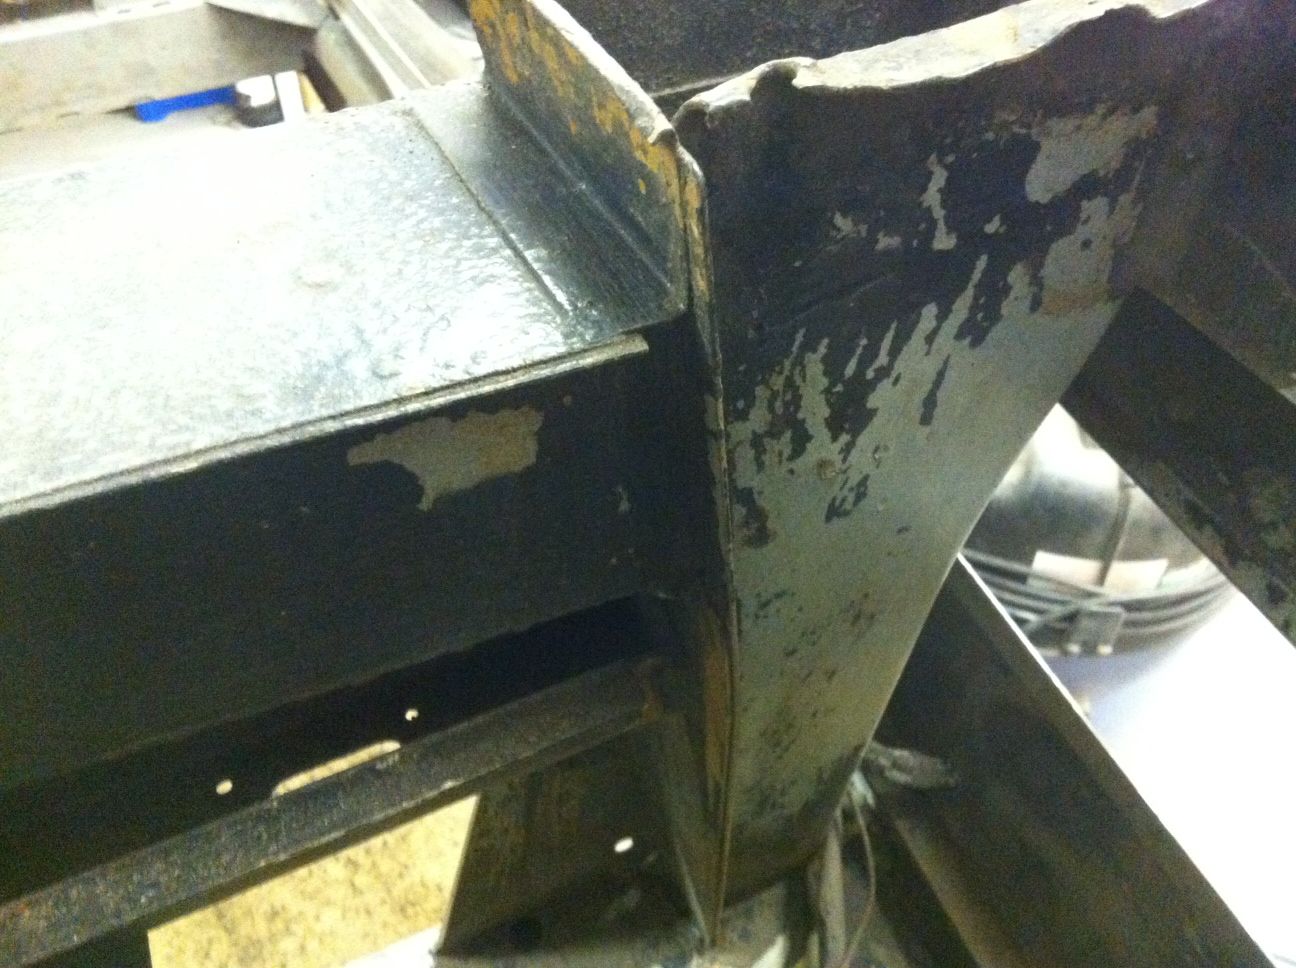 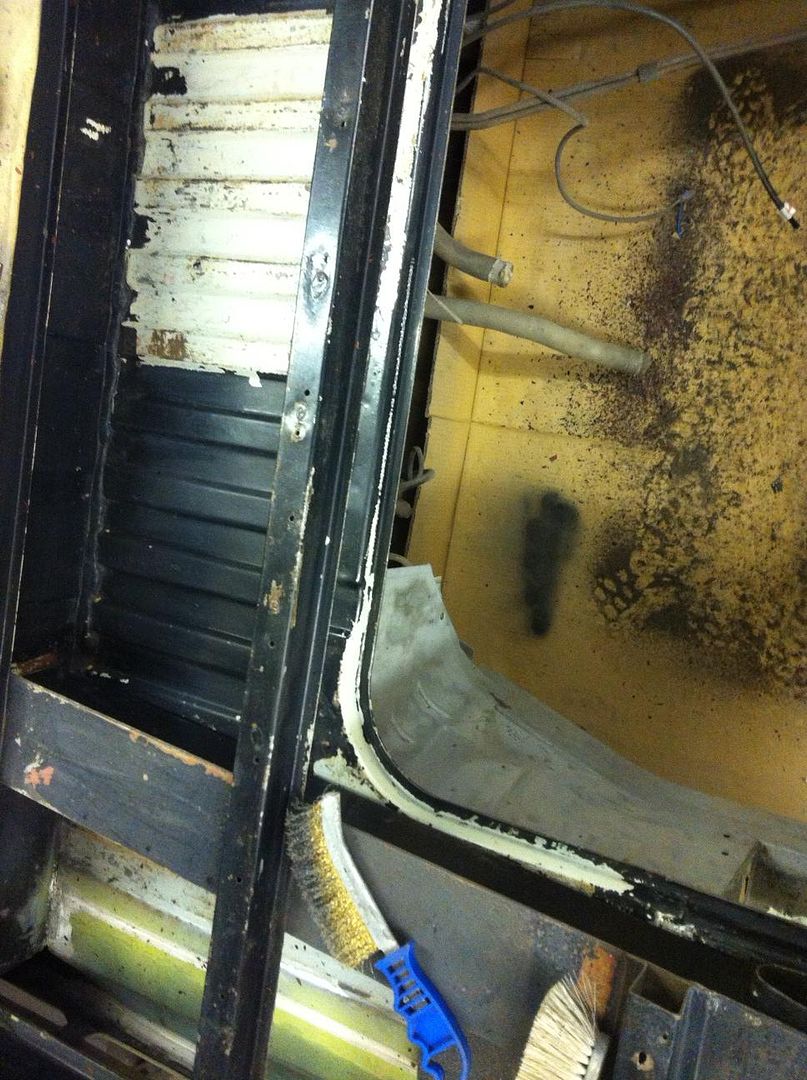 I'll be attacking it with the grinder tomorrow. More work, but there is surface rust under there and I don't want to have to go back and do any of this again so I'd rather give it the best chance possible! Thanks for looking in :D Pete
|
|
|
Too many projects..... Not enough time!
|
|
|
|
|
surf dude
Yardie
Joined: 11 Apr 05 Location: United Kingdom Status: Offline Points: 470 |
Post Options
Thanks(0)
Quote Reply
Posted: 04 Apr 13 at 23:33 |
|
Well, another day, another.........  (Load of rust with this bloody van!!!) (Load of rust with this bloody van!!!)So, I took to it with the grinder and a new wire cup brush courtesy of Aldi (or Lidl!) In fact I went a bit mad with grinder attachments!! Sure I'll get the use out of them though. After a bit of grinding we get to here, 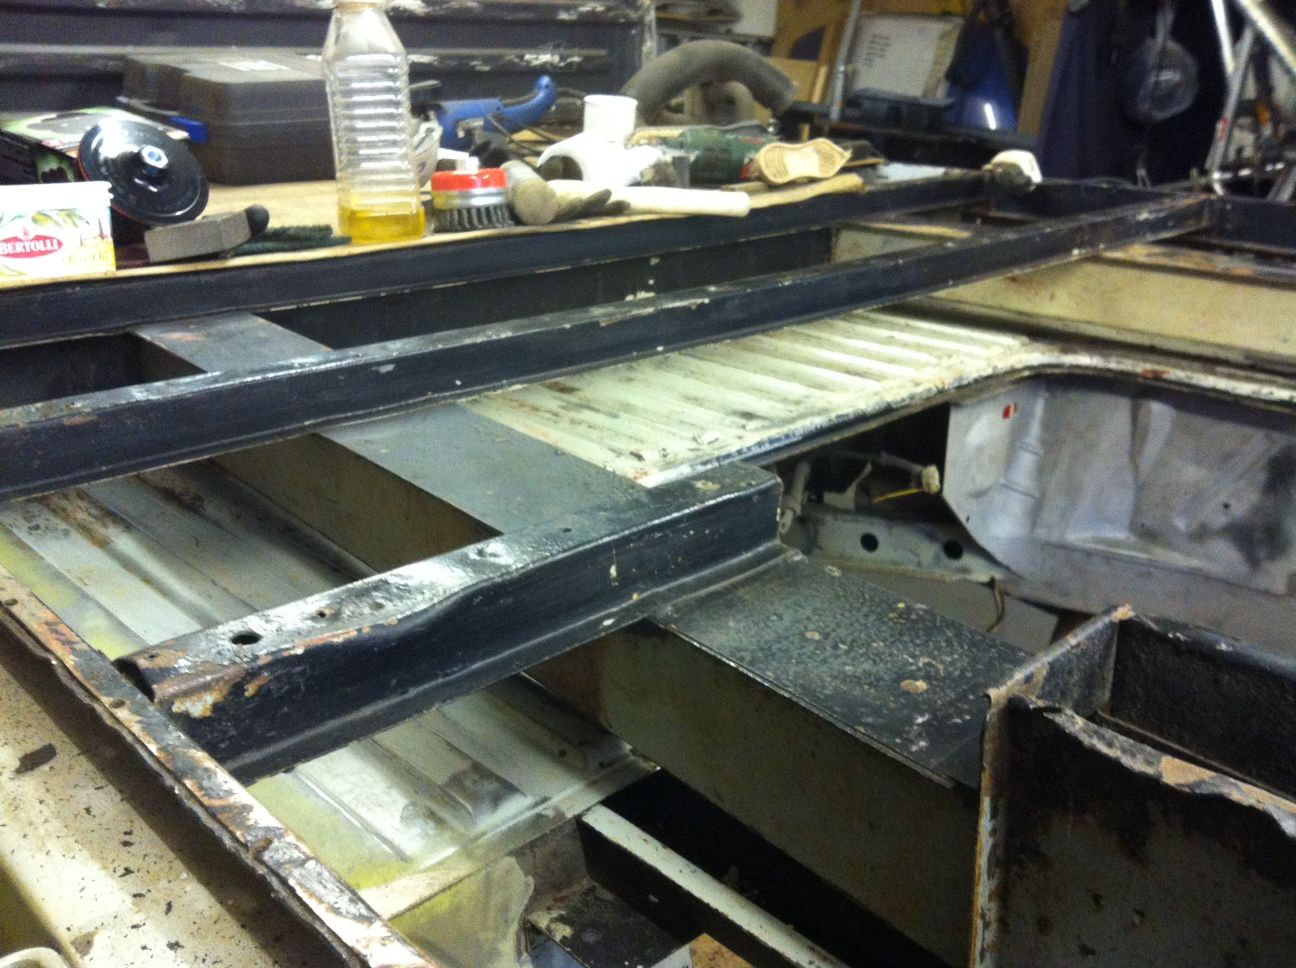 But I can't get to some areas so out comes the spot weld drill and..... 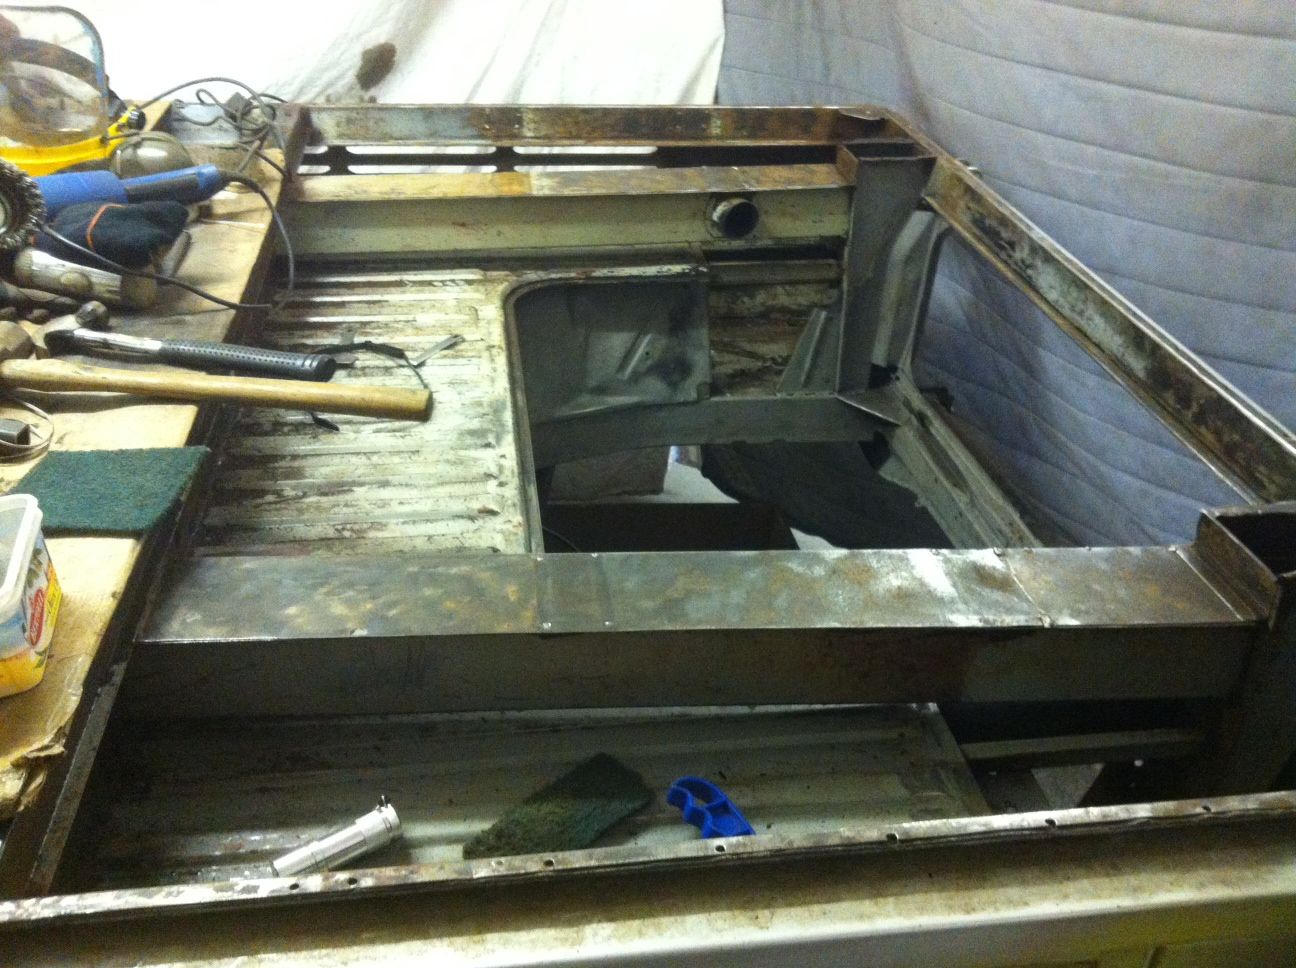 They were in a right old state to be honest. 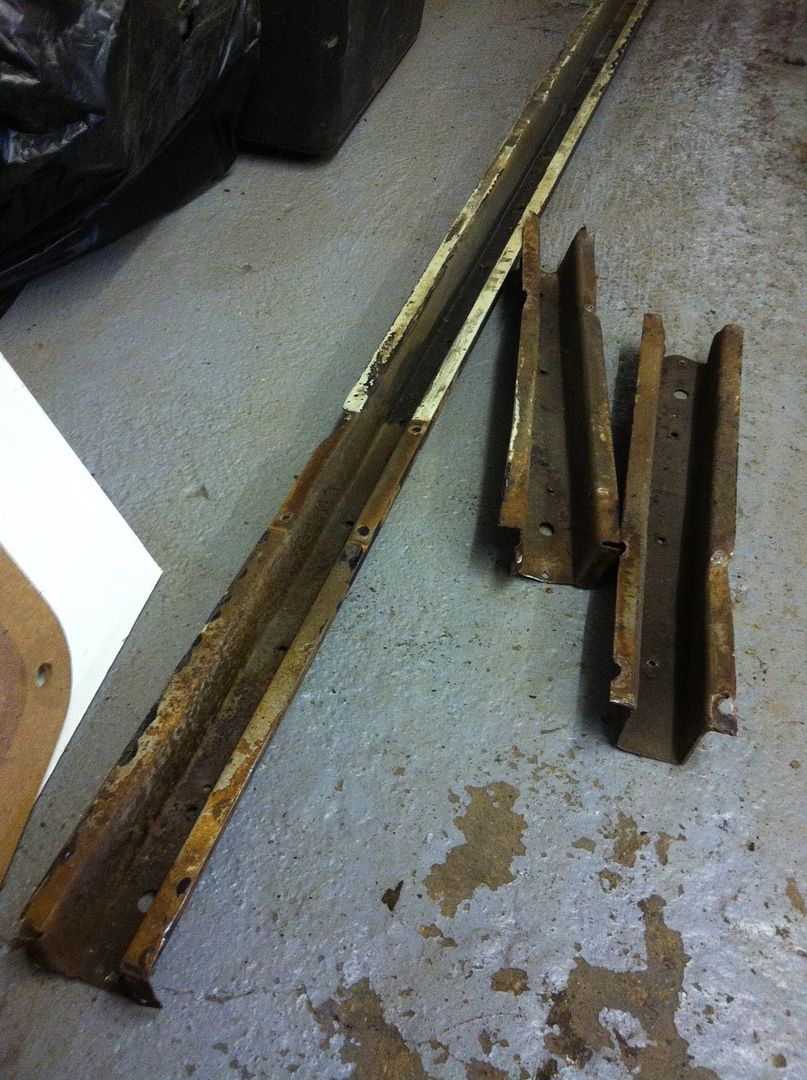 But as I had foreseen their demise I had (for once) thought ahead ;) 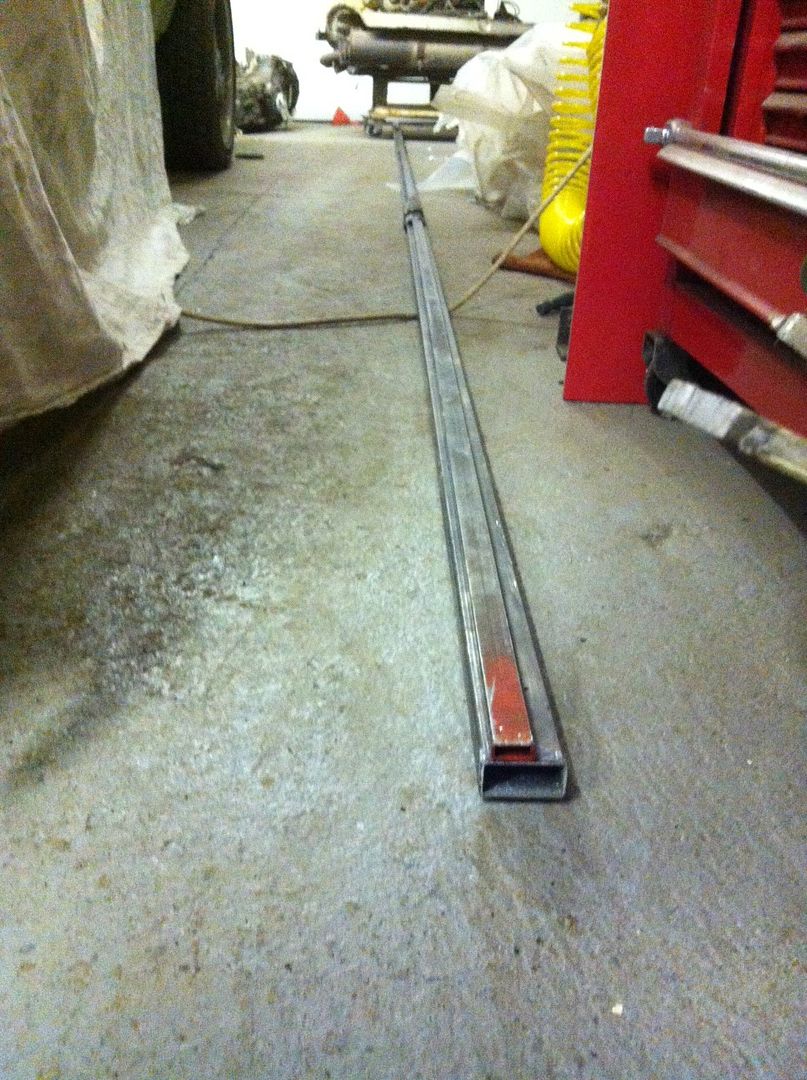 6 metres of 40mm x 20mm box section. Sadly the other stuff with it was an exercise in man measurements  All too small All too small  I spent another hour with the grit blaster, but it doesn't really look too different! Next job is to start treating some rust, otherwise I'll be getting a bit carried away! The box section will be reinstated to form a better base for the new bed as well as making up an area for an engine lid. On another note I caught sight of the side of the van  At this rate I'm going to need some more grit At this rate I'm going to need some more grit  |
|
|
Too many projects..... Not enough time!
|
|
|
|
|
Post Reply
|
Page <12345 11> |
| Tweet |
| Forum Jump | Forum Permissions You cannot post new topics in this forum You cannot reply to topics in this forum You cannot delete your posts in this forum You cannot edit your posts in this forum You cannot create polls in this forum You cannot vote in polls in this forum |


 Topic Options
 Gtavalanche wrote: